Beyond being fun, emojis are great for quickly finding something – instead of reading all of the channel names, I can quickly scan to find the video icon or little balloon.
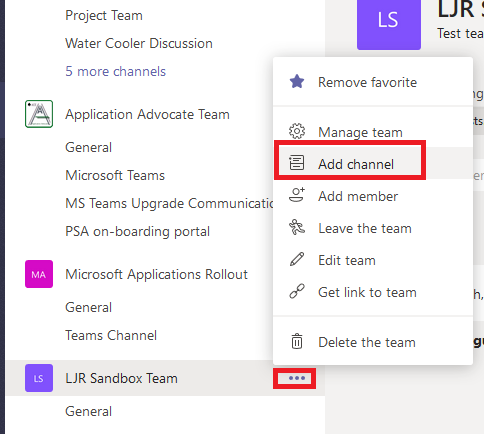
To add a new channel, click the ellipsis next to the Team name and select “Add channel”
In the channel name field, hold the Windows key on your keyboard and type a full stop (period, dot, “.”). Now you’ll have an emoji keyboard.
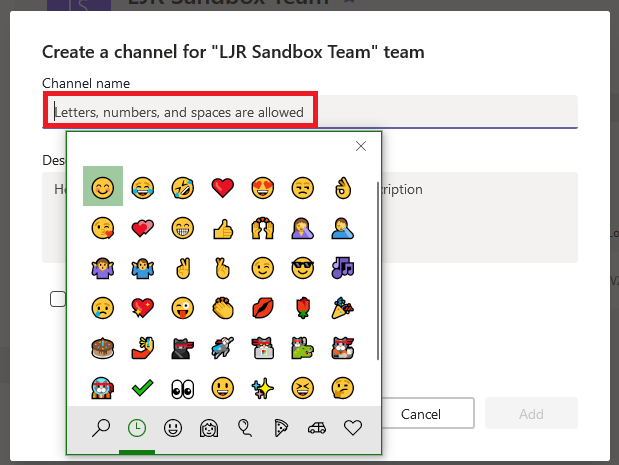
Select an emoji and type some text.
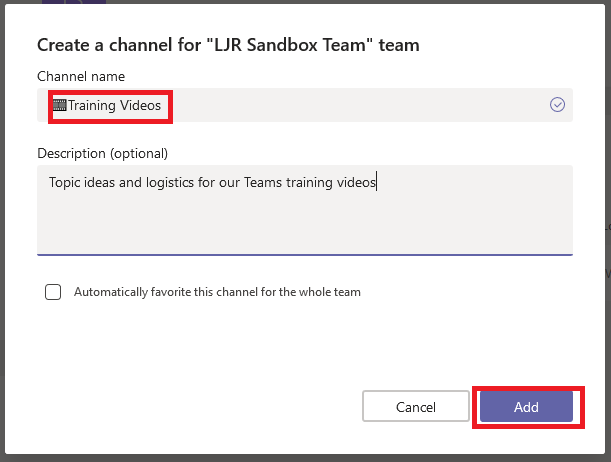
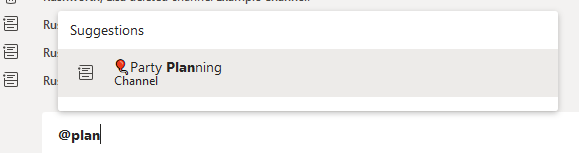
Alphabetically, an emoji is first – so “🎞Training” will sort before “A Channel”. You can still at-mention channels with emojis in the name. For this to work well, make sure you have spaces around the emoji character. When I have a channel named “🎈Party Planning”, I cannot use @party as the at mention – Teams tells me it doesn’t find any matches.
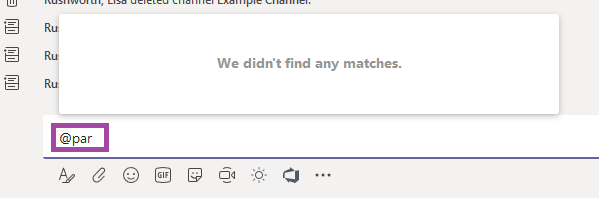
I can use @planning to find my channel.

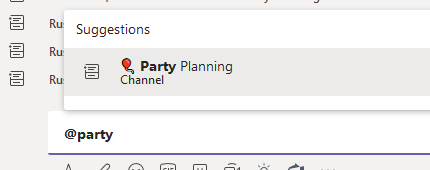
If I rename the channel to “🎈Party Planning” with a space between the balloon and ‘Party’, I can at-mention @party and find my channel.

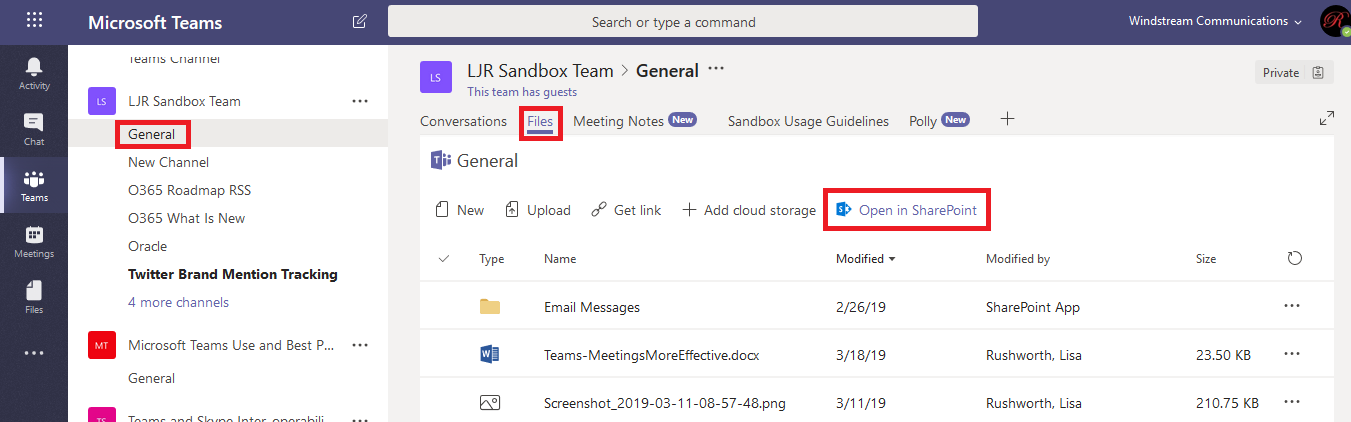
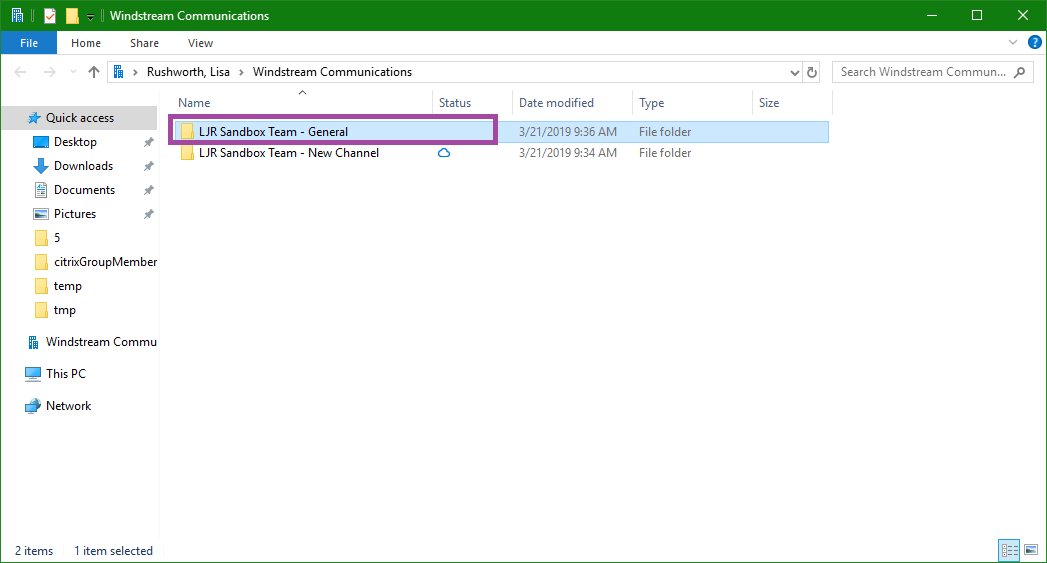
And, yes, you can rename existing channels (except for the “General” channel which cannot be renamed) to include emojis – click on the ellipses next to the channel and select “Edit this channel”.
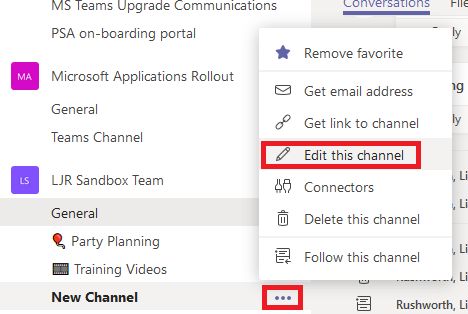
Hold the windows key and press . to bring up the emoji keyboard. Select an emoji and save the changes to your channel.

Did you know … you can use emojis in Teams channel names?
Beyond being fun, emojis are great for quickly finding something – instead of reading all of the channel names, I can quickly scan to find the video icon or little balloon.
To add a new channel, click the ellipsis next to the Team name and select “Add channel”
In the channel name field, hold the Windows key on your keyboard and type a full stop (period, dot, “.”). Now you’ll have an emoji keyboard.

Select an emoji and type some text.

Alphabetically, an emoji is first – so “🎞Training” will sort before “A Channel”. You can still at-mention channels with emojis in the name. For this to work well, make sure you have spaces around the emoji character. When I have a channel named “🎈Party Planning”, I cannot use @party as the at mention – Teams tells me it doesn’t find any matches.
I can use @planning to find my channel.
If I rename the channel to “🎈Party Planning” with a space between the balloon and ‘Party’, I can at-mention @party and find my channel.
And, yes, you can rename existing channels (except for the “General” channel which cannot be renamed) to include emojis – click on the ellipses next to the channel and select “Edit this channel”.

Hold the windows key and press . to bring up the emoji keyboard. Select an emoji and save the changes to your channel.