Month: April 2022

Upgrading ElasticSearch – From 7.6 to 7.17

Before upgrading to 8, you must be running at least version 7.17 … so I am first upgrading my ES7 to a new enough version that upgrading to ES8 is possible.

Environment

Not master eligible nodes:
a6b30865c82c.example.com
a6b30865c83c.example.com

Master eligible nodes:
a6b30865c81c.example.com


  1. Disable shard allocation

PUT _cluster/settings{  "persistent": {    "cluster.routing.allocation.enable": "primaries"  }}


  1. Stop non-essential indexing and flush

POST _flush/synced

  1. Upgrade the non-master eligible nodes first then the master-eligible nodes. One at a time, SSH to the host and upgrade ES
    a. Stop ES

systemctl stop elasticsearch
b. Install the new RPM:
rpm --import https://artifacts.elastic.co/GPG-KEY-elasticsearch
wget https://artifacts.elastic.co/downloads/elasticsearch/elasticsearch-7.17.3-x86_64.rpm
wget https://artifacts.elastic.co/downloads/elasticsearch/elasticsearch-7.17.3-x86_64.rpm.sha512
shasum -a 512 -c elasticsearch-7.17.3-x86_64.rpm.sha512


rpm -U elasticsearch-7.17.3-x86_64.rpm

c. Update configuration for new version
vi /usr/lib/tmpfiles.d/elasticsearch.conf


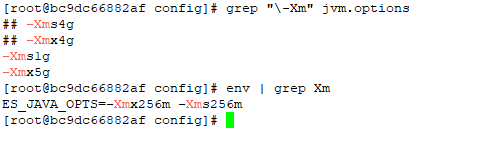
vi /etc/elasticsearch/elasticsearch.yml # Add the action.auto_create_index as required -- * for all, or you can restrict auto-creation to certain indices

d. Update unit file and start services
systemctl daemon-reload
systemctl enable elasticsearch
systemctl start elasticsearch.service

  1. On the Kibana server, upgrade Kibana to a matching version:systemctl stop kibana
    wget https://artifacts.elastic.co/downloads/kibana/kibana-7.17.3-x86_64.rpm
    rpm -U kibana-7.17.3-x86_64.rpm
    sytemctl daemon-reload
    systemctl enable kibana
    systemctl start kibana
  2. Access the Kibana console and ensure the upgraded node is back online

  1. Re-enable shard allocation

PUT _cluster/settings{"persistent": {"cluster.routing.allocation.enable": null }}

Linux Disk Utilization – Reducing Size of /var/log/sa

We occasionally get alerted that our /var volume is over 80% full … which generally means /var/log has a lot of data, some of which is really useful and some of it not so useful. The application-specific log files already have the shortest retention period that is reasonable (and logs that are rotated out are compressed). Similarly, the system log files rotated through logrotate.conf and logrotate.d/* have been configured with reasonable retention.

Using du -sh /var/log/ showed the /var/log/sa folder took half a gig of space.

This is the daily output from sar (a “daily summary of process accounting” cron’d up with /etc/cron.d/sysstat). This content doesn’t get rotated out with the expected logrotation configuration. It’s got a special configuration at /etc/sysconfig/sysstat — changing the number of days (or, in my case, compressing some of the older files) is a quick way to reduce the amount of space the sar output files consume).

Certbot — Plugin Not Found

I got a certificate expiry warning this morning — an oddity because I’ve had a cron task renewing our certificates for quite some time. Running the cron’d command manually … well, that would do it! The plug-in for my DNS registrar isn’t found.

Checking the registered plugins, well … it’s not there.

Except it’s there — running “pip install certbot-dns-porkbun” (and even trying pip3 just to make sure) tells me it’s already installed. Looking around for the files, this turns out to be one of those things that there’s obviously a right way to solve and a quick way to solve. For some reason, /usr/local/lib is not being searched for packages even though it’s included in my PYTHONPATH. The right thing to do is figure out why this is happening. Quick solution? Symlink the things into where they need to be

ln -s /usr/local/lib/python3.10/site-packages/certbot_dns_porkbun /usr/lib/python3.10/site-packages/
ln -s /usr/local/lib/python3.10/site-packages/pkb_client /usr/lib/python3.10/site-packages/
ln -s /usr/local/lib/python3.10/site-packages/filelock /usr/lib/python3.10/site-packages/
ln -s /usr/local/lib/python3.7/site-packages/tldextract /usr/lib/python3.10/site-packages/
ln -s /usr/local/lib/python3.10/site-packages/requests_file /usr/lib/python3.10/site-packages/

ln -s /usr/local/lib/python3.10/site-packages/certbot_dns_porkbun-0.2.1.dist-info /usr/lib/python3.10/site-packages/
ln -s /usr/local/lib/python3.10/site-packages/filelock-3.6.0.dist-info /usr/lib/python3.10/site-packages/
ln -s /usr/local/lib/python3.10/site-packages/pkb_client-1.2.dist-info /usr/lib/python3.10/site-packages/
ln -s /usr/local/lib/python3.7/site-packages/tldextract-3.0.2.dist-info/ /usr/lib/python3.10/site-packages/
ln -s /usr/local/lib/python3.10/site-packages/requests_file-1.5.1.dist-info /usr/lib/python3.10/site-packages/

Voila, the plug-in exists again (and my cron task successfully renews the certificate)

Kibana – Defining Index Patterns

This isn’t something I will notice again now that I’ve got my heap space sorted … but when you are using Kibana to add index patterns, there’s nothing that waits until you’ve stopped typing for x seconds or implements a minimum characters before searching. So, after each character you type into the dialog, a search is performed against the ES server — here I wanted to create a pattern for logstash-* — which sent nine different search requests to my ES. And, if the server is operating reasonably, all of these searches would deliver a result set that Kibana essentially ignores as I’m tying more characters. But, in my case, the ES server fell over before I could even type logstash!

ElasticSearch Java Heap Size — Order of Precedence

I was asked to look at a malfunctioning ElasticSearch server this week. It’s a lab sandbox, so not a huge deal … but still something they wanted online and functioning for some proof-of-concept testing. And, as a bonus, they’re willing to let us use their lab servers for our own sandboxing (IPv6 implementation, ELK upgrades). There were a handful of problems (it looks like the whole thing used to be a multi-node cluster but the second cluster node has vanished without any trace, the entire platform was re-IP’d, vm.max_map_count wasn’t set on the Docker server, and the logstash folder had a backup of a pipeline config in /path/to/logstash/pipeline/ … which still loads, so causes a continual stream of port-in-use exceptions). But the biggest problem was that any attempt at actually using the ElasticSearch server resulted in it falling over. Java crashed with an out of memory error because the heap space was exhausted. Now I’ve had really small sandboxes before — my first ES sandbox only had a gig of memory and was quite prone to this crash. But the lab server they’ve set up has 64GB of memory. So allocating a few gigs seemed like a quick solution.

The jvm.options file and jvm.options.d folder weren’t mounted into the container — they were the default files held within the container. Which seemed odd, and I made a mental note that it was something we’d need to either mount in or update again when the container gets updated. But no matter how much heap space I allocated, ES crashed.

I discovered that the Docker deployment set an ENV variable for ES_JAVA_OPTS — something which, per the ElasticSearch documentation, overrides all other JVM options. So no matter what I was putting into the jvm options file, the 256 meg set in the ENV was actually being used.

Luckily it’s not terribly difficult to modify the ENV’s within an existing container. You could, of course, redeploy the container with the new settings (and I’ll do that next time, since I’ve also got to get IPv6 enabled). But I wasn’t planning on making any other changes.

Linux – Clearing Caches

I encountered some documentation at work that provided a process for clearing caches. It wasn’t wrong per se, but it showed a lack of understanding of what was being performed. I enhanced our documentation to explain what was happening and why the series of commands was redundant. Figured I’d post my revisions here in case they’re useful for someone else.

Only clean caches can be dropped — dirty ones need to be written somewhere before they can be dropped. Before dropping caches, flush the file system buffer using sync — this tells the kernel to write dirty cache pages to disk (or, well, write as many as it can). This will maximize the number of cache pages that can be dropped. You don’t have to run sync, but doing so optimizes your subsequent commands effectiveness.

Page cache is memory that’s held after reading a file. Linux tends to keep the files in cache on the assumption that a file that’s been read once will probably be read again. Clear the pagecache using echo 1 > /proc/sys/vm/drop_caches — this is the safest to use in production and generally a good first try.

If clearing the pagecache has not freed sufficient memory, proceed to this step. The dentries (directory cache) and inodes cache are memory held after reading file attributes (run strace and look at all of those stat() calls!). Clear the dentries and inodes using echo 2 > /proc/sys/vm/drop_caches — this is kind of a last-ditch effort for a production environment. Better than having it all fall over, but things will be a little slow as all of the in-flight processes repopulate the cached data.

You can clear the pagecache, dentries, and inodes using echo 3 > /proc/sys/vm/drop_caches — this is a good shortcut in a non-production environment. But, if you’re already run 1 and 2 … well, 3 = 1+2, so clearing 1, 2, and then 3 is repetitive.


Another note from other documentation I’ve encountered — you can use sysctl to clear the caches, but this can cause a deadlock under heavy load … as such, I don’t do this. The syntax is sysctl -w vm.drop_caches=1 where the number corresponds to the 1, 2, and 3 described above.


Using Excel To Decrypt ROT

Anya has made us a scavenger hunt complete with clues — clues that are encrypted! While working out a ROT-1 or ROT-2 decryption isn’t terribly difficult, it was getting a little time consuming [especially when what was advertised as ROT-1 was actually ROT-(25) and I had to do it all over again!], so I made a quick spreadsheet to decrypt strings. The letter pairs are in the first two columns, then VLOOKUP is used to convert the printed character to the actual one. I found a trick card!