Month: March 2019

Did you know … you can edit and delete Teams messages?

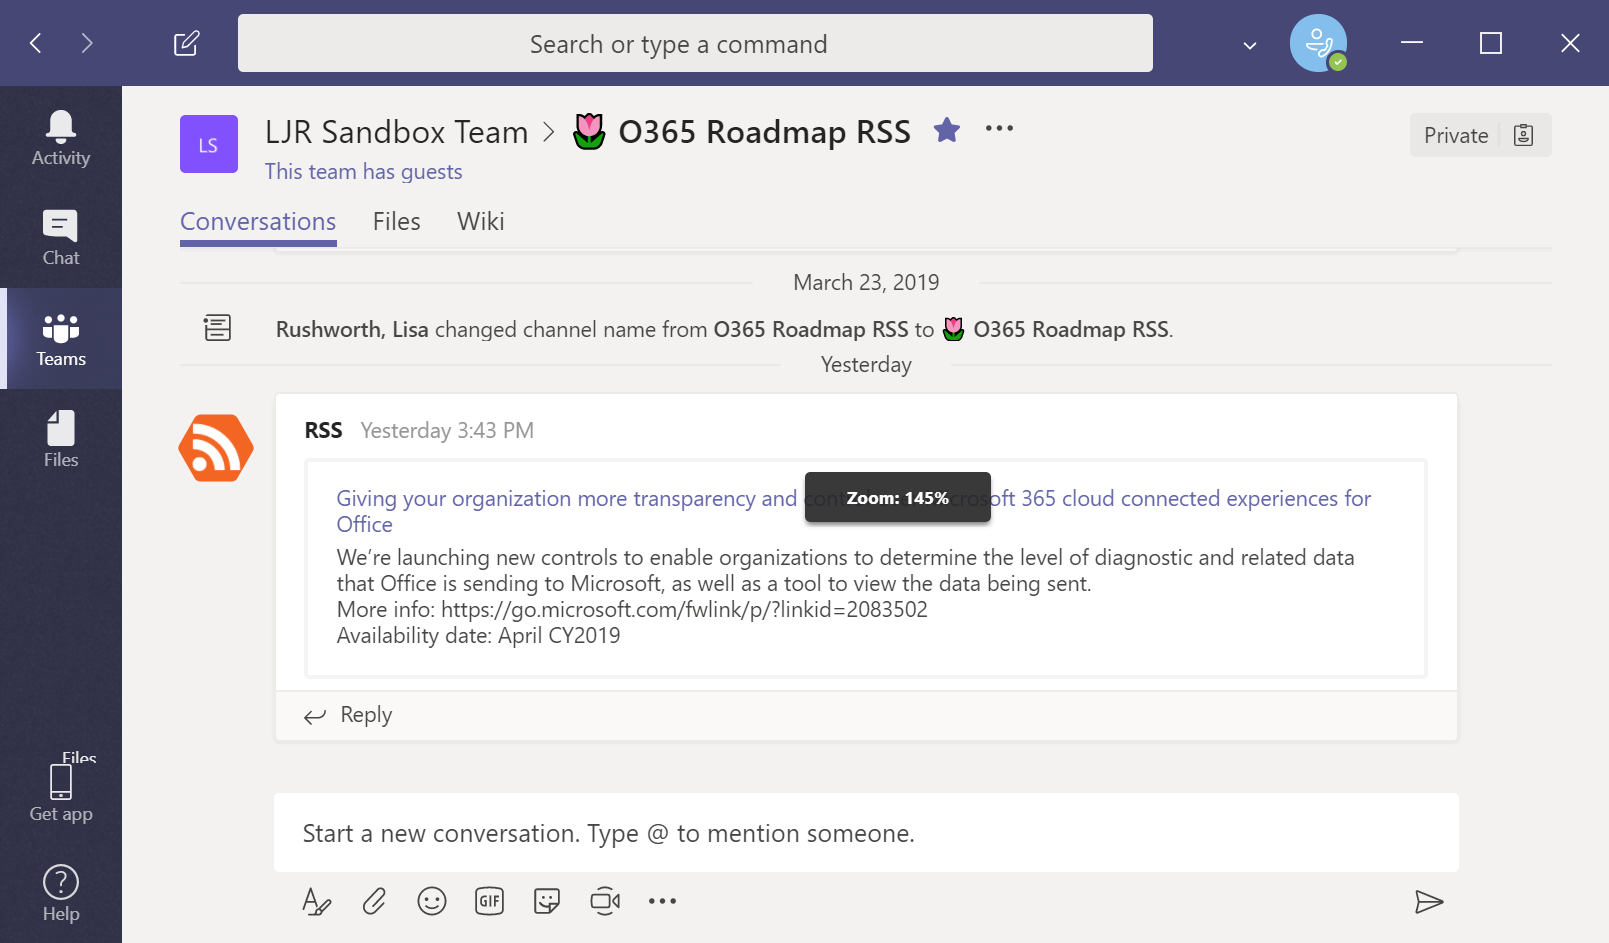
Typos happen – especially in quick, “instant messaging” type communication tools like Microsoft Teams. There is a spell checker to identify mistakes that aren’t words.

But spell check doesn’t catch everything.

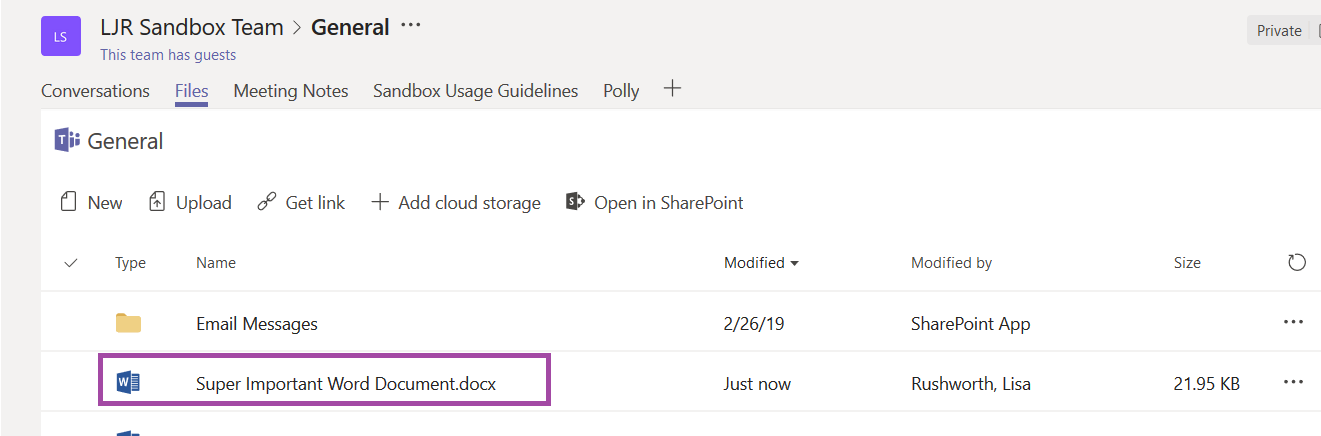
Beyond mistyped characters, my thread would be nicer if I had included a subject! And even if my message was perfect when posted, processes change and information becomes incorrect. Because Teams conversations are persistent, out-of-date instructions are going to turn up in search results. Instead of creating a new thread with the updated instructions, I return to the old post and edit it. Changed posts do move to the bottom of the channel (and create an activity alert for individuals who follow the channel). In private chats, edited messages do not appear as new activity, so I’ll copy my updated message and post it into the chat again.

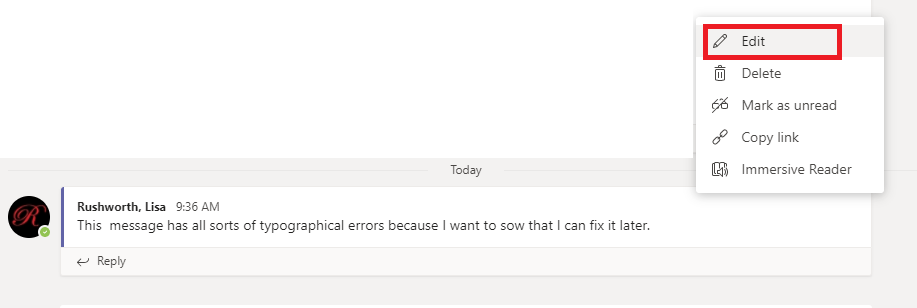
How do you edit a message? In either the chat or channel conversation, click on the ellipses in the upper right-hand corner of your message (these controls only appear when your mouse is over the message block).

Select “Edit”

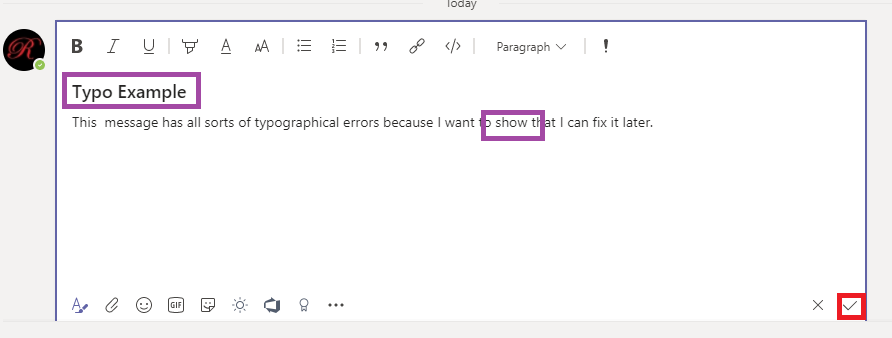
Your message is open in the basic editor. To add a subject, click the “Format” button to open the expanded editor.

Edit your message – add a subject, correct typos or update content. When you are done, click the check-mark to save your changes. Or if you no longer wish to edit the message, click the “X” to cancel.

And, yes, people will be able to see that you edited the message. They won’t see what you edited … but the phrase “Edited” will appear right next to the message timestamp. What about messages that no longer apply? Put in the wrong place? You can a message them to explain why it is no longer valid. Or you can delete it. To delete a message, click the ellipsis in the upper right-hand corner of your message and select “Delete”.

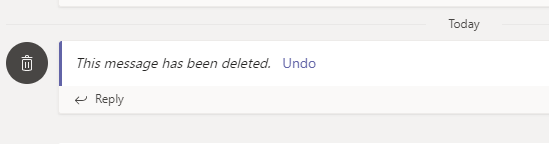
While there is no “are you sure?” prompt, you can undo the deletion. Note that the “This message has been deleted” banner remains in the thread. So until there’s better delineation between ‘reply’ and ‘start a new thread’, everyone is going to know you replied in the wrong spot 😊

What about someone else’s message? You can only edit messages you have posted. In private chats, only the person who sent the message can delete it. In channel discussion, Team owners can delete any message (including messages posted by a bot or connector).


Teams Debugging

The Teams desktop client is an Electron application – which means you can debug the Teams client just like any other Electron application. To set up debugging through Chrome, open Chrome to chrome://inspect Configure network targets. Click “Configure”

Add an unused port to be used for Teams debugging.

Run Teams with the remote debugging flag port set to the same port you added above. E.g.

%userprofile%\AppData\Local\Microsoft\Teams\current\Teams.exe –remote-debugging-port=51555

Now you’ve got access to the Electron app in Chrome. Click on “Inspect” for the thread you want to watch

You can add break-points in the code to pause program execution.

You’ll see a “Paused in debugger” indicator when a breakpoint is reached. You can resume or step over using this indicator, or you can use the DevTools debugger – the DevTools debugger also allows you to proceed one step at a time through program execution (F9).

Through the debugger, I was able to identify the source of the weak little notification ding

https://statics.teams.microsoft.com/hashedassets/audio/Teams_Notification_Secondary-a8621153.mp3

Which means I can redirect this URL … really anything that matches the URL up through Teams_Notification because I expect the alpha-numeric at the end to change and I’m sure there’s a primary notification 😊 … and make the notification noticeable.

Looking through the package, I see eighteen different ‘ringtone’ type MP3 files, and only three lines of code that use them. Hopefully this is an indicator that MS has begun development of some user-selectable notification sounds in the desktop client.

nonMeetupRingAudio = new Audio(data.assetsPath + ‘audio/ring.mp3’);

meetupRingAudio = new Audio(data.assetsPath + ‘audio/meetup_ring.mp3’);

screenshareRingAudio = new Audio(data.assetsPath + ‘audio/screenshare_ring.mp3’);


Accessing MS Teams Log Files

There are two sets of log files that we can use to troubleshoot Microsoft Teams issues.

Debug Logs On Windows, these are accessed by holding CTRL + ALT + SHIFT + 1 … on OSX holding Option + Command + Shift + 1 — both the desktop and web client will download three files. In the web client, you’ve got to tell it to save each file individually. The desktop client automatically stashes the files in your downloads folder (sorry, OSX folks, not a clue where your files are!).

Bootstrap log: Teams desktop also has bootstrap logs at %appdata%\Microsoft\Teams\logs.txt This file is generally useful for launch failures, authentication failures, and issues where the app is restarting. Once Teams is started, only background authentication ‘stuff’ is logged here.

If you’re inclined to read them, the debug client log is JSON formatted text followed by lines with timestamp, message level, and the message. War (Warning), Err (Error), Inf (Informational) messages appear in the log. When my Internet connection goes flaky, I get “War” messages with timeouts. But I’ve also seen really strange errors about the back-end Skype call not being found (AFAIK, Skype and Teams share a back-end calling infrastructure. The Skype back-end was upgraded for the Teams launch, but it’s a shared resource).

I pull the log file into Excel and split it into columns with the timestamp, severity, and log data. You can use

=DATEVALUE(MID(A1,1,10))+TIMEVALUE(MID(A1,12,8))

to convert an ISO8601 timestamp into a value on which Excel can perform calculations. You can also just reformat it by replacing ‘T’ with a space and removing the ‘Z’ https://assets2.jiveon.com/core/2016.3.10.4.179277c/images/emoticons/happy.png

For some activities, you can isolate the end-to-end transaction. This means you can also calculate how long the transaction took. At-mentions are great because they’ve got an obvious start (search text entered … length 0 means just the @ symbol was used. You’ll see different lengths depending on what the user actually types) and an obvious end (dropdown is shown for X search results). There’s also a single remote call (calling atMentionsService.SearchForUserPrifileInChannel) and response (scope.processSearchResults) where you can determine delay introduced outside the local computer.

When performing calculations in Excel with DateTime objects, the result is in unit days. To display the results in seconds, multiply this by 86400 (number of seconds in a day, which anyone who ever administered Bind zone files will be able to tell you off the top of their head … otherwise 24 * 60 * 60)

In the at-mention above, it took a little over half a second to complete and all of that time was the network call.


Did you know … there’s a Teams bot to create a quick Forms survey?

Microsoft Forms offers a nice mechanism for collecting survey results, and I often post Forms links to my Teams chats and meetings. But that means I’ve planned for the survey – it takes some time to build the survey, after all! For ad hoc surveys, I’ve been using a third-party Teams app, Polly. Unfortunately, Polly isn’t an approved place for storing company information … so while I’m happy to ask where people want to get lunch or if anyone needs a quick break, I don’t want to ask questions that contain company proprietary information.

Forms has a Teams bot that quickly creates a quick one-question survey. You’ll need to have Forms installed in your Teams space. Click on the “Store” icon, search for Forms, and select Microsoft’s Forms.

Select the name of the Team to which you want to add Forms and click “Install”.

Click “Setup” next to “Bot” to add the forms bot to your Teams space.

Now you can at-mention Forms and create a quick one-question survey. ** This works fine if you are using the Teams desktop client. In the Teams web client, adding the question removes the at-mention link (the @Forms text changes from purple to black). To create quick forms in the web client, I have to type the question/answer bit first, then hit ‘home’ to get to the front of the message and add @Forms **

Help will be displayed to remind you of the question/answer format.

Type your question and answers and send the message.

Forms will create a new post with your survey.

Survey results will be updated in real-time in the thread.

If you want to view detailed results (or export the results to Excel), visit https://forms.office.com The Forms bot creates a “Group form”, so you’ll need to select the “Group forms” tab. Click on the Teams space where you posted the form.

You’ll see the form – they’re readily identifiable because the form name starts with “<at>Forms</at>” followed by the question you posted. Select the form and you can view response details and open the response results in Excel.

One oddity – if you host a meeting in the Teams space, you can at-mention Forms to create a survey in the meeting chat. The response from the Bot – where people vote – does not appear in the meeting chat because the bot response is a new thread.

Team members will find the survey as a new thread in the channel.

This is a little confusing to me, so I just send the message to create the survey in the channel instead of using the meeting chat. Using the meeting chat would, however, associate the survey with the meeting because the message which prompted the form creation will appear in the meeting chat.


Did you know … You can paste records into a SharePoint list?

I’ve written about using the SharePoint REST API to maintain data in a SharePoint list, but tweaking a program to maintain your list data takes some programming knowledge. If you just want to get data into the list, it can even seem quicker to just retype the information. But you can paste data into the list too.

From your list, switch to “Quick Edit” mode

Look at the columns – the data you are pasting in will need to line up with the quick edit view.

Format your data to match the quick edit view – I often use Excel to store my data because it’s quick and convenient.

Highlight the records and click copy (or use ctrl-c)

Return to the SharePoint list. Scroll to the bottom of the page and click in the bottom left-hand corner to highlight the blank row.

Use CTRL+v to paste your new records into the list.

That’s it! You can click “Exit quick edit” to return to your normal view or close the browser tab if you’re done.


Did you know … you can use emojis in Teams channel names?

Beyond being fun, emojis are great for quickly finding something – instead of reading all of the channel names, I can quickly scan to find the video icon or little balloon.

To add a new channel, click the ellipsis next to the Team name and select “Add channel”

In the channel name field, hold the Windows key on your keyboard and type a full stop (period, dot, “.”). Now you’ll have an emoji keyboard.

Select an emoji and type some text.

Alphabetically, an emoji is first – so “🎞Training” will sort before “A Channel”. You can still at-mention channels with emojis in the name. For this to work well, make sure you have spaces around the emoji character. When I have a channel named “🎈Party Planning”, I cannot use @party as the at mention – Teams tells me it doesn’t find any matches.

I can use @planning to find my channel.

If I rename the channel to “🎈Party Planning” with a space between the balloon and ‘Party’, I can at-mention @party and find my channel.

And, yes, you can rename existing channels (except for the “General” channel which cannot be renamed) to include emojis – click on the ellipses next to the channel and select “Edit this channel”.

Hold the windows key and press . to bring up the emoji keyboard. Select an emoji and save the changes to your channel.

Did you know … you can restore a deleted Teams file?

Oh no! I’ve accidentally deleted a document from my Teams files! Can someone restore it for me?!?

Yes! I can restore it for me – I can even restore documents others have deleted from our shared Teams file spaces. From the “Files” tab, click “Open in SharePoint”

You’ll see the documents that weren’t deleted … that doesn’t help! But click on “Recycle bin” on the left-hand navigation bar.

There it is! Click to select the file.

Then click “Restore”

In the upper right-hand corner of the web site, you will see a status message indicating that the document is being restored.

When the restore completes, click away from the “Files” tab and return to it. Voila! The document is back 😊


Do you know … where you saved that Office 365 document?

Being able to save documents directly to Teams, to sync documents and work on them locally, and to just store documents locally provides a lot of options when you’re saving a document. For me, though, a lot of options also means I’m not always sure which option I chose 😊 In which Teams space is this document saved? Did I stash it locally because I’m not ready for other people to peruse it?

Luckily where the document is saved can quickly be displayed in the Office 365 applications. Click “File” on the ribbon bar.

The “Info” section contains the path to the document – a document that is stored in a SharePoint document library (be that a Teams Channel file space or some other SharePoint document library) will include the SharePoint site name (the Team name in the case of Teams Channel files). Clicking “Open file location” will open a browser tab to the SharePoint document library which contains the file.

A document on a local or network drive will have a path starting with the drive letter. Clicking “Open file location” will open a File Explorer window to the folder containing the document.

And a document that hasn’t been saved won’t have any file information listed.


Did you know … you can sync Teams files to your desktop using OneDrive for Business?

An advantage of using the cloud-based Microsoft Office 365 platform is that you can work just about anywhere you have an Internet connection. This provides a lot of flexibility for mobile workers, but there are still situations where bandwidth is expensive or Internet connectivity is just unavailable. Situations where you want to be able to continue working offline.

Files stored within Teams channels are document libraries in SharePoint Online. Anything you can do in SharePoint Online works with the Teams files. SharePoint Online document libraries can be synchronized to your local drive through OneDrive for Business – which means you can work on Teams documents offline.

To set up the synchronization, you’ll need to open the Teams files in SharePoint. Select the channel and click on “Files”. Then click on the “Open in SharePoint” link.

You are now viewing the SharePoint document library. Click the “Sync” button to set up synchronization to your local computer.

Select “Sync now”

You may be asked to confirm you want to use OneDrive to open the link. You do! Click “Open link” (you can check the box to ‘Remember my choice for grvopen links’ to skip this step in the future)

If you have not yet configured OneDrive, you’ll be asked to sign in. Confirm that your logon ID is displayed and click “Sign in”

You can change the location where OneDrive stores synced files, if you wish. Click “Next” to continue.

Once OneDrive setup is completed, click “Open my OneDrive folder”.

v

You will see a confirmation that the Teams document library is being synchronized.

When you view your OneDrive folder, you will see the Teams channel(s) with document libraries syncing to your local computer.

When you save a new file to the OneDrive location, or update a file, you will see a circle indicating that the file is being synchronized. You will see a green check-mark when the file is successfully synchronized to SharePoint Online.

And the changes will be visible immediately in Teams

If you no longer wish to synchronize the Teams files with your local computer, right-click on OneDrive for Business in your system tray and select “Settings”.

Click “Stop sync” on the location(s) you no longer wish to synchronize.

Files stored on your computer will not be deleted; changes locally will not be updated in SharePoint/Teams, and changes in Teams will not be updated to your computer. The icon in the status column will be removed to indicate the folder is no longer being synchronized. You can safely delete the local folder.