Month: February 2019

Did you know … Microsoft Teams Who?

I’ve discussed developing bots for use with Teams, but did you know there are already bots available in Teams? Bots published by other companies are available in AppSource. Some are published by Microsoft too.

Who, a bot published by Microsoft, answers questions about the company’s organization. These include concrete organizational questions – “who is Lisa Rushworth’s manager” will give you my manager’s contact card. That is information I could discover any number of other ways too – looking in Outlook, the company directory. The unique feature of Who is personalized organizational answers.

How do you use Who? Just start a conversation with “Who”.

Or type “/who” in the command bar atop your Teams window.

The first time you converse with Who, you’ll need to install the Who bot and confirm that you want it to search the directory on your behalf.

Once Who is installed, you can chat with the bot. Type your question and send the message.

Ask something ambiguous – “Who is Todd?” – and the results will be unique to you. Todd’s with whom you communicate will be ranked higher in the result set. As will Todd’s who are closer to you in the company organization.

You can also ask Who about your own correspondence. I know I’ve talked about WebLogic configuration with a few people in the past, and I want to correspond with the person again. Instead of searching through my e-mail, I can ask Who. You won’t get access specific messages (i.e. you cannot do this to reply to an existing e-mail chain), but contact information helps me remember with whom I’ve previously discussed the topic.

You can ask who you met with to search calendar items

If you ask “who knows about” a topic, you’ll see results based on Teams posts to which you have access. Who does not search conversations to which you do not have access – so if you’ve never been involved in a discussion about WinCare, you won’t find an expert from posts within their Teams spaces.


Did you know … you can link to any Teams channel post?

You can! If you click the not-quite-a-hamburger menu on any post, “Copy link” will copy place a link to that post in your clipboard.

What do you do with a link to a post? Paste it somewhere 😊 Paste it where?! I use the URLs in code comments – we’ve had a discussion about how to implement a function. A link to that discussion is great supplemental documentation to my quick “# We’re doing this here” summary comment. I’ve included them in documentation footnotes. I add these links in Planner tasks – a reminder of what exactly the task entails. When reviewing my goals for the year, I can include a link to the Teams post where I discuss progress and announce the completion of the task.

I use these links to work around a Teams limitation too – you cannot move items between threads and channels. If a discussion becomes involved enough to warrant its own channel (or even Teams space), I can start the new channel discussion with a link to the previous conversation thread.

When you send e-mail to a channel, the message starts a new thread. As an example, if you’ve been discussing an opportunity in Teams, you can BCC the Teams channel when sending a proposal to the customer. This is great for ensuring Teams has as much information about the opportunity as possible, but that e-mail creates a new thread.

Simply include a link to the e-mail thread in the discussion thread and you’ll be able to correlate the items (I don’t, but you could get a link to the original discussion and include it as a reply to the message thread as well)

Caveat: Use thread links in locations that are generally accessible only by Team members. Only individuals with access to the Teams space can use the thread link to read the thread. Individuals who are not members of the Team will generate a request to join the Team when they use the link.


Did you know … you can delete Teams connectors?

The best way to figure out which Connectors are useful for your Team is to peruse the options, install some, and see if they provide useful information. You may subsequently want to remove a connector – the information didn’t prove useful, there were too many posts, or you never got any information from the connector.

Some people will be able to delete connectors successfully, others will see an error that says “You donot have permission to delete connector. Please contact Administrator”. You don’t need to contact us! As of 25 February 2019, a Team owner cannot delete a connector if Team members cannot delete a connector.

Before you attempt to delete a connector, modify member permissions and allow them to create, update, and remove connectors.

Now a Team owner can delete a connector. On the channel from which you want to remove the connector, click the not-quite-a-hamburger menu and select “Connectors”.

Along the left-hand side, click “Configured”. Then select “# Configured” on the type of connector you want to remove.

Click “Manage” on the connector you wish to delete.

Scroll down and click “Remove”

Click “Remove” again to confirm you want to remove this connector.

The connector will be removed. Some connectors have associated accounts – select “My Accounts” to clean up accounts associated with the removed connector.

If you don’t normally want Team members to be able to configure Connectors, go back into the member permission settings and uncheck the box we checked at the beginning of this document.


Choosing A Communication Tool

There are a lot of communication tools available, how do you know which one to choose? There are a few situations that require a specific tool — if you want to host a conference call with PSTN dial-in, use HD Meeting — but generally there are an array of options to consider.

Most simply, think “I, We, Us“.

  • I need to work on this = OneDrive
  • We (work group) need to collaborate on this = Teams (SharePoint)
  • Us as a company needs to know this = Jive (the internal company home page)

A slightly more complex rubric considers “How many people need to access this information?” and “How soon do they need to see this information?” And I made a convenient chart showing where our communication tools fall on this spectrum.  

Which isn’t to say you cannot use OneDrive to share super-urgent information to the entire company – provided you use some other method to let everyone know the document is available, sharing a file on OneDrive will work. But when I’m already writing a Stream post about my document, including the document in the Stream post is convenient (and my document shows up in Stream searches!).  

This chart is still an oversimplification of the question – there are additional factors that can make one platform more suited to your specific needs.  

Interactivity: When you need to communicate information to the entire company (like with these blog posts), Stream is a good platform. Employees see the Stream home page frequently, anyone using the search on Stream will find my articles, and you don’t have to do anything special to allow everyone to see the posts. But if I want to interact near real-time – take questions from the company and provide answers – then comments on a Stream post don’t suffice. I’d want to use some type of real-time broadcast: a conference call or a web broadcast meeting. Similarly, having a highly interactive conversation with a smaller group via e-mail can become inundating – replies to various messages stack up in your mailbox – and moving the discussion into Teams provides a better experience.  

Formality: The content of your communication conveys a tone, but so does where you publish it. E-mail messages and Teams posts are informal – they are quick and easy for everyone to use, and your message is going to be viewed between a lunch invitation and a quick project status check-in. SharePoint sites and Stream posts are more formal.  

Identifiability: Do you know the people who need to receive the communication? This could be knowing the individuals personally or being able to identify a rule to select recipients. Some communication platforms require specific recipients be specified – I cannot send an e-mail to “any developer who needs to add single sign-on functionality to their application” because I don’t know who that would be. Based on job title and department, I could identify all developers (or development managers) and e-mail them … but I cannot send an e-mail to an unknown audience, so published my single sign-on guides on Stream even though my audience is small. Similarly, HR cannot send a form to every employee contemplating adoption to detail the adoption assistance benefit – that would require some impressive psychic abilities   Even if the target audience is small, communication platforms like Stream allow information to be accessible to a nebulous “whoever needs it” audience.  

How the recipients work: I am posting this information to Stream because it is accessible and searchable by all employees; the Stream web site comes up every time we open a browser, so it’s highly visible. Similarly posts in Teams will be accessible and searchable to the group, and the messages are highly visible if everyone has the Teams client running all day. If the recipients are just starting to use Teams but have Outlook open all day, Outlook may be a more effective communication method.  

Individual Preference: And, of course, some consideration will be given to what platforms you prefer using.

Did you know … there are four ways to set your Teams presence?

You’ve changed your presence in the Teams client by clicking on your avatar – it’s not hard, but it does require you the Teams client be in the foreground before you can update your presence.

You can avoid navigating through the menu by typing “/available”, “/busy”, “/dnd”, “brb”, or “/away” in the command bar.

You can right-click on the Teams icon in your system tray to set your presence. This technique brings Teams to the foreground. This technique is quicker if Teams wasn’t already the active application. What if you are using another application? Maybe you started an HD meeting, or maybe you just opened an Excel spreadsheet that requires some focus? Bringing the Teams app into the foreground and then minimizing it is not ideal.

You can also set your Teams presence in the Aero preview. Hover your mouse over the Teams app on your Windows Taskbar, and you can use the four icons (available, busy, do not disturb, and away) to quickly set your presence and return to your active application.


Did you know … you can send audio messages in the Teams mobile client?

There are times when typing on your mobile device isn’t a problem, but there are a lot of scenarios where it is easier to talk than type (especially for those of us up North cold enough Fahrenheit or Celsius doesn’t matter!). You can now record an audio message in both individual and channel conversations.

In the message composition dialogue, look in the lower right-hand corner and find a microphone icon. To record a message, hold the microphone icon and speak. You’ll see a banner indicating that your message is recording. Release the microphone icon to stop recording.

Click the ‘play’ icon to review your audio message and click the little paper aeroplane to send it.

The audio message is can be played from any Teams client – mobile, web, or desktop.


Did you know … you can schedule a meeting in a Teams channel?

I’ve previously provided information on scheduling a private meeting in Teams and a shortcut to schedule a meeting from within a chat. Private meetings are great for discussing topics that need to be private, but a team can be more engaged with a project when planning and implementation discussions are visible and inspectable.

Instead of inviting participants to a private meeting, schedule the meeting in a channel and members can attend your meeting and see what happened during the meeting. Channel meetings will appear as a thread in the channel discussion, and any chat messages sent during the meeting can be read by Team members.

If the shared notebook was used to take meeting notes, or a recording of the meeting was made, links to those items will be displayed in the meeting thread. Avatars for each attendee appear in the bottom right-hand corner of the meeting thread. Because the meeting information is readily available in the channel discussion, these meeting are a great way of keeping everyone “in the loop” and engaged.

To schedule a channel meeting, click the drop-down for “Select a channel to meet in”, expand a Team name, and select the appropriate channel.

Meetings appear in the channel, and participants can click to join the meeting directly from the channel post.

As the meeting organizer, I see the meeting in my Teams meetings section and my Outlook calendar.

However, other channel members to not see channel meetings in their Teams meetings section or Outlook calendar.

*Not* displaying the meeting to all channel members is an intentional decision – Microsoft originally displayed all channel meetings in everyone’s calendar. It caused a lot of confusion because people weren’t sure if they needed to attend the meeting or not. Not displaying the meeting can cause problems too – I glance at my calendar to plan my day and don’t know about your meeting until the reminder pops up ten minutes before the meeting starts. If you need specific Team members to attend your meeting, enter their names in the “Invite People” section.

Individuals listed as attendees will see the meeting in their calendar. Other team members can join if they have interest and availability, but the required participants can see the meeting and plan on attending.

When a channel discussion becomes involved and it would be easier to talk, you can start an ad hoc meeting in a channel. Click the “Meet now” icon under the new conversation box. Attendees can join the meeting from the channel thread, and meeting information is posted to the thread just like with a scheduled channel meeting.


Do you know … what that Team is?

While you can join public teams, or you may have been provided an access code to join a private team, most of the time someone adds you to their Teams space. If you’re lucky, the name they gave the Team is an answer unto itself. If you’re not lucky, they named it “Engineering” and you work with eight different engineering groups. A description is included when creating a Team, but how do you read that description? At the bottom of your Teams listing, click on the little gear.

You will see a summary of your Team memberships – along with the description.

If you’re still not sure, ask the Team owner. Click the not-quite-a-hamburger menu across from the Team and select “Manage Team”.

You’ll see the Team owners. Hover your mouse over a name, and you can quickly send the person a chat message.

Tip for Team Owners: In addition to providing a brief team description, you can add a Wiki tab to your Teams space with more information on how the Team and its channels should be used — if you’ve got a “Watercooler Discussion” channel for off-topic commentary, or if a channel receives posts from an RSS feed or another connector, you can convey that information to Team members in a Wiki tab.


Did you know … you can use Teams as a support channel?

To be honest, I wasn’t sure this was true until we tried it. But my group is promoting Teams usage within the company, so it made sense to try using Teams as a tool for users to engage support. I don’t mean technically work – anything where someone can report an issue & someone else can read/respond to the issue can be used as a support channel! Smoke signals and carrier pigeons would technically work. I mean ‘you can use Teams as a support channel without subjecting yourself to rampant chaos, long wait times, and irritated participants.’

What did we do? Some employees transitioned to a new company under the Earthlink CSMB divestiture. While the individuals would be terminated in PeopleSoft (i.e. we’re not going to keep paying them), they needed to retain access to many Windstream systems during a transition period. Since terminating an employee in PeopleSoft automatically terminates their Active Directory and LDAP accounts (a great thing from a security perspective), these individuals needed to be changed to temporary IDs (n99 accounts). Coordinating account changes for fifty people is an undertaking, and the actual conversions were spread across a full day. After their account is converted, each individual needs to perform a series of steps to get their computer and applications functioning with their new ID. And problems occur.

I built a Teams space for the transitioning employees and support staff who would be assisting with the account conversions. End-user documentation and the schedule of whose account is being converted when was stored in the Teams space. On the account conversion day, we had a HD Meeting bridge open and used a Teams channel for issue reporting.

What happened? Well, first I’ll tell you what didn’t happen. The Teams channel didn’t become a confusing mess of issue reports that became onerous to manage. Now I’m not saying I want to replace ITSM with a bunch of public Teams spaces you can join when you’ve got an issue … but in a limited and controlled environment, Teams was a great supplement that allowed us to better support the transitioning individuals.

People who had never used Teams before didn’t find it difficult (although they also had the bridge-line as a backup) – they used the https://teams.microsoft.com URL, signed in, and were quickly able to chat with the support team.

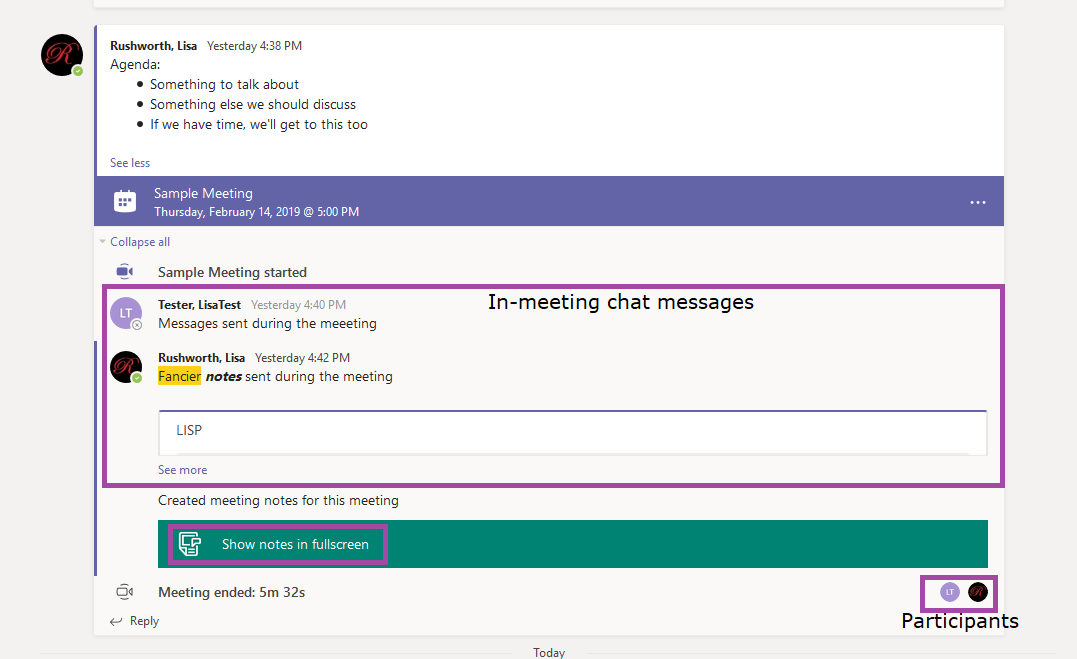
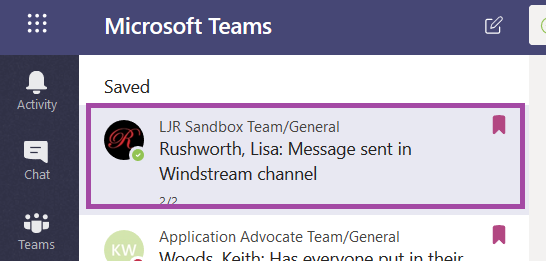
When issues were reported, support staff could quickly reply to indicate they were looking at the issue. And unlike a bridge call, three people can easily type at the same time. As a support person, I clicked the little bookmark to ‘save’ an issue on which I was working.

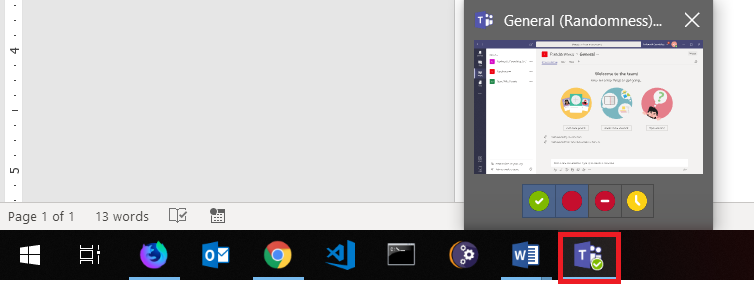
Typing /saved into the command bar at the top of my Teams client

Provided quick access to threads on which I was working. When multiple issues are reported to a bridge line, I find myself with a Notepad document with who and what.

When the problem was a misunderstanding of or a gap in the documentation, I was able to update the end user documentation directly in Teams. These updates were immediately available to users.

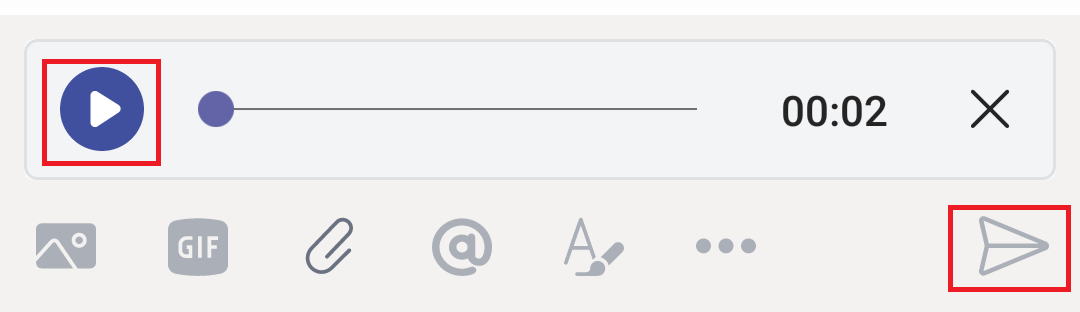
Individual chat and screen sharing within Teams – without having to ask someone how to spell their name three times – was an enormous help in walking users through reconfiguration tasks. Where I’ve used Skype for this before, telling someone who I am so they could chat or share their screen with me was time consuming. And I had to tell a LOT of people.

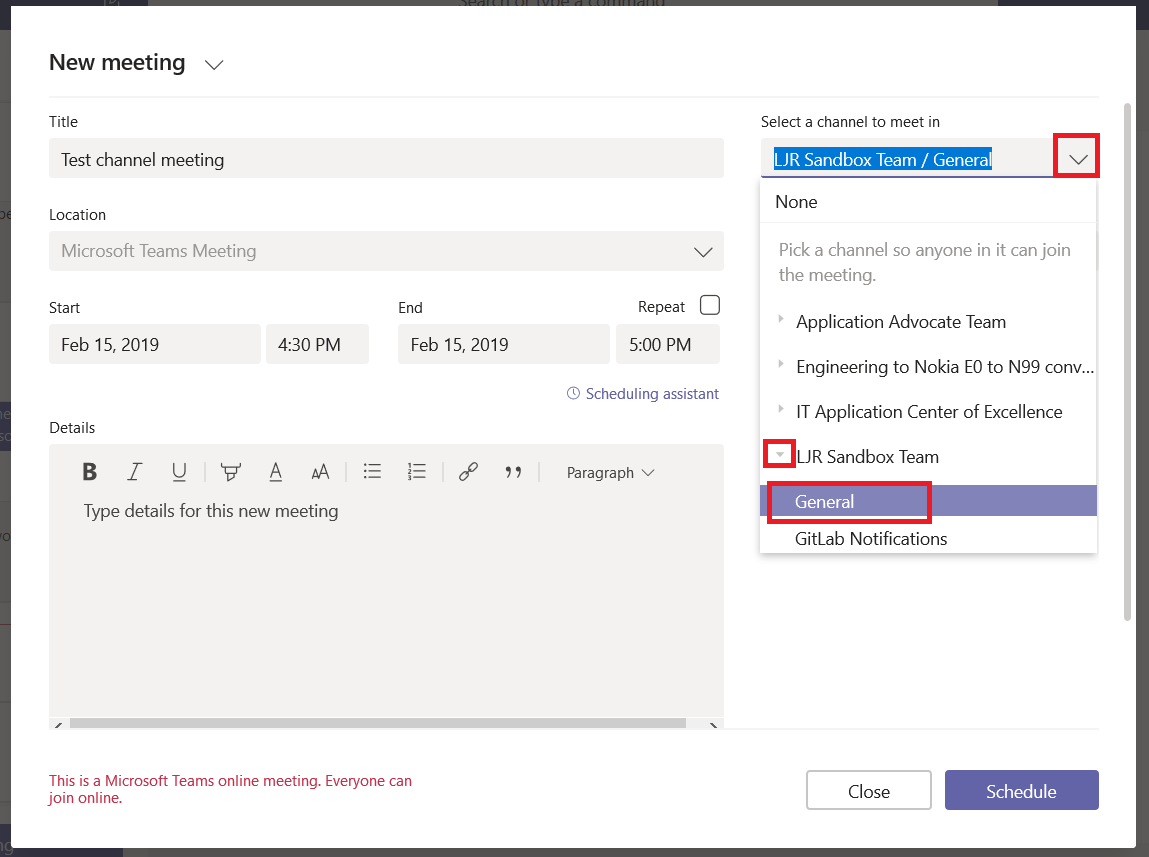
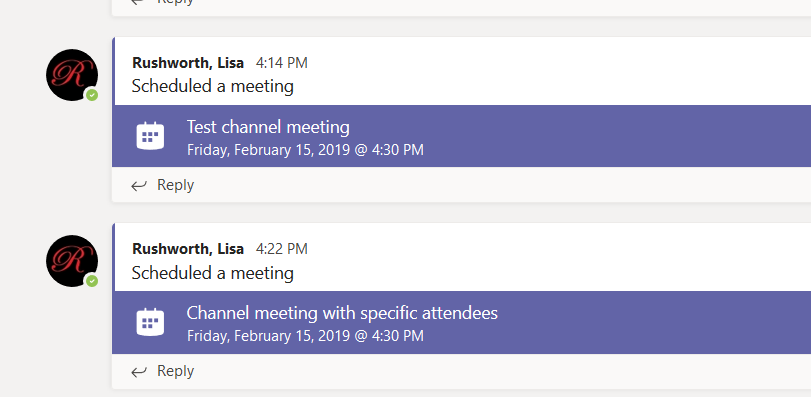
In Teams, you can use the “meet now” button at the bottom of the channel discussion to start an ad hoc meeting that anyone can join.

Or hover your mouse over the individual’s avatar on their post and click the “Chat” icon to start an individual chat.

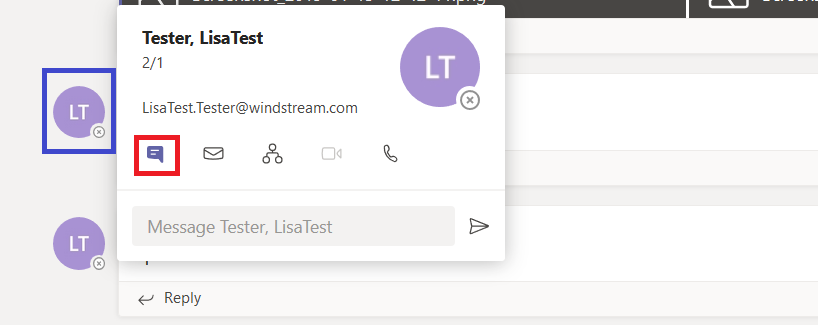
From within the individual chat, the individual needing assistance could use the sharing control to share their screen.

And they could even give keyboard/mouse control to support staff.

But the best thing about using Teams as a support channel? Participants read channel posts, followed previously-provided instructions, and sorted their own problem.

And in the days following the account conversion? I left the Teams space open for anyone who encountered a problem. Leaving the Team open means support staff can keep an eye on the channel without dedicating a lot of time to waiting to see if problems arise.

The one thing that would have made the experience even better – pinning posts to the top of the channel. It would have been great to pin the three process updates where everyone could find them instead of relying on participants to read through the entire channel history.


Did you know … you can Quick Edit SharePoint lists by default?

Web forms are fine for one-off data entry, but the default SharePoint list view is inefficient for bulk item updates. Since you can create your own list views, and you can set your view as the list default … you can have lists open in the Quick Edit view.

Click the not-quite-a-hamburger menu between the list name and “List”, then select “Settings

Scroll down to the “Views” section and click “Create view”

Select “Datasheet View” as the basis for your new view

Give the view a descriptive name. You might not want to set the view as the default just yet – create it, verify it looks good, then set it as the default. Or, like me, you might be a combination of impatient and confident 😊 Either way, select to create a public view.

Check off the columns you want to include, uncheck any that you don’t need.

Select how you want your list sorted – I am sorting by the record creation time, but you can sort and sub-sort by whatever columns make sense for your data.

You can also filter items displayed in your view – my example is order entry, so maybe a ship date column is superfluous for data entry and programmatically populated by some order fulfillment process. Or you can leave the data unfiltered. Scroll down and click “OK” to save your view.

If you didn’t make your view the default, click the drop-down by the view name and select your view to test it. Return to the list settings and click on your view name to edit it and set it as the default view.

Now that my datasheet style view is the default, my list opens in the “Quick edit”, and I can update lots of records.

Asdf