Anya’s school work submission platform limits files to ten meg – when she embedded a dozen 3d images in a single presentation to create a seventy meg file? That was an easy fix – drop the 3d object down to a PNG. But her most recent presentation was just photos from the web, and it was just over the ten meg limit. Fortunately (or unfortunately in this case) the more recent Office document formats are already compressed … so you cannot just zip up the file to shrink it. We learned a quick way to reduce the size of a PowerPoint presentation.
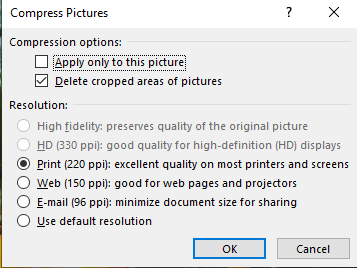
Select one of the pictures in the presentation. On the “Picture Format” tab, find the “Compress Pictures” button.
If you know there is one really high-resolution picture (or a single picture where you cropped out most of it), selecting just that picture and leaving “apply only to this picture” checked makes sense. But, generally, I apply the compression to all images. Select a resolution that’s reasonable – we’ve used “Print” and reduced an eleven meg file to just over four meg. Using “Web” as the resolution reduced the file to just over a meg.
Being able to save documents directly to Teams, to sync documents and work on them locally, and to just store documents locally provides a lot of options when you’re saving a document. For me, though, a lot of options also means I’m not always sure which option I chose 😊 In which Teams space is this document saved? Did I stash it locally because I’m not ready for other people to peruse it?
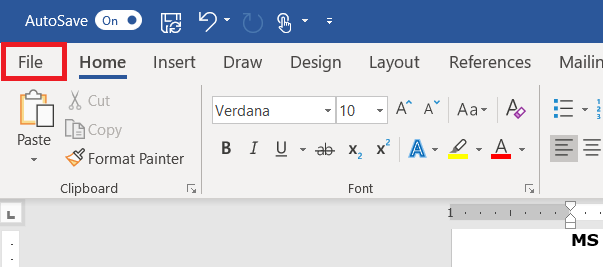
Luckily where the document is saved can quickly be displayed in the Office 365 applications. Click “File” on the ribbon bar.
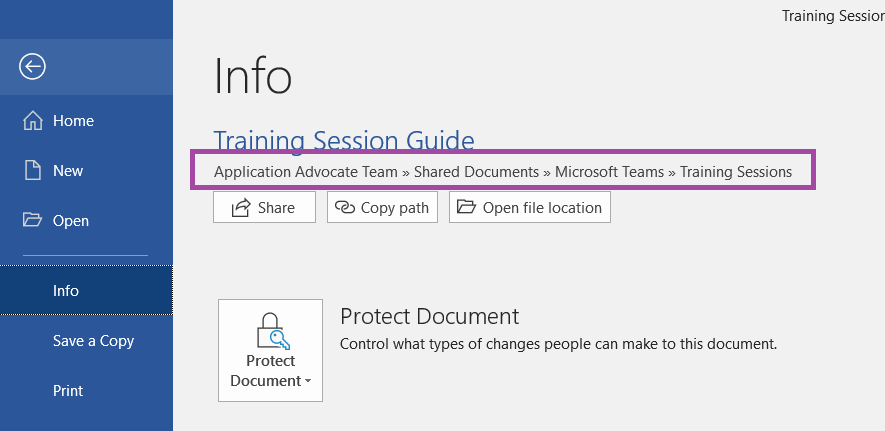
The “Info” section contains the path to the document – a document that is stored in a SharePoint document library (be that a Teams Channel file space or some other SharePoint document library) will include the SharePoint site name (the Team name in the case of Teams Channel files). Clicking “Open file location” will open a browser tab to the SharePoint document library which contains the file.
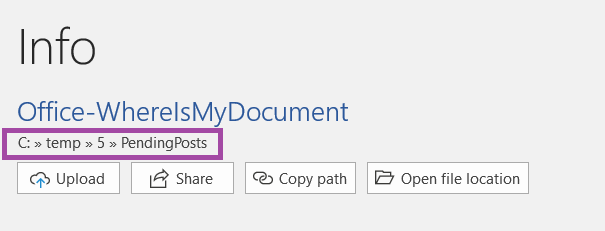
A document on a local or network drive will have a path starting with the drive letter. Clicking “Open file location” will open a File Explorer window to the folder containing the document.
And a document that hasn’t been saved won’t have any file information listed.
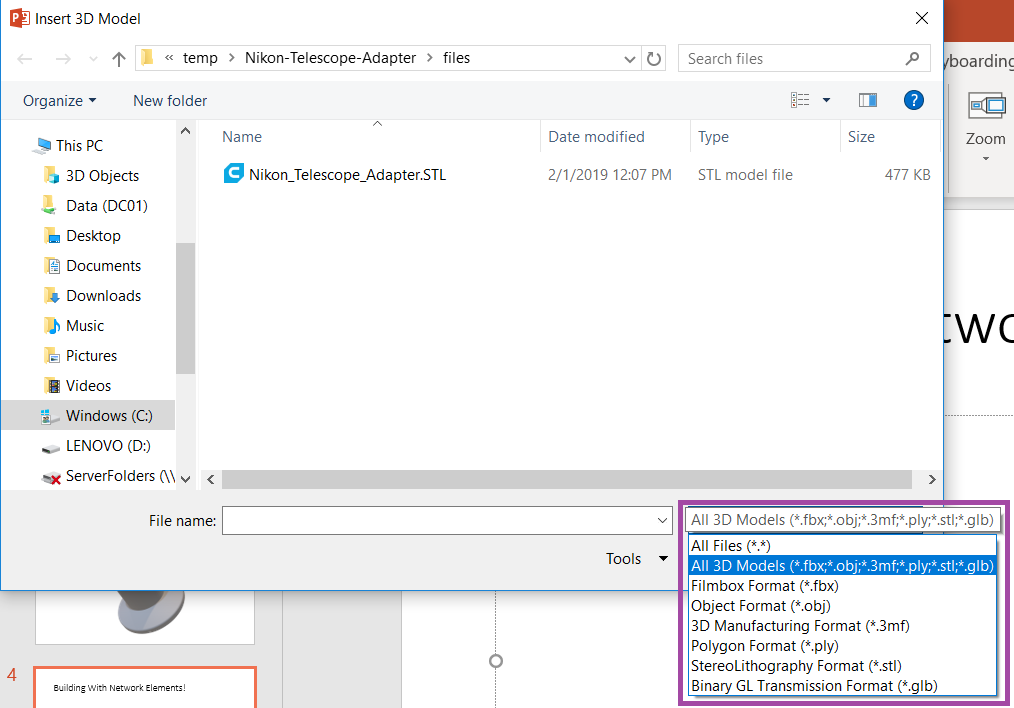
Select “Insert” from the ribbon bar, then click the drop-down on “3D Models”. You can browse models from Remix 3D (“From Online Sources”) or models stored on your computer (“From a File”).
You can insert Filmbox (fbx), Object (obj), 3D Manufacturing (3mf), Polygon (ply), StereoLithography (stl), and Binary GL (glb) files.
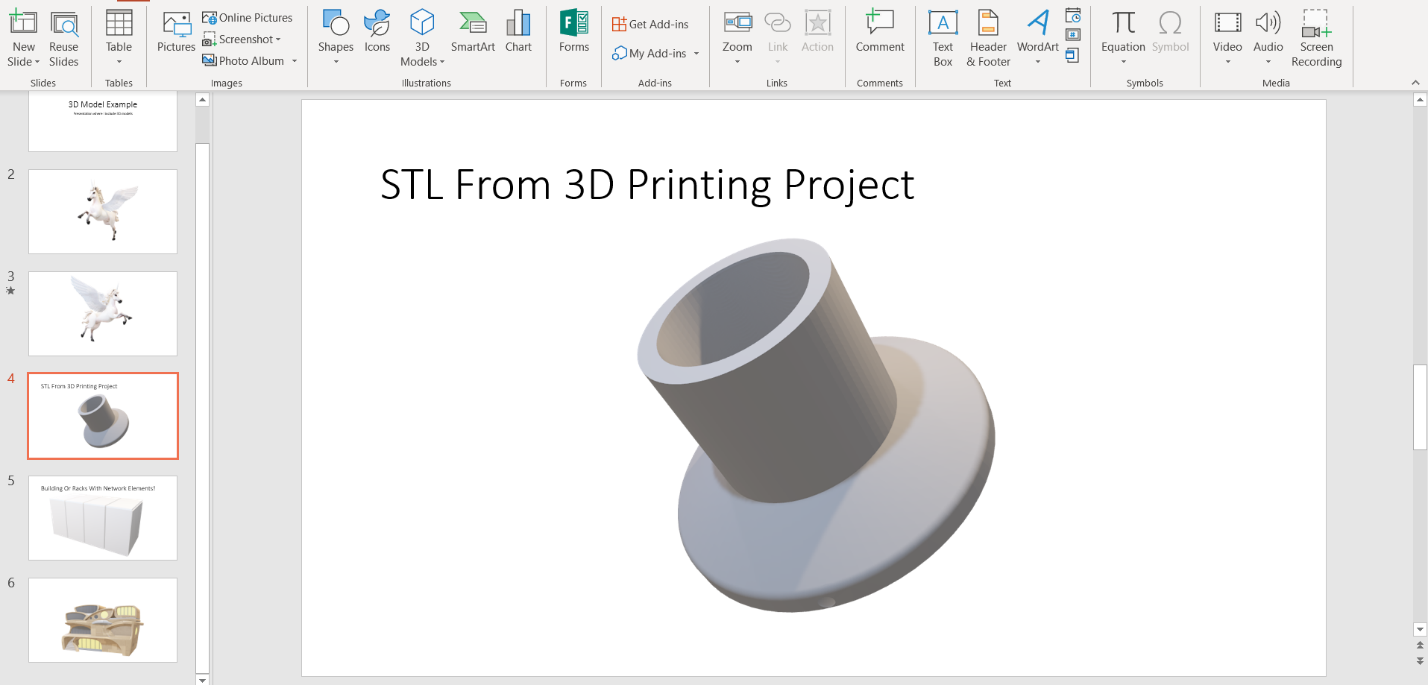
STL files are commonly used when designing objects for 3D printing – here I’ve included a camera/telescope adapter.
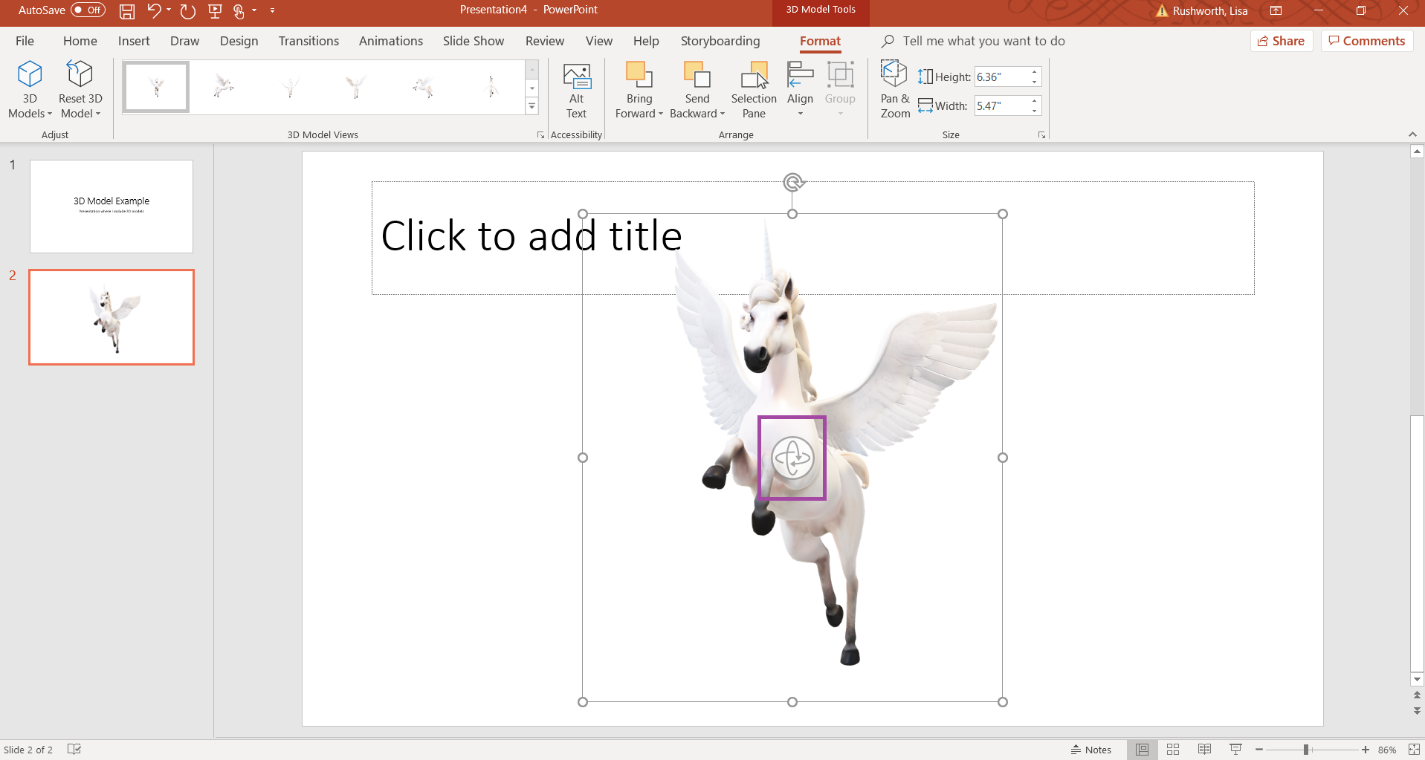
Click on a 3D object and there is a rotation control
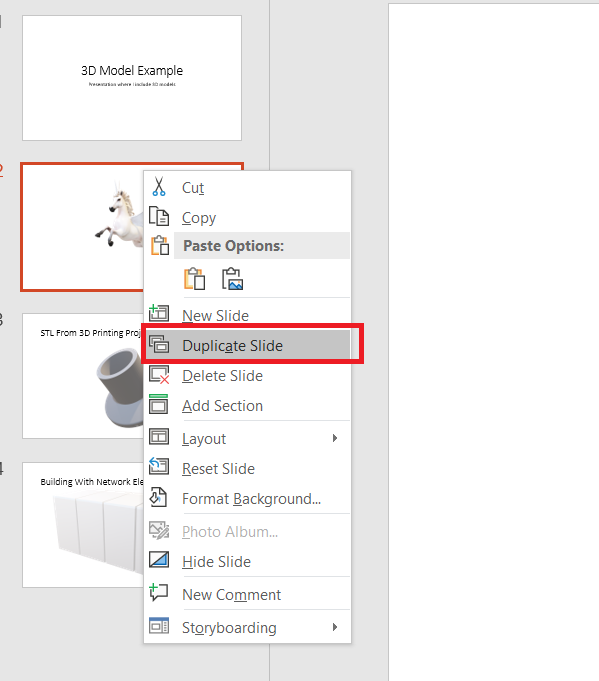
By changing an object’s orientation, you can use the “Morph” transition to rotate the object during your presentation. Right-click on the slide that contains your 3D object. Select “Duplicate Slide”.
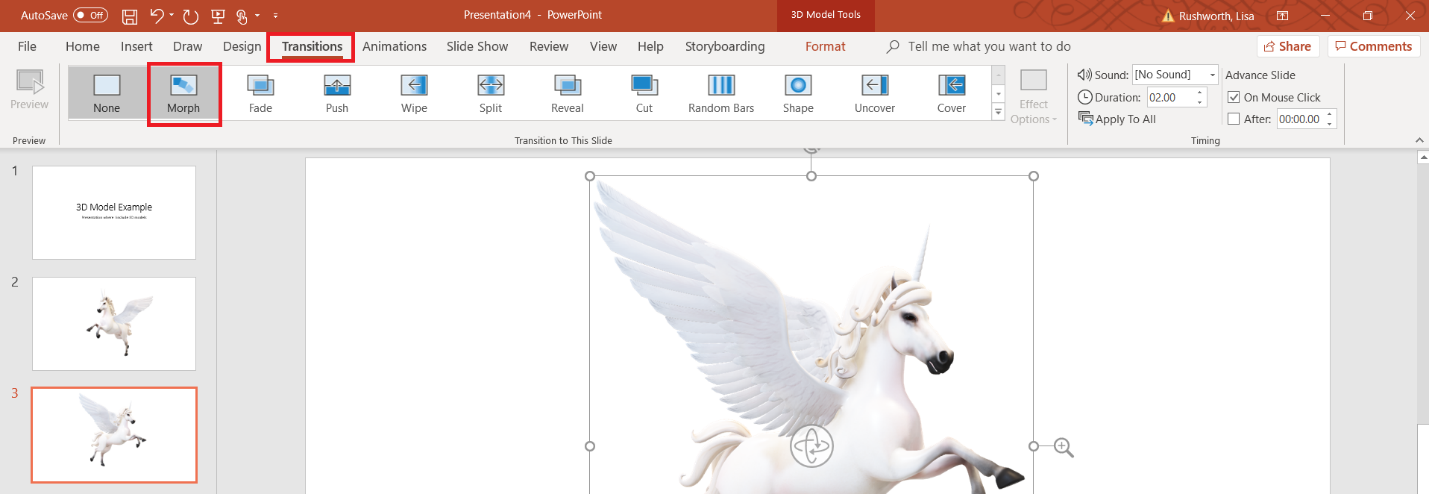
Rotate the object on the new slide. Select “Transitions” from the ribbon bar, and select “Morph” as the transition.
When you play your presentation, the object will rotate as PowerPoint transitions between the two slides.
Now I know there aren’t a lot of uses for rotating 3D unicorns in business presentations, but manufacturers can embed 3D renderings of their products. Many architectural firms are providing 3D building designs that can now be included in PowerPoint presentations.
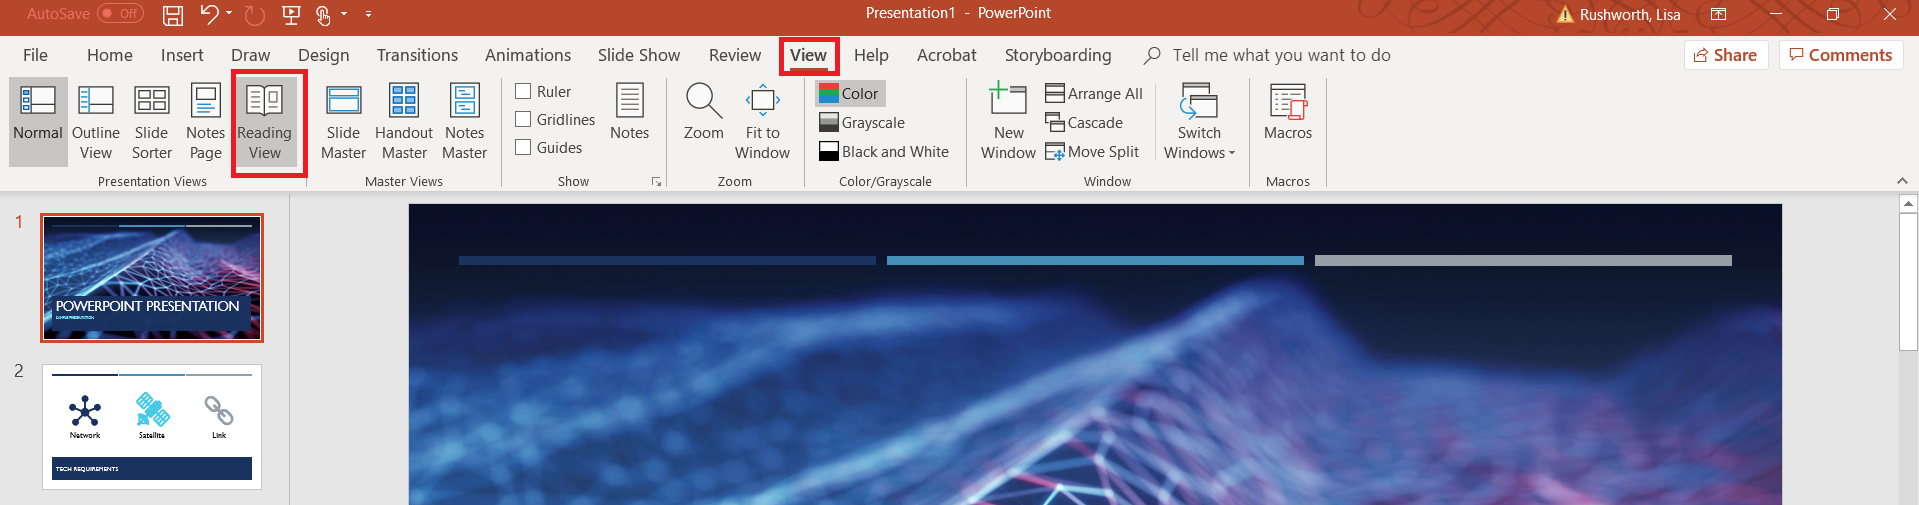
This works both in “Reading View” and when you are playing a presentation. To enable “Reading View”, select “View” from the ribbon bar and click “Reading View”.
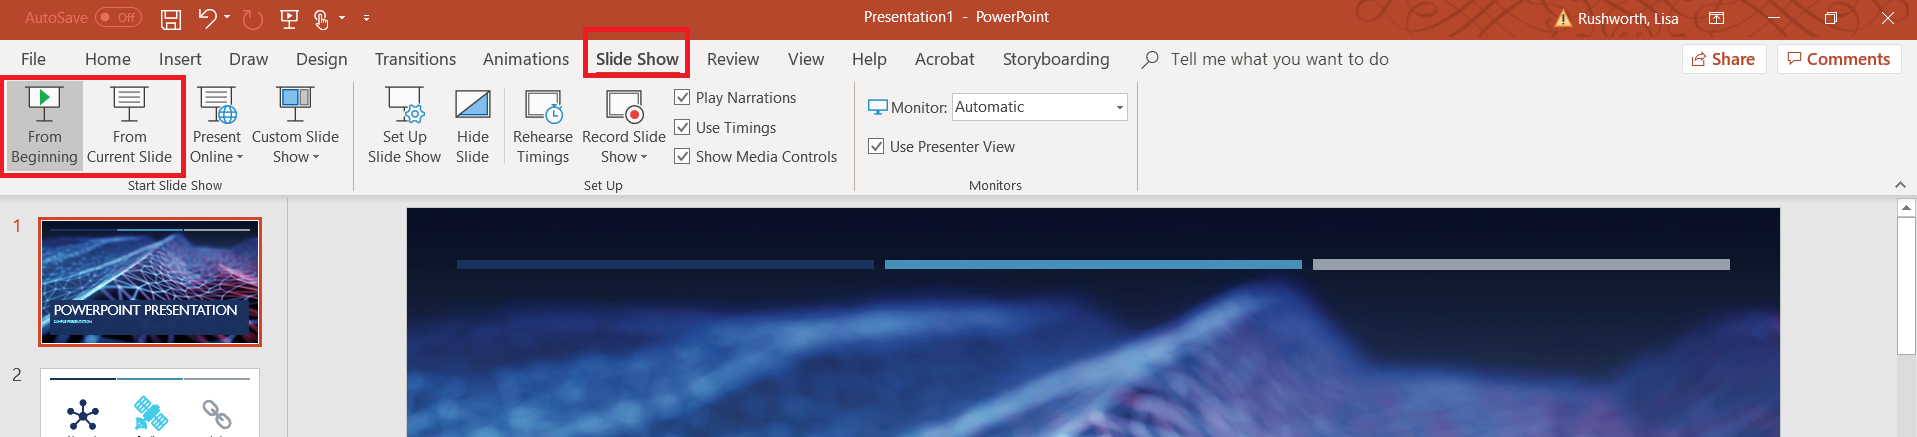
To play your presentation, select “Slide Show” from the ribbon bar and click “From Beginning” (or “From Current Slide” to begin the presentation from the current slide).
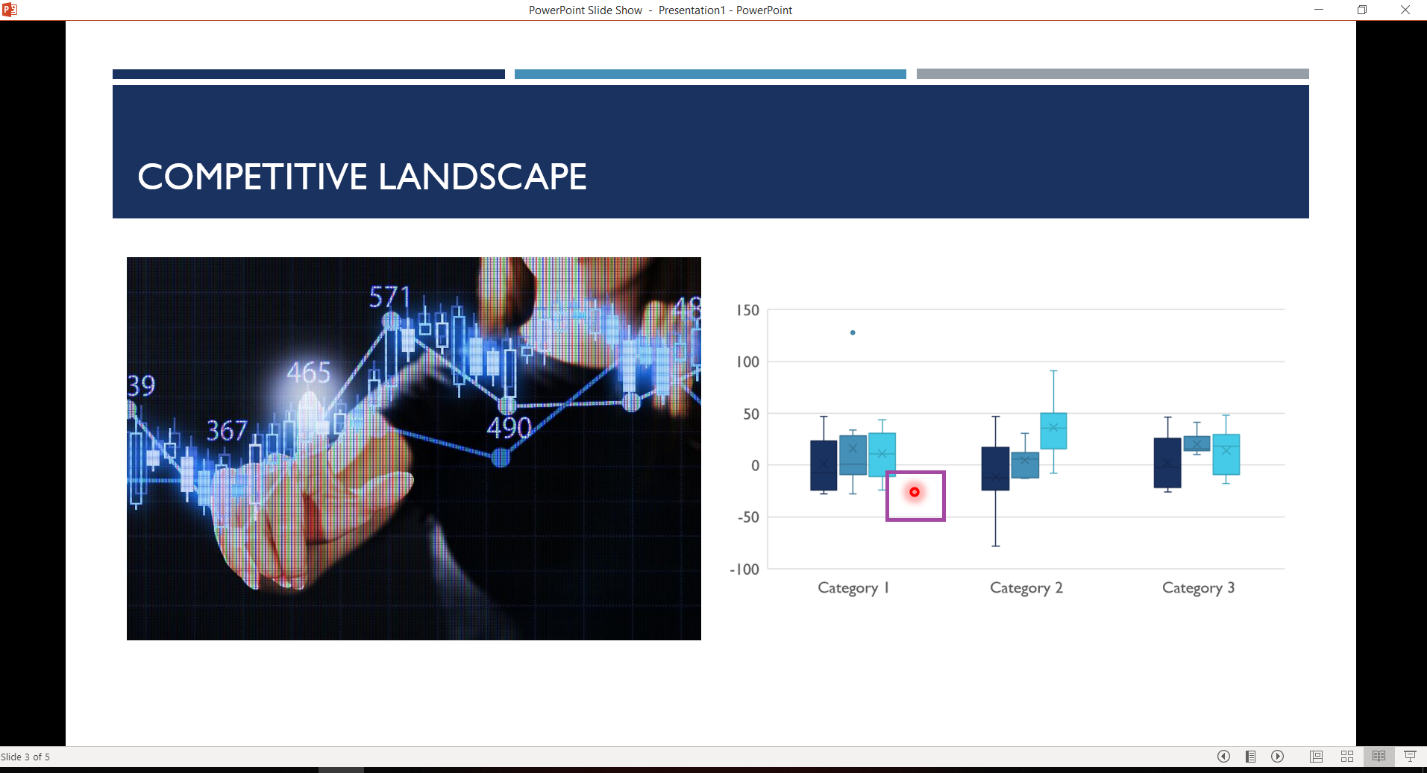
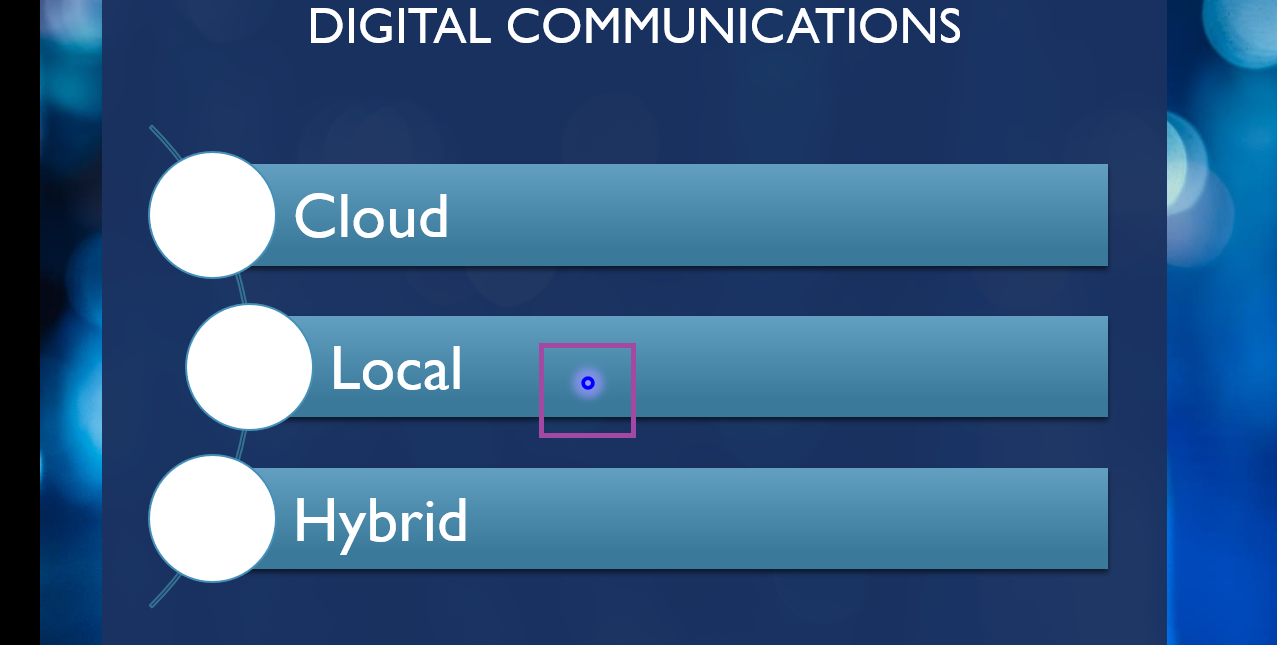
Hold the CTRL key, then left-click and drag your mouse. You’ll see a red circle which can be used to draw attention to elements of your slide.
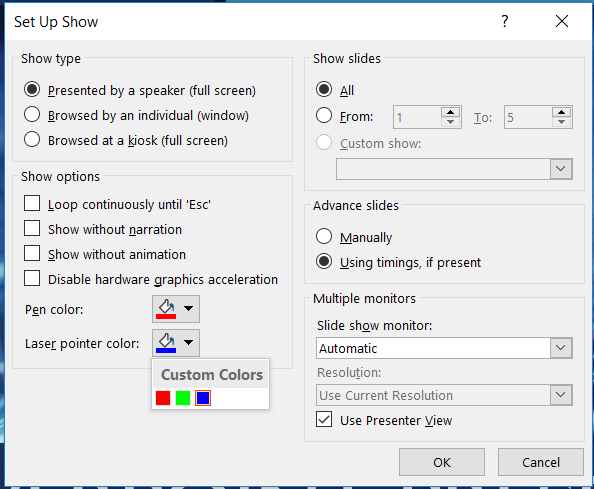
If you want a different color “laser”, select “Slide Show” from the ribbon bar and click “Set Up Slide Show”.
Click the drop-down next to “Laser pointer color” and select the desired color. Click OK.
Now when you hold the CTRL key, left-click and drag the mouse … now there’s a blue laser pointer.
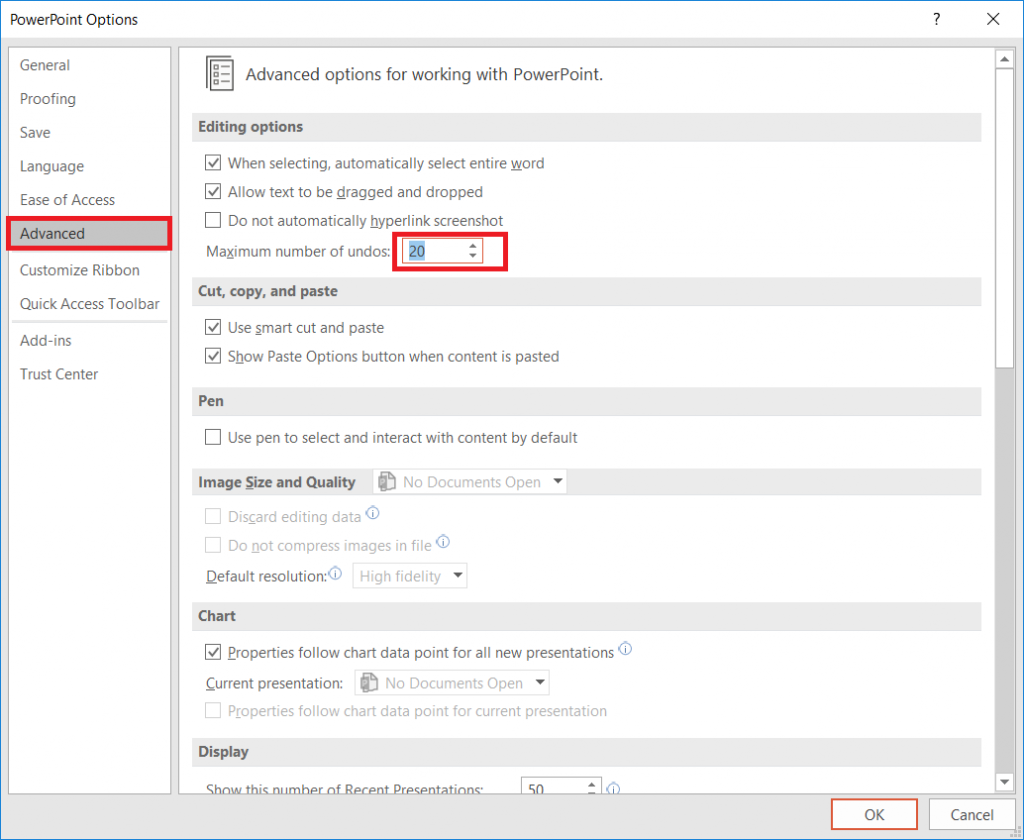
I am a big fan of “undo” – highlighted something to copy it but missed the ‘ctrl’ part of ctrl-c? Undo! Editing an image and drew a line the wrong place? Undo! Change some verbiage and regret the modifications? Undo! (I’ll generally copy the stuff I’ve added into a new document before I start hitting ctrl-z {the keyboard shortcut for undo} and incorporate a few of the new ideas into the original text.) Occasionally, you run out of undo-able operations. If you are saving to OneDrive, SharePoint, or Teams, you can use the version history to get back to your original content. But did you know that PowerPoint allows you to increase the number of undo operations available?
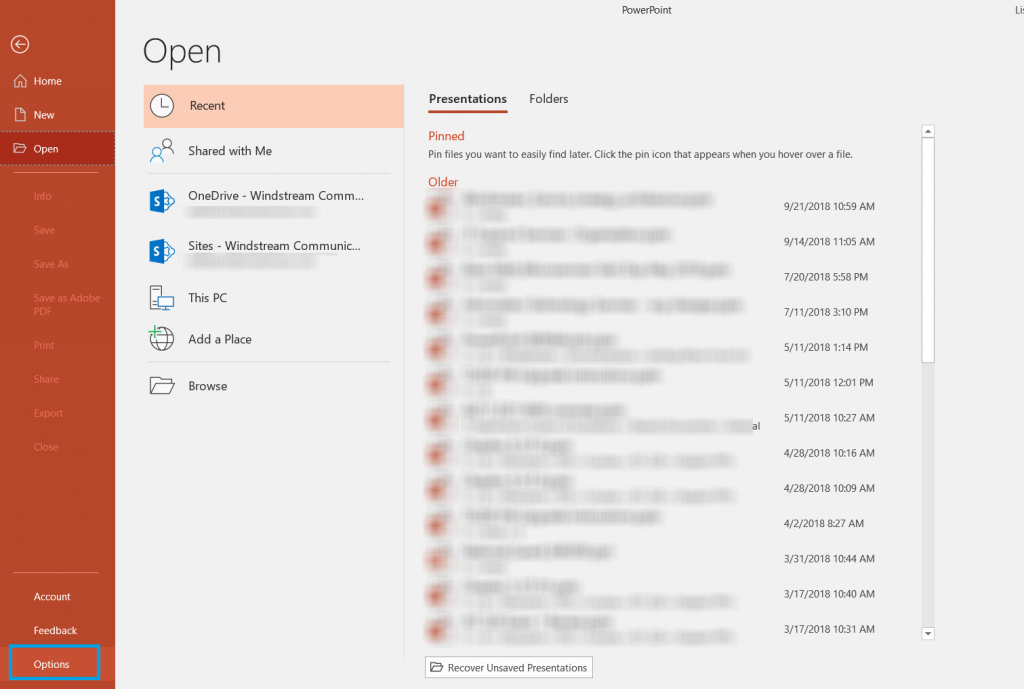
Click “File” on the ribbon bar and select “Options”
Select “Advanced”. Under “Editing options”, you will see a
maximum number of undos – this value defaults to 20.
You can increase it up to 150 – although higher numbers can
adversely impact performance, so stick to a lower number unless you really want to undo a hundred operations!
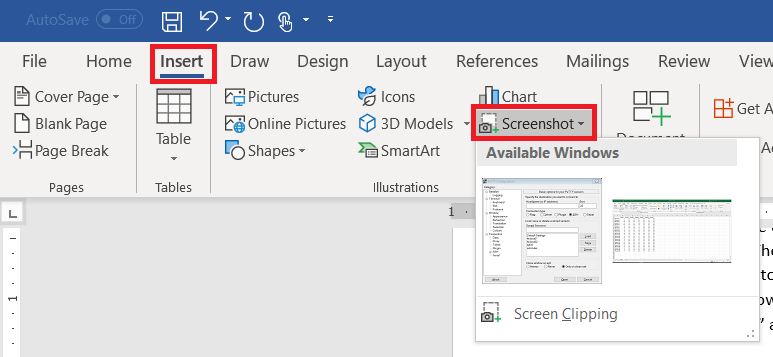
You’ve encountered some odd error in an application and need to send IT support a picture. Or you’rewriting documentation. There are lots of reasons you need a picture of your computer screen. You can hit the “Print Screen” button on your keyboard (even hold Alt and hit print-screen to isolate the image to the active window). But did you know Microsoft Office programs can do that for you? On the ribbon bar, select “Insert” and locate “Screenshot”
Click on one of the “Available Windows”, and an image of the window will be inserted into your Word document, Excel spreadsheet, Outlook e-mail, or PowerPoint presentation.
Use the “Screen Clipping”selection to grab part of a window. Minimize all of your Windows. Bring up the Window of which you want an image. Now bring up the Office document into which you want the image inserted. Use Insert => Screenprint => Screen Clipping, and wait a minute. Your Office document will be minimized, your screen will get washed out, and you’ll have a cross-hair instead of a mouse pointer. Click and drag to draw a rectangle around something. When you release the mouse, whatever is in that rectangle will be pasted into your Office document.
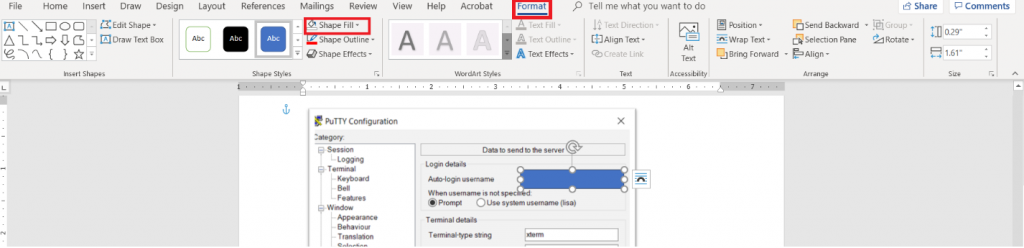
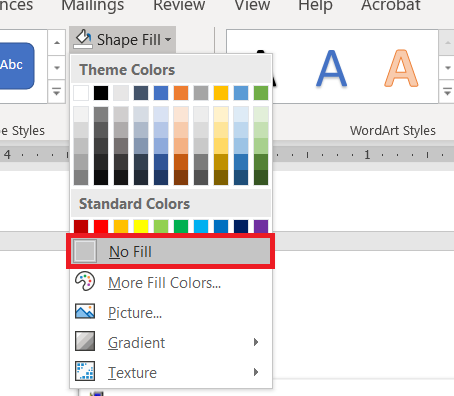
Wait – what about those rectangles I use to highlight the image? From the ribbon bar, select “Insert”and “Shapes”. I took a University course where debugging screen shots had to have the “important bit” highlighted with a red square – that stuck with me. You’ve got an array of shapes and colours available. Pick one. Draw the shape over your image – yes, it looks like the shape covers the important part. Draw it anyway. While the shape is still selected, click “Format” in the ribbon bar. Select “Shape Fill”
Select “No Fill” (you could also use a highly transparent fill colour if you’d prefer).
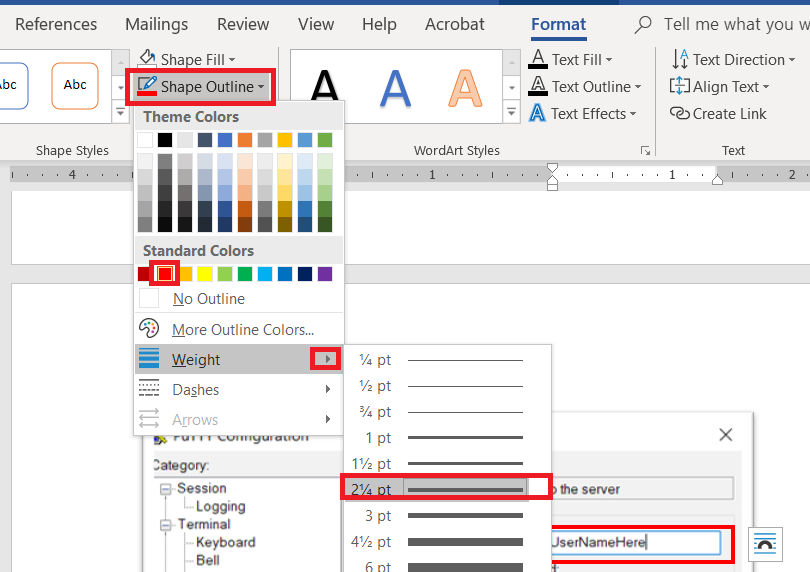
Click “Shape Outline” – pick a colour, and if the line is not thick enough select “Weight” to increase the line width.
When I’m writing documentation with a lot of images, I’ll still use an image editor and ‘print screen’. There are filters that just don’t exist in the Office image editors – sometimes I want to selectively blur screen text so my work conversations are not included in documentation. Sometimes I want to create a composite image. But for small documents – showing someone the error I get on their web site, “click here, type this” – using a single application is efficient.