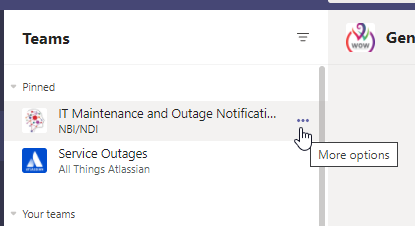
“Pinned” channels are basically links to channels that get a listing at the top of your Teams list for quick access. The way they list the pinned teams is kind of backwards in my mind — the big text is the channel name and the small text is the team name. So I’ve got a channel named “IT Maintenance and Outage Notifications” in the “NBI/NDI” team.
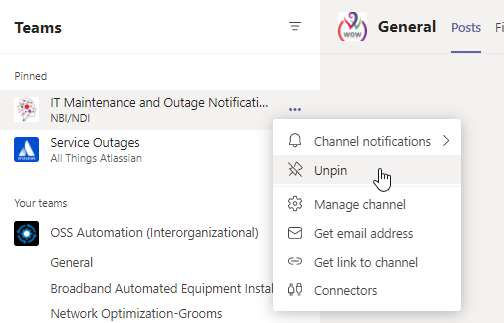
If you don’t want them pinned to the top, hover your mouse over the listing and an ellipsis will appear to open more options.
Click on ‘unpin’, and the pinned link to the channel will go away.
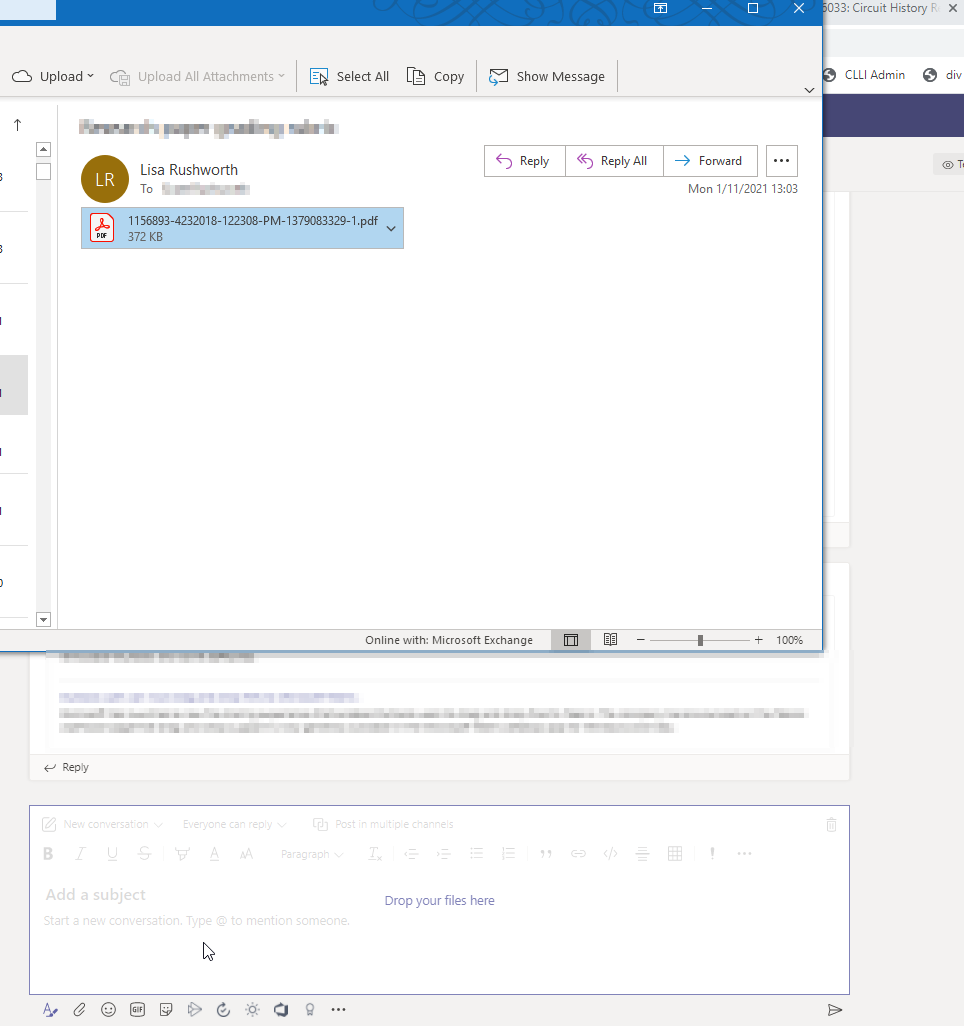
Can’t say I’ve needed to get an Outlook attachment into Teams myself – I try to store my files in OneDrive and e-mail links instead of e-mailing a copy of the file. When I need to update something, there’s no need to send an updated copy; and no one needs to figure out if they’re looking at the “right” version. Click the link now, and you have the right version. But there are certainly scenarios where you’d have attachments to share in Teams – especially if you interact with people outside of the organization. And you used to have to save the attachment and then share it into Teams. Not anymore – you can now drag attachments directly from Outlook into Teams (this works with the Teams web client too – but you cannot use the Outlook web client for this method. The message with an attachment needs to be opened in Outlook).
If you’ve got multiple monitors, this is easier … but, if not, shrink the Outlook window so you can see both the message and Teams. Then drag the attachment icon into the message composition box in Teams. You’ll see text that says “Drop your files here” appear in Teams.
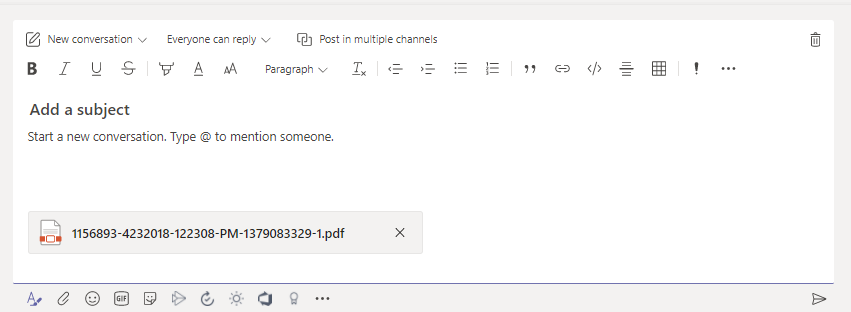
Release the mouse, and the file will be uploaded to Teams.
Collaborative document editing in Teams and SharePoint is a huge time saver – instead of trying to merge multiple versions of a document together, we can all edit the same document (we can even edit it at the same time). OneDrive offers the same benefit, but it’s a bit of a hassle going into OneDrive, setting up sharing, and then sending people a link to the document. But Outlook handles this for you.
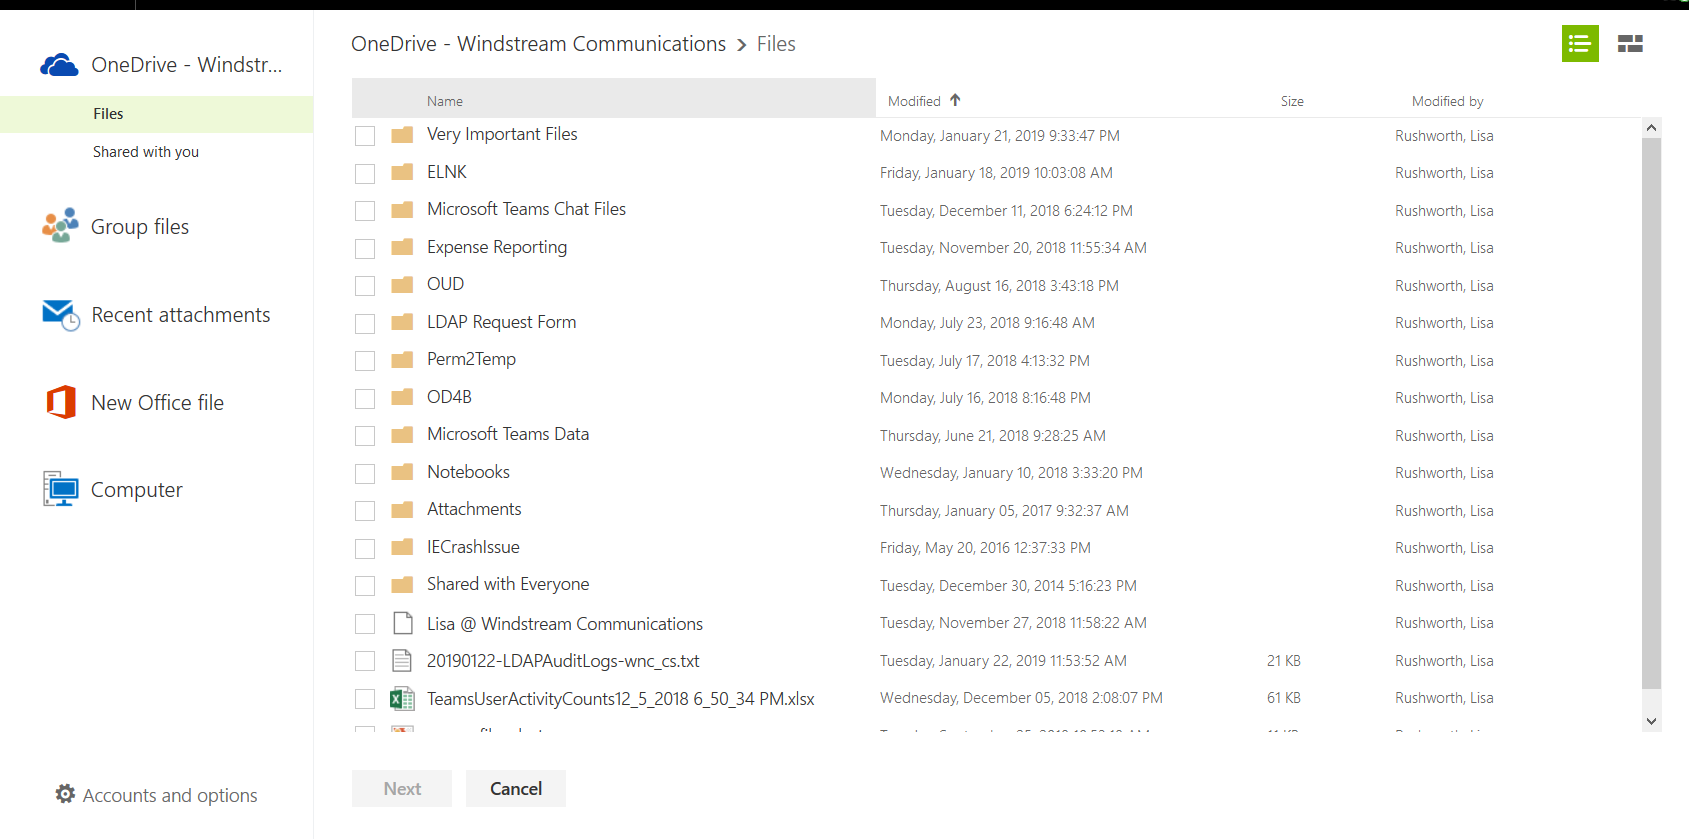
I have a private file saved to my OneDrive for Business space.
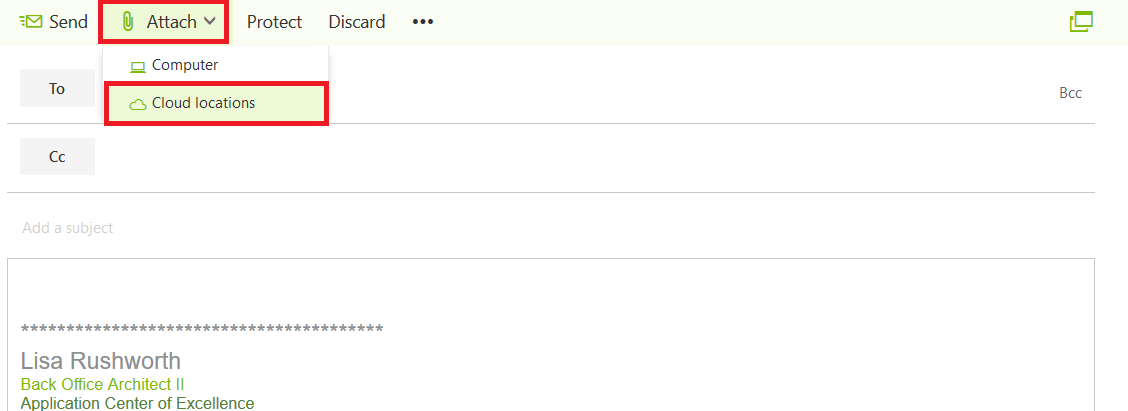
In your message, select ‘Attach’ and then ‘Cloud locations’.
You will see your OneDrive for Business files – select the file(s) that you want to share and click “Next”.
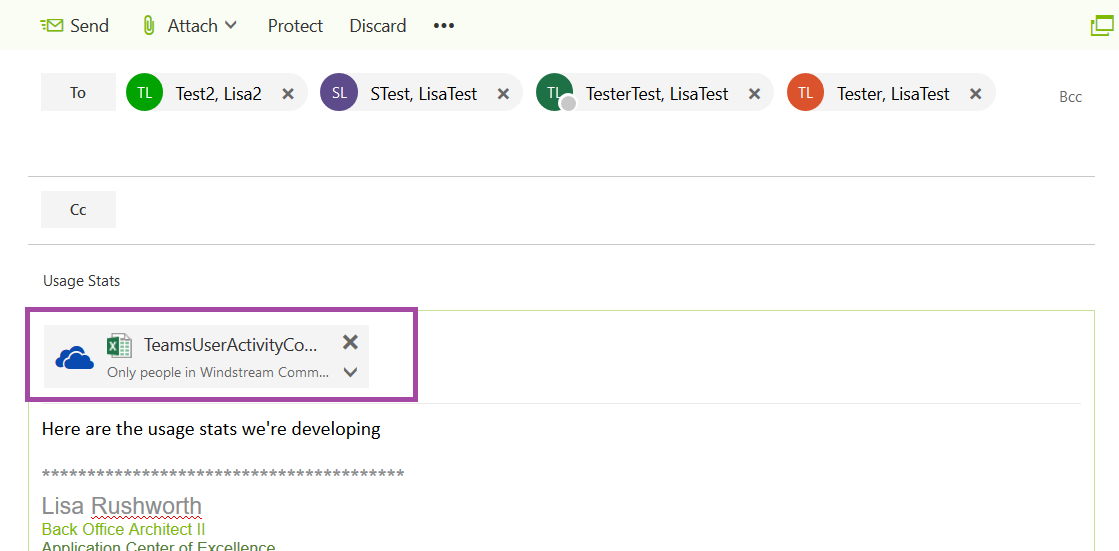
You will see the file as an attachment to the message – the OneDrive cloud logo lets you know that the ‘attachment’ is actually a link to a OneDrive document. Address and send the message as you normally would.
Check OneDrive again, and you will see that the document is shared.
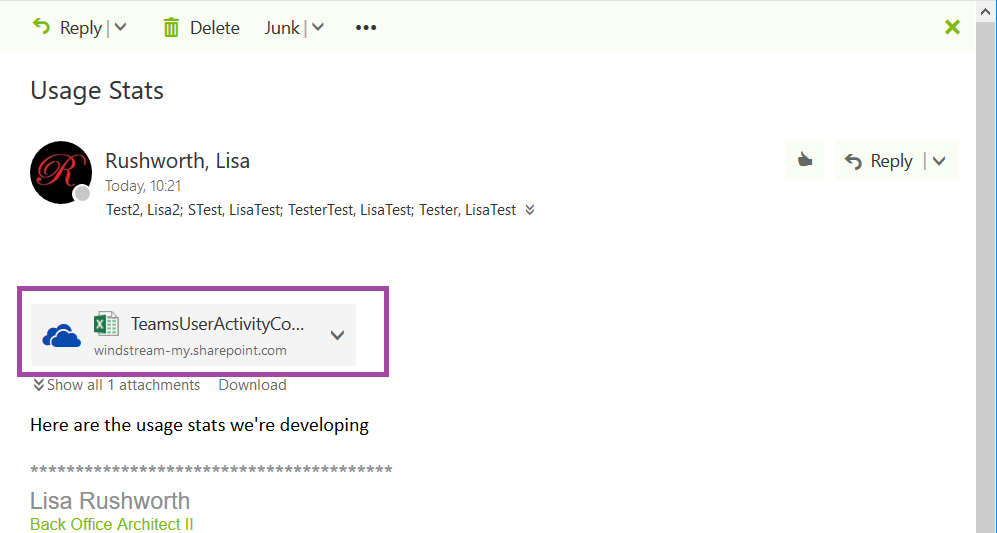
The recipient will see an attachment to the message, and they will be able to view and edit the file.
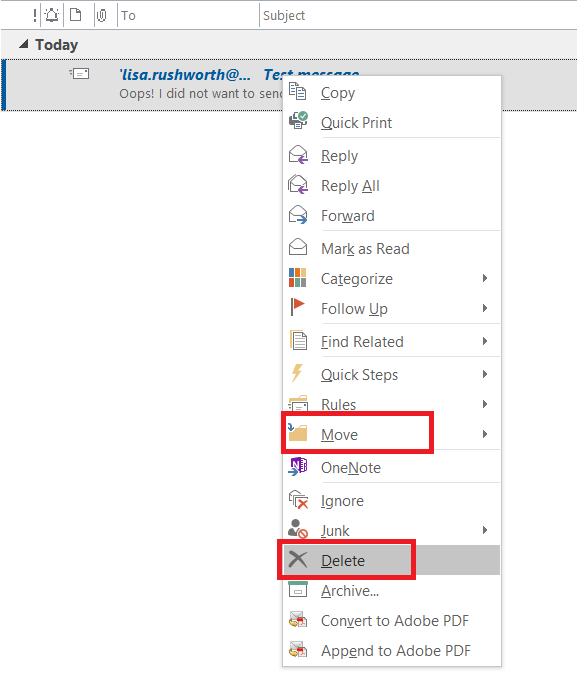
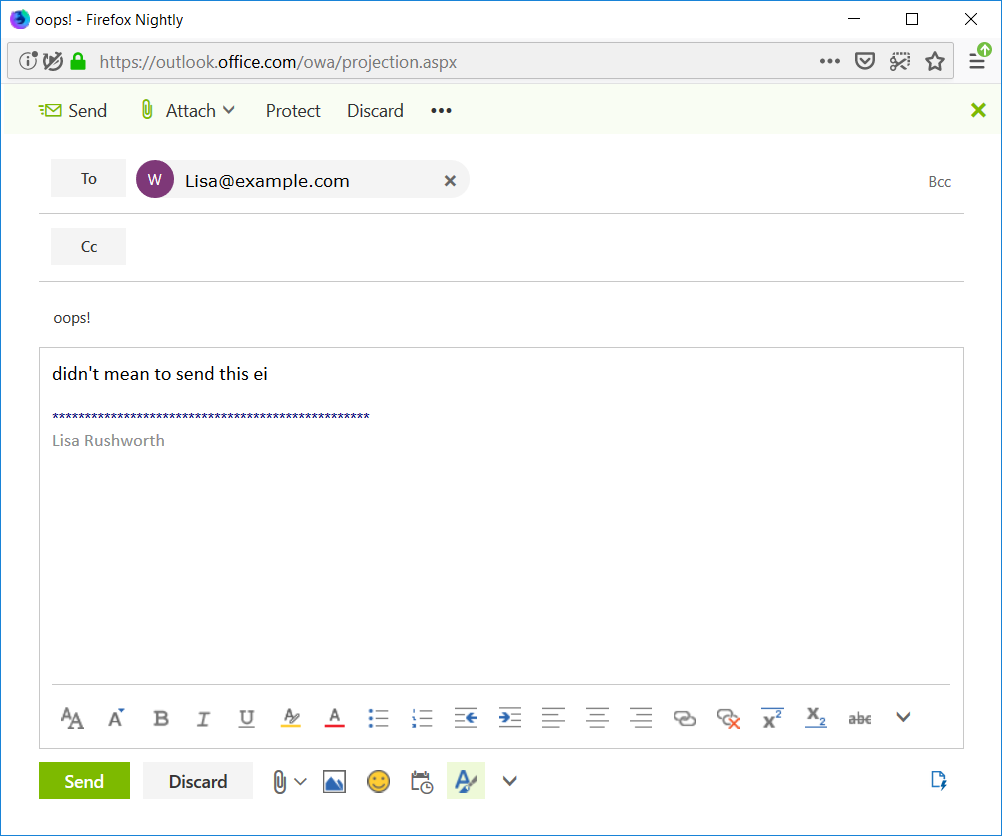
Anyone who has mis-addressed a message or hit ctrl-enter and
prematurely sent, well, some of a message
has probably found the message “recall” option. Unfortunately, “recall” depends
on the recipient having “Automatically process requests and responses to
meeting requests and polls” enabled, cannot recall the message if the recipient
has a rule that moves the message out of their inbox, and doesn’t work if the recipient
isn’t using Exchange. Many times, your attempt to recall a message yields another message like this:
Which is better than someone thinking I meant to send them half
of a thought that stopped mid-sentence. But it’s not what I expected. You can,
however, configure Outlook to delay sending messages … allowing you a little
time to cancel the message.
Outlook Client:
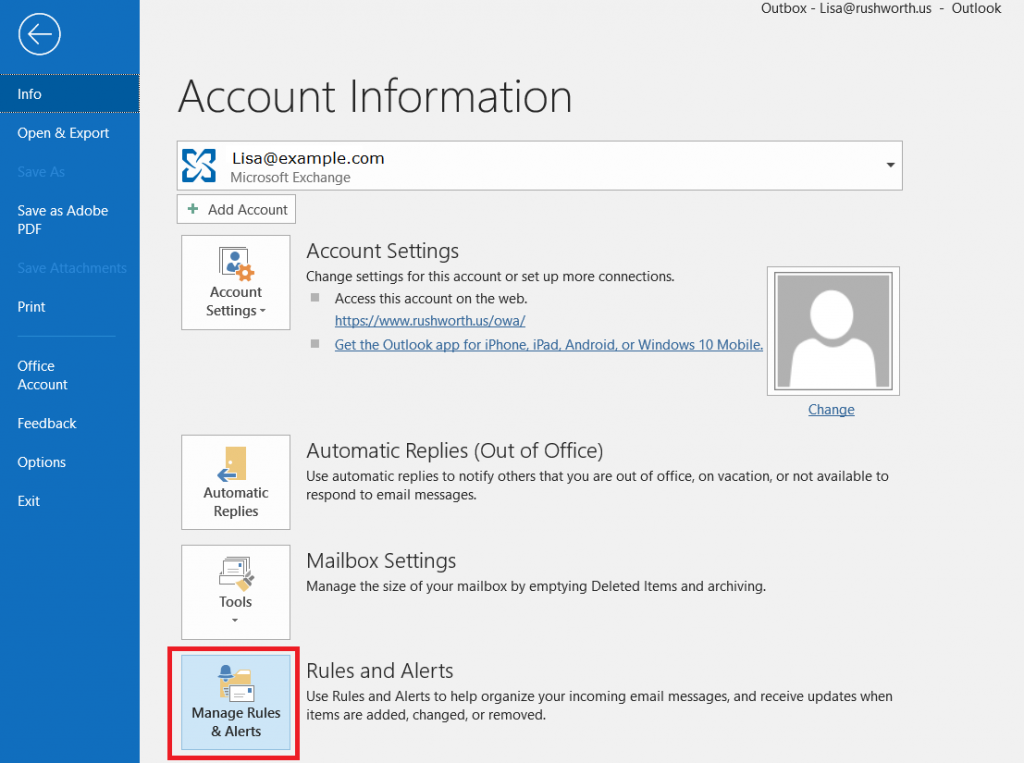
On the ribbon bar, click “File”. On the ‘Account Information’
screen, click “Manage Rules & Alerts”
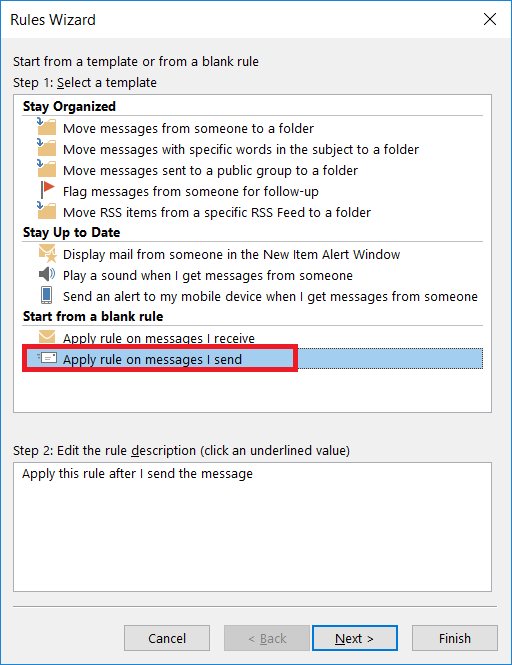
Click “New Rule…”
In the new rule wizard, select “Apply rule on messages I
send”
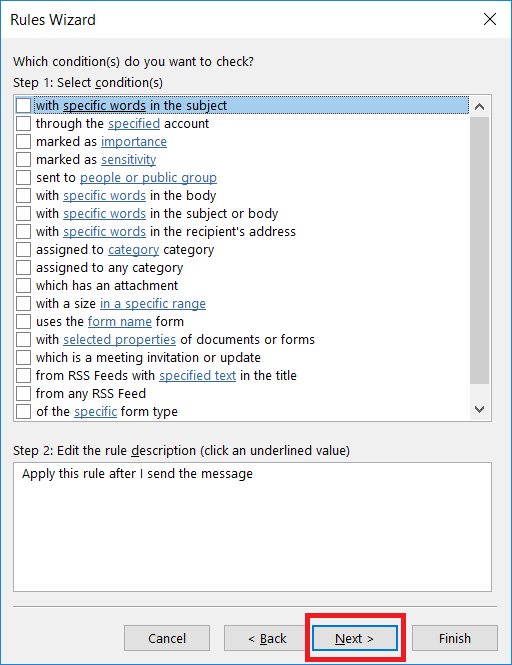
Do not select any conditions – just click “Next”.
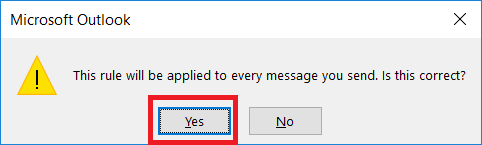
You will see a warning that the rule will be applied to all
messages you send – click “Yes”.
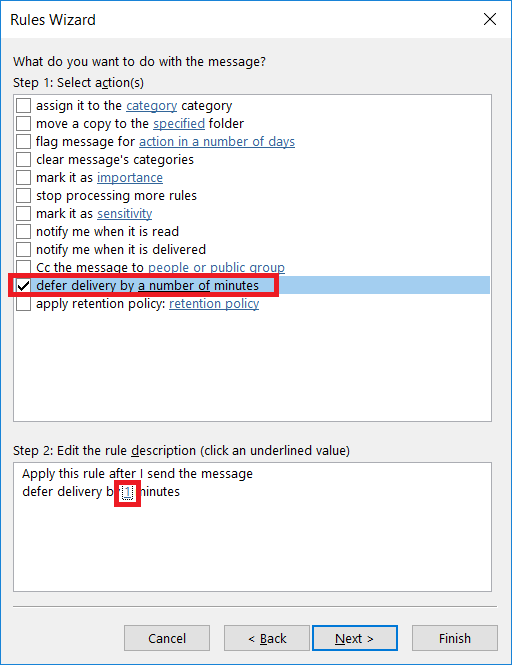
Click the check-box before “defer delivery by a number of
minutes”, then in the text below click the hyperlinked ‘a number of minutes’
and enter the number of minutes you want to delay sending messages. Use a small
number – if you close Outlook before the message is sent, it will not be sent
until you re-open Outlook! (Plus it’s confusing if you’re on a call with
someone, tell them you are sending them something, and it doesn’t actually send for fifteen minutes). Click
‘Next’ to continue.
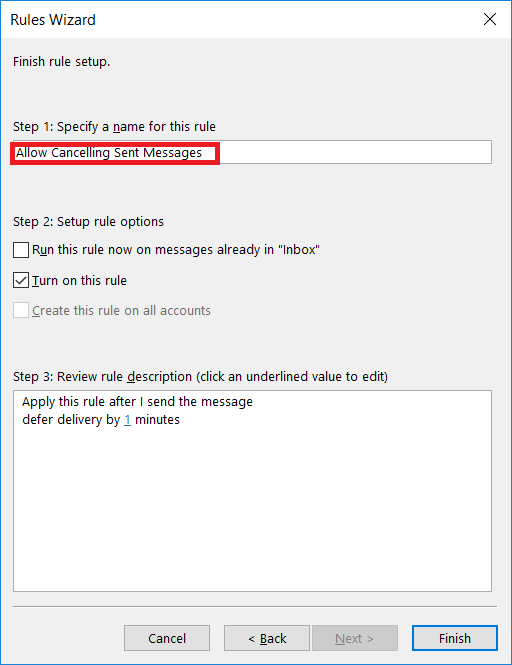
Give your rule a descriptive name, then click “Finish”.
You will be warned that the rule will only run if Outlook is
running – click OK. If you routinely
use Outlook on two different computers, you’ll need to create this rule on both computers.
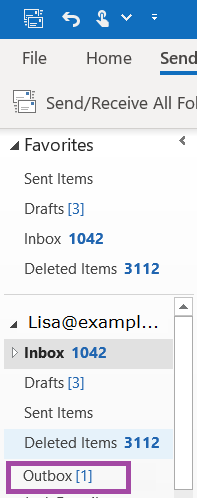
Now when you send a message, you will see a counter next to “Outbox”.
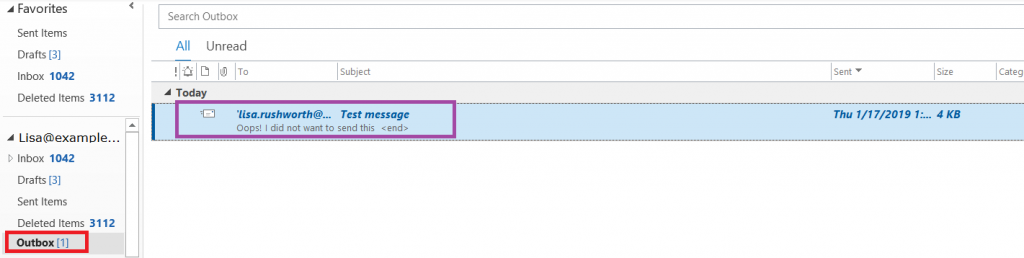
The message will sit there for the time you specified, then it will be sent. Once
the message is sent, the counter will disappear.
If you want to stop the message from being sent, click on “Outbox”.
Right-click on the message – you can select “Move” and move
the message back to your “Drafts” folder or you can delete it.
Outlook Web:
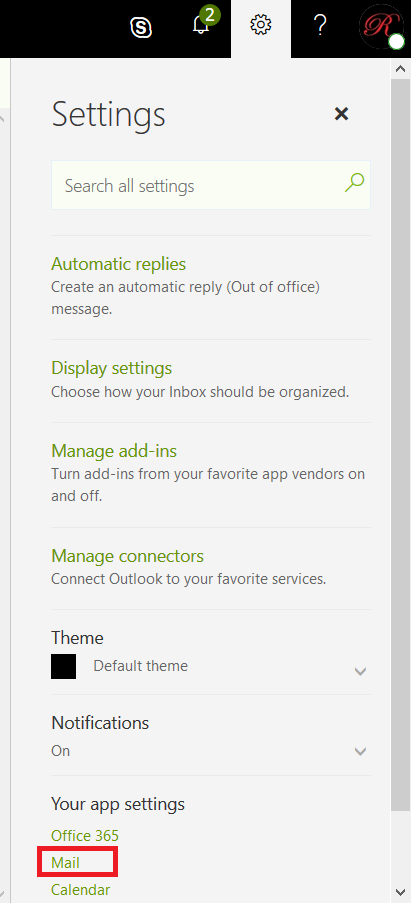
Click the “Settings” gear in the upper right-hand corner of
your screen.
Click on “Mail” to display the mail-related settings.
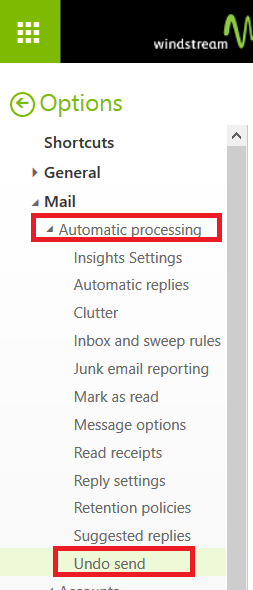
Expand “Automatic processing” and click on “Undo send”
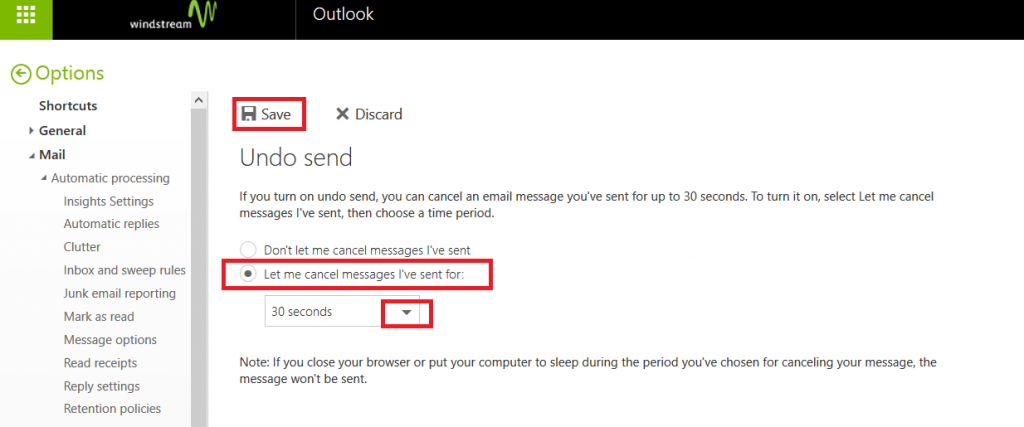
Click the radio button to select “Let me cancel messages I’ve
sent for:” then click the drop-down to select how long sending will be delayed.
Pending messages won’t be sent if you close your browser or put your computer to
sleep – they’ll still be there when you open Outlook again. Click save.
Now when you send a message, it will be deferred in your “Drafts”
folder for the selected time period. While the message is deferred, you will
see a “Cancel send” option in the upper right-hand corner of your Outlook Web screen.
If you don’t want to send the message, just click “Cancel send”.
The message will be opened to allow you to continue editing
it. You can save it as a draft or discard it as well.
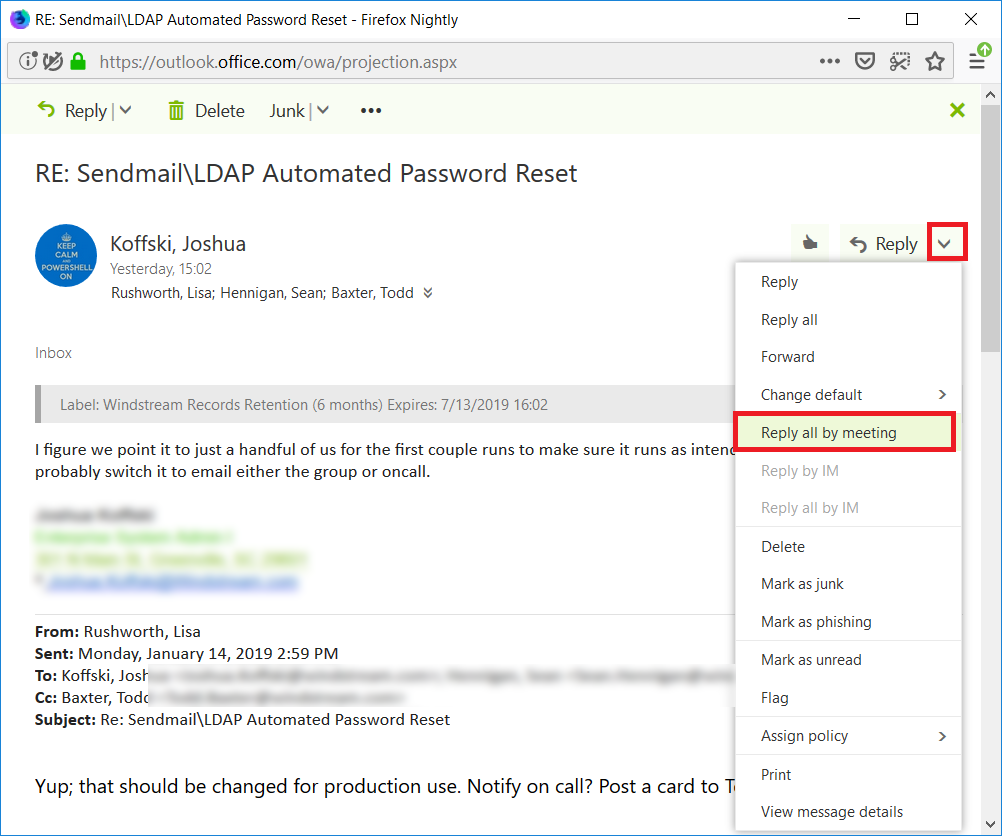
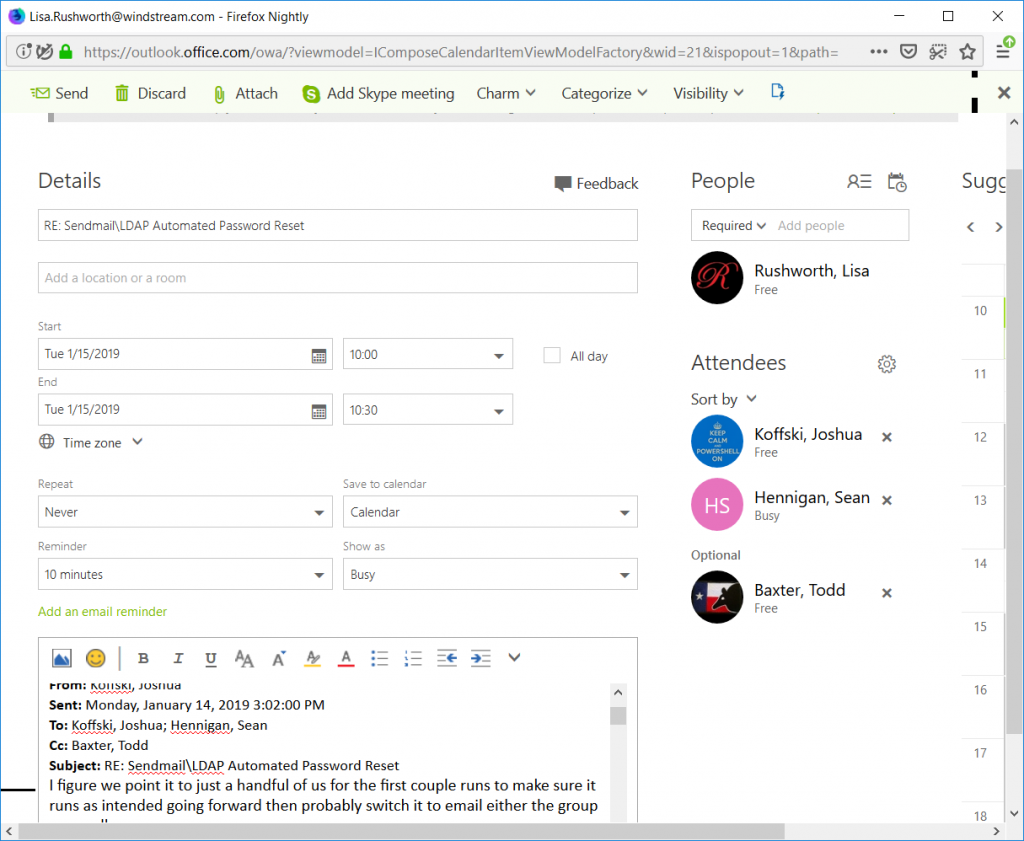
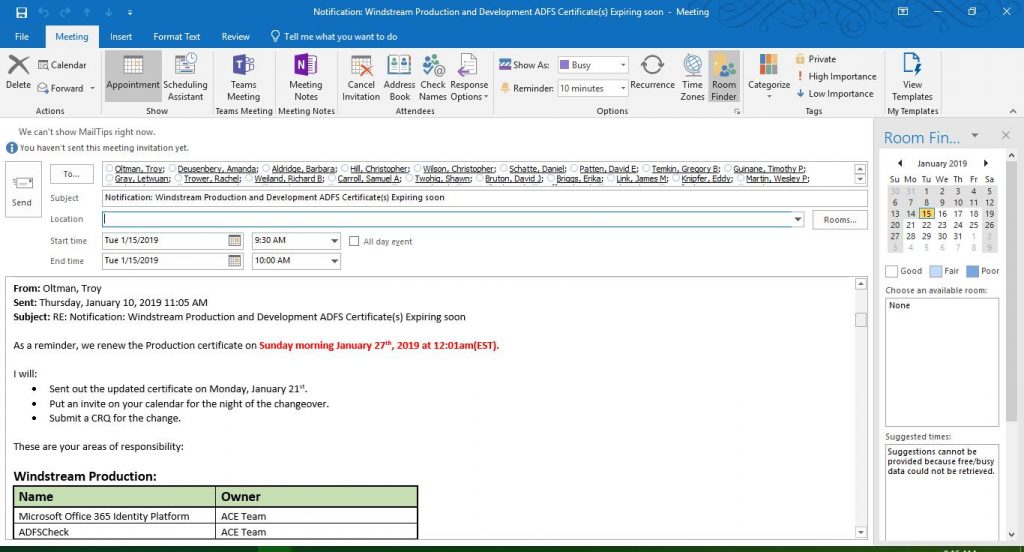
Sometimes it is easier to take a few minutes, get everyone together, and talk about something. Switching from an e-mail thread to a meeting invitation, though, means you’ve got to copy/paste all of the recipients and provide a message summary so attendees have a clue about what you want to meet. Did you know that you can reply to a message with a meeting request? All message recipients are included in the invitation, and the message content is copied into the meeting request.
Web Mail:
Click
the drop-down next to reply and select “Reply all by meeting”
A new
meeting request will be constructed – complete with attendees (addresses in he ‘to’
line become required attendees, cc’s become optional attendees), a meeting subject,
and the entire e-mail thread in the meeting body.
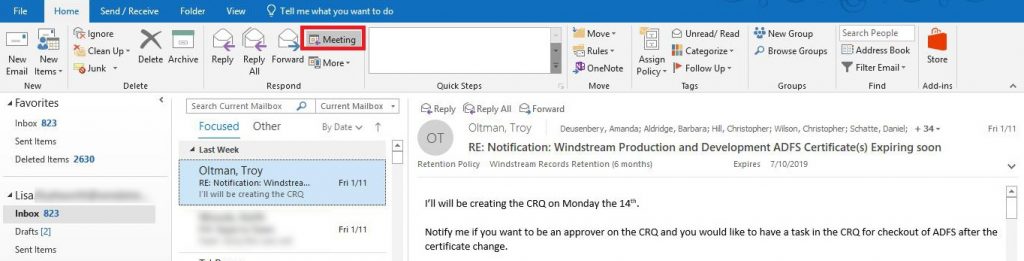
Outlook:
In
Outlook, click on the “Meeting” button in the ‘Home” ribbon bar.
Again,
a meeting request is created with attendees, subject, and message content.
Anything
you can do in a manually created meeting request can be done here – if you want
to add a Teams meeting space or set up recurrence … this is a normal meeting
request, it’s just got a lot of information pre-populated.
In one of my prior jobs, I worked in Boston. I had
colleagues in Hawai’i. Scheduling a meeting was a mental undertaking – 8AM in
Honolulu is 1PM in Boston (and I had to count through Alaska, the west coast,
the mountains, the next one over, and then me all.the.time). Beyond the time
wasted figuring out what time it is elsewhere … you forget to think about it
when you’re in a hurry. I’d book the guys in Hawai’i for mid-morning meetings
at dark-o-clock, and the guys in Hawai’i would schedule mid-afternoon meetings
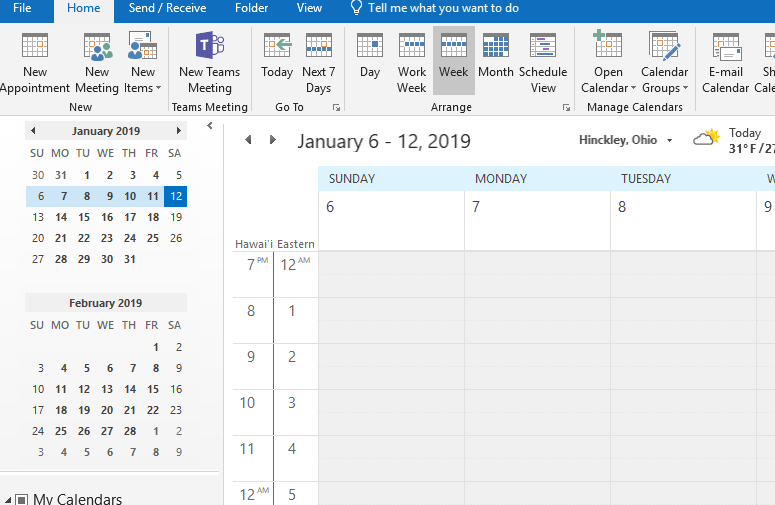
that were 8PM for me. The Outlook calendar can show two time zones concurrently
– both reminding you that time zones are a ‘thing’ and quickly showing you what
time it is over there.
Click “File” on the ribbon bar
Select “Options”
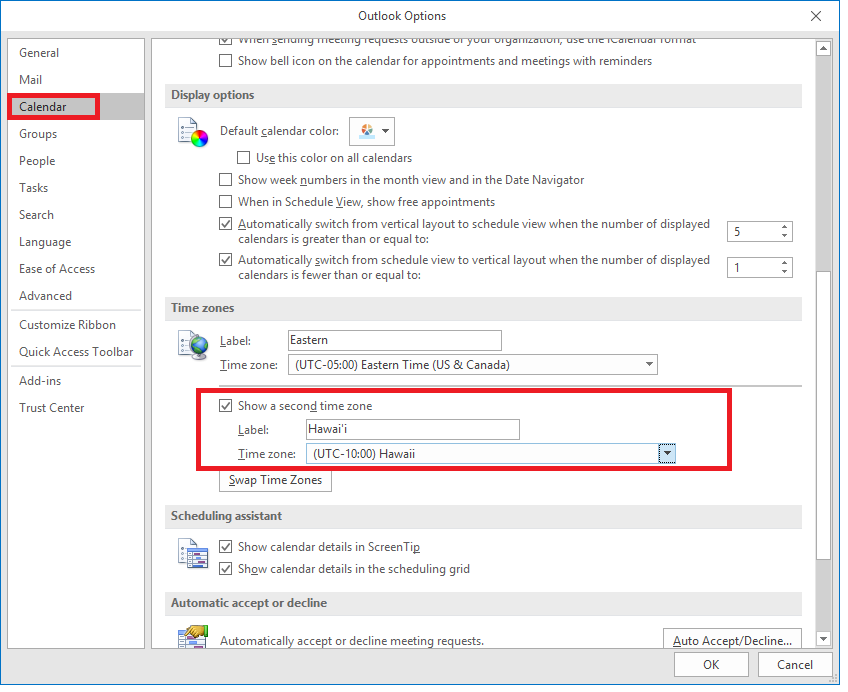
Select “Calendar” from the left-hand navigation bar. Scroll down and find the ‘Time Zones’ section. Check the box to ‘show a second time zone’, and select that other time zone. I add a label both to my time zone and the secondary one. Click OK. If you have the monthly update channel, you’ll be able to select a third time zone too.
You can! Of course, you don’t want to ignore important conversations; but we’ve all
been accidentally included on message (or been caught up in the dreaded
reply-all blizzard) and been inundated with messages that really can be ignored.
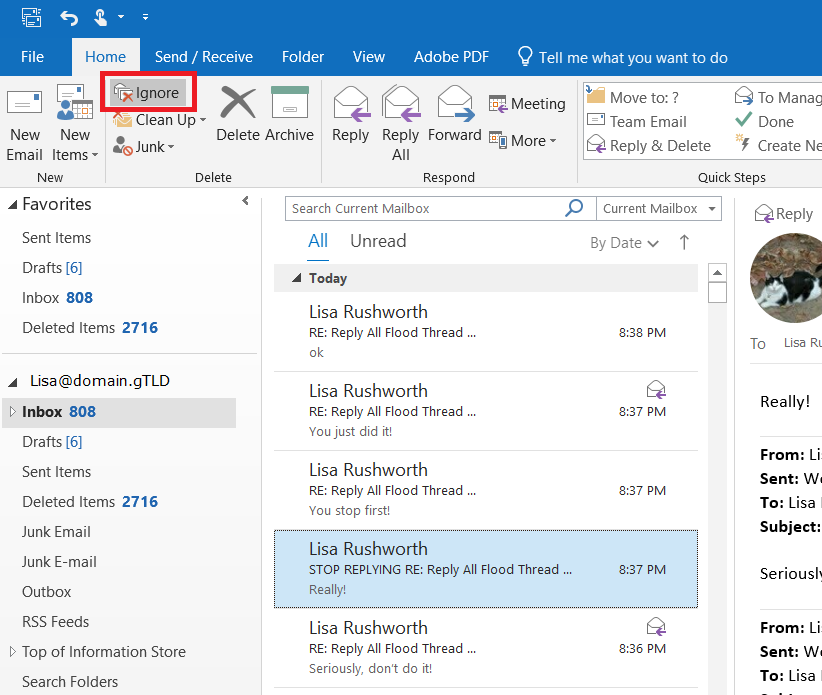
Within the Outlook client, click on one of the messages. On
the left-hand side of the ‘Home’ ribbon, click “Ignore”
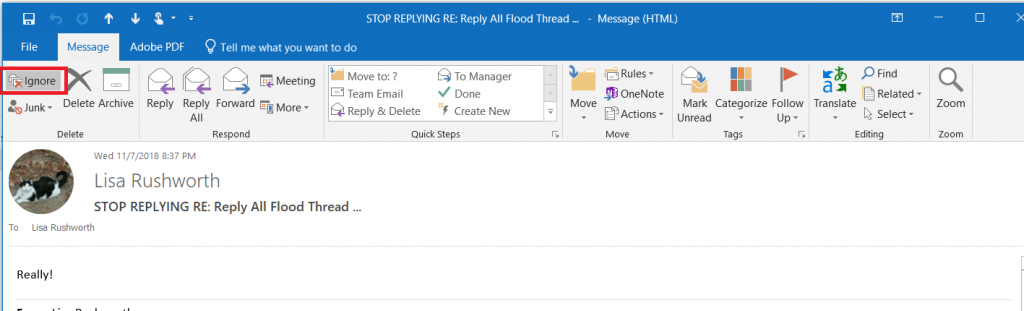
Or from within the
message, “Ignore” appears on the left-hand side of the “Message” ribbon bar.
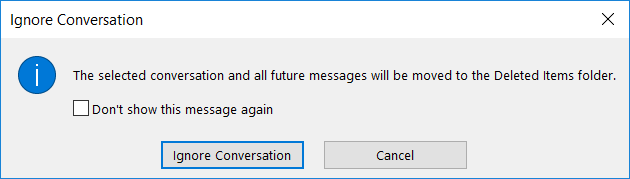
If you haven’t previously selected “Don’t show this message
again”, you will see a warning that the entire conversation and all future messages will be moved to
“Deleted Items” … click “Ignore Conversation”
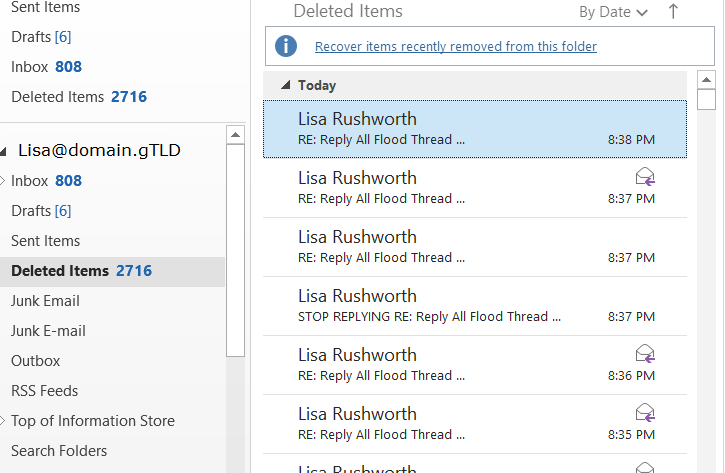
If you change your mind, all of those messages are in
“Deleted Items” and you can easily move them back.
If someone changes the message subject, those messages become a new thread that you’d need to ignore again.
When you’ve been erroneously included on some message, the subject rarely
changes … but I usually have to block five or six different threads in
reply-all blizzards.