Month: February 2023

Mid-Season Maple Collection Status

So far, we’ve collected about 121 gallons of maple sap. We started boiling the sap on the 23rd using our new maple evaporator.

Maple Sap Collection Log

Date Location Quantity
2/14/2023 All trees except river 60
2/18/2023 All trees except river 20
2/23/2023 All trees except river 15
2/25/2023 River 6
2/26/2023 Back woods and front yard 12
2/26/2023 Top of Driveway – east and west 8

Maple Evaporator Build

We built our maple evaporator — well, combination fire table, maple evaporator, grill, and smoker all-in-one backyard fire contraption. Scott calls it the MapleAtor. Total cost was about a hundred bucks — $60 for refractory brick, about $10 for the cinder blocks, and about $30 for “engineering” size brick (and probably another hundred bucks in fuel to *get* the blocks and refractory brick!).

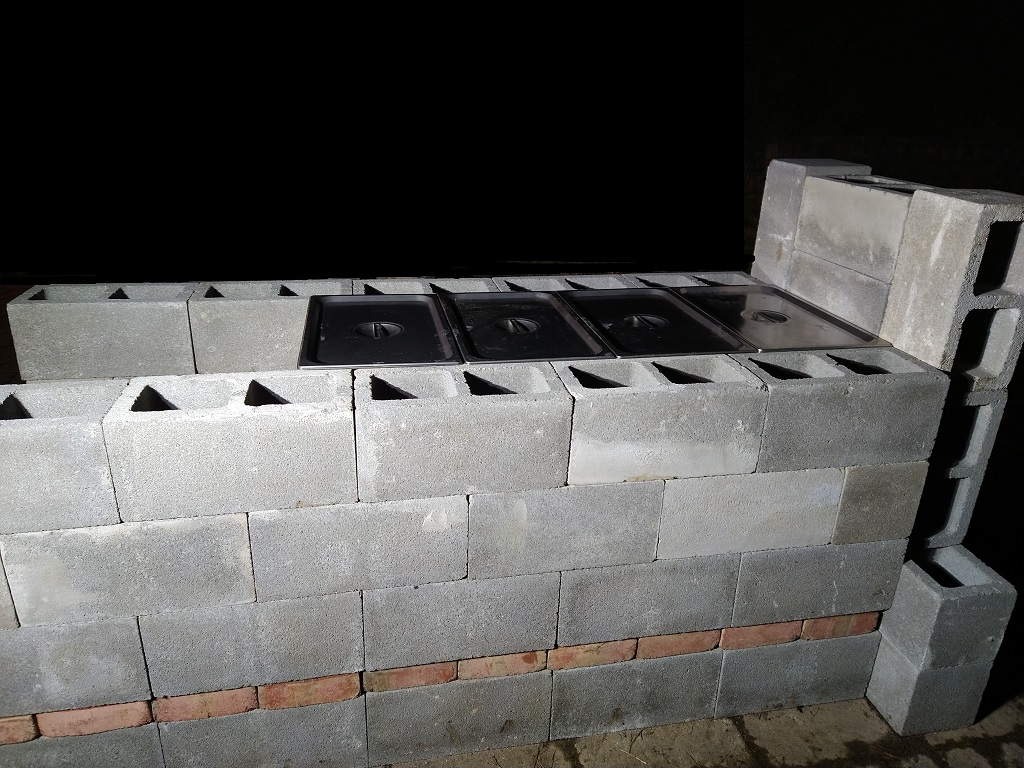
We’ve got a layer of cinder blocks on the base — four rows five blocks long. Since we had four half-blocks, we were able to stagger the walls. Nothing is mortared together yet — we wanted to make sure it was a good size, shape, and location before we made anything permanent.

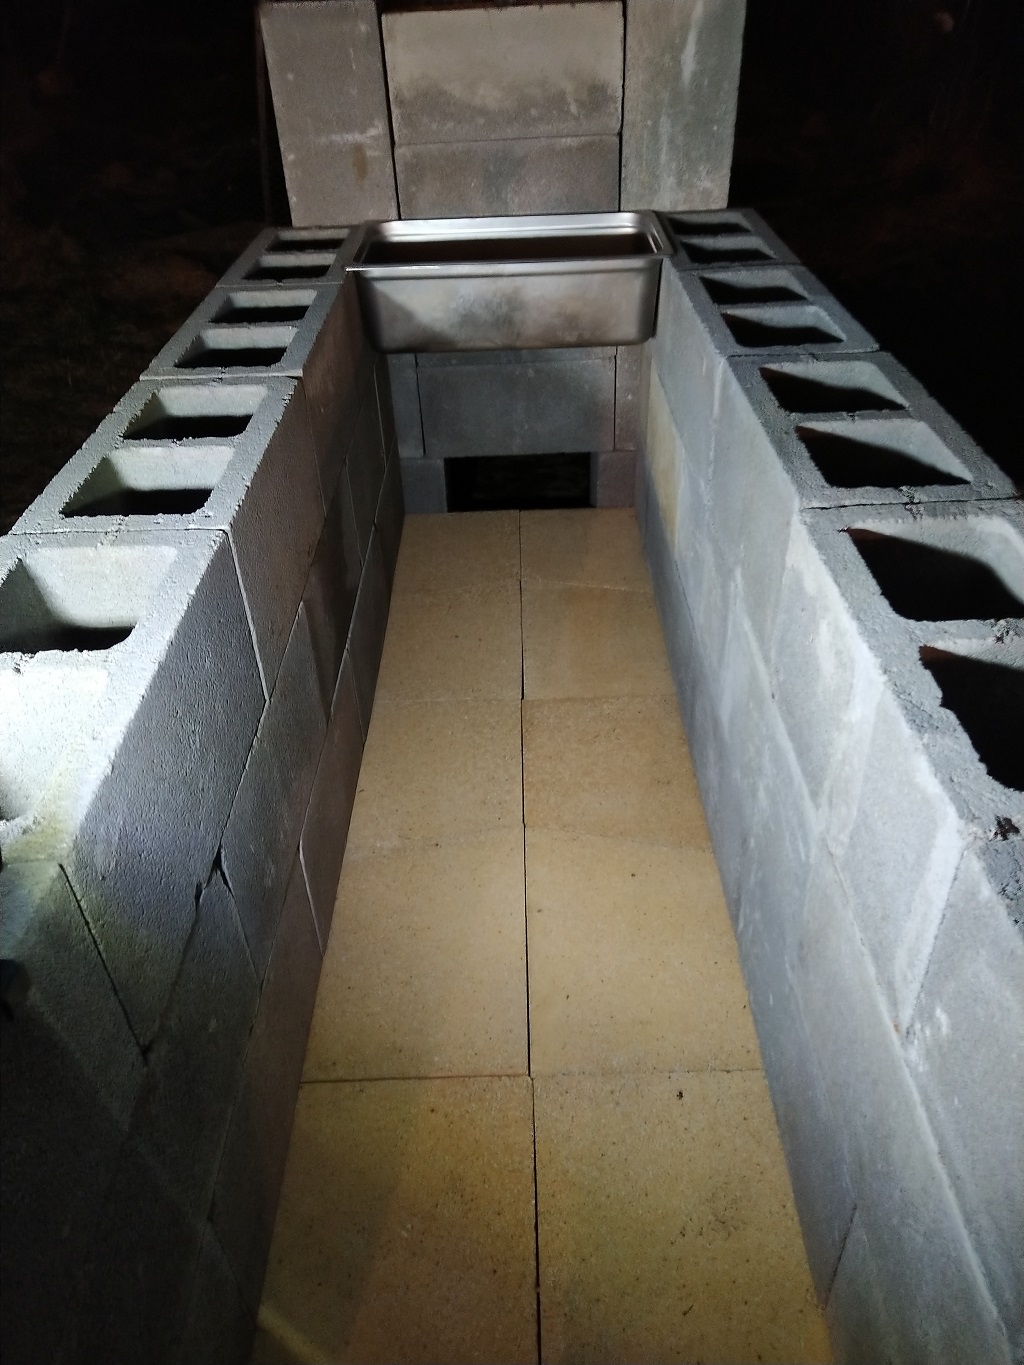
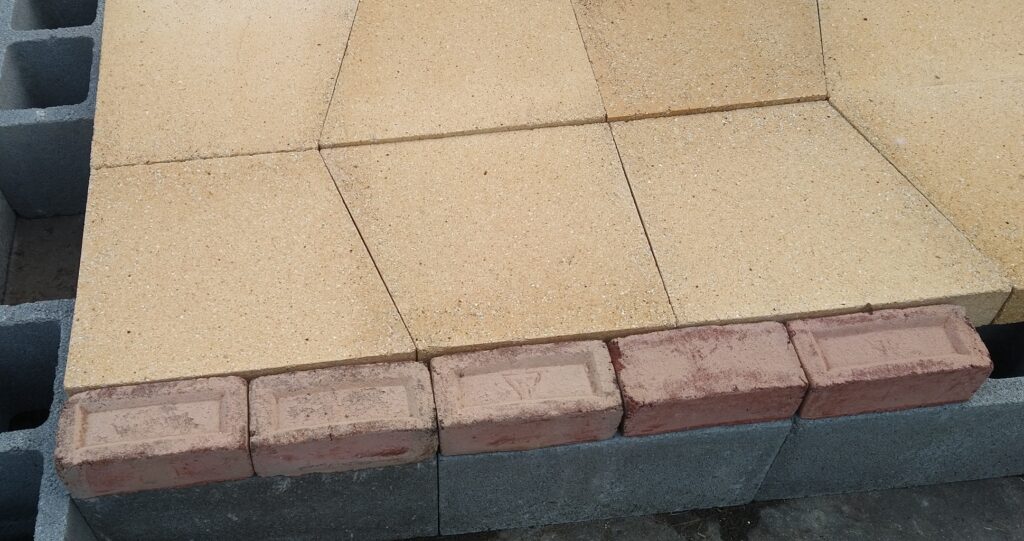
Two rows of fire brick lay atop the cinder blocks — we wanted to be able to set the 6″ steam table trays that we use to evaporate sap onto the cinder blocks and seal the fire section in so the syrup doesn’t get smoked as we evaporate it. The dimensions didn’t quite line up — we needed something 2 3/4″ high to fill in the gap between the edge of the refractory brick and the edge of the cinder block. I happened across “engineering” bricks online, and we found a company that sold them. They fit perfectly.

Once the base layer was covered in refractory brick and red brick, we started stacking the walls — more cinder blocks.


Along the back wall, we have some bricks forming a wall, but we have one row slightly pushed in so a block can straddle the two bricks and form an exhaust area. Then a bunch of blocks are stacked up to form a chimney.

The evaporator trays fit perfectly and are supported by the cinder block.

We ended up re-stacking the chimney — having the exhaust port at the same level as the refractory brick meant that pushing wood around in the fire box shoved coals out into the chimney. The exhaust port is now one row higher than pictured.

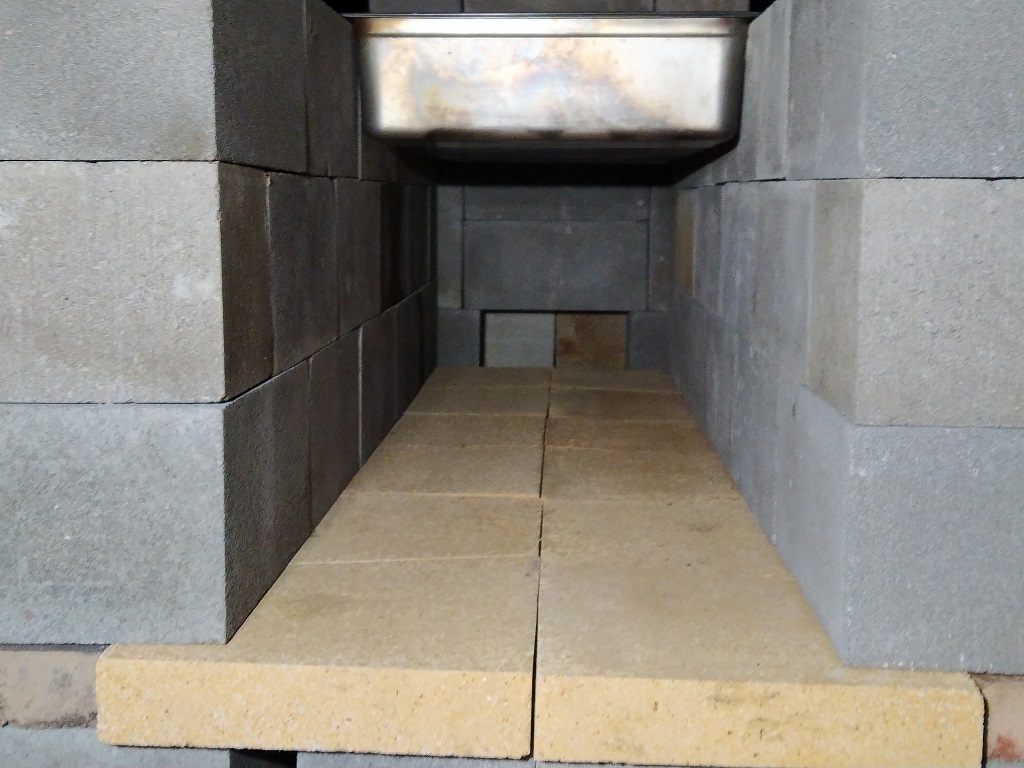
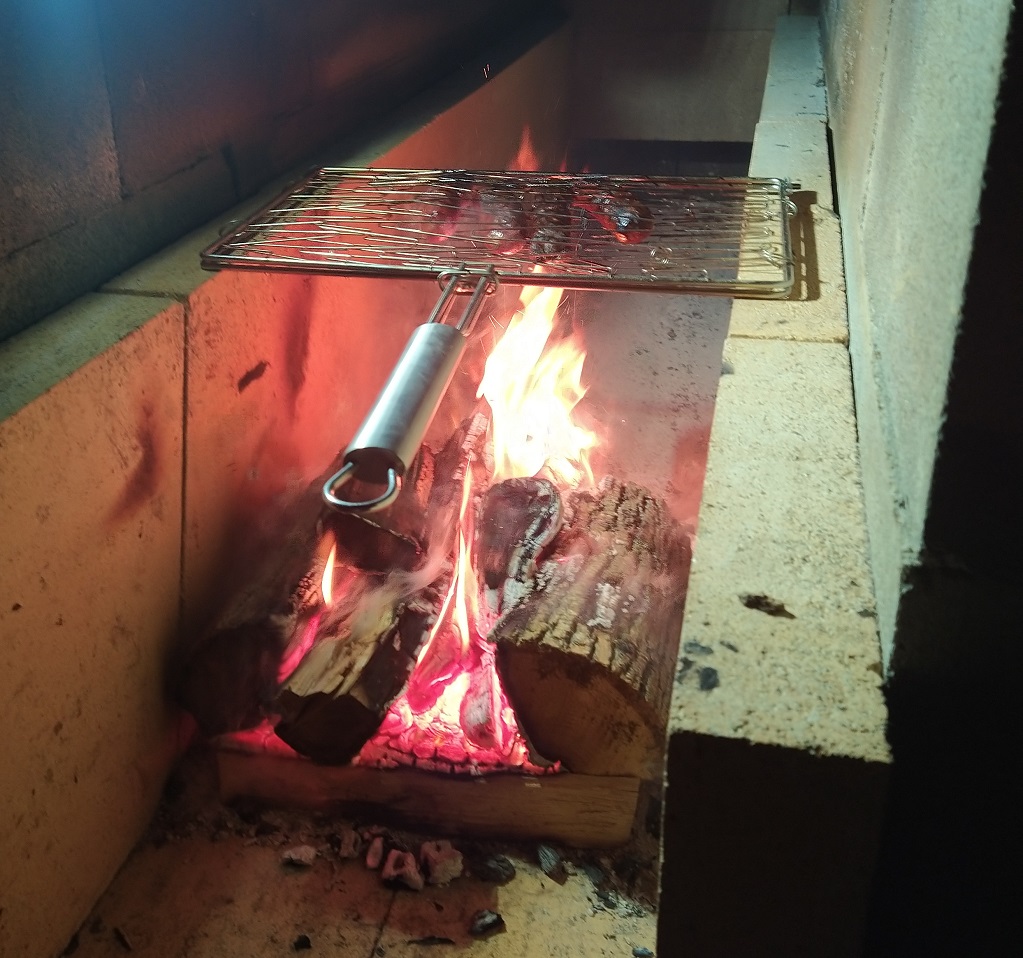
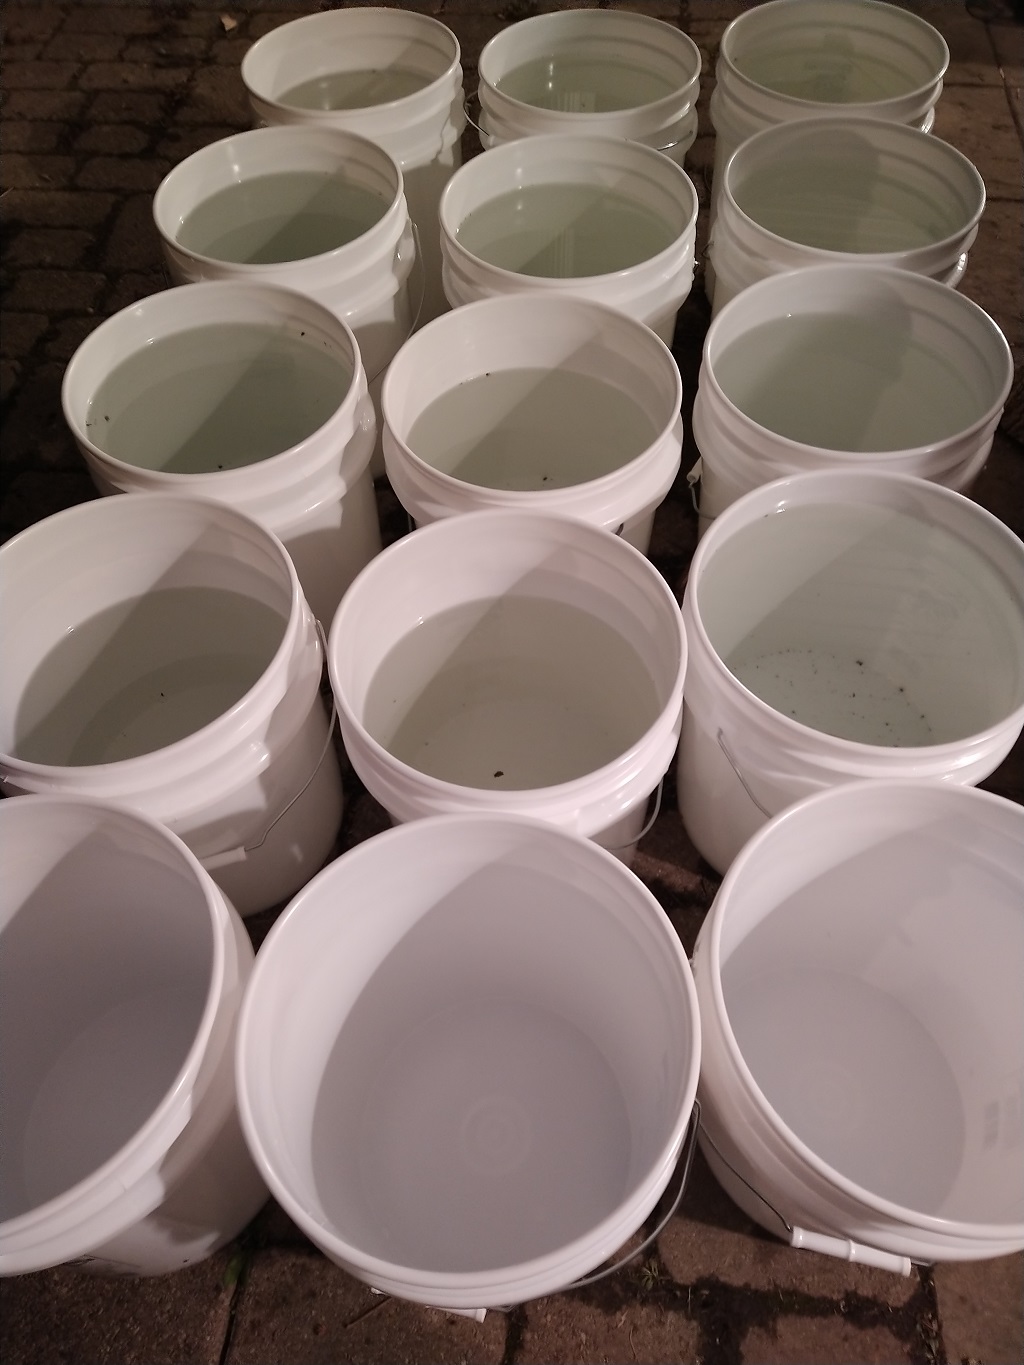
We then lined the firebox with more refractory brick — there are two or three inches between the top of the refractory brick and the bottom of the evaporator trays. Adding logs and lighting a fire, we finally have maple sap evaporating.

We added a steel plate at the end of the trays to keep smoke away from the sap.

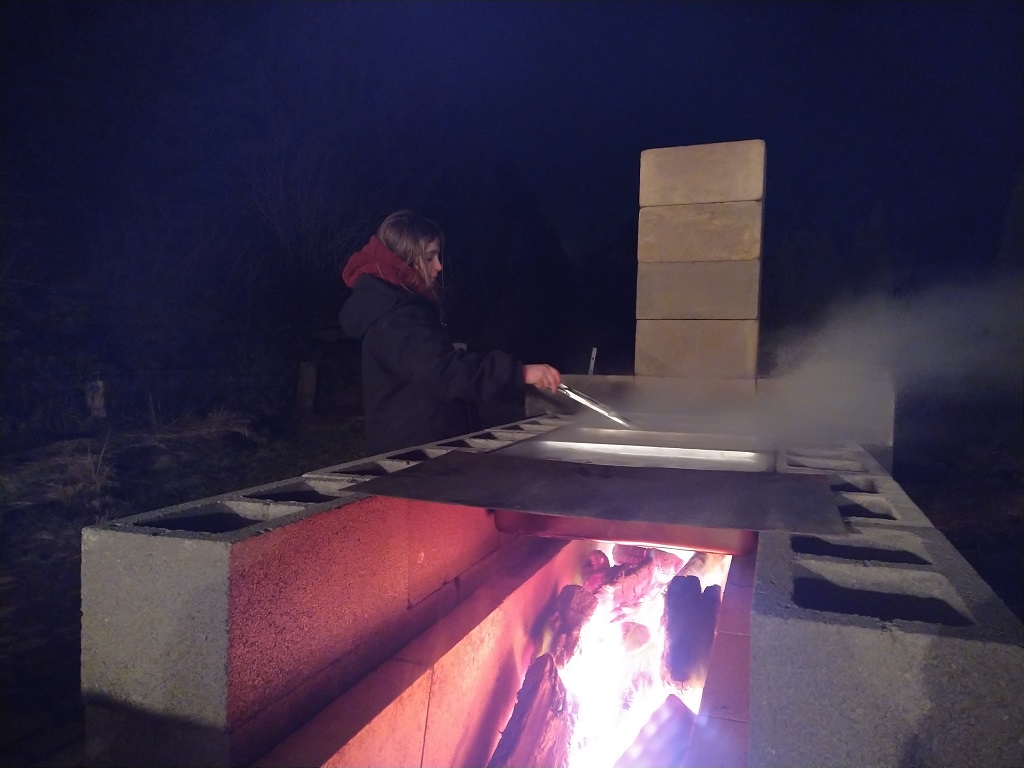
Bonus — we can cook dinner while we’re evaporating sap!

Maple Mapping

For the last few years, we’ve talked about mapping out our maple trees — we track which ones we tap, when we tap them, and occasionally try to track how much sap the tree produced. Which is difficult when the tree is labeled as “second down from planter on driveway” or “the next, next one by neighbor”. It seemed like we should be able to use our phones to tag each location — ideally while there are still leaves on the trees so we could denote them as sugar, red, etc.

We settled on an open source app that uses Open StreetMap — https://github.com/osmandapp/OsmAnd/ — there’s no convenient way for Scott and I to simultaneously edit the data set, but we can export the file on one phone and import it onto the other so we are both looking at the same points. Each tree is numbered, and there is a note with the type of tree and how many taps.

Now we know we are at tree #27 (the phone’s location will show up as a blue dot).

Maple Tapping

Instead of taps with a hook for a bucket (which seemed, to me, like it would put a lot of stress on the tree!), we use ratchet straps to hold our maple buckets. One end of the “S” is passed into the fabric loop that holds the other “S” — and that other “S” becomes our bucket hook. I like the bright orange straps because it makes finding trees in the woods very easy (bright white buckets look obvious too, but they can hide behind the tree).

Our first set of buckets has large holes drilled into the lids — which are great for larger trees with multiple taps. But the new buckets we bought this year have tube-sized holes to prevent rain from leaking into the bucket.

2023 Maple Season – First Sap Collection

We tapped trees for the last few days and have our first sap collection — thirteen five-gallon buckets (not completely full, but around 4.5 gallons per bucket … so not 65 gallons but at least 58.5 gallons) waiting to run through the reverse osmosis.

This year, our starting sap measured around 1.006-1.008 SG at around 50 degrees. The reverse osmosis is running at just under 100 psi (at 100 psi, we are not getting any sugar water out). The output sugar water is measuring at 1.022 … which is 3.7 times as concentrated as before we filtered the sap.

The flow rate is about a gallon every ten minutes, or six gallons an hour.

Maple Sap Reverse Osmosis

Since I had the reverse osmosis system laid out for assembly, I figured I could take a picture to show how the filters are connected in series. Each filter “cleans” water out of the maple sap — that water is fed into a common output tube where we collect gallons of water (the clean water output lines are removed here so we can see the path maple sap travels, ignoring the clean water). We use this water for rinsing sappy stuff as we collect, filter, and boil the sap … also water we drink, bring out to the chickens and turkeys, give the cat, dump in the washer.

The “dirty stuff” that normally gets discarded? That’s the concentrated sap — each filter’s “dirty stuff” line is connected to the input of the next filter. Which then “cleans” more water from the sap and passes the “dirty stuff” down the line.

The maple “setup” is the reverse of the “drinking water” setup — below — where the “dirty stuff” goes to a common drain line for disposal and the clean water is sent to the input of the next filter for farther cleaning.