Tracking Electrical Usage With SmartThings and AeonLabs Home Energy Meters

When we started shopping for solar generation installations, how much electricity we can consume was a challenging question. We were replacing our HVAC system, so “look at the last 12 months of electric bills” wasn’t an approach that would yield valid data. What we needed was a way to see electrical consumption for the next two or three weeks once our new HVAC system was installed.

We purchased several AeonLabs Home Energy Meters (HEM) and have been using them to track our power consumption for almost six months now. The HEM’s are set up in SmartThings & have a SmartApp-HEMLogger “SmartApp” attached to them that posts data to a MySQL table on our server via a web form (myURL needs to be … well, your URL).

Install a quick MySQL server (does not need to be Internet accessible) and a web server / programming language of your choice combination (*does* need to be Internet accessible – we are using Apache and PHP).

Create the database and a table to hold your energy data:

mysql> describe EnergyMonitors;
+-----------+-------------+------+-----+-------------------+----------------+
| Field | Type | Null | Key | Default | Extra |
+-----------+-------------+------+-----+-------------------+----------------+
| keyID | int(11) | NO | PRI | NULL | auto_increment |
| monitorID | varchar(50) | YES | | NULL | |
| clampID | varchar(50) | YES | | NULL | |
| eventTime | timestamp | NO | | CURRENT_TIMESTAMP | |
| kwatts | double | YES | | NULL | |
| kwhours | double | YES | | NULL | |
+-----------+-------------+------+-----+-------------------+----------------+
6 rows in set (0.00 sec)

Create an ID within your database that has read/write permission to this table. I create another ID that has read-only access (pages displaying data use this ID, the page to post data uses the read/write ID).

We also track temperature — ideally, we’d be able to compare power consumption based on temperature *and* sunlight (we use a lot less power on a cold sunny day than I expect … just don’t know how much less) … but I’m not there yet. Currently, the weather database only holds temperature:

mysql> describe weather;
+--------------+-----------+------+-----+-------------------+-----------------------------+
| Field | Type | Null | Key | Default | Extra |
+--------------+-----------+------+-----+-------------------+-----------------------------+
| recordedTime | timestamp | NO | | CURRENT_TIMESTAMP | on update CURRENT_TIMESTAMP |
| temperature | int(11) | YES | | NULL | |
| id | int(11) | NO | PRI | NULL | auto_increment |
+--------------+-----------+------+-----+-------------------+-----------------------------+
3 rows in set (0.01 sec)

Since we brought our Bloomsky online, I use the Bloomsky API to record temperature. Prior to that, I was parsing the XML from NWS’s closest reporting station’s – for Cleveland, that is  http://w1.weather.gov/xml/current_obs/KCLE.xml … there’s probably one near you. I grabbed both observation_time_rfc822 and temp_f in case observations were not updated regularly – the observation time was stored as the recordedTime. The temperature recording script is in cron as an hourly task.

You also need a small web page where SmartThings can post data — in PHP, I have

<?php
if(!$_POST["monitorID"] || !$_POST["clampID"] ){
echo "<html><body>\n";
echo "<form action=\"";
echo $_SERVER['PHP_SELF'];
echo "\" method=\"post\">\n";
echo "Monitor ID: <input type=\"text\" name=\"monitorID\"><br>\n";
echo "Clamp ID: <input type=\"text\" name=\"clampID\"><br>\n";
echo "KW Value: <input type=\"text\" name=\"kwatts\"><br>\n";
echo "KWH Value: <input type=\"text\" name=\"kWHours\"><br>\n";
echo "<input type=\"submit\">\n";
echo "</form>\n";
echo "</body></html>\n";
}
else{
$strMeter = $_POST["monitorID"];
$strClamp = $_POST["clampID"];
$strKWValue = $_POST["kwatts"];
$strKWHValue = $_POST["kWHours"];
print "<pre>Meter: $strMeter\nClamp: $strClamp\nKW: $strKWValue\nKWH: $strKWHValue\n</pre>\n";
$servername = "DatabaseHostname";
$username = "MySQLUID";
$password = 'MySQLPassword';
$dbname = "HomeAutomation";
$conn = new mysqli($servername, $username, $password, $dbname);
if ($conn->connect_error) {
die("Connection failed: " . $conn->connect_error);
}
if($strKWHValue && $$strKWValue){
$sql = "INSERT INTO EnergyMonitors (monitorID, clampID, kwatts, kwhours) VALUES ('$strMeter', '$strClamp', '$strKWValue', '$strKWHValue')";
}
elseif($strKWHValue){
$sql = "INSERT INTO EnergyMonitors (monitorID, clampID, kwhours) VALUES ('$strMeter', '$strClamp', '$strKWHValue')";
}
else{
$sql = "INSERT INTO EnergyMonitors (monitorID, clampID, kwatts) VALUES ('$strMeter', '$strClamp', '$strKWValue')";
}
if ($conn->query($sql) === TRUE) {
echo "New record created successfully";
}
else {
echo "Error: " . $sql . "<br>" . $conn->error;
}

$conn->close();
}
?>

DatabaseHostname, MySQLUID and MySQLPassword need to be yours too. Since posted data is meant to come from a trusted source (a source where I’ve supplied the URL) and in a known good format, these are quick INSERT statements *not* the safest.

Check in your database that you are getting data, then let it run for a few hours. Once you have a little bit of history, you can start viewing your energy usage. Link it into Excel/Access using MyODBC for ad-hoc reporting, write your own code to do exactly what you want, use a generic charting package capable of reading MySQL data …

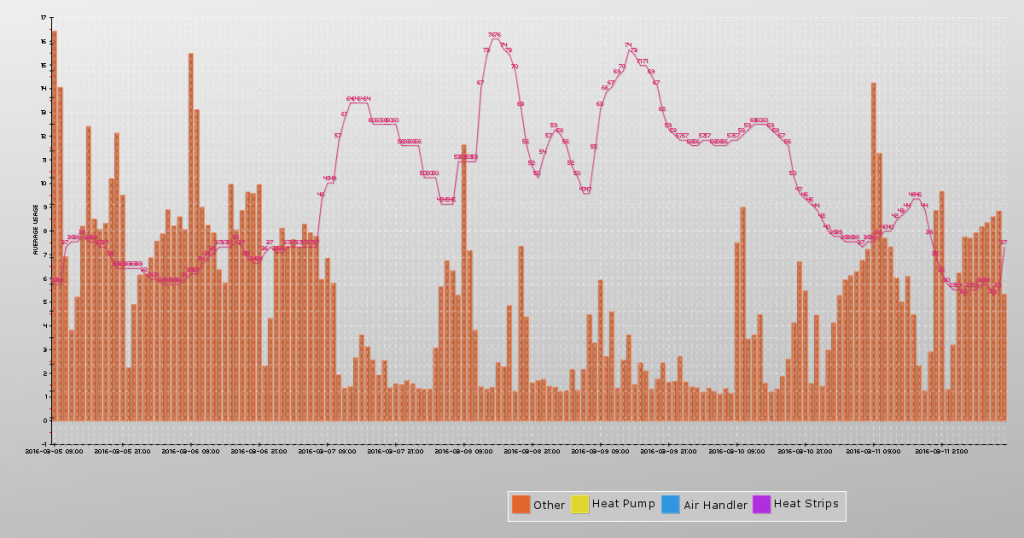
I am using pChart to display data – the chart I use most frequently is the stacked bar chart for kWH and a line chart for temperature. Here is the PHP code which generates this PNG: energyUsage-StackedBarChart-Flat – again, DatabaseHostname, MySQLUID, and MySQLPassword need to be yours.

StackedBarChart-KWHAndTemp

We no longer have our heat pump, air handler, and heat strips being monitored – but for periods where there is data from the other sources, we had several segments to our energy usage report (“other” is the report from the HEM on our mains MINUS all of the other reporting segments). You can yank all of the non-mains segments (or change them to be whatever sub-segments you are monitoring. The monitor ID comes from the HEM name in SmartThings – since those are user-configured, I have the names hard coded. You *could* hard code the Mains and then use “select distinct” to get a list of all the others and make the code more flexible.).

Short term charts (past 24 hours or so) can render out real-time, but longer term views take a long time to load. Since we’re looking more for trends and totals – being up to the second isn’t critical. I’ve got cron tasks that generate out PNG files of the charts.

Two enhancements for a nothing-doing rainy day – adding authentication to the HEM Logger (SmartThings posts from multiple netblocks, so there isn’t a good way to IP source restrict access to the post data page. Anyone with your URL could post rogue energy usage info into your database – or more likely try to hack your servers.) and add lumen to the weather data / graph displays.
Homemade Soap

I’ve been making my own soap for about three years now. I’ve used several different recipes, but my default is a 100% coconut oil soap recipe. I double the recipe to make a six pound batch of soap (66 oz coconut oil, 9.6 oz lye, 19.2 oz water, and 3-6 oz of essential oil if I add any).

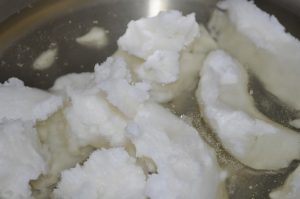
The process is quite easy — put the oils (or oil, in this case) in a pot and heat until melted.

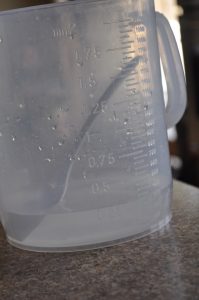
In a safe container (heat resistant plastic like polypropylene 5), combine the water and lye slowly — it gets HOT. I use a graduated pitcher from a science supply center. Soap recipes have a weight of water and not volume, so the markings aren’t useful for this particular application.

I turn the oven light on – it’s an incandescent bulb and heat the oven to about 110 degrees F. I then put the lye container and warm oil in the oven and let them set for an hour or so to reach thermodynamic equilibrium.

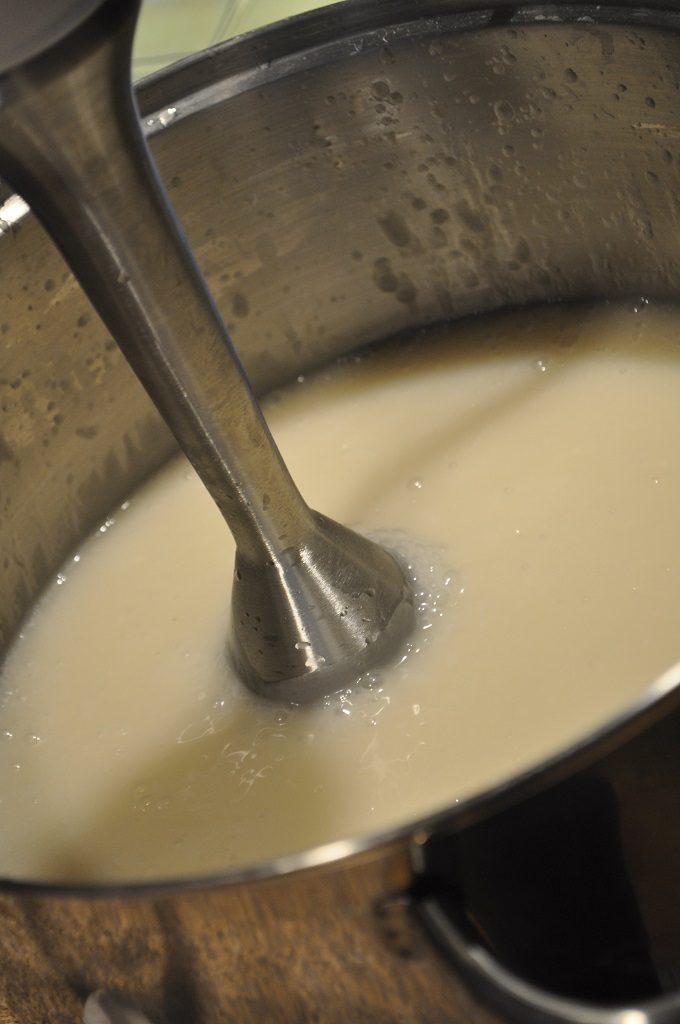
When the hour is about up, get everything ready. Always a stick blender. If essential oil, colorant, herbs, or abrasives are going to be added, I weigh them out and have them waiting. Remove the pot of oil and set it somewhere (Not a hot burner! This was the one thing that absolutely stumped me on my first batch — the instructions say to heat the oil, but it never says to remove the pot from heat!). Set the stick blender in the pot. Get the container of lye water. Turn on the stick blender and get the oil moving. Slowly add the lye mixture.

Keep the stick blender going until you reach ‘trace’ — kind of like making whipped cream or egg whites where there’s a soft peak and a firm peak state. You’re looking for it to thicken up enough that lines will form or a little bit dropped back into the pot stay in a little mound. You are NOT looking for something that holds peaks (it would be difficult to get into molds at that point).

If you are adding ‘stuff’ you want to do that at the first sign of trace. Some add-ins will accelerate trace (basically harden your soap quicker), and adding them into a medium trace can get you a big block of solid soap pretty quickly.

Once the soap mixture reaches trace, put into the soap molds. Tap the molds on a solid surface a few times to remove air bubbles. I place these molds on a cutting board (hard surface) and then place them back into the warm oven. Proper instructions tell you to wrap it up in towels to retain the heat. After about 12 hours in the warm oven, I turn off the oven light. Let it sit a few more hours to cool, then set on the counter overnight. If the soap is hard to get out a mold, pop the whole thing in the freezer – frozen soap pops right out.

Voila, you’ve got soap. Let it sit for a few weeks to cure (dry out).

Anya Quilt – Part 1

I have been working on an Ohio Star quilt for Anya’s bed (figure anyone who lives in Ohio should have an Ohio Star quilt or two in their house!). Constructing a quilt is a great visual example of exponential progression. Piecing the four tiny triangles into fairly small squares … you’ve still got a whole lot of tiny pieces. Strips of three squares put together were still a lot of small pieces. But, the quilt builds up rather quickly from there – strips turn into 3×3 blocks, then these blocks form three really large strips with a border fabric between them. Then border strips go in between the star strips to form the entire quilt top.

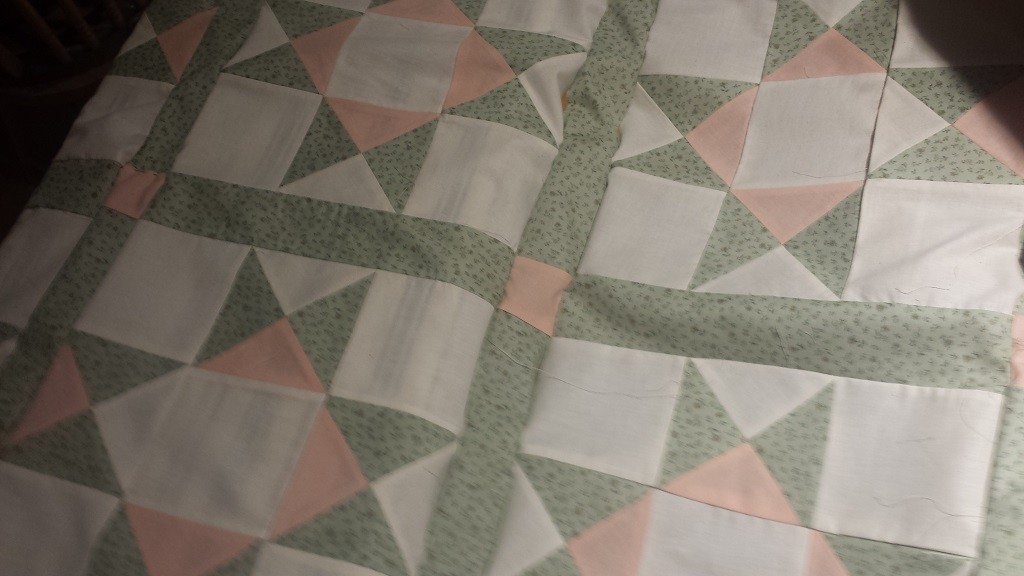
I had the final top pinned together and took a quick picture to share. Something didn’t look right. Took the picture, folded up the project for the night, and went on to other things. Right before bed, I pulled the picture up again to send to my mom:

20160225_223327

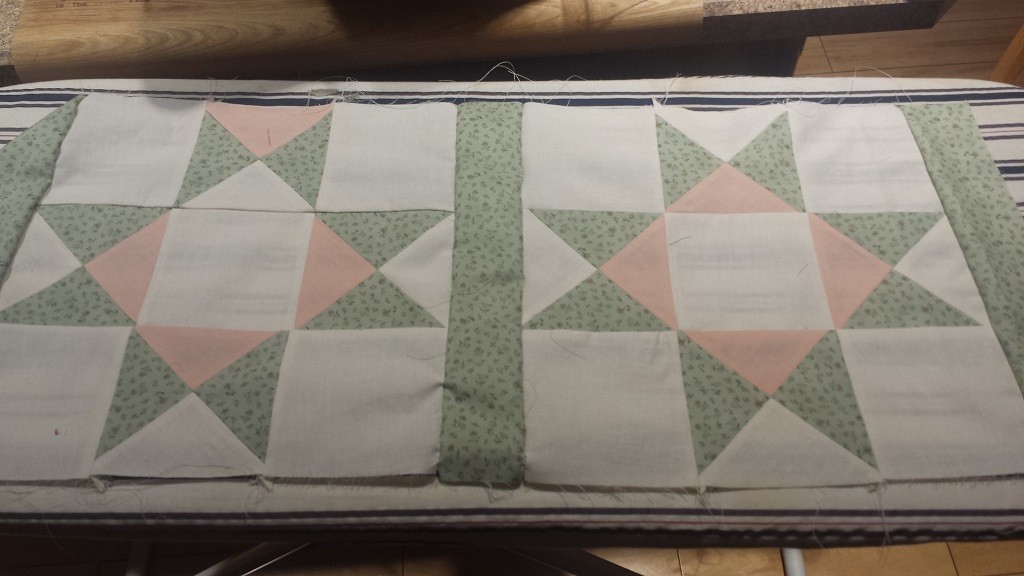
Something REALLY didn’t look right … stared at it for a few minutes before I realized that two of my block-triangleblock-block strips were attached upside down! Instead of having a pink triangle along the center block, I have a white triangle. Looking back at the previous step, I do not know how I missed it:

20160225_213145

Evidently there is no historical basis for a humility block (an “intentional” mistake put into a quilt – sort of like small dead end roads used to copyright protect maps) … and, honestly, it always sounded like a defensive “I meant to do that!” kind of thing rather than a real “only God is perfect, so my quilt should have a flaw to avoid angering God” thing 🙂

My task for today is to rip out the two backwards blocks and get them stitched back into the quilt. Ugh! Very important lesson learnt — but all in all, not bad for my first quilt.

Buzzard Day Celebration

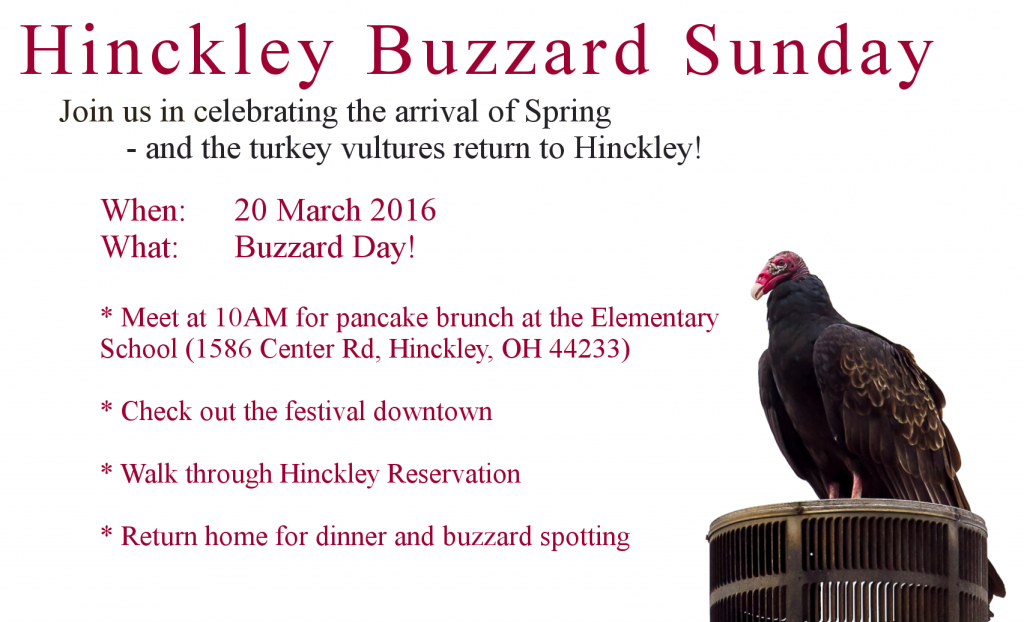
Join us on 20 March for any of the Buzzard Day activities:

2016BuzzardDayInvitationPublic

The arrival of the Buzzards at the Hinckley Reservation on 15 March is an annual occurrence. The Hinckley Township web site has a page detailing the history of this event.

Hinckley’s Buzzard Sunday celebration is the first Sunday following the return of the buzzards — 20 March . Details about Buzzard Sunday can be found at the Hinckley Chamber of Commerce web site.

We plan to meet at the Elementary School at 10AM for the pancake breakfast and then check out the festivities downtown. Weather permitting, we can walk the paved trail around the lake; and we plan to grill some burgers for dinner.

Last year, many of the newly arrived vultures perched in the trees along our driveway. Near sunset, the group took flight and flew around our property and the park. We are hoping to capture pictures of the flight on our BloomSky. Even if you cannot make it to Buzzard Day, check out the BloomSky time-lapse movies to spot some Buzzards.

And for any early risers out there … at 7 AM on 15 March, the Hinckley Reservation has an official Buzzard Spotter at the Buzzard Roost. Maps of the Hinckley Reservation can be found at the Cleveland Metroparks web site. The buzzard roost is at the south end of the park, at West Drive and State Road. Since this is 7 AM on a Tuesday … we weren’t planning on attending this particular event 🙂

Kerberos Authentication and LDAP Authorization In Apache

I’ve been authenticating users of Apache web sites against Active Directory using Kerberos for some time now. Installed krb5-workstation and mod_auth_kerb, configured /etc/krb5.conf for my specific domain, and added some config to the Directory section of the Apache config. Great if you just require valid-user (or require valid-user and then turn around and do some authorization within your web code using something like php_auth_user). Not so great, though, for restricting access to the site outside of web code. And I really didn’t want to code in an authorization function when my web server should be able to do that for me.

I FINALLY got kerberos authentication working in Apache with an LDAP authorization component. Turns out the  mod_auth_kerb version 5.1 that was available from the Yum repository is terribly buggy  – like not usable in this instance buggy. KrbLocalUserMapping did not consistently remove the realm component. I’d hit a site and it would know who I am, click a link and come across as me@REALM.TLD and get access denied errors, click refresh and get in because it knew I was me again. Or not. More than 50% failure rate.I built the 5.4 version from http://modauthkerb.sourceforge.net/ and haven’t had a problem since.

I’m authenticating to Active Directory using the Kerberos module then authorizing against a group housed in an external LDAP directory. You can totally point your LDAP config toward Active Directory & use AD groups instead:

AuthType Kerberos
AuthName “Kerberos AD Test”
KrbAuthoritative off
KrbMethodNegotiate on
KrbMethodK5Passwd on
KrbServiceName HTTP/this.isyour.url.tld@EXAMPLE.COM
KrbAuthRealms EXAMPLE.COM
KrbLocalUserMapping On
Krb5Keytab /path/to/keytabs/keytab.file

AuthBasicAuthoritative On
AuthBasicProvider ldap
AuthLDAPURL “ldaps://ldap.example.com/o=BaseDN?uid?sub?(&(cn=*))”
AuthLDAPBindDN “YOUR SERVICE ACCOUNT HERE”
AuthLDAPBindPassword “YOUR BIND PWD HERE”

AuthLDAPGroupAttribute uniqueMember
AuthLDAPGroupAttributeIsDN on
require ldap-group cn=Website Test,ou=groups,o=BaseDN


WooHoo! I hit the site from my domain-member computer, it knows I am LisaR. It then turns around and finds an LDAP user matching uid=LisaR and grabs the user’s fully qualified DN (because AuthLDAPGroupAttributesIsDN is ‘on’ here … if you are using just uids in your member list, that would be off). It then verifies that the fully qualified DN is a member of the Website Test group.

Now I’m trying to figure out how to let the user log in without supplying a realm (not everyone’s in the domain … and they need to be able to log in too. Works fine right now, provided they input their username as uid@REALM.TLD).

Primary Elections In Ohio

This is mostly a note for myself, but if anyone else in Ohio is currently an unaffiliated voter who wants to cast a primary ballot for a party, you can switch party affiliation at your polling location by asking for the party ballot. Since you did not cast a ballot for that party in the previous primary (I’ve used the non-party issues ballot for the past few years. In Arkansas, you did not have to be party-affiliated to use a party’s primary ballot), you may be challenged by the poll worker. If that is the case, tell them you wish to switch parties and would like to complete the appropriate form.

Per Ohio Revised Code 3513.20, this is the proper process *provided that you “support the principals of the political party whose ballot” you vote*. Political party principals are *really* generic (and don’t specify the specifics to reach those goals) – not a lot of people who want more crime, think primary education is a bunch of nonsense, wish there was more unemployment, and so on. Really, even long time party members disagree about how to reach a goal and how well an individual candidate reflects the principals of their party … so not liking a specific policy implementation does not negate my support for the PRINCIPALS of the party.

Buzzard Cam — Almost There!!

We got our BloomSky!!! There has been a lot of snow, and it is very cold. We shoveled our driveway on Sunday hoping there’d be some melting today & delivery vehicles would be able to get up our hill. Then we got another two or three inches of snow overnight. Scott and Anya did some shoveling and put a large plastic box at the bottom of the driveway … and they actually delivered packages to the large plastic box. WooHoo!

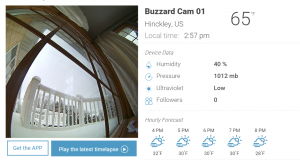
The Buzzard Cam is almost ready! Right now it’s inside — so it looks like you could take a tropical holiday in Hinckley because it’s 65 degrees on our window 🙂 But we’ve got the network set up, the device registered, and can upload data. We’ll get the device mounted up outside on Friday or Saturday when it’s not so cold and snowy.

BuzzardCamDebut


Pinwheel Dress – Part 1

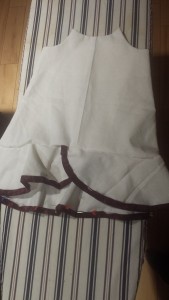
I’ve started piecing together Anya’s Pinwheel Dress — all of the pieces are cut out, and the strips for the bias tape are sewn together. I’ve got one of the bias strips folded and pressed too — so I was able to affix it to the bottom of the dress layer. Right now, the flounce at the bottom and the bias tape are pinned on so I could visualize the dress. I wanted a really simple white dress with a dark colored bias binding. The binding is a marbled maroon fabric, although that detail is completely lost in the photos. I don’t know that the marbling comes across well in person either – we’ll see.

20160212_002139

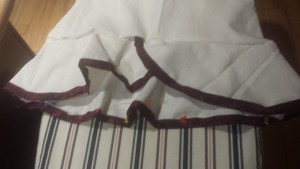
This is the hemline – both the dress and tunic have a similar hemline. When worn together, they create a two layer flounce.

20160212_002151

Here’s a view of the trim with a little better lighting – it’s a maroon fabric with a marbled design on it.

20160213_113001