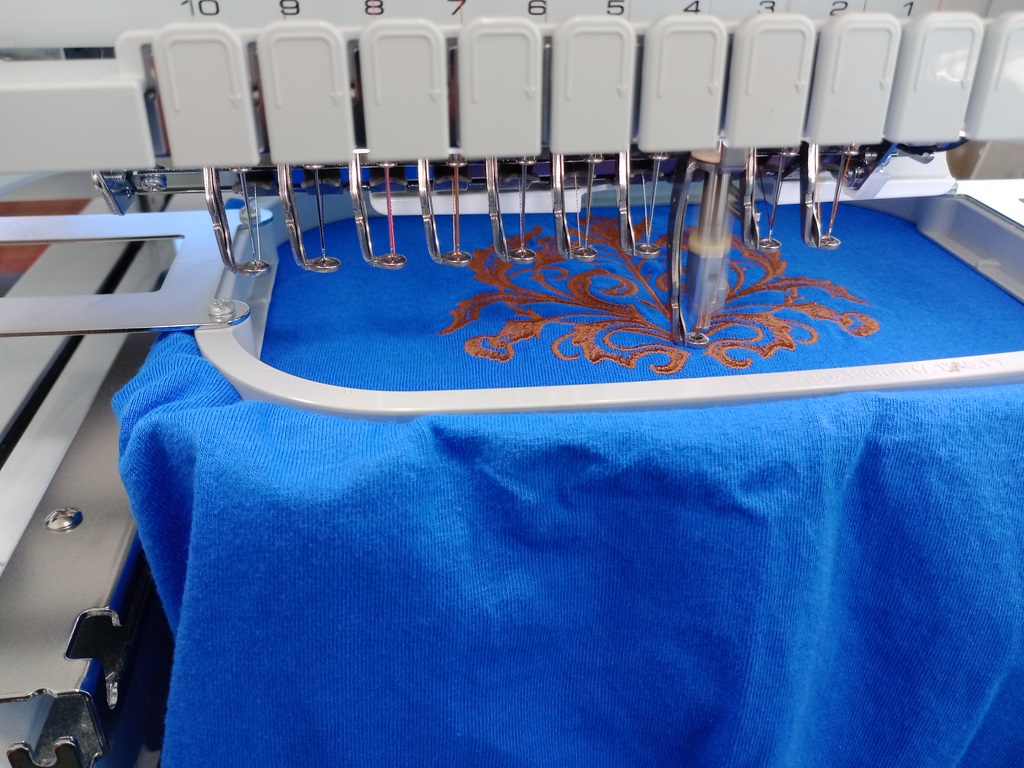
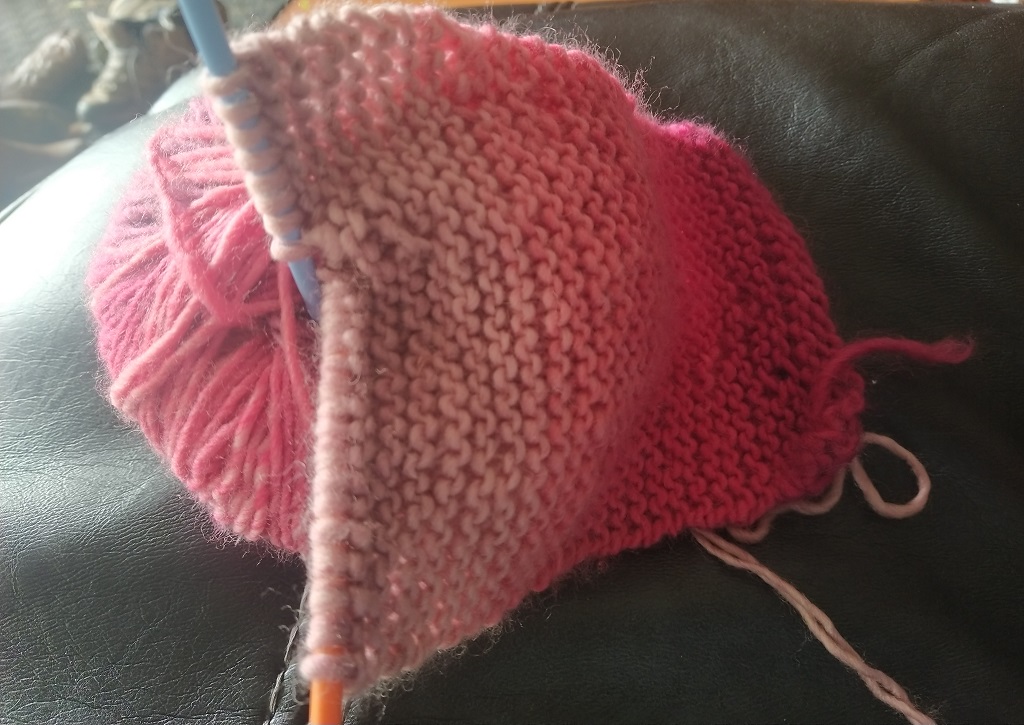
Category: Crafts

Knitting – Finally

I learned to knit and crochet at the same time — crocheting was something I could do easily but knitting? It was awkward and never really worked. I’ve always suspected I was just doing something wrong — if only someone who knew what they were doing could spot it. I even managed to teach a friend of mine to knit, and she couldn’t show me what I was doing wrong.

I got Anya a knitting book — it wasn’t quite enough for her to figure out knitting, so I let her find a few videos on YouTube. She has gotten to where she knits quite well. At first, she was using pencils — but I got her some knitting needles with little cats on the top. And she decided to teach me how to knit. Casting on — check. Knitting — not a check. It’s this strange awkward motion and the yarn ends up way too tight on the needle. So she sat and watched what I was doing — corrected the couple of things I was doing wrong, and …

I am actually able to knit now (yes, there are a few mistakes … but the tension is reasonable and it’s reasonable looking).

Macrame Project – Hanging Plant Basket

I have eight spiral knot “arms” on the plant hangar — it’s starting to look like a sea critter!

The trick that I’ve found to macrame is managing the cords as you work. It’s rather difficult to make knots with four eight foot cords. Gathering the working cords into individual bundles (and, since I am doing square knots where two cords are being wrapped around a pair of cords … I gathered two of the cords into one bundle) makes the whole process quicker and easier.

The tie around the “active” cords then matches up with the string color on my knot diagram — which is great for remembering which of the two knots you just tied!

Macrame Project – Hanging Plant Basket

Scott got a hoya earlier this year, and it is about time to transplant it into a larger pot. He wants to be able to hang it in the window to get plenty of light — so I’m making a basket to hold the plant.

The main part of the planter is 16x 18 feet strands that will be folded in half an arranged as four sets of four strands. Additionally, I need a 6.5 foot strand to wrap the hanging loop and another three foot section for gathering at the base of the loop. Wow, it takes a lot of cord to make a plant hanger.

Hanging loop followed by four groups knotted as: 7″ of spiral knot, 4.5″ straight then single knot, and
10″ of square knot. Then the groups will be changed to form a diamond shaped net that will hold our planter.

I got all of the cords cut, taped off the ends so they don’t fray, and am starting to make the hanging loop.

Since this is such a huge pile of strings, I grouped the strings that will be knotted together. Once they were grouped, I coiled each group up and used a bread time to hold the coil. I’ve still got a big pile of strings, but only the four I am actively working on are eight feet of hanging strands.

Body Butter, Take 2

I tried making body butter last year — it was not a success. There were fairly large chunks of solid oil. It worked, they melted eventually so it worked. But it wasn’t something I wanted to give away to friends. In researching, I found some people add sweet almond oil to the mixture. The amount of almond oil I found in recipes online proved to be way too much — the melted oil mixture never congealed. I ended up doubling my coconut oil, shea butter, and cocoa butter amounts. The oils became solid. When I started the mixer, there was liquid almond oil coating small chunks of solid oils and the chunks got somewhat liquidy. I still have really fine grains of solid oils, but they melt quickly.

Initially, I used a cup of coconut oil, a cup of shea butter, half a cup of cocoa butter, and half a cup of sweet almond oil. Added another cup of coconut oil, shea butter, and half cup of cocoa butter.

I melted it all in a pot then transferred to the mixer bowl and set the bowl outside to cool off.

Once it had hardened, I used the whisk attachment on the mixer at a high speed for five minutes or so. It fluffs up a lot! I think the trick is to not let the oils fully solidify. My initial plan was to whip the oils as they cooled … but it took so long to cool that this approach was not practical. Setting the bowl outside to cool worked, but it needs to be checked frequently because there’s evidently not much time between “totally liquid” and “solid block”.

Bigger Pumpkin Hat

Anya asked me to make her a bigger pumpkin hat. When she was less than a year old, I made her a hat with a green stem and leaf and ribbed orange hat body to go along with her Halloween costume. Which meant I had to figure out a way to increase the hat size but retain the pumpkin ribbing. The hat is made with double crochet stitches (x in the chart below) and the ribs are front-post double crochet stitches (| in the chart below). The last row is Anya head-sized, so I am repeating that row until the hat is large enough for her. Then I’ll probably finish the hat with a row or two where the pipebars become front-post half-double crochet stitches and the x’s become back-post half-double crochet stitches.

I’m just getting to the ribbed section on the hat — but it’s much more Anya-head-sized that the one I made her in 2013!

Autumn Wrap-up and Winter Projects

Autumn is coming to a close. We had an great growing season this year — I covered the lettuce beds with fabric tents three or four nights in November because temps would be near freezing. We had a few nights where our small pond froze on the surface, but tomorrow night will be the first sustained sub-freezing temperature. I got a bit of a late start to outdoor gardening because we rebuilt the garden beds in a sunnier location, but I still managed a 200 day growing season. Adding another six weeks for the seeds started indoors, I had plants growing for 244 days — about 2/3 of the year! Moving the beds to a sunnier location greatly increased productivity, and the compost in the garden area has turned into a large pile of dirt. We’ve been adding new stuff to the north side of the pile, and I’ve been moving everything south as I turn the pile. It is impressive how much the pile of grass and leaves shrinks down as it decomposes. In early autumn, I put about 16 cubic feet of compost into the garden beds to make a lettuce and kale bed. Yesterday, I amended another fifteen cubic feet of the lettuce bed. Anya and I used two cucumber A-frame trellises and a few of the tomato trellises to create a structure and covered the lettuce bed with greenhouse plastic. Hopefully we’ll be able to continue growing lettuce throughout the winter. I also plan on planting the broccoli, brussle sprouts, and cabbage under the cover next April.

I was worried the chicks we got in August would be too small when the temps dropped, but they are fifteen weeks old today. They love being outside and fluff up really big when it gets cold. Both the coop and chicken tractor have a wide roost so they can keep their toes under their warm feathers.

In the next few weeks, we’ll build some nesting boxes and get the coop finalized. I also want to finish making packets for the seeds we harvested this year and file them into my seed storage boxes. In the next week or two, I will be making a lot of candied almonds — vanilla cinnamon candied almonds, maple roasted salted almonds, and some plain candied almonds — for us and to give away to neighbors.

This winter, I want to finish the crochet blanket I am making for our family room. It should be a thick, warm blanket that we can all snuggle under. I want to finish Anya’s new Peppermint Swirl dress. I also want to make her micro-corduroy dress/tunic/shirt to replace the one she outgrew this past year. Both will be worn in the spring/summer, but sewing is a cold/snowy day activity for me.

On art

All levels of school have wrong approaches teaching art. I got the “Art History” memorize-these-slides approach in Uni — it is a about as effective an approach to putting someone off art as I could conceive.
 
My experience with primary school art education has had a focus on semi-realist movements. Worse, in the lower grades? Art seems to be a fancy name they’ve decided to give “fine motor skill practice”. There’s no attempt to convey that art has historical meaning and purpose (think Hogarth Beer Street / Gin Lane), is emotional communication, captures energy … that there’s a LOT to experience in art, and there’s a lot of yourself you put into art for others to experience. And this approach leads to kids thinking they are bad at art … which, yeah, you can have difficulty expressing yourself. But that’s got nothing to do with hand-eye coordination.
 
The idea of collaborative art is interesting — and it’s something that’s completely missing in art education. I was shocked the first time I was at an artist’s studio and saw all of the people doing Chihuly’s glasswork. A second of reflection, I realized there was no way one dude made the giant tree of lights from the White House Christmas display or all of the glass bubbles at the Kew Gardens. But I totally never realized there was an artist equivalent of a sous chef.
 
I’ve seen some art clubs with large projects (mural on the side of the school) take this approach, but that’s been a more pragmatic thing based on the project size than any attempt to include collaboration in art education. With more mature participants, I totally see how a collaborative approach would be beneficial. I’m trying to think of some way to pitch it to kids my daughter’s age (early elementary school) where “Ken is good at trees” gets heard as either “you aren’t good at trees” or “trees are super awesome, and I’m letting Ken do them”. Maybe talking through it and seeing what everyone’s into — like draw a base scene and then have each kid draw their favorite animal.