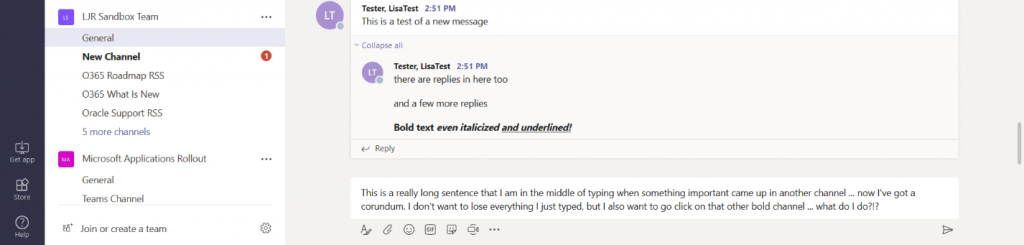
While cognitive research says we focus best if we’re not switching topics every few minutes,sometimes I find myself needing to switch to a new channel in the middle of a thought. Desktop notifications, important content flags … but Teams will save what you’ve already typed even if you leave the channel or chat session.
I’ve switched over to the channel with that important activity – I can even send a new message here.
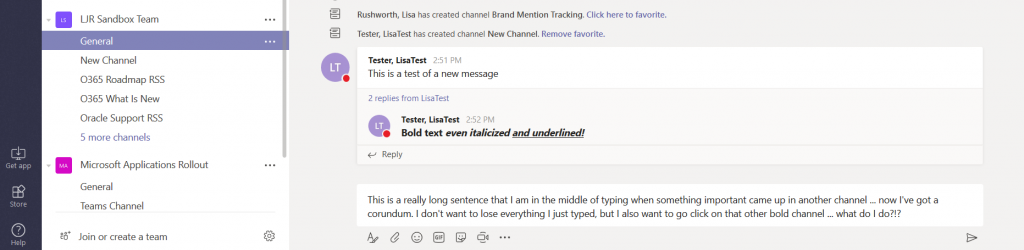
And when I return to my original channel, everything I’ve typed is still in there. Teams even saves the un-sent post if you close the client (I still copy my post to notepad just in case if I’m doing anything more than re-launching the browser to apply updates, but I haven’t needed the saved post content yet)
As you use Teams to chat with colleagues, you may find your “recent”chats include several entries with almost the same list of people. And now you’re clicking between groups with someone’s name to find the right group chat. Don’t! You can rename group chats to make it easier to find a specific conversation.
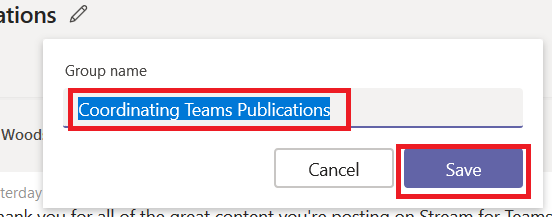
Within the group chat, click on the little pencil next to the participant names.
You will have an edit dialogue where you can add a group name – this is displayed to the other participants so select the name accordingly 😊 Click ‘Save’.
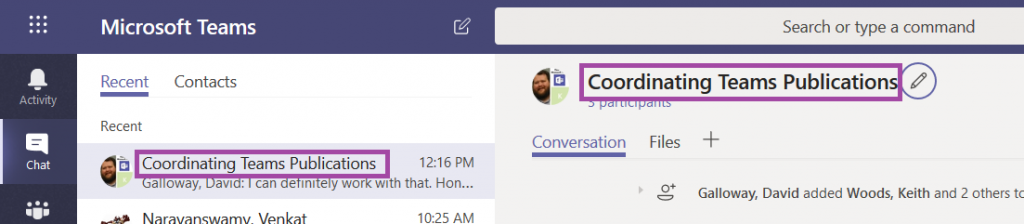
The conversation is now listed with the name you’ve supplied. Should you want to remove the name, simply click the pencil again and delete the name. Save a blank name, and the conversation will be titled with the participants again.
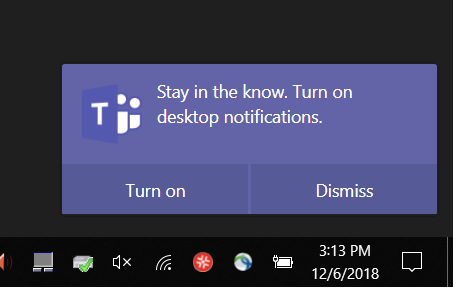
The *one* disadvantage of using Teams in a web browser was not getting notifications for new activity, but the Teams web site now supports desktop notifications. Next time you log into Teams in a web browser, you’ll be asked if you want to turn on desktop notifications – click “Turn on”.
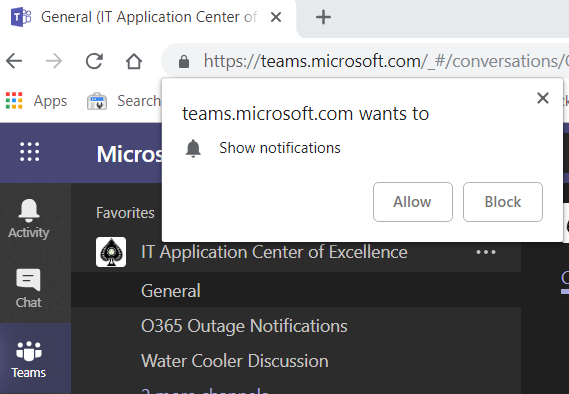
You may see an additional browser prompt asking you to confirm you wish to grant the Teams website the right to show notifications –click Allow.
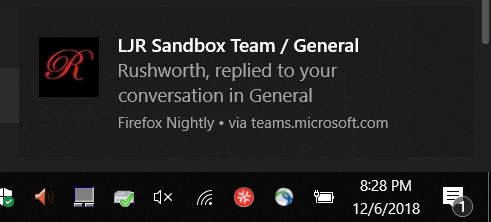
If you have Windows 10 notifications enabled, you will now get notifications in the lower right-hand corner of your screen and the Windows notification panel.
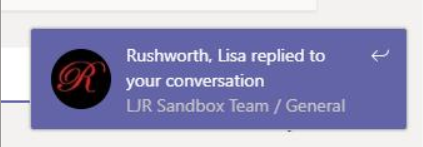
You will get notifications even if you’ve disabled desktop notifications.When you are on the Teams tab, you’ll see notifications in the lower right-hand corner of the browser.
And when you are not on the Teams tab, you’ll see a number indicating the number of new notifications that have been sent.
I frequently collaborate on documents with a small group of people – not that I don’t want everyone’s input, but starting a discussion with thirty people and a blank sheet of paper can become a cat-herding endeavor. I start drafting a document with a small group of people and then present the mostly finished information to a larger team for final review. I do not want to keep track of different versions of the document spread across multiple Teams! Fortunately, you can move documents between Teams.
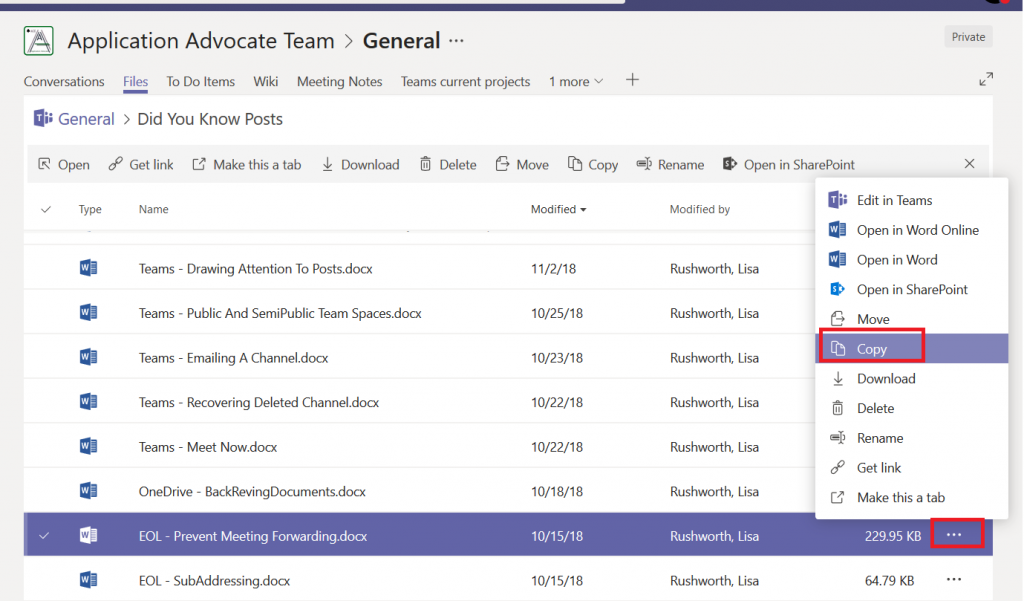
Find the document that you want to move. Click the not-quite-a-hamburger menu to the right of the document listing. Then select either “Move” or “Copy”.
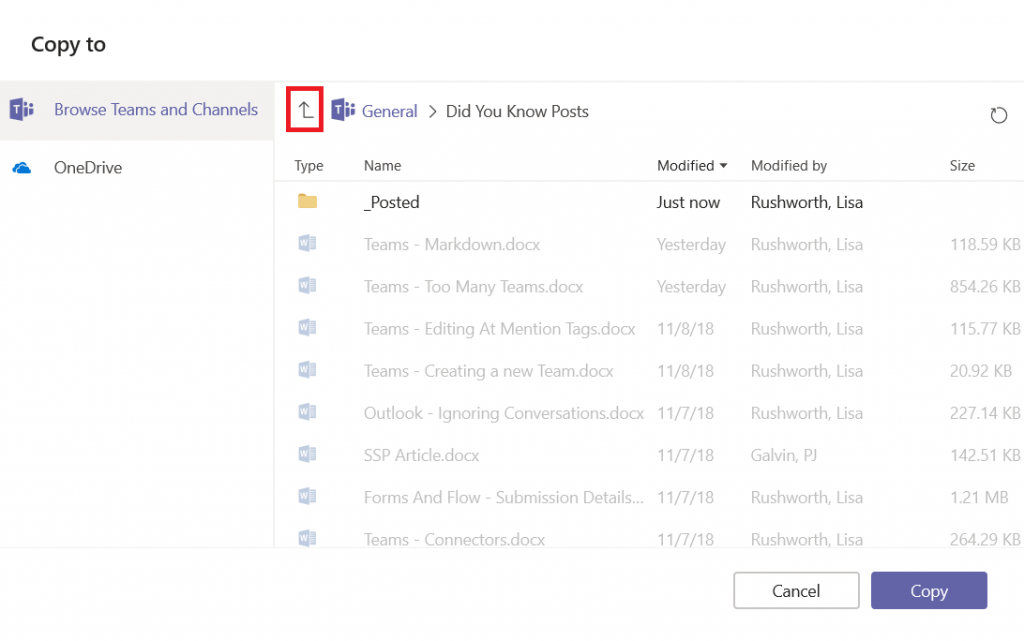
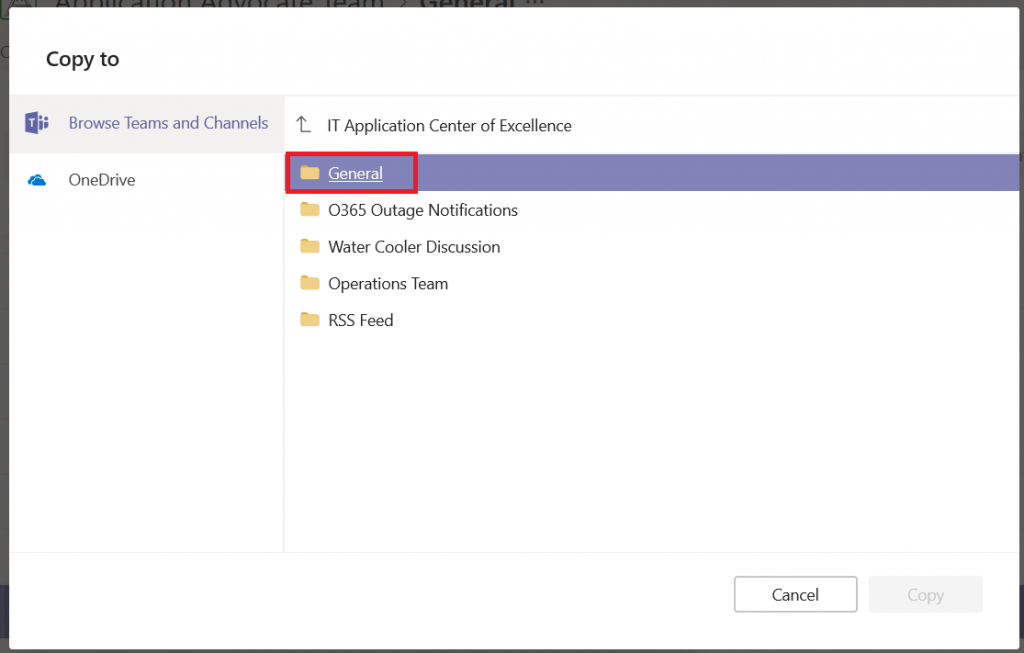
A “Copy/Move To” dialogue will open, allowing you to select where you want to document to appear. You can navigate the folder structure within the channel’s file space or click this arrow to move outside of the channel’s file space.
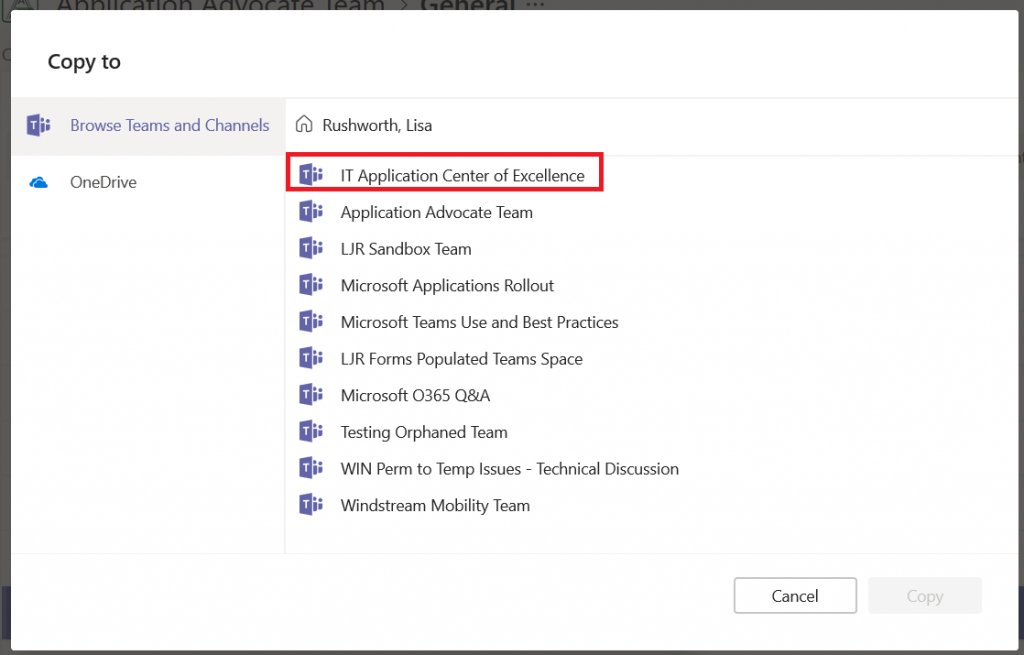
Clicking the arrow once will bring show the channels within the team. Clicking it a second time will display all your Teams. Click on the team into which you want to move the document.
Select the channel in the new team where the document will appear.
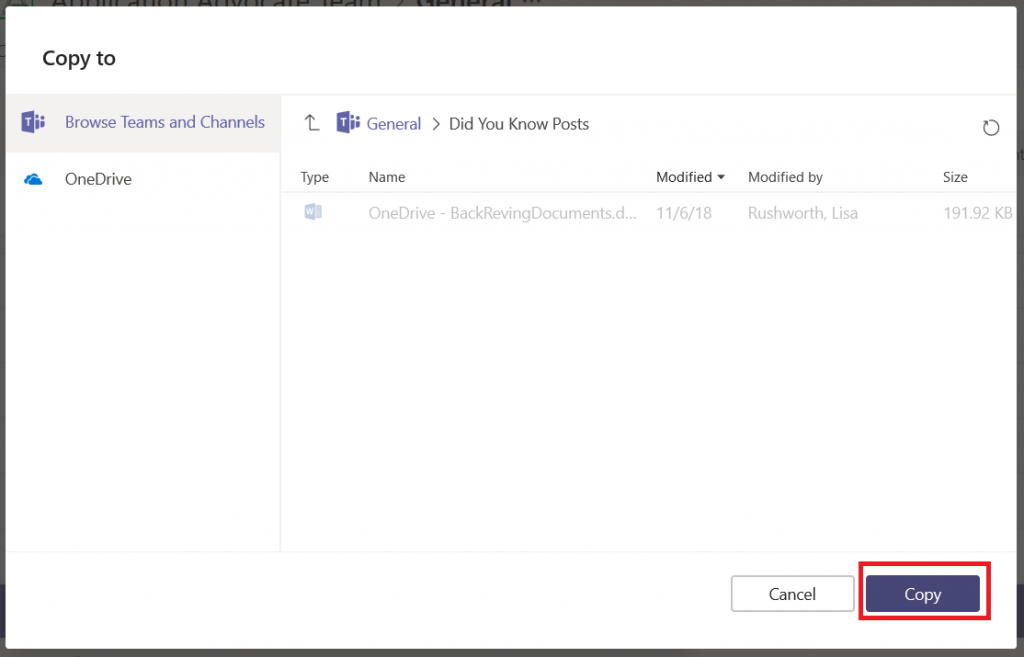
If there is a folder structure within that channel’s file
space, select the folder path you want. When you’re in the right place, click “Copy”
or “Move”.
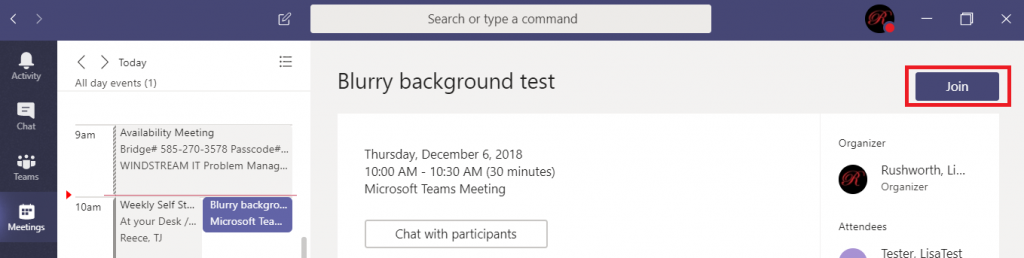
Do you have a two-foot-high stack of papers on the desk behind you? Does your whiteboard contain information that isn’t quite ready to be broadcast? Or maybe you are working from the aeroport and your camera is facing the main terminal hallway – all of those people running past can be distracting. Video meetings humanize participants, but what’s behind you isn’t always something you want to share with others. When you join a scheduled Teams meeting, you can use a video filter to blur all of that stuff.
Click to join a meeting.
Click the slider next to the video camera to join the
meeting with video.
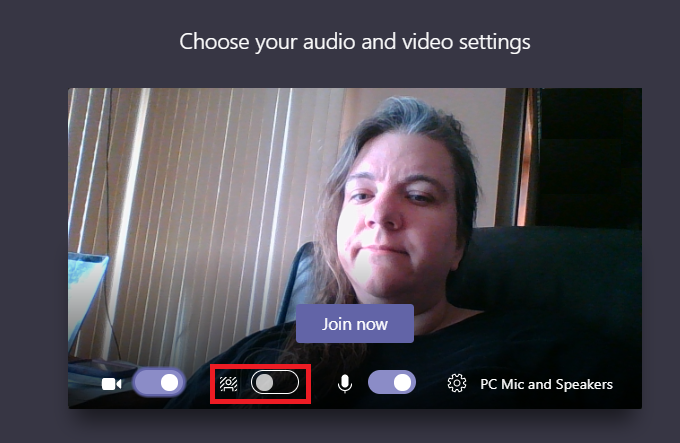
You will see a video preview. Click the middle slider to activate
the background blurring filter.
The video preview shows the changes. If the blur
sufficiently obfuscates whatever you didn’t want to show, click ‘Join now’ and
join the meeting. If your desk still looks a mess … move your stuff 😊
The blur effect is not applied to things the filter considers to be in the “foreground”
… so you might be able to achieve
more blurring by pushing an object farther from the camera.
Adding a Planner board to Teams spaces is a great way to manage tasks within a group or for a project, but it can be a little difficult as an individual to keep track of tasks scattered across various Teams. Microsoft Teams also provides a view of your tasks.
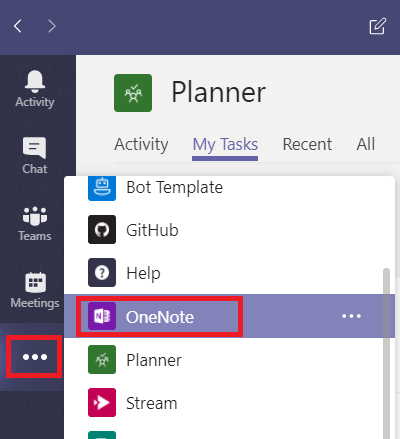
Click on “More apps” on the left-hand toolbar and select “Planner”
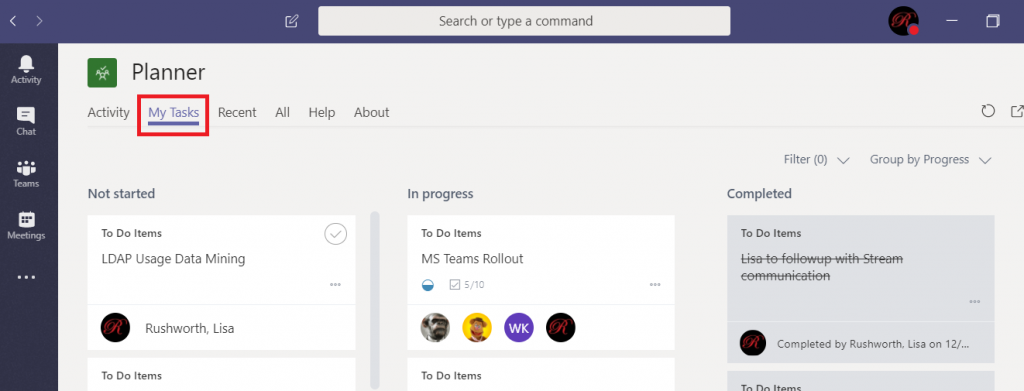
Click on “My Tasks”. You will see tasks in any Planner board that have been assigned to you. You can edit task content, change labels, and change the completion status from within this view.
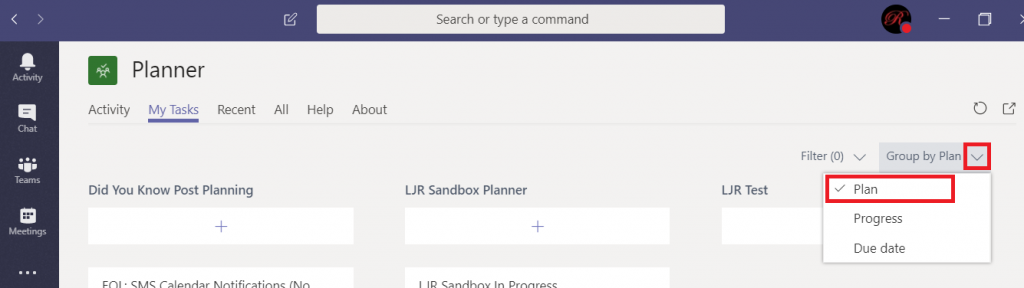
Although you can edit most of the Task details, you cannot drag it between buckets on the Planner board. To do that, you need to open the containing Planner board. Currently, there’s no way to navigate directly to the Planner board from within this view. You can click the inverted caret next to “Group by …” and select “Plan” to see the name of the Planner board that contains your task. You can then find the board on https://tasks.office.com
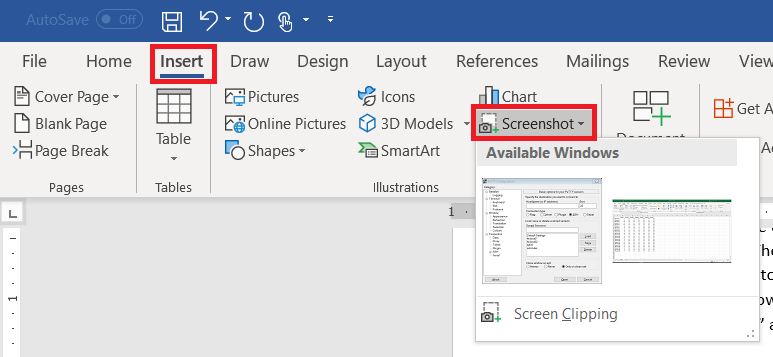
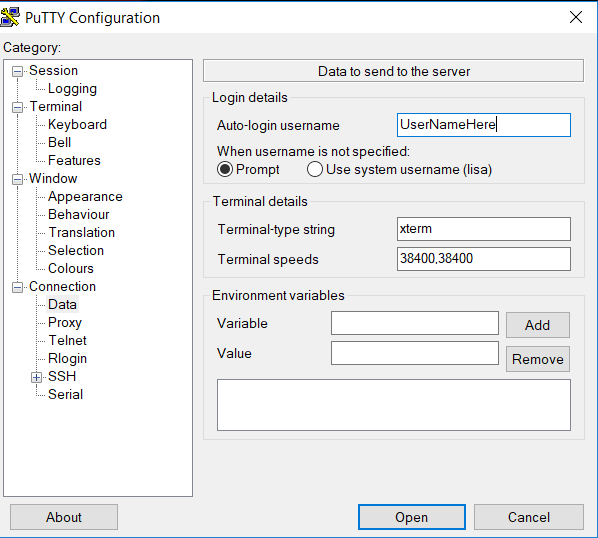
You’ve encountered some odd error in an application and need to send IT support a picture. Or you’rewriting documentation. There are lots of reasons you need a picture of your computer screen. You can hit the “Print Screen” button on your keyboard (even hold Alt and hit print-screen to isolate the image to the active window). But did you know Microsoft Office programs can do that for you? On the ribbon bar, select “Insert” and locate “Screenshot”
Click on one of the “Available Windows”, and an image of the window will be inserted into your Word document, Excel spreadsheet, Outlook e-mail, or PowerPoint presentation.
Use the “Screen Clipping”selection to grab part of a window. Minimize all of your Windows. Bring up the Window of which you want an image. Now bring up the Office document into which you want the image inserted. Use Insert => Screenprint => Screen Clipping, and wait a minute. Your Office document will be minimized, your screen will get washed out, and you’ll have a cross-hair instead of a mouse pointer. Click and drag to draw a rectangle around something. When you release the mouse, whatever is in that rectangle will be pasted into your Office document.
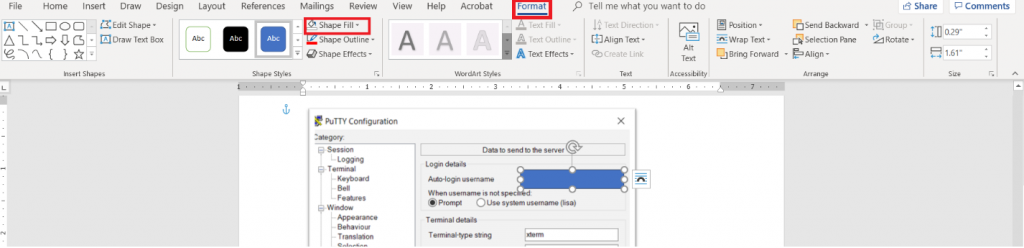
Wait – what about those rectangles I use to highlight the image? From the ribbon bar, select “Insert”and “Shapes”. I took a University course where debugging screen shots had to have the “important bit” highlighted with a red square – that stuck with me. You’ve got an array of shapes and colours available. Pick one. Draw the shape over your image – yes, it looks like the shape covers the important part. Draw it anyway. While the shape is still selected, click “Format” in the ribbon bar. Select “Shape Fill”
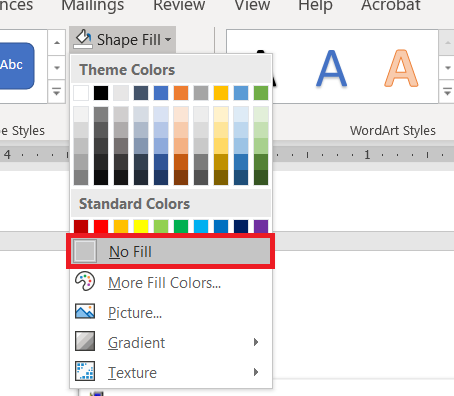
Select “No Fill” (you could also use a highly transparent fill colour if you’d prefer).
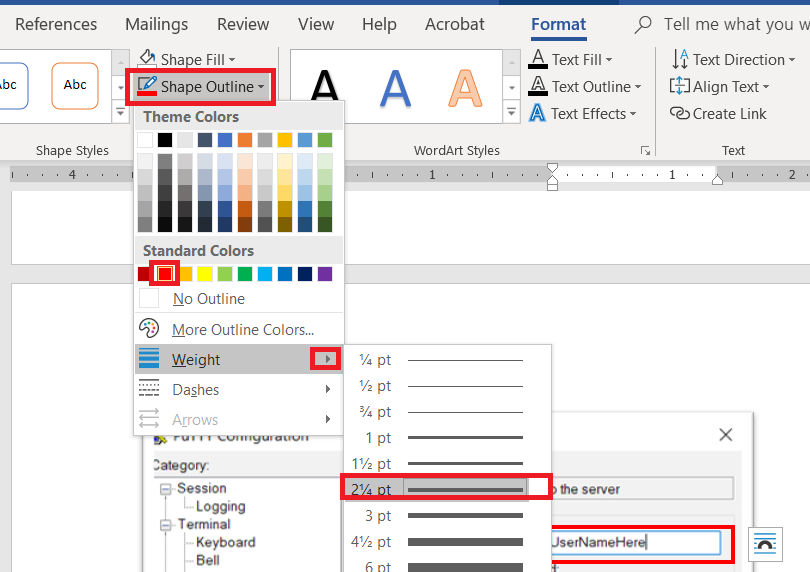
Click “Shape Outline” – pick a colour, and if the line is not thick enough select “Weight” to increase the line width.
When I’m writing documentation with a lot of images, I’ll still use an image editor and ‘print screen’. There are filters that just don’t exist in the Office image editors – sometimes I want to selectively blur screen text so my work conversations are not included in documentation. Sometimes I want to create a composite image. But for small documents – showing someone the error I get on their web site, “click here, type this” – using a single application is efficient.
You’ll need to use the application, not the OneNote website.
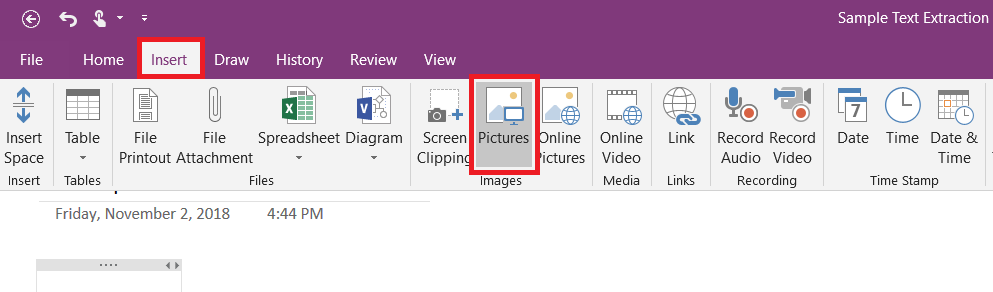
Insert the picture – from the ribbon bar, select “Insert” then “Pictures”.
Select the image you want and click OK.
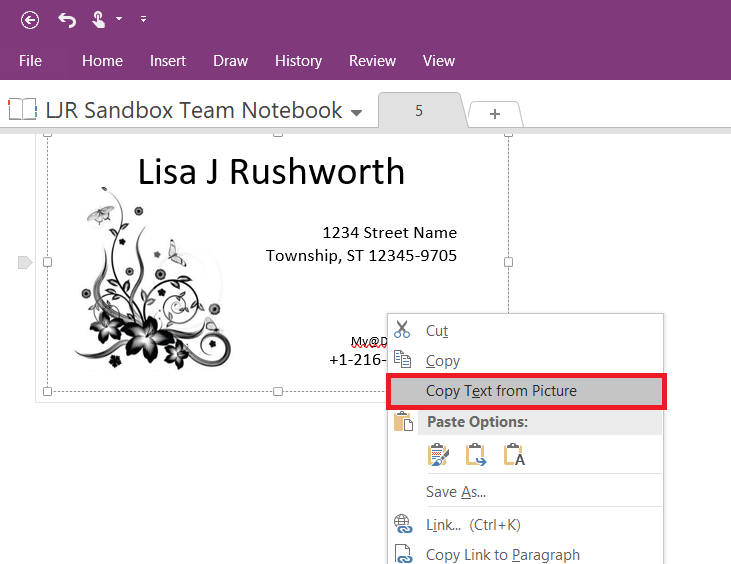
Right-click on the image. “Copy Text from Picture” does
exactly that – if your image is low resolution or really blurry, it’ll take a minute for this option to be available.
Wait a bit and right-click again.
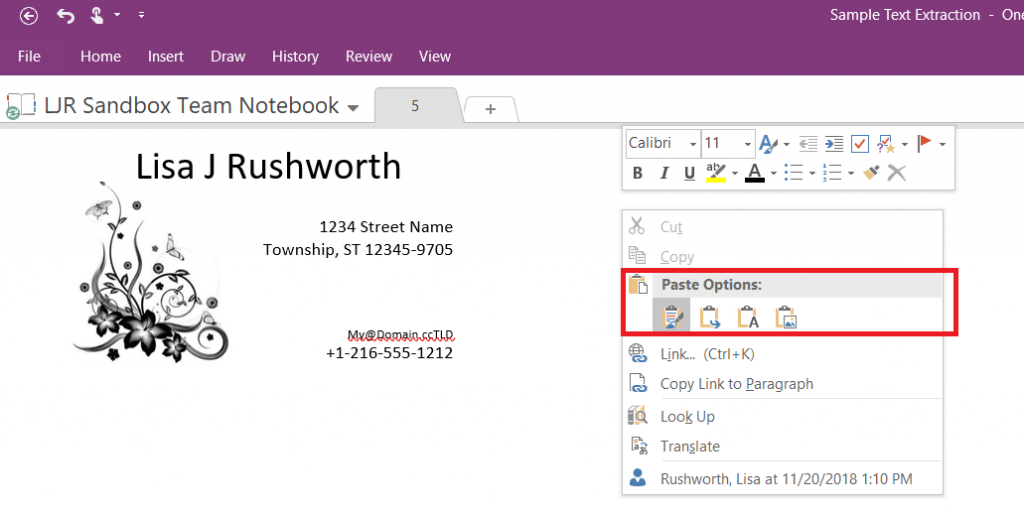
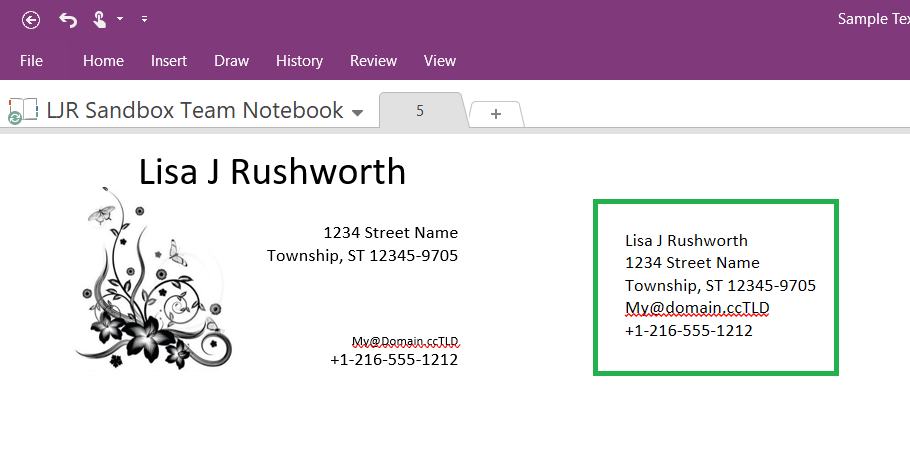
The text from the image is now in your clipboard. I’m
pasting it into the same OneNote page, but you can paste it anywhere.
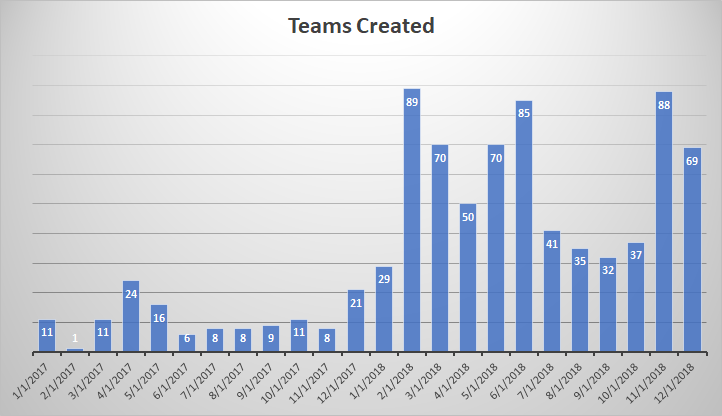
I’ve been generating reports to track our Microsoft Teams adoption – how many people are using Teams, how many messages are being sent in Teams, how many Teams are there. Some of these metrics have easily visualized count-per-unit-time summaries available. Some, like the number of Teams, do not.
Team
Created On
Directory Services
1/19/2017
App Proxy
1/19/2017
LDAP
1/19/2017
ADFS
1/19/2017
Nagios
1/19/2017
File Cluster
1/19/2017
Exchange Online
1/19/2017
Active Directory
1/19/2017
Commvault
1/19/2017
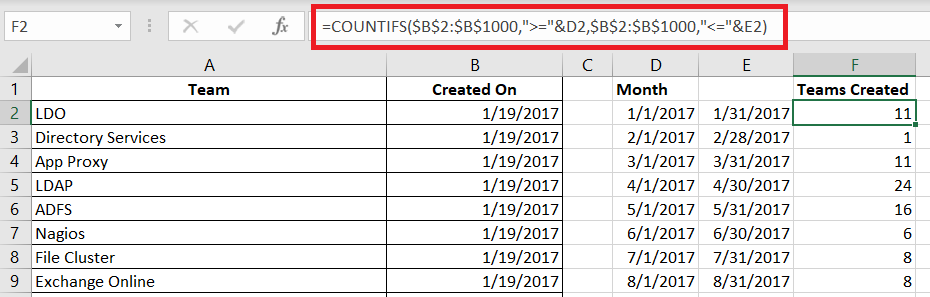
But it’s easy to turn a list of groups and creation dates into visualizable data. Paste the data into Excel. To find the number of items where “Created On” falls in a range, we need to be able to define that range. 01 January 2017 is easy enough, but how do you get the end of January? Excel has a function, EOMONTH, that returns the last day of a month.
Date is any date object. Offset is an integer number of months prior (negative numbers) or after (positive numbers) Date for which you want the last day of the month. I can list the dates to start and end quarters with =EOMonth(Date,2). With 01 January 2017 in cell D2, the last day of January is =EOMonth(D2,0)
I don’t want to type01 Feb, Mar, April … flash fill and the fill handle need a few values before they can figure out the rest of a sequence. But I can use the last day of the month to get the first day of the next month – just add one! With 31 January 2017 in cell E2, I want =E2 + 1 in cell D3. (Yes, there are other ways to do this – probably dozens.)
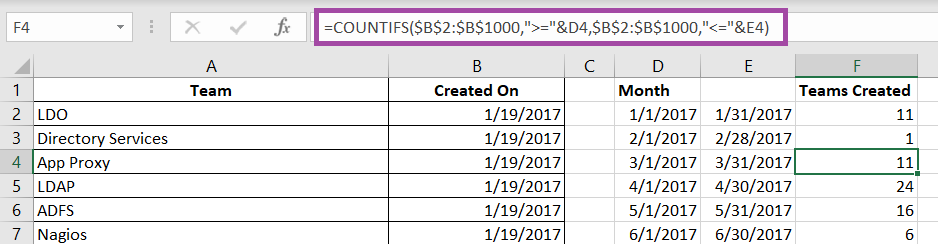
Now that we’ve got a formula for the start and end of the month, just fill down to produce the ranges we need to see how many Teams were created each month. Then we just need a formula to do the counting for us. I use the COUNTIFS function.
I know modern software is driven by graphical user interfaces, but as an old-school Unix admin (there were loads of interface choices – Bourne shell, c shell, korn shell, bash shell!) it’s weird to take my hand away from my keyboard just to turn a bit of text bold or move to a new field. And Microsoft has done a decent job of standardizing keyboard shortcuts across their applications – ctrl-b will toggle “bold” pretty much anywhere (even Teams!)
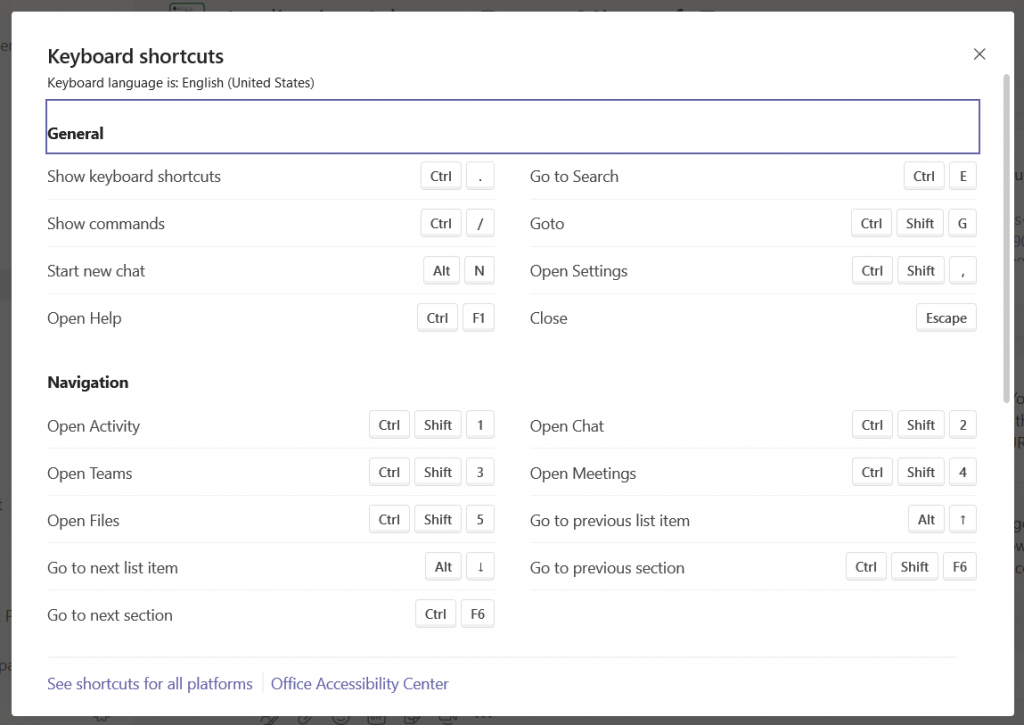
But … within your Teams client (even the web client) hold the “Ctrl” key and type a full stop (.) and look – special keyboard shortcuts!
There’s even a link at the bottom for all of the shortcuts on Windows and Mac. I can hit ctrl-shift-1 to flip over to my Activity feed; ctrl-shift-3 puts me back in the Teams chat section.