The application I am registering will pull report data from Graph for use within existing company systems. I will be assigning application-level permissions and no callback URL is needed.
To register an application, log into http://portal.azure.com and select “Azure Active Directory” from the left-hand navigation column. Then select “App Registrations (preview)”.
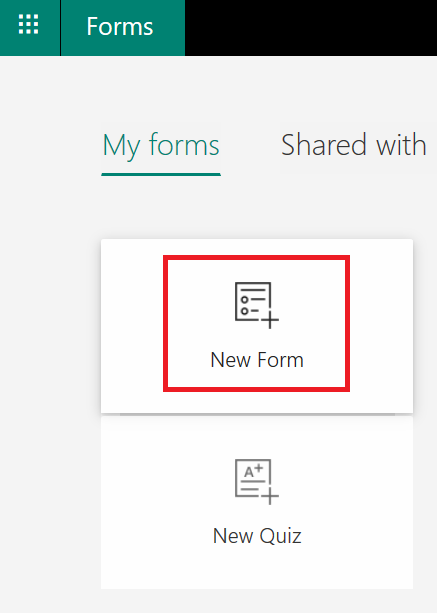
Click on “New registration”
Provide a descriptive name for the application — tenant managers can see all of the registered applications and it’s a lot easier if you ask them to approve access for “Specific Application Name For Engineering” than “LJR Test”.
The application will be created and you will be brought to the app overview. Select “API permissions” then click the “Microsoft Graph” hyperlink.
Click on “Application permissions”
And find the permissions you need. For the script I want to run, I need Reports.Read.All. Click “Update permissions” to save your changes.
If you are a tenant admin, you can approve your own rights. Otherwise, you’ll need to contact a tenant admin and have them approve the permissions you have requested. Once the permissions have been acknowledged, you’re ready to go.
You will need the app ID and a secret for use within your code. The application ID is listed on the application “Overview”.
To create a secret, select “Certificates & secrets” then click “New client secret”. This is displayed one time, so copy it into your code now.
We managed to use the stock Teams webhook app in Splunk — just needed to modify the search being used. Adding “|table” and specific fields to be included in the table avoids having to filter the list data within the Python code
There still is a tweak to the code that I prefer — Python lists aren’t in any particular order. I’d like to be able to look the same place in the Teams post to see a particular field. Adding a sort when the facts array is put into the post body ensures the fields are in the same order each time.
Using either the default webhook action or the Teams-specific webhook, Splunk searches can post data into Microsoft Teams. First, you need to get a webhook URL for your Teams channel. On the hamburger menu next to the channel, select “Connectors”. Select Webhook, provide a name for the webhook, and copy the webhook URL.
If you intend to use the generic webhook app, there is no need to install the Teams-specific one. The Teams-specific app gives you prettier output & a “view in splunk” button. Download the app tgz. To install the app, go into “Manage Apps” and select “Install app from file”.
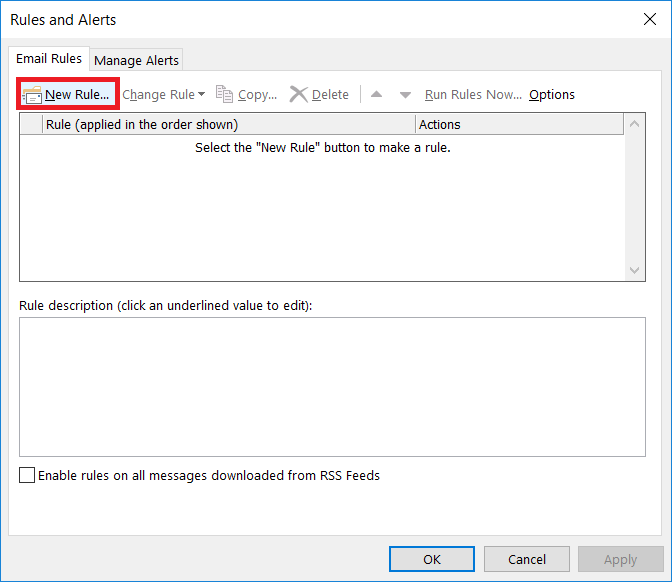
Click ‘Browse…’ and find the tgz you downloaded. Click ‘Upload’ to install the app to Splunk.
Now create a search for which you want to post data into your Teams channel. Click “Save As” and select “Alert”
Provide a title for the alert — you can use real-time or scheduled alerts. Once you’ve got the alert sorted, select “Add Actions” and select the Teams webhook action (or the generic webhook action if you intend to use that one). Paste in the URL from your Teams channel webhook and click “Save”.
You”ll see a confirmation that the alert has been saved. Close this.
Now you would think you’d be ready to use it … but wait. Neither one works out of the box. In the Splunk log, you see error 400 “Bad data” reported.
For the default webhook app, edit the Python script (/opt/splunk/etc/apps/alert_webhook/bin/webhook.py in my case). Find the section where the JSON body is built. Teams requires a summary or title within the POST data. I just added a static summary, but you could do something fancier.
body = OrderedDict( sid=settings.get('sid'), summary='LJRWebhook', search_name=settings.get('search_name'), app=settings.get('app'), owner=settings.get('owner'), results_link=settings.get('results_link'), result=settings.get('result')
For the Teams-specific webhook, edit the Python script (/opt/splunk/etc/apps/alert_msteams/bin/teams.py in my case) and find the section where the facts list is populated. There’s too much data being sent through. There’s probably a way to filter it out in Splunk, but I don’t know how đ
The right way to do it is select the most important items from settings.get(‘result’).items that you want to be displayed within Teams and populate facts with those elements. I used a new list, strWantedKeys, to determine which keys should be added to the facts list. The quick/ugly way is to just take the first n items from the result items (settings.get(‘results’).items()[:7] gets seven … 8 produced a ‘bad payload received by generic incoming webhook’ error from Teams.
try: settings = json.loads(sys.stdin.read()) print >> sys.stderr, "DEBUG Settings: %s" % settings url = settings['configuration'].get('url') facts = [] strWantedKeys = ['sourcetype', '_raw', 'host', 'source'] for key,value in settings.get('result').items(): if key in strWantedKeys: facts.append({"name":key, "value":value}) body = OrderedDict(
Once you have started a Microsoft Teams meeting, click the not-quite-a-hamburger menu in the meeting control and select âStart recording.
You will see a confirmation that your meeting is recording â and, as the message mentions, make sure everyone knows they are being recorded.
If you are attending the meeting using a web browser, the browser tab will have a little red circle indicating that recording is active.
If you no longer wish to record the meeting, click the not-quite-a-hamburger-menu button again and select âStop recording.
Now where is that recording?? Open the meeting chat
And youâll see a post indicating that the recording is saving. Once the recording has been saved, a link to the recording will appear in the conversation. You can get a link to share with others.
If you would like a transcription to be created for your meeting, select âOpen in Microsoft Streamâ. This will open the recording in a web browser. Under the meeting information, click the not-quite-a-hamburger menu and select âEditâ
On the edit page, select the video language. Ensure âCaptionsâ is checked.
Scroll up to the top of the page and click âApplyâ.
Wait for it â the transcription process can take a loooong time. Once the transcription is done, you can click the gear icon in the video information and select âShow transcriptâ (if the transcript isnât done yet, this option is still available. But the transcript pane will just tell you to come back later)
Read through the transcript â an AI engine is used to perform the natural language processing, and the transcription accuracy *should* improve as you use the service. Click on âEditâ, make any corrections
Click âDoneâ to save your changes.
When your video is played, there is now a button to display closed captioning.
And the transcript will be displayed as the video progresses.
When you view the transcript, you can copy the entire thing & paste the transcript into OneNote or the meeting chat to have computer-generated meeting notes. I usually edit the transcript to remove the timestamps (and remove any tangential discussions).
While cognitive research says we focus best if weâre not switching topics every few minutes,sometimes I find myself needing to switch to a new channel in the middle of a thought. Desktop notifications, important content flags ⌠but Teams will save what youâve already typed even if you leave the channel or chat session.
Iâve switched over to the channel with that important activity â I can even send a new message here.
And when I return to my original channel, everything Iâve typed is still in there. Teams even saves the un-sent post if you close the client (I still copy my post to notepad just in case if Iâm doing anything more than re-launching the browser to apply updates, but I havenât needed the saved post content yet)
You can! From the Teams side-bar, select Meetings.
At the bottom of your screen, along the left-hand side click âSchedule a meetingâ.
Add the usual stuff â a title, time, agenda. Click under âInvite peopleâ and type in some names to add people to the invitation. They donât all have to work here â you can type in SMTP addresses as well.
Once youâve added your attendees, click on âScheduling assistantâ to view attendee availability.
You will see each personâs published availability to the left of their name, and text under their name will indicate if they are free during the selected time interval.
Select a time and click âScheduleâ.
A meeting summary is displayed. You can edit the meeting if needed or click close.
As attendees accept your invitation, you will see their acceptance within your meeting.
To attend the meeting, click the âJoinâ button.
If youâve invited individuals who work outside of Windstream,
they can still use the âJoin Microsoft Teams Meetingâ link to join the meeting.
Theyâll be joining anonymously, and someone will have to let them join the meeting
⌠but theyâll get there too.
On my home domain, I’ve always added an access control entry to prevent this from happening … it’s really easy to double-click and be in rename mode or drag and drop an OU into a new location. I’ve always considered this to be a bit of paranoia on my part — not like anyone’s routinely screwing up entire OU’s.
Until they are. We’ve had significant two outages at work caused by unintentional changes to Active Directory organizational unit names. Partially to avoid wide-spread outages due to something that’s fundamentally silly and partially because any widespread outage requires a root cause analysis that includes some action you’ve taken to prevent whatever from happening again we’re going to implement the same permission tweak at work now.
Since it’s not just me who has wanted/needed this permission, figured I would publish how I’ve got the permissions set:
No idea why the GUI shows name and Name instead of rdn and CN respectively. But I’ve denied write for adminDisplayName, rdn, and cn.
Just like the “prevent accidental deletion” checkbox is a bit of a pain when you want to delete an OU, this is inconvenient if you want to rename or move OUs. The first step is to remove the permission, then you can make your change, and then you’ve got to re-apply the permission. Slight inconvenience, but having the entire company failing LDAP authentications (where the base DN no longer finds the users) is a massive inconvenience too.
As you use Teams to chat with colleagues, you may find your ârecentâchats include several entries with almost the same list of people. And now youâre clicking between groups with someoneâs name to find the right group chat. Don’t! You can rename group chats to make it easier to find a specific conversation.
Within the group chat, click on the little pencil next to the participant names.
You will have an edit dialogue where you can add a group name â this is displayed to the other participants so select the name accordingly đ Click âSaveâ.
The conversation is now listed with the name youâve supplied. Should you want to remove the name, simply click the pencil again and delete the name. Save a blank name, and the conversation will be titled with the participants again.
The *one* disadvantage of using Teams in a web browser was not getting notifications for new activity, but the Teams web site now supports desktop notifications. Next time you log into Teams in a web browser, youâll be asked if you want to turn on desktop notifications â click âTurn onâ.
You may see an additional browser prompt asking you to confirm you wish to grant the Teams website the right to show notifications âclick Allow.
If you have Windows 10 notifications enabled, you will now get notifications in the lower right-hand corner of your screen and the Windows notification panel.
You will get notifications even if youâve disabled desktop notifications.When you are on the Teams tab, youâll see notifications in the lower right-hand corner of the browser.
And when you are not on the Teams tab, youâll see a number indicating the number of new notifications that have been sent.
I have been writing a lot of âdid you knowâ articles as part of our Microsoft Teams reintroduction, and I have an Excel file that lists topics for which we want articles. To avoid posting the same article twice (or worse, writing the same article twice!), I mark off when the article is written and posted. With a long list, though, it is difficult to identify which articles still need to be posted (yeah, I know I’m not apt to have posted an article that hasn’t been written so I could have just used a filter on the ‘Posted’ column … but there are plenty of cases where a simple filter does not suffice). Sometime you can build an advanced filter that isolates the specific data you need, but there’s an easier way — the Excel IF function.
In my spreadsheet, I
added a column, named âStatusâ. The âIFâ function displays different
text when the test evaluates to TRUE and FALSE: if(B2=âxâ,âWrittenâ,âNot writtenâ) displays âWrittenâ in all of the rows where column B has an x, and âNot writtenâ in the remaining columns.
In
conjunction with IF, I can use the Boolean AND function to display
âFinishedâ in any row where both columns B and C contain an X: =IF(AND(B2=âxâ,C2=âxâ),âFinishedâ,âIn Progressâ)
The content of the Status cells can be used as a filter. On the âDataâ tab, select âFilterâ.
Click the drop-down menu on the âStatusâ column, deselect whatever values you do not wish to display, then click âOKâ.
Voila! Now I see only the articles where the status is not “Finished”.