Before you start, understand how billing works for Microsoft’s cloud services. There are generally free tiers for selections, but they are resource limited. When you first start with the Azure magic cloudy stuff, you get a 200$ credit. A message indicating your remaining credit is shown when you log into the Azure portal. Pay attention to that message – if you think you are using free tiers for everything but see your credit decreasing …you’ll need to investigate. Some features, like usage analytics, cost extra too.
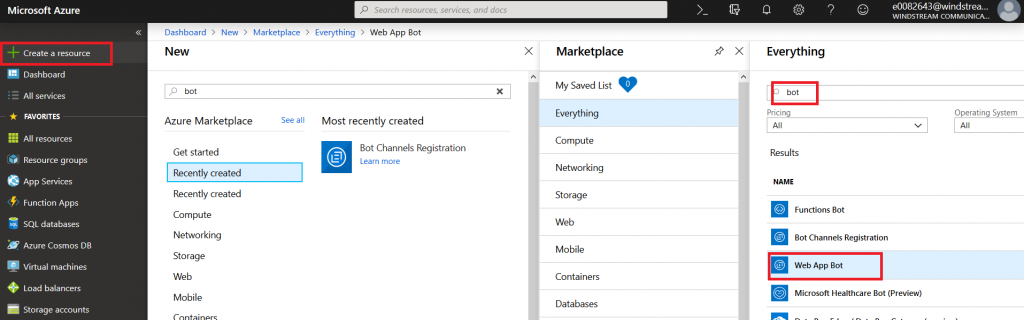
Microsoft Teams uses Azure bots – so you’ll need to create an Azure bot to get started. From https://portal.azure.com, click on ‘Create a resource’. Search for “bot” and find the bots you are looking for. To host your bot on Azure, select either the “Functions Bot’ or “Web App Bot”. Functions bots use Azure functions, which are C# scripts, for logic processing; WebApp bots use WebAPI App Service for logic processing (C# or NodeJS). To host your bot elsewhere, select “Bot Channels Registration”. In this example, we are using a “Web App Bot”.
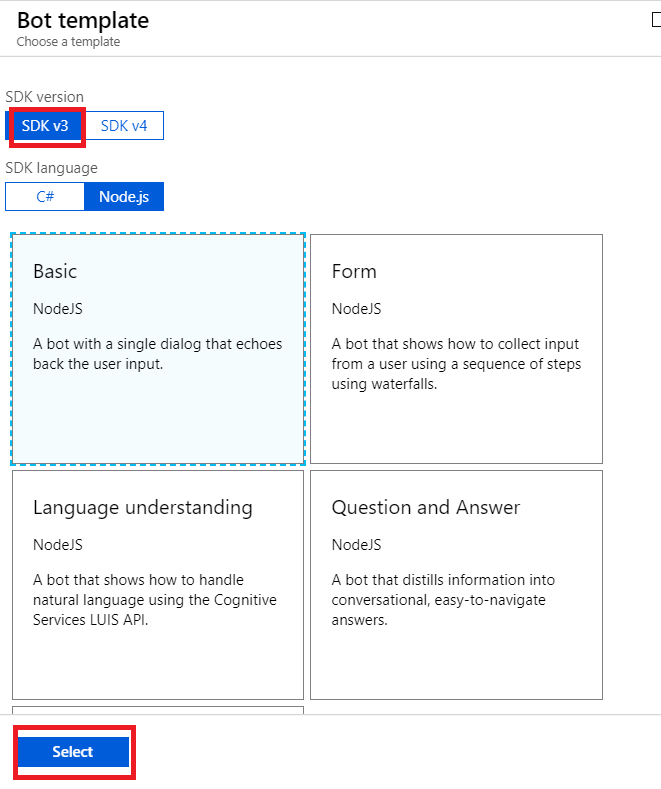
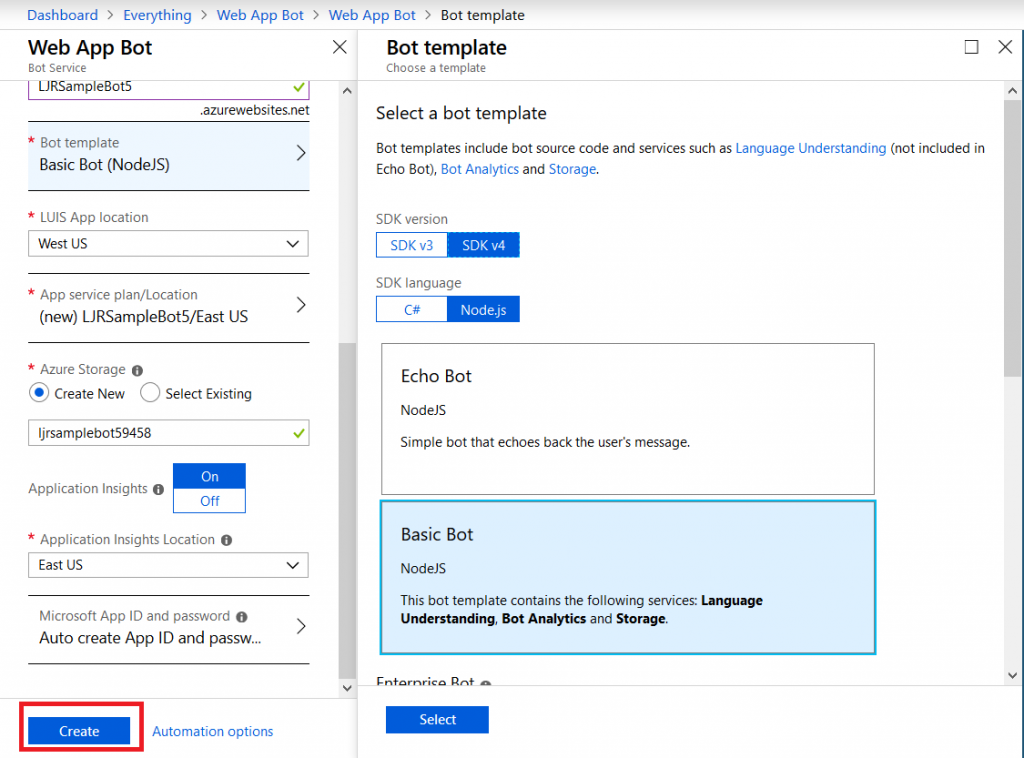
Give your bot a name– there will be a green check if the name is unique. Pick your language – C# or Node.JS – and then decide if you want an Echo bot (which gives you a starting place if you’re new to developing bots) or a blank slate (basic bot). Don’t forget to click “Select” otherwise you’ll be back to the defaults. You’ll need to create a resource group. Click on “Bot template” and select what you want to use as the basis for your bot. As of 14 Dec 2018, use v3 unless you need something new in v4 – there’s a lot more available there, and the Bot Builder extensions only work with v3 (https://github.com/OfficeDev/BotBuilder-MicrosoftTeams)
You may need to create a service plan
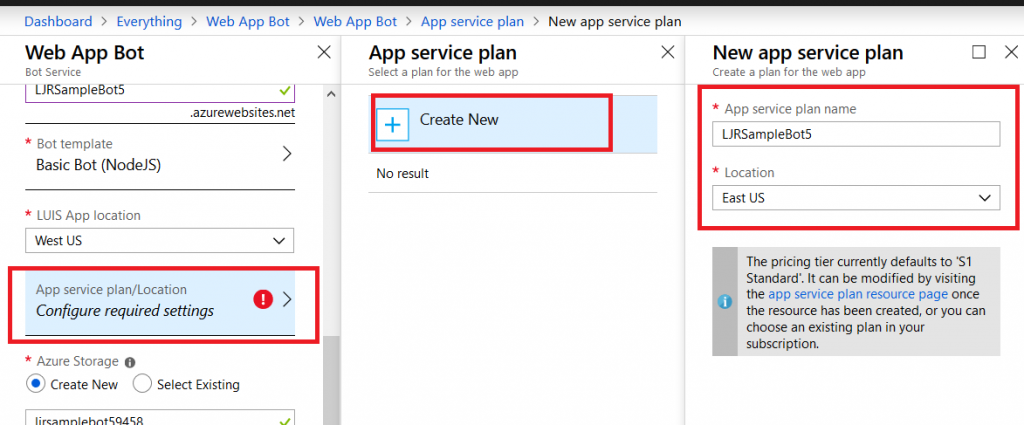
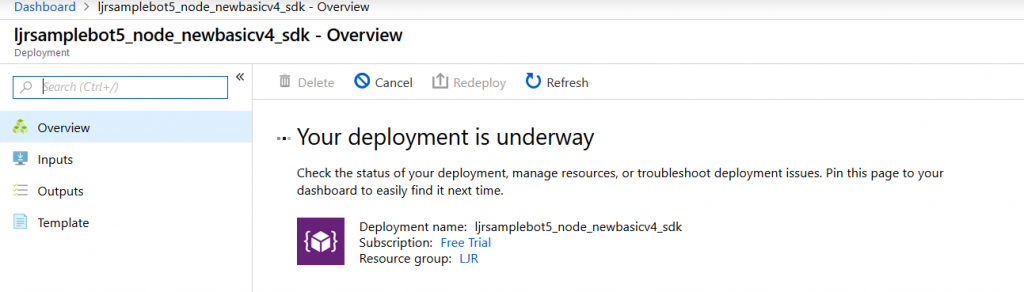
And storage configuration. Once you have completed the bot configuration, click “Create” and Azure will deploy resources for your bot.
You’ll see a deployment process message, and your messages will have a similar notification. Wait a minute or three.
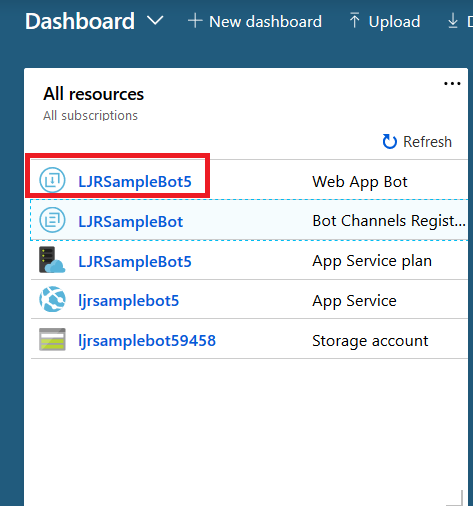
Return to the dashboard & you’ll see your bot services. Go into the bot that you just created.
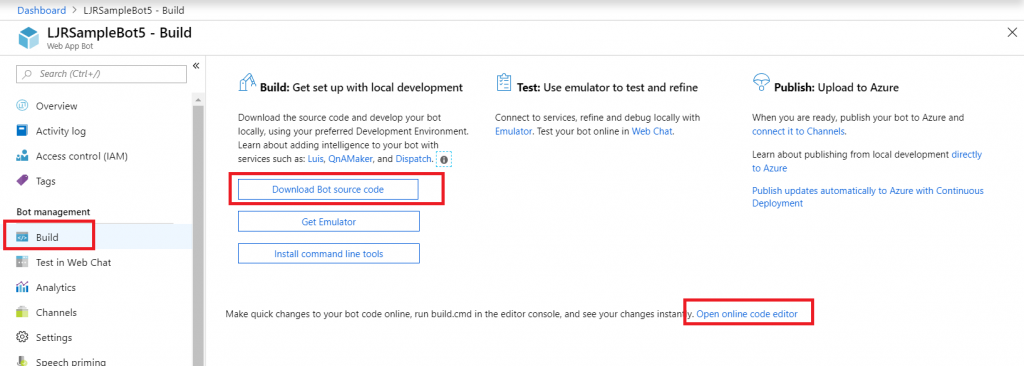
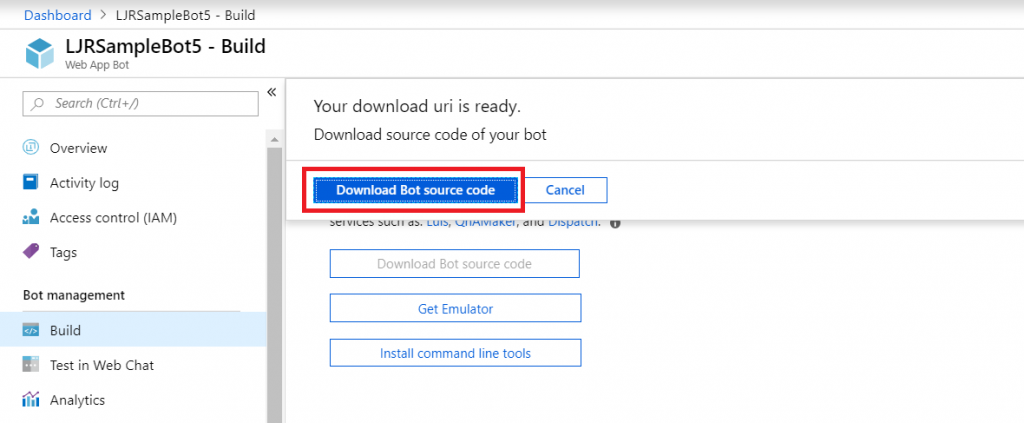
Select “Build” – you can use the online code editor or use an existing source repository and configure a continuous integration. I will be setting up a continuous integration – don’t click the link under “Publish”, it goes to an old resource. Click to download the source code – it takes a minute to generate a zip file for download.
Once the download link is available, download and extract the file – this will be the base of your project. Put it somewhere – in this example, I’ll be using a GitHub project. Extract the zip file and get the content into your source repository.
Return to your dashboard and open the App Service for your bot. Select the “Deployment Center”.
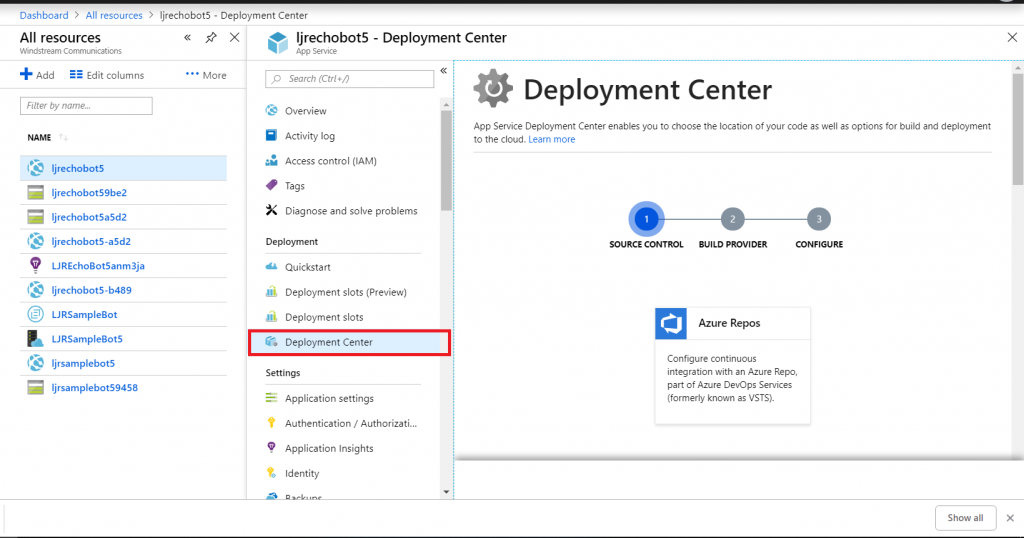
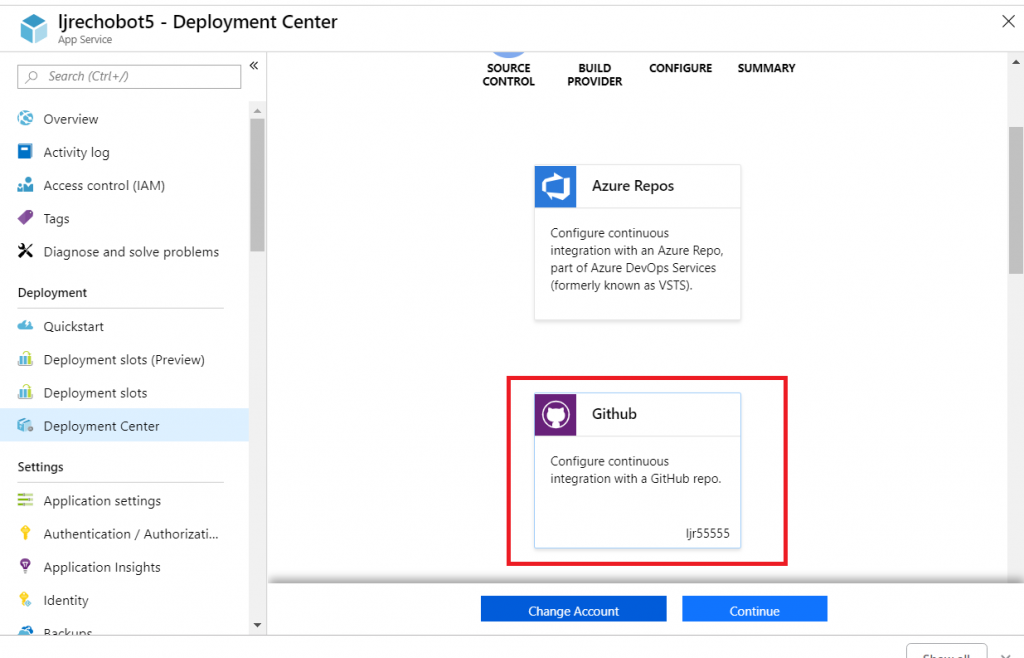
Select the appropriate source repository. When GitHub is used, you will need to sign in and grant access for Azure to use your GitHub account. Click “Continue” once the repository has been set up.
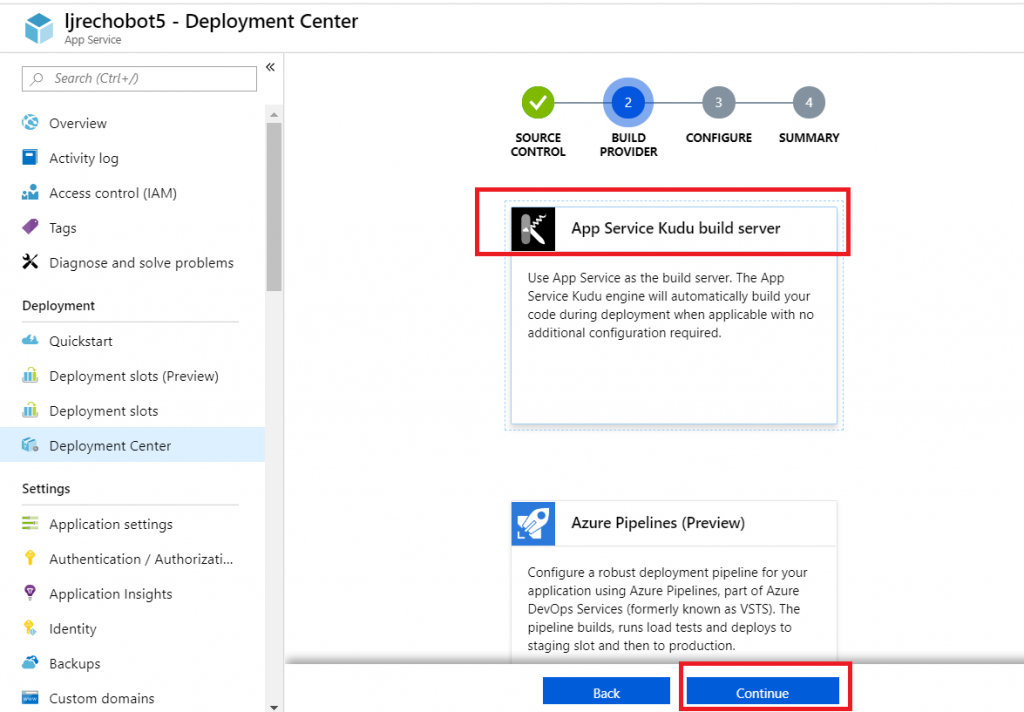
Select the build provider – Kudu or Azure Pipelines. Which one – that’s a personal preference. Azure Pipelines can deploy code stored in git (at least GitHub, never tried other Git services). Kudu can build code housed in Azure DevOps. Kudu has a debugging console that I find useful, and I’ve successfully linked Kudu up with GitLab to manage the build process elsewhere. Azure Pipelines is integrated with the rest of the Azure DevOps (hosted TFS) stuff, which is an obvious advantage to anyone already using Azure DevOps. It uses WebDeploy to deploy artifacts to your Azure websites (again, an advantage to anyone already doing this elsewhere).
The two build environments can be different – MS doesn’t concurrently update SDK’s in each environment, so there can be version differences. It’s possible to have a build fail in one that works in the other. Settings defined in one platform don’t have any meaning if you switch to the other platform (i.e. you’ll be moving app settings into a Build Definition file if you want to switch from Kudu to Azure Pipelines) so it’s not always super quick to swing over to the other build provider, but it might be an option.
I prefer Kudu, so I’ll be using it here.
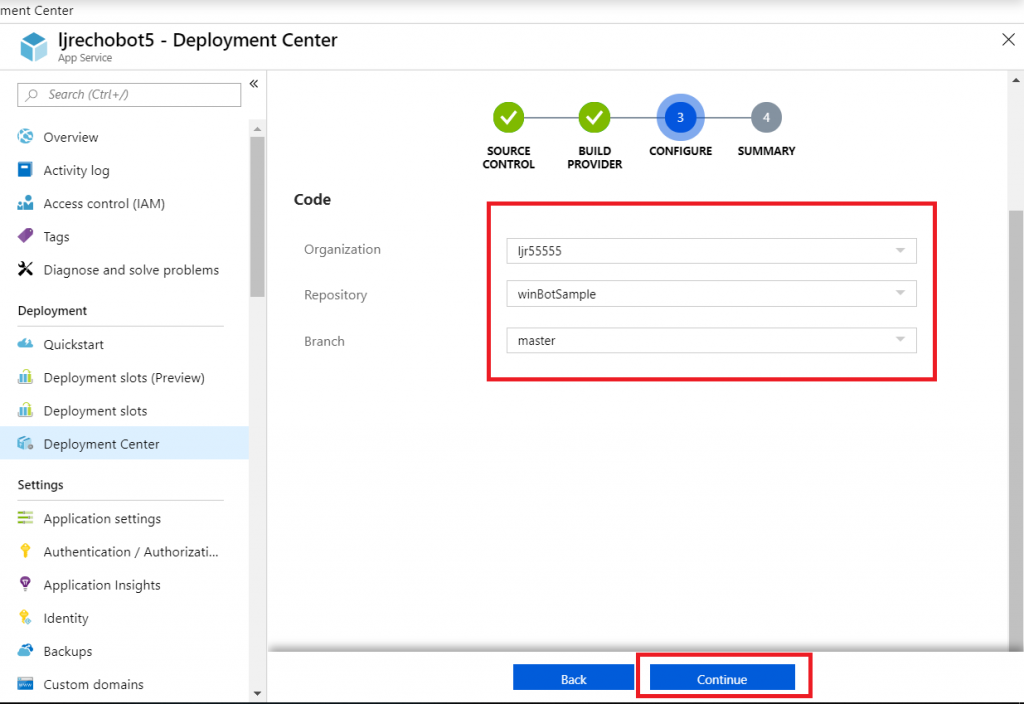
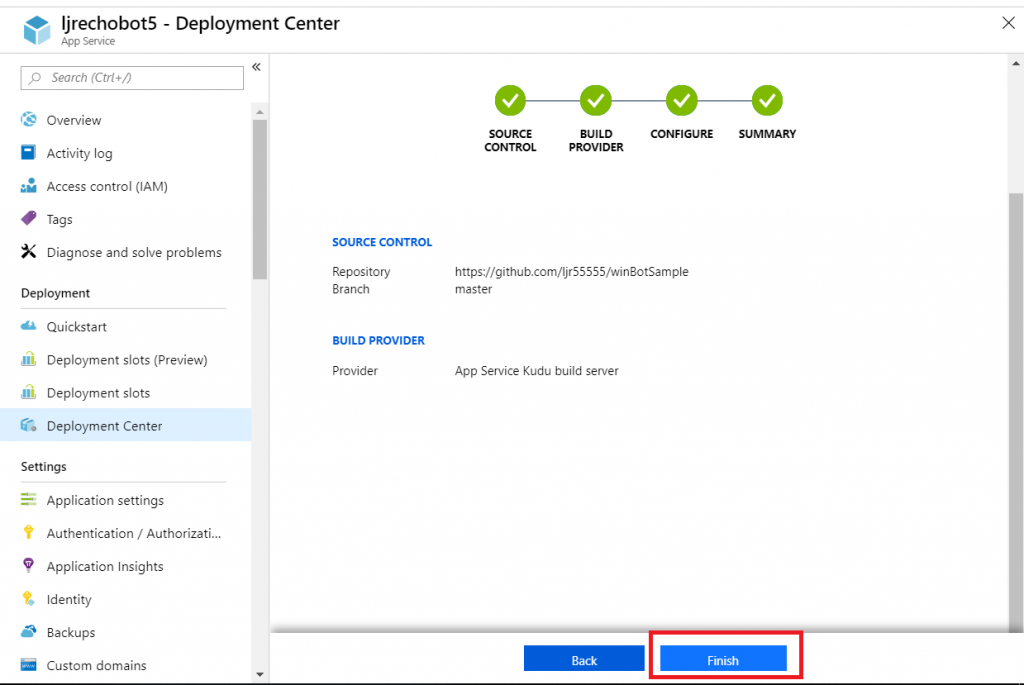
Select your repository name from the drop-down, then select the project and branch you want to use for deployment. In my repository, the master branch has functional code and there is a working branch for making and testing changes.
Review the summary and click “Finish”.
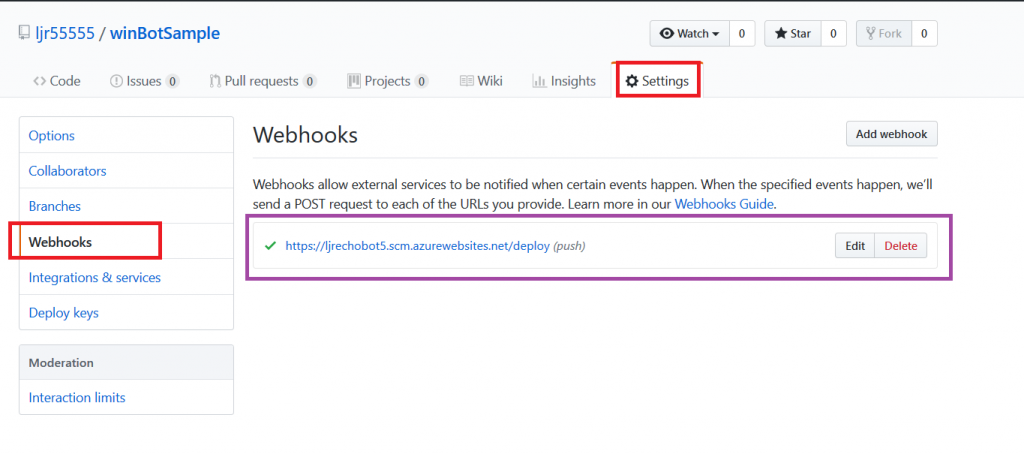
In GitHub, you confirm a webhook has been added to your project on push events. From your project’s settings tab, select “Webhooks” and look for a azurewebsites URL that includes your bot name. You can view the results of these webhook calls by clicking “Edit” and scrolling down to “Recent deliveries”.
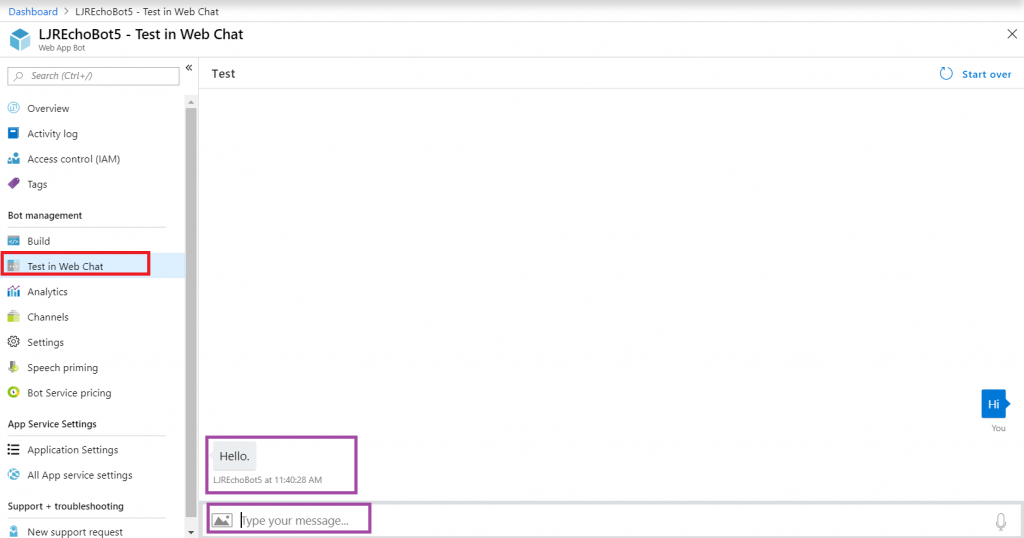
Add the interactions you want – information needs to be accessible from the Azure network, otherwise your bot won’t be able to get there. You can test your bot from the Azure portal to identify anything that works fine from your local computer but fails from the cloud. From the Web App Bot (*note* we are no longer in the App Service on the Azure portal — you need to select the bot resource), select “Test in Web Chat” and interact with your bot.
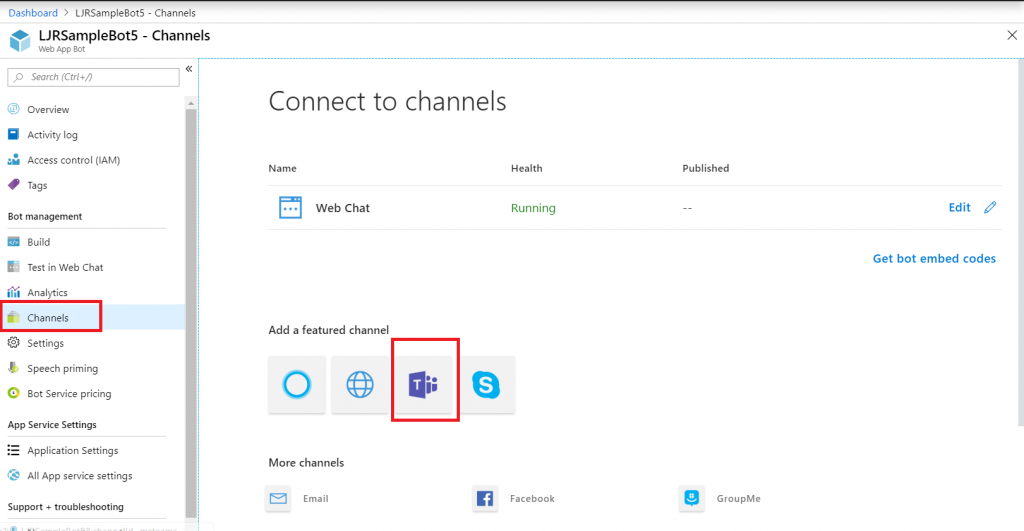
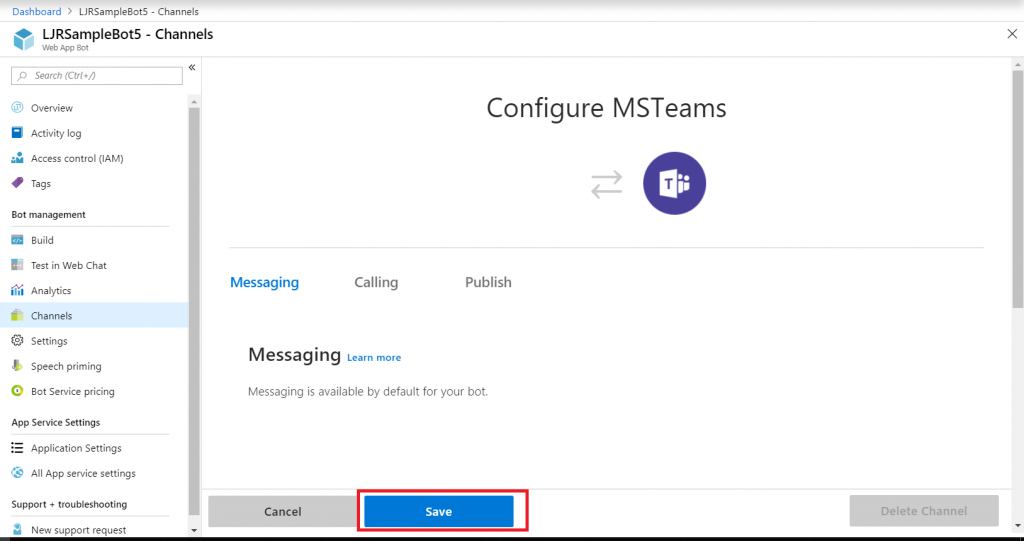
Once you have your bot working, you need to add the Teams channel to allow the bot to be used from Teams. Select “Channels” and click on the Teams logo.
There’s not much to set up for a bot – messaging is enabled by default. I don’t want IVR or real-time media functionality … but if you do click on the “Calling” tab. The “Publish” tab is to publish your bot in the Windows store – this might be a consideration, for instance, if you wanted to create a customer service interaction bot that enterprise customers could add to their Teams spaces (i.e. something you want random people to find and use). Since I am answering employee specific questions, I do not want to publish this bot to the Internet. Click “Save” when you have configured the channel as needed (in my case, just click ‘save’ without doing anything).
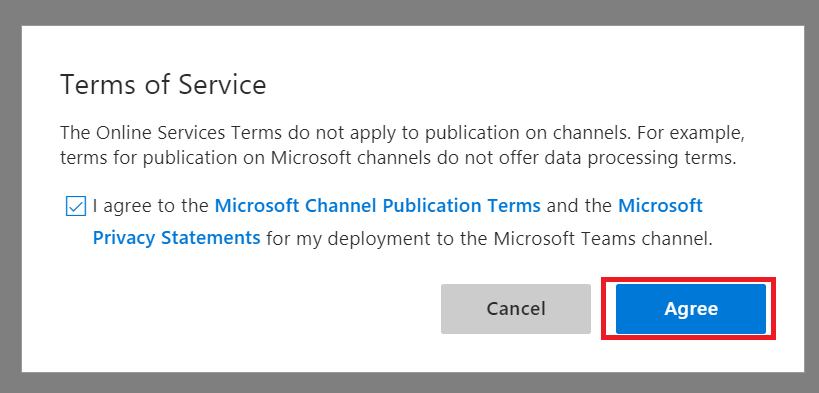
Review the publication terms and privacy statement. If these are agreeable, click “Agree”.
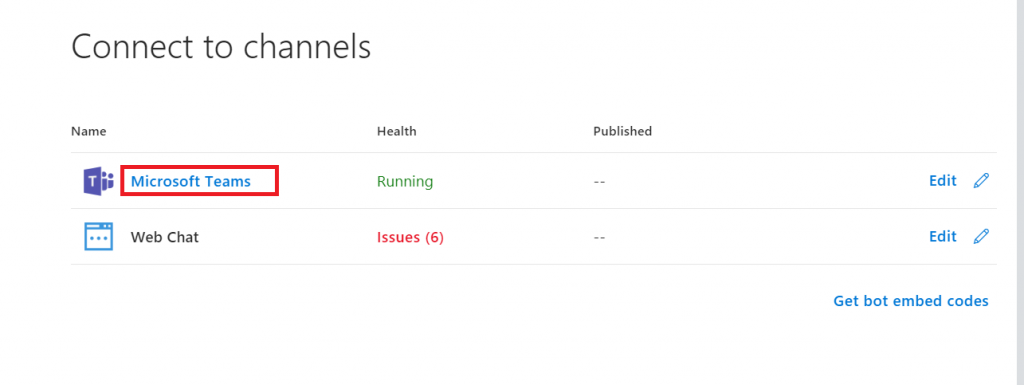
You’ll be returned to the Channels overview. Click on the hyperlinked “Microsoft Teams” – this will open a new URL that is your bot.
You can copy the URL here – others can use the same URL to use your bot. Either open the link in the Teams app
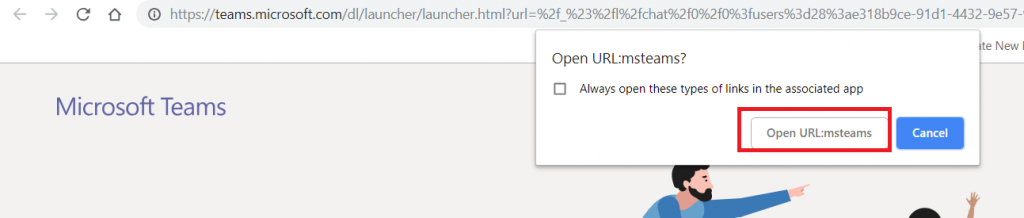
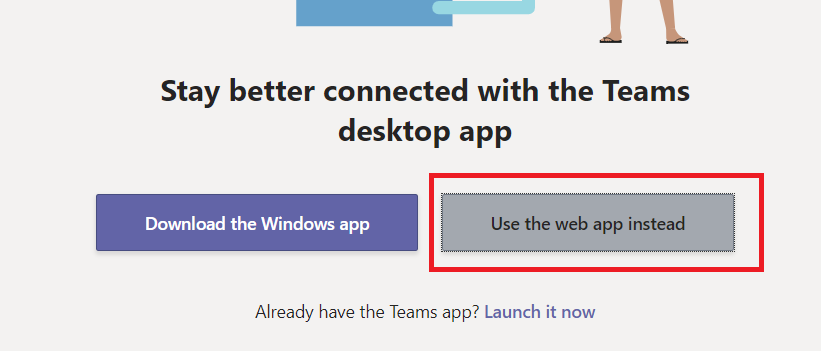
Or cancel and click “Use the web app instead” at the bottom of the screen.
Wait for it … your bot is alive!
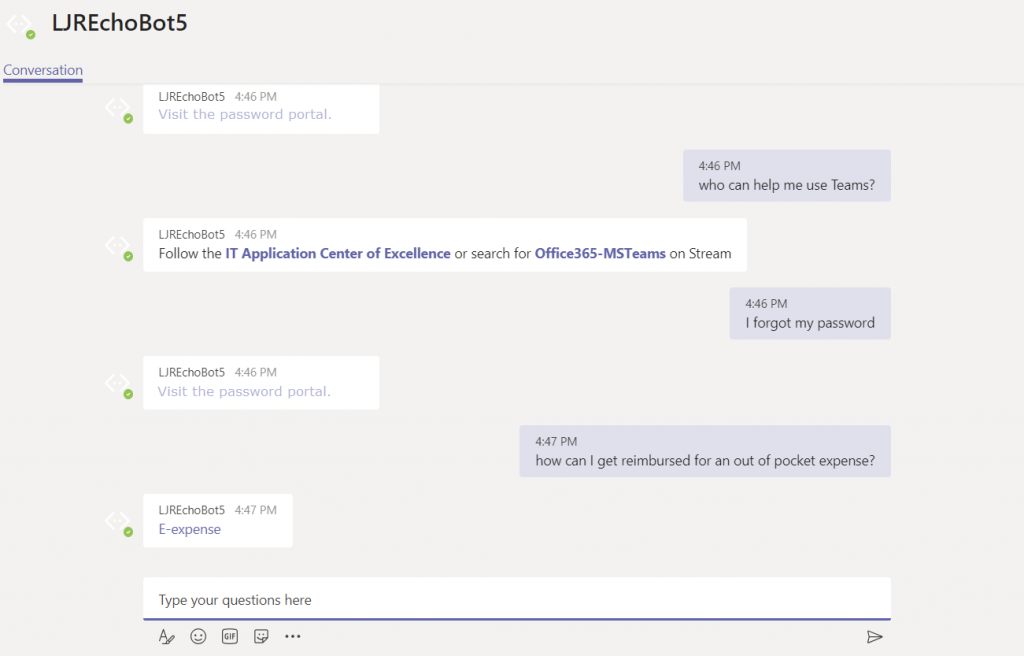
That’s great … how do I interact with company resources? Quick answer is “you don’t” – this bot uses resources available on the Internet. To interact with private sources, the magic cloudy Microsoft network must be able to get there. Personally, I’d host my own bot engine. Expose the bot to the Internet and create a “Bot Channels Registration” instead.