Tag: ms teams

Did you know … you can post announcements in Teams?

Teams announcements are another way to bring attention to a specific post. This doesn’t address the desire to pin a post so it’s always visible in the channel (click the link and vote if that’s something you want to do too).

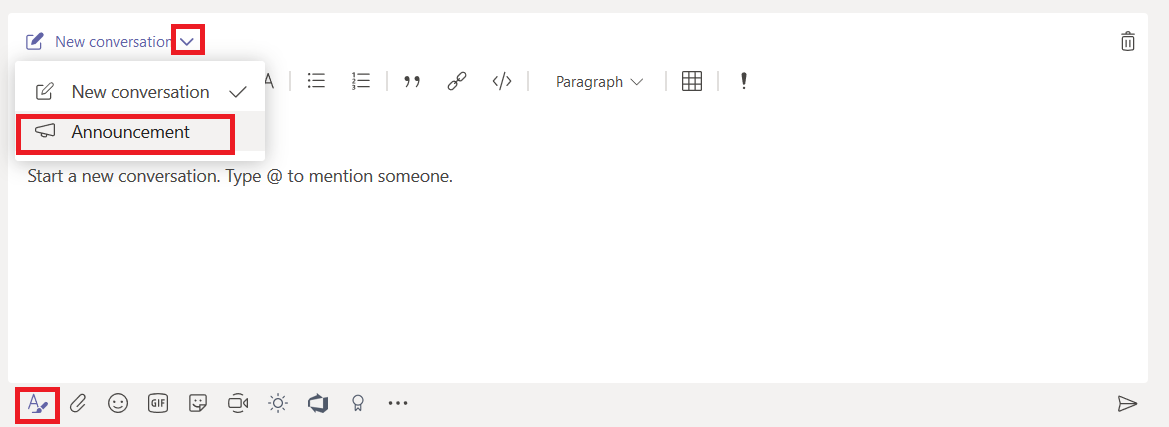
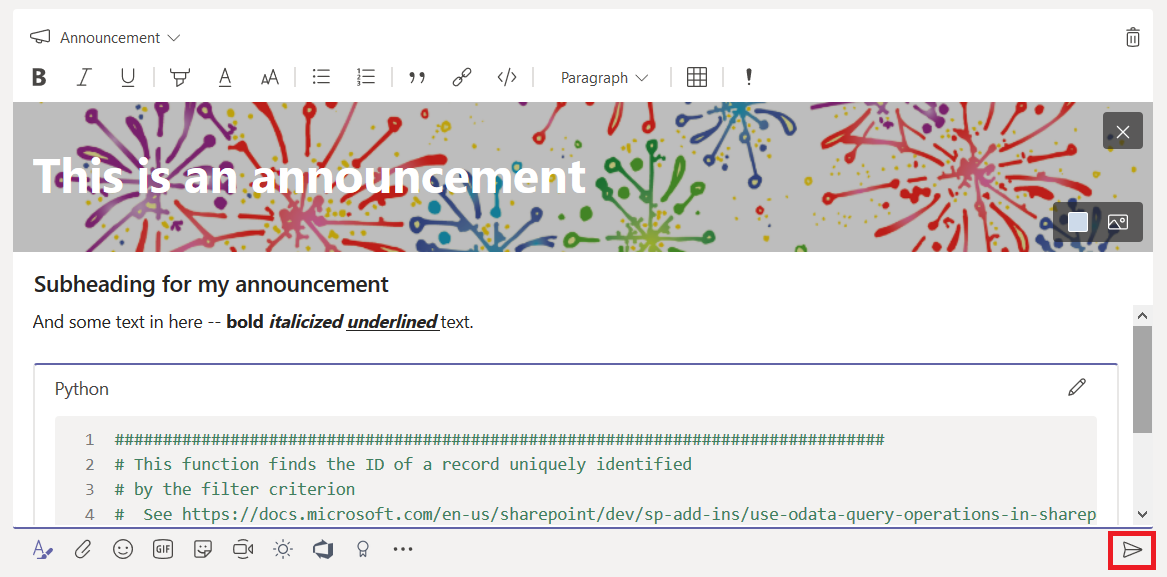
When you are in the advanced editor (click “Format” or use Ctrl-Shift-I), you will see a drop-down to change conversation posts to an announcement.

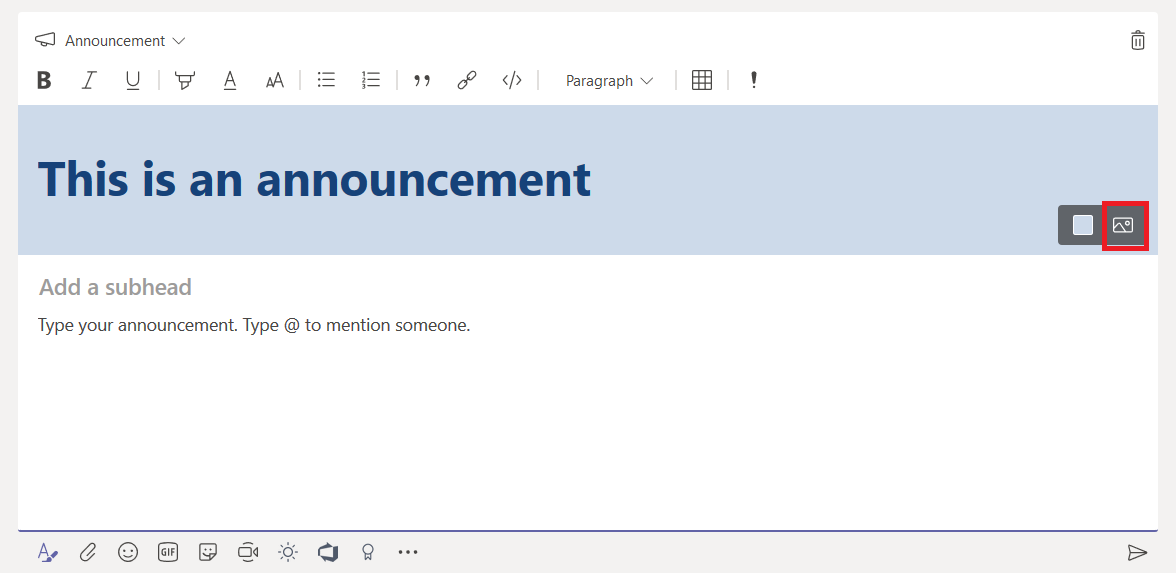
When creating an announcement, the editor will have a banner at the top. You can put text in the banner and customize the banner background. Click either the color selector or the image selector in the bottom right-hand corner of the banner.

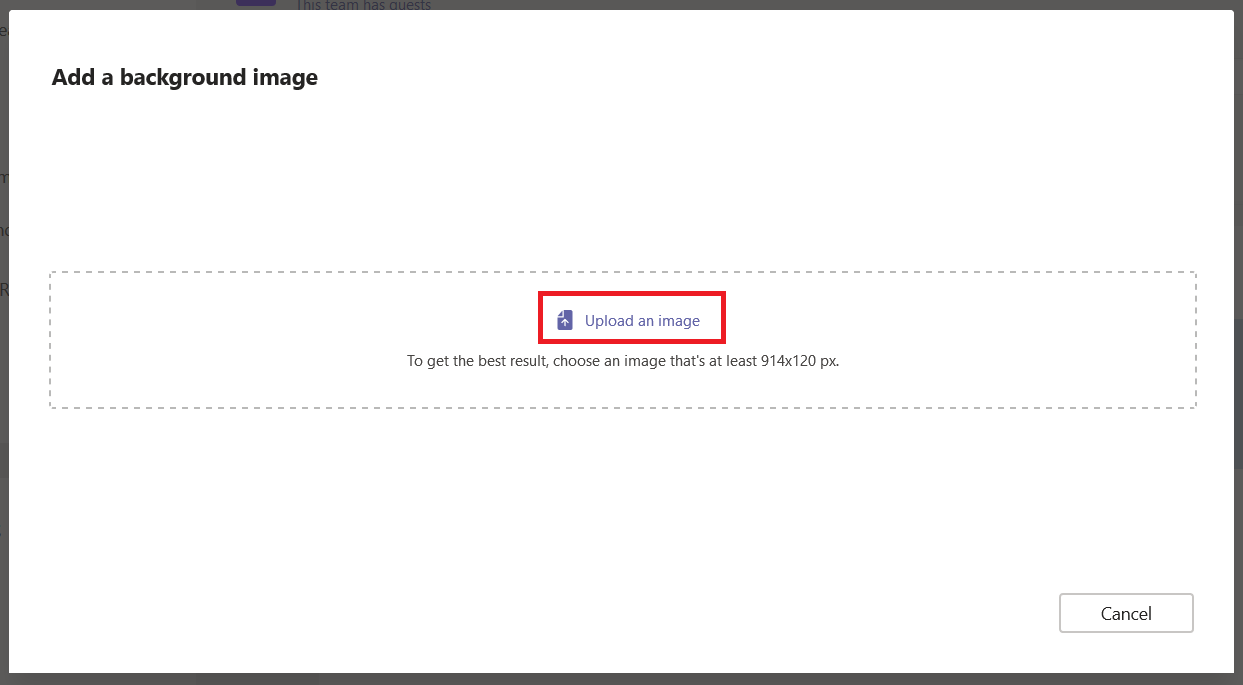
You can upload a custom image – you’ll want something that is a long, horizontal rectangle. Select “Upload an image” and select the file you want to use as the background.

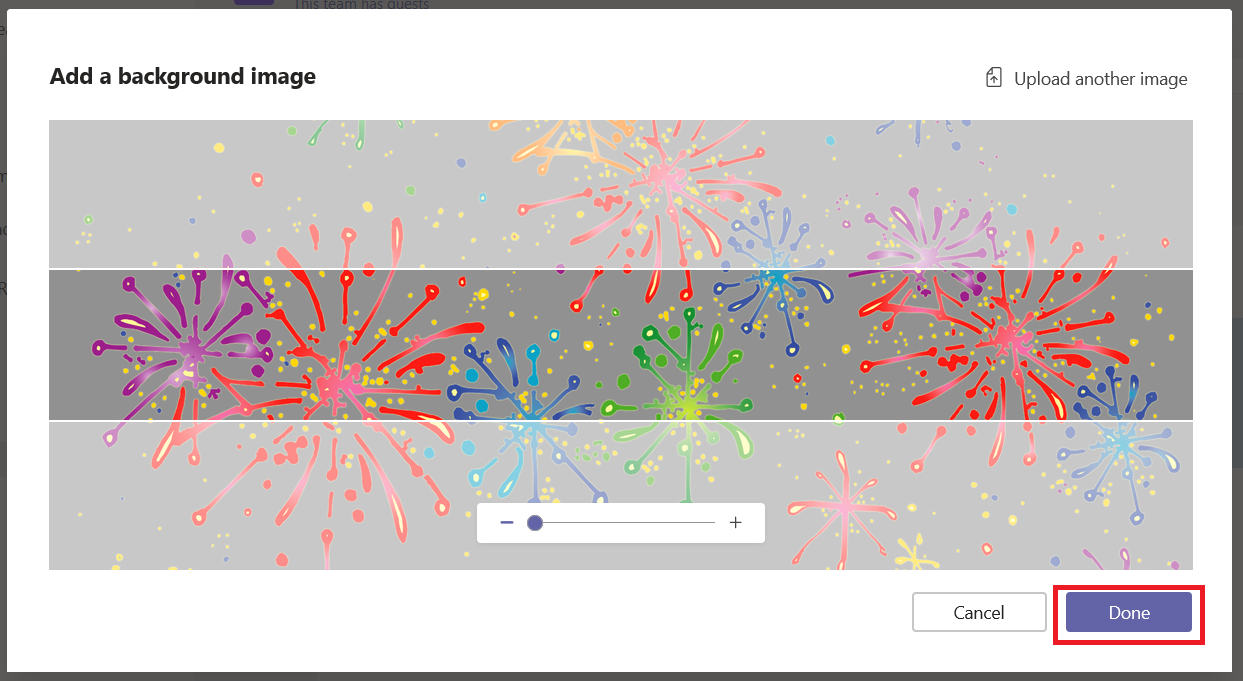
You’ll probably need to crop the image – you can adjust which portion of the image is shown and zoom into the image as needed. Click “Done” to accept your crop selections.

Compose the rest of the message as normal – you can add a sub-heading and any of the message content available in regular posts. Post the announcement

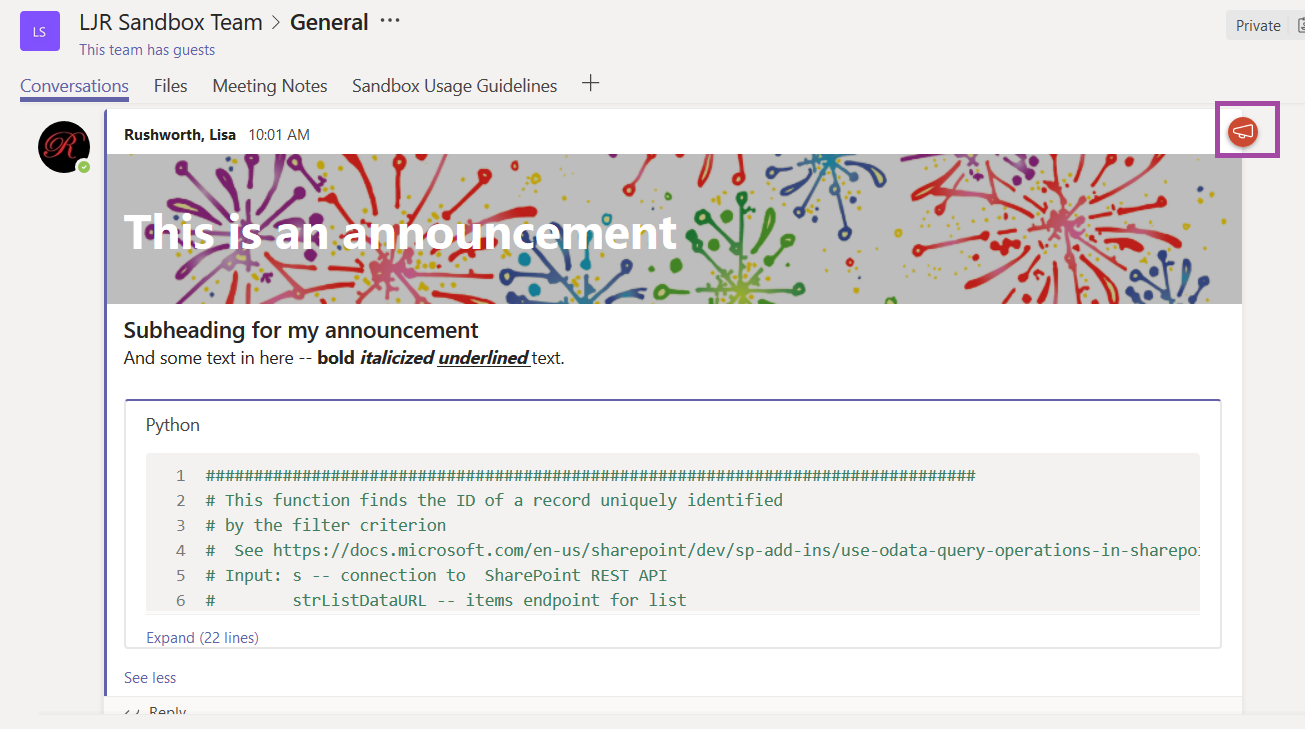
The post will have a little megaphone logo (this doesn’t show up as a filter option yet, but I expect it will be added in the future) and the banner will make your post stand out in the conversation listing.

They make your post stand out with a caveat – just like marking all of your posts as important, announcements lose their efficacy when every post is an announcement. Use sparingly!


Did you know … you can share your screen from the Teams web client in Chrome?

I use the Teams web client as my primary Teams application – I like it, but it’s also important to be able to identify where the web client falls short of full Teams functionality. There is one big “missing” feature to me – screen sharing. I can view shared screen, but I cannot remote control shared screens and cannot share my own screen.

But now you can share your screen in a Teams web client. You have to schedule a meeting, and you still cannot perform remote control operations in the web browser. But it’s awesome to be able to show someone what I’m working on or let a tech support engineer follow along as I reproduce an error.

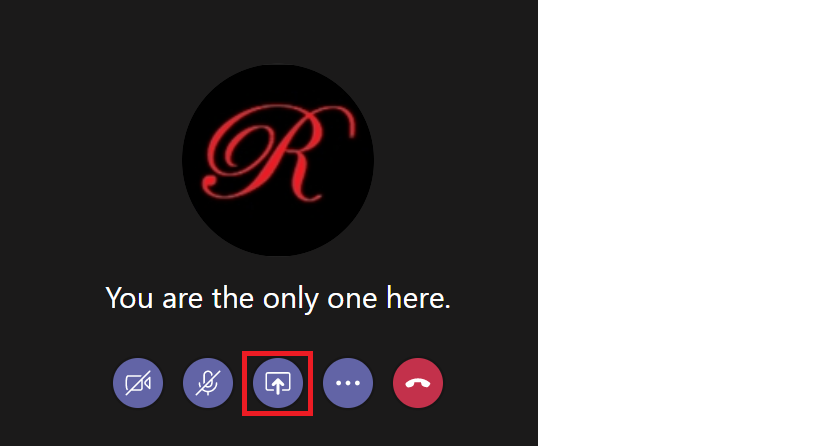
To share your screen from a Chrome browser, first open https://teams.microsoft.com in Chrome. Schedule a meeting and join it. Open the sharing control panel.

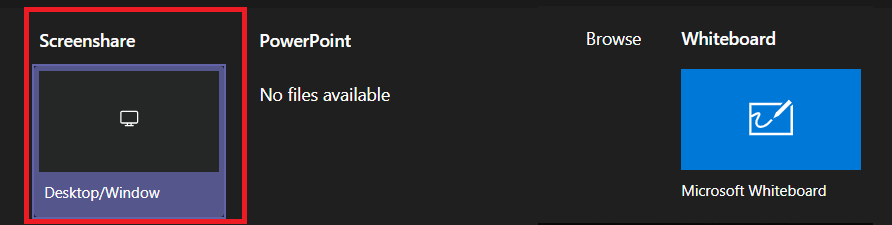
Select “Screenshare”

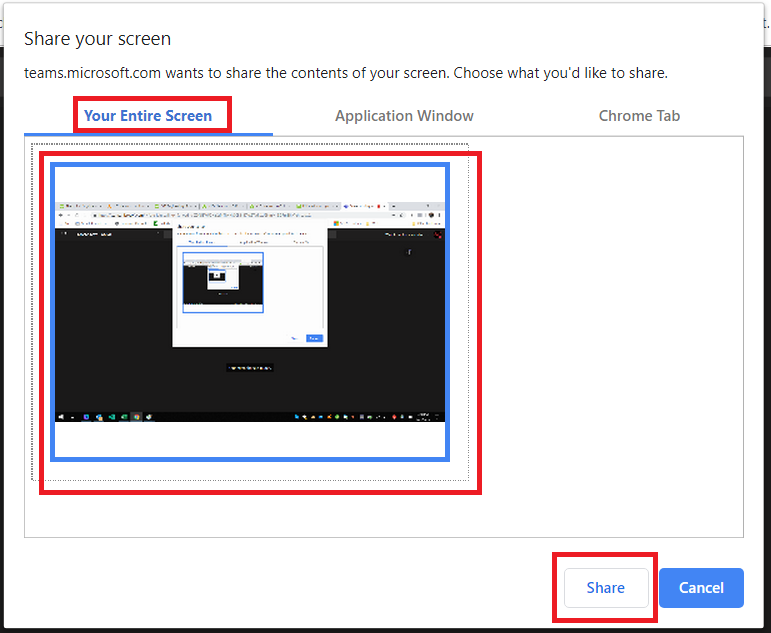
Select the appropriate tab to share your entire screen, a single application, or a single Chrome tab. Select the screen/application/tab that you want to share and click “Share”.

Voila! You are sharing your screen. Click “Stop sharing” when you are done (or just disconnect from the meeting).


Did you know … you can “clean up” your Teams chat history?

My inbox has 7,582 messages in it. This fact doesn’t bother me at all because “Unread: 2” indicates what still needs to be addressed. I mark a message as unread to keep them in my “needs to be worked on” queue, so seeing thousands of messages in my inbox doesn’t feel like an overwhelming pile of outstanding requests.

Some people move messages from their inbox – either deleting the message or sorting it into an appropriate folder – and, for them, the item count is their “needs to be worked on” list. My mom is one of those people – she gets a little stressed out just seeing the pages (and pages, and pages!) of messages in my inbox.

I mention this because it never bothered me that the Teams chat list is cluttered with the last 30 days of private chats, chats from within meetings, Planner notifications. Nothing is in bold, there’s no activity indicator on the Chat tile … to me, that says “you’re all done here”.

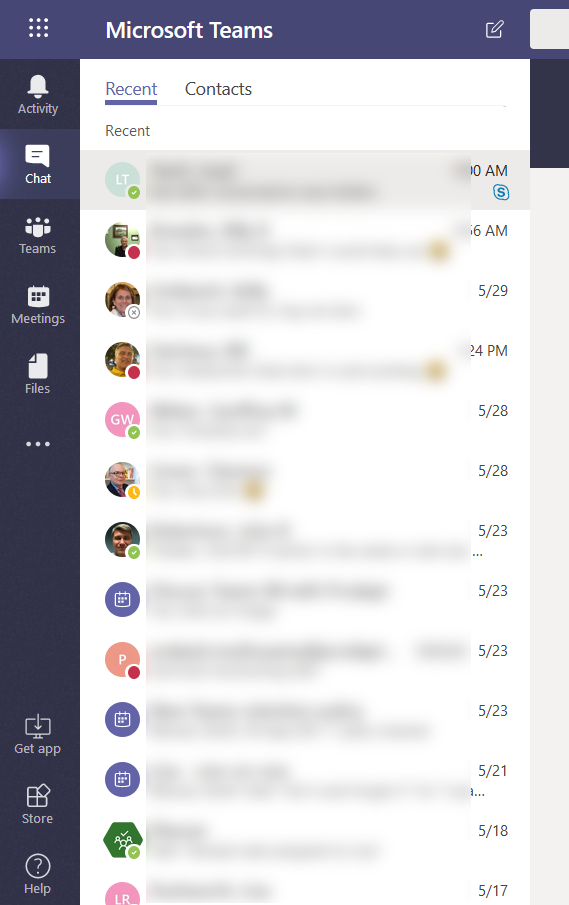
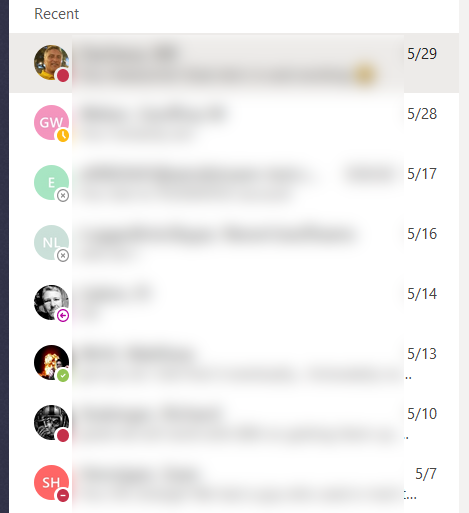
But that’s not true for everyone. Some people see the pages of conversation history and subconsciously see a bunch of messages they still need to address. Or they see clutter — “when you’re done with it, put it away” and this isn’t away! If you don’t like to have dozens of finished conversations hanging out for a month, you can hide them. Hiding conversations does NOT delete the messages – if you receive a new message from the individual or address a new message to them, your previous chat history will still be there. Hidden chat messages are still displayed when you search for information. But hiding chats reduces the number of “recent” conversations displayed in Teams.

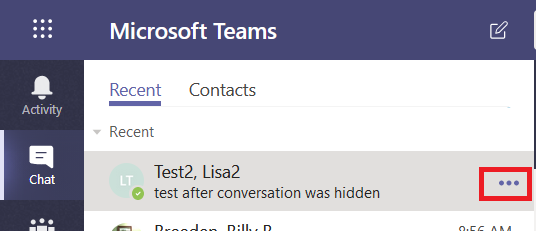
To hide a conversation, move your mouse over a listing and click the ellipsis which appears.

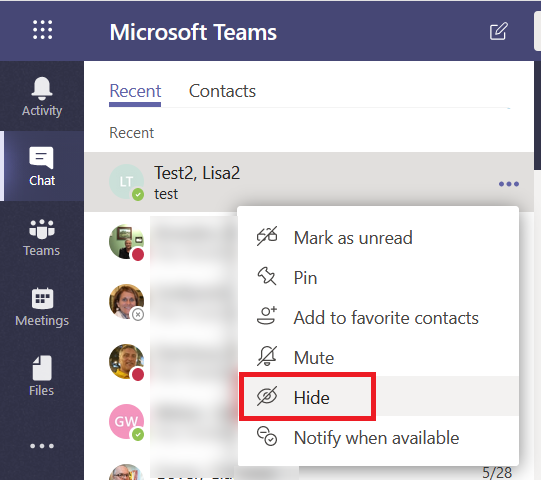
Select “Hide” from the menu.

The hidden chat record will no longer be listed in your recent conversation history. Repeat as needed with the rest of your chat history.

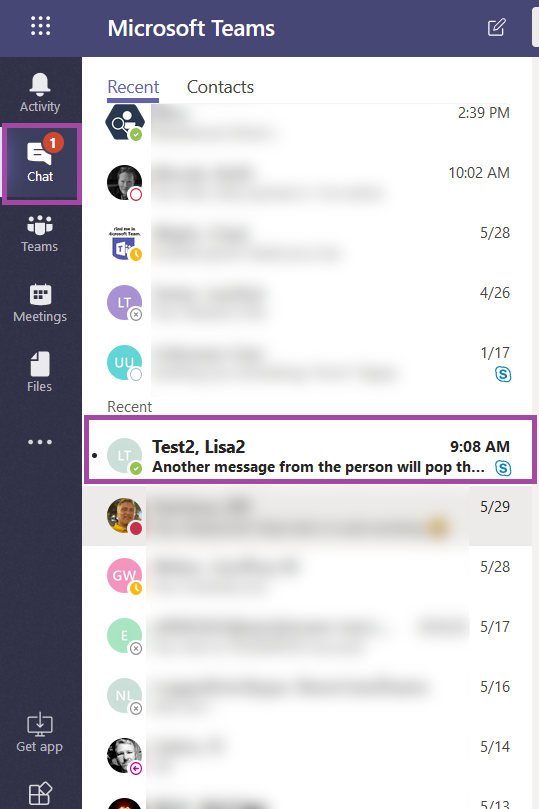
If the person sends you a new message, you will see an activity indicator on the “Chat” tile and the conversation will pop back into your recent conversation listing. If you address a new chat message to the person, the conversation will pop back into your recent conversation listing. You can hide the conversation again when you’ve finished the discussion.


Did you know … the Teams mobile client lets you configure you time?

Mobile access to the company’s communication platforms is convenient – and you can use Teams on your Android or iOS device. A training class or a trip out to a customer’s site no longer means you are disconnected from the day’s routine discussions. But sometimes I want to disconnect – watching my daughter’s gymnastics performance, my husband’s birthday dinner, listening to a band at the local club, painting en plein air at the local park. Oh, and certainly dark-o-clock when I’m sleeping. Configure “quiet hours”!

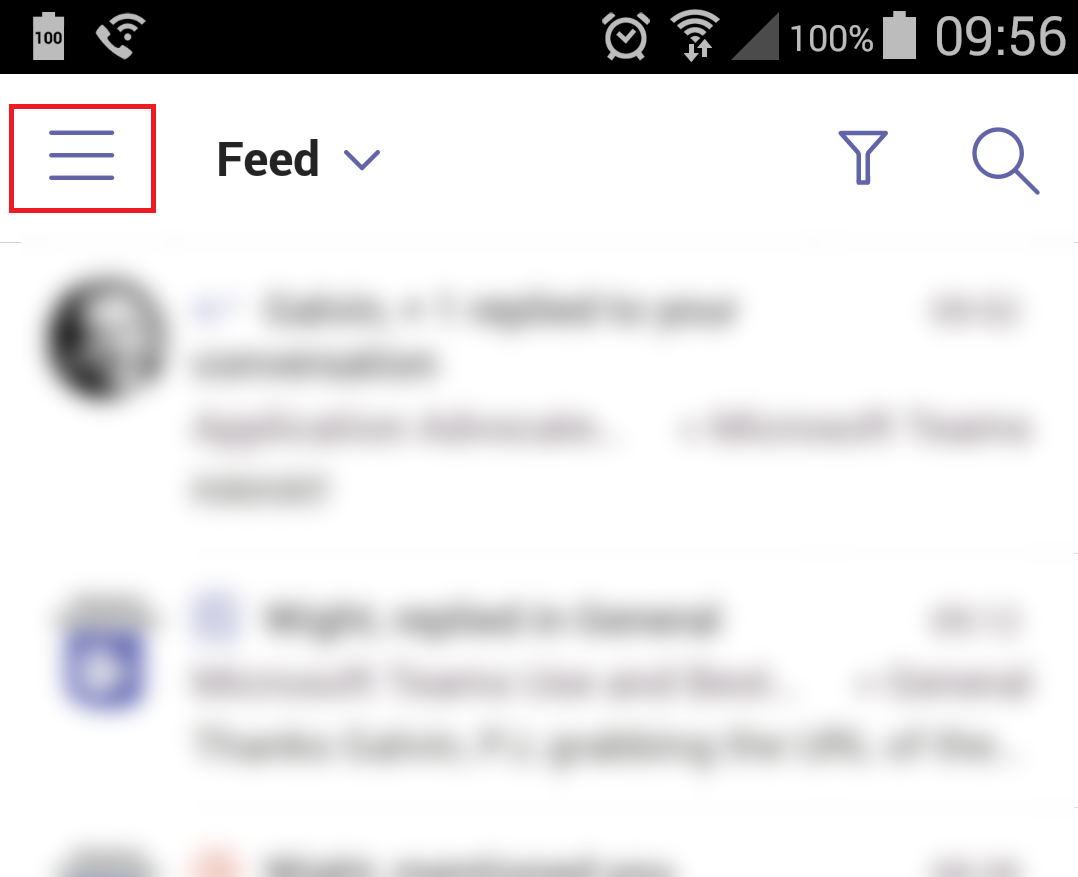
Tap the hamburger menu in the upper left-hand corner of the screen.

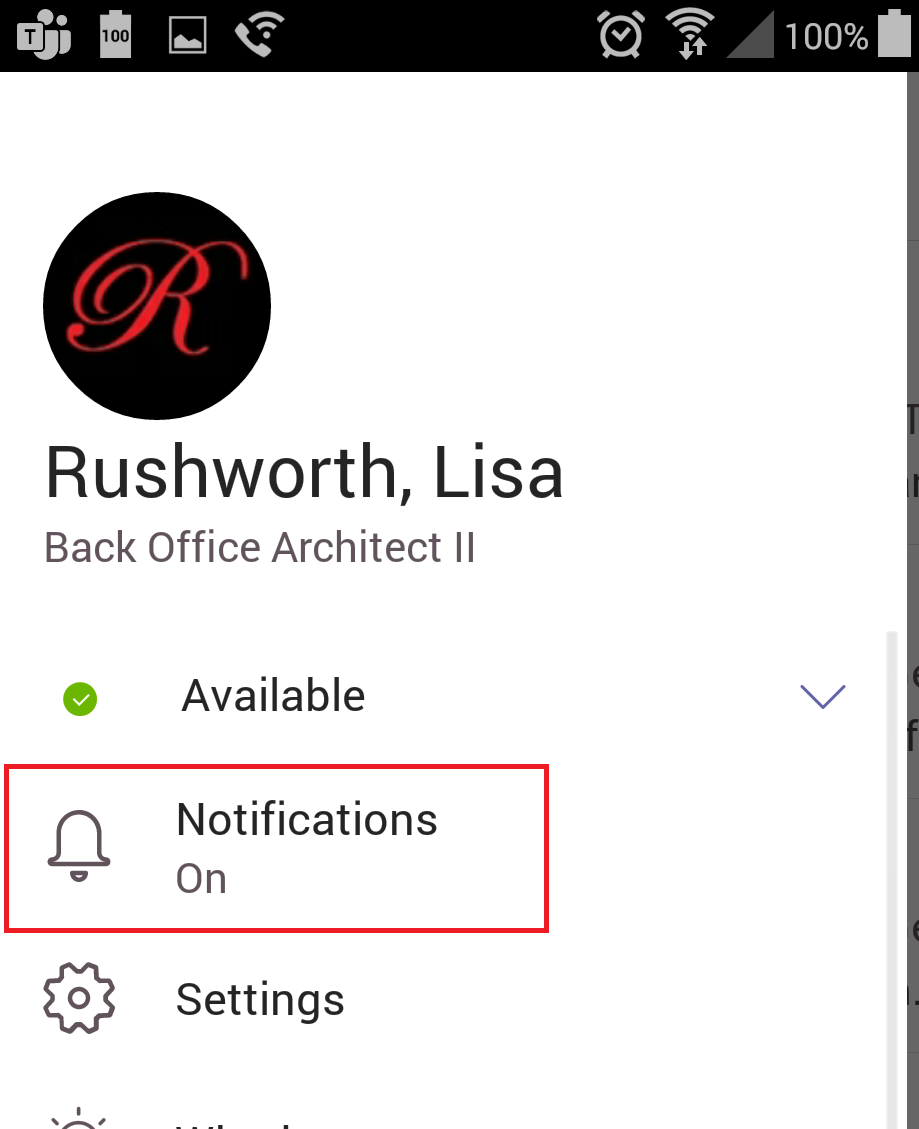
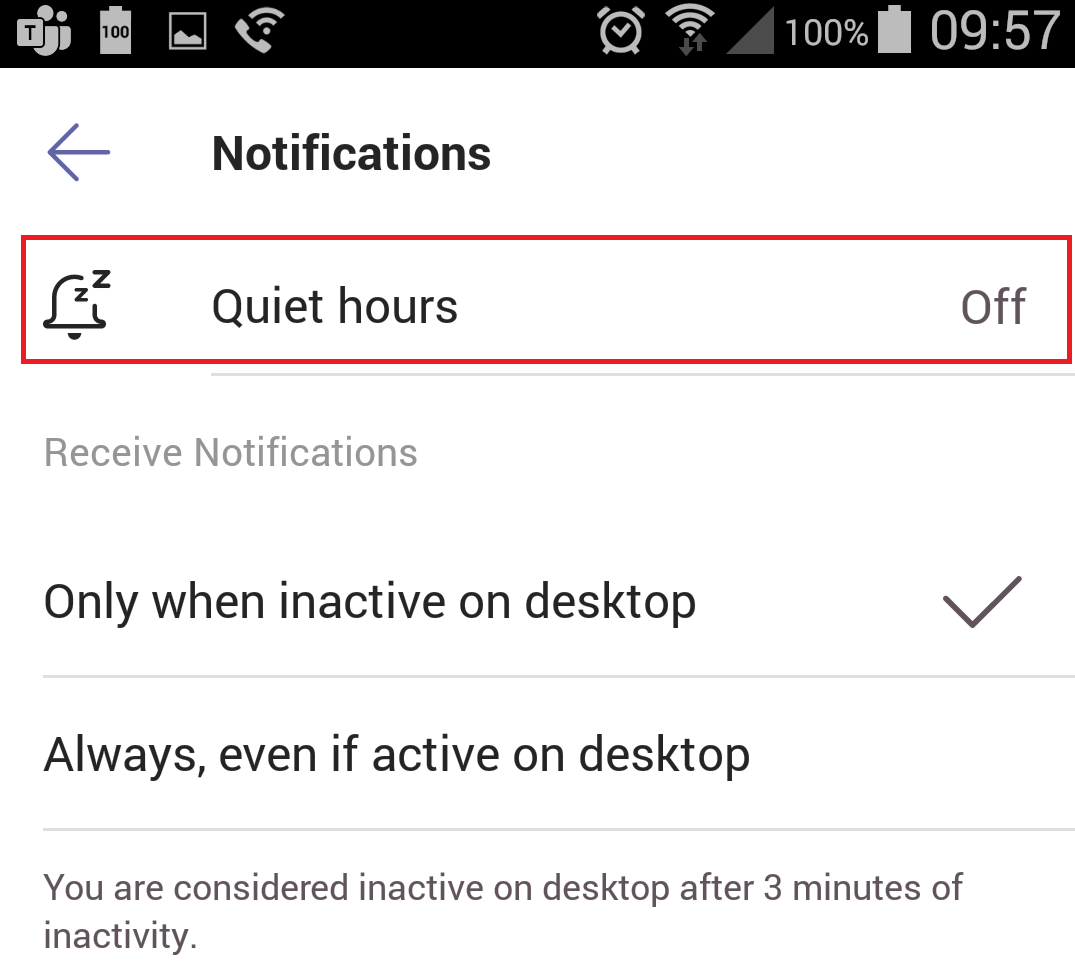
Tap “Notifications”

Tap “Quiet hours”

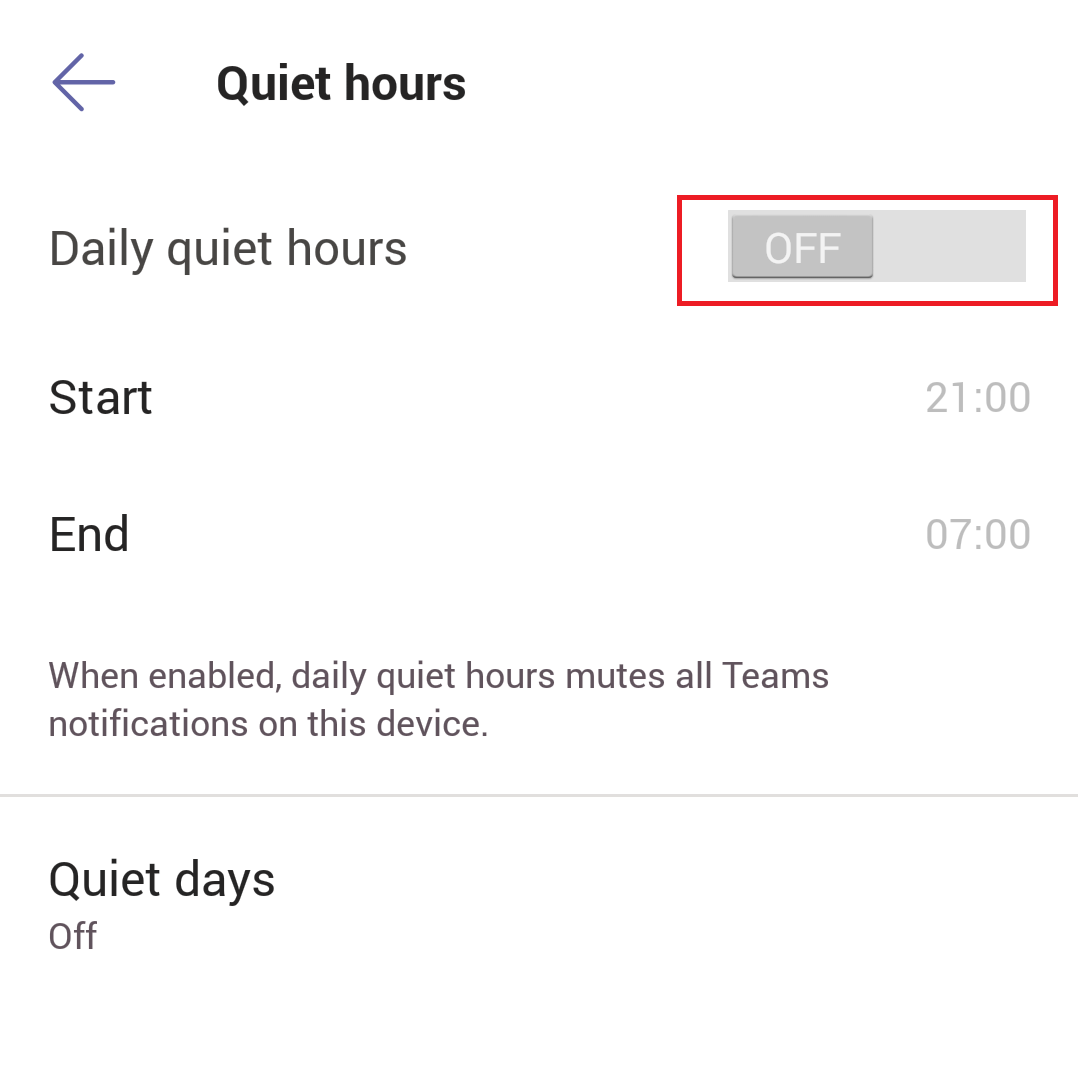
Move the “Quiet hours” slider to ‘on’

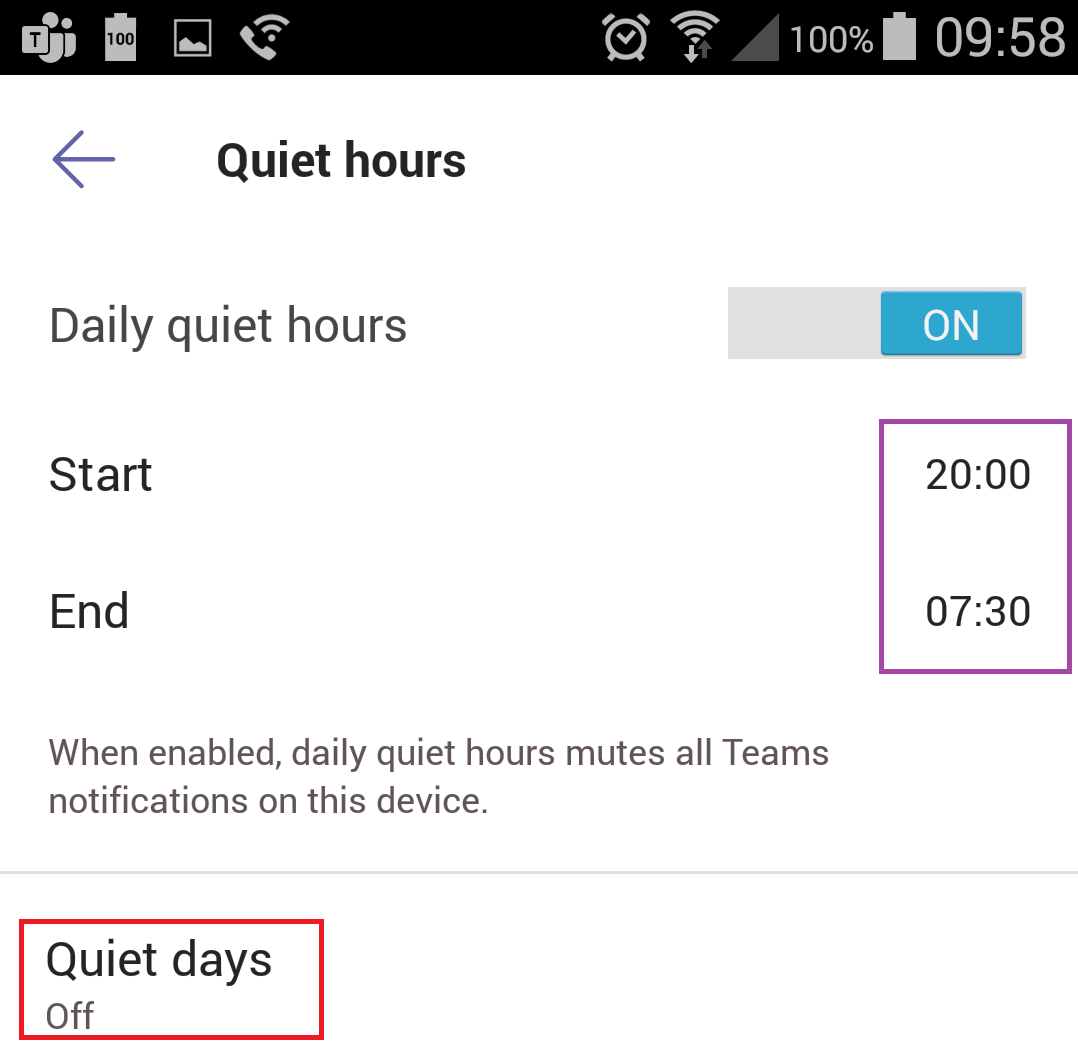
Select the times when you want Teams notifications to stop and resume. If you want to disable Teams notifications for entire days (regularly scheduled days off or temporarily for vacation days), tap “Quiet days”

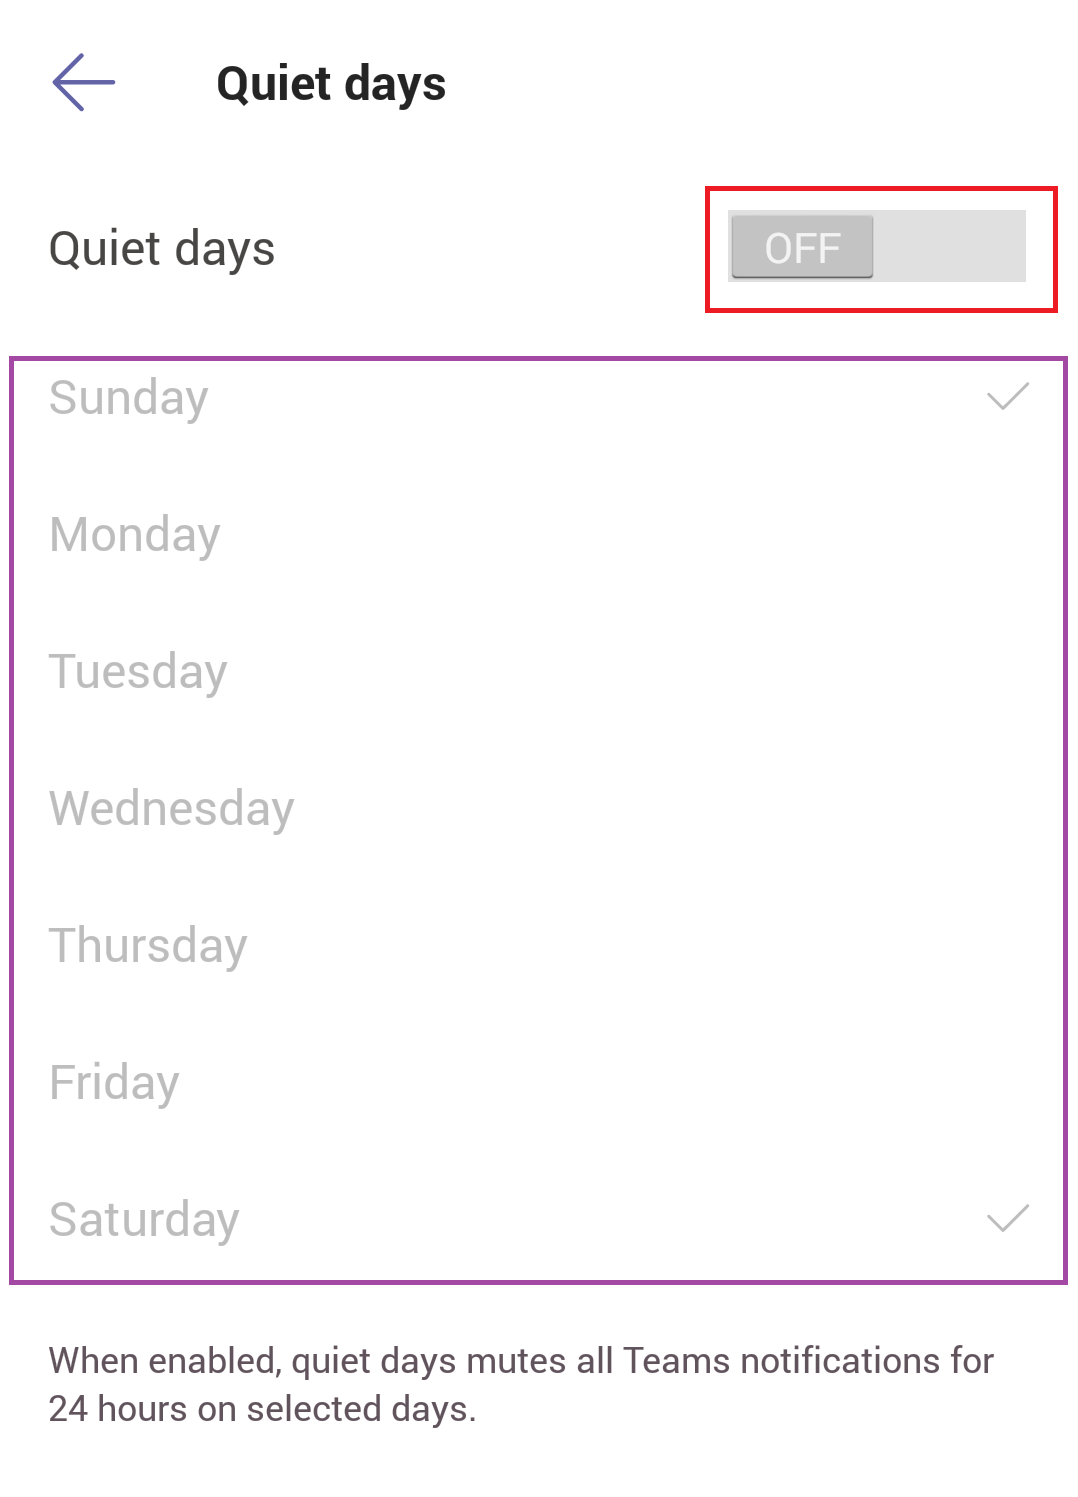
Move the “Quiet days” slider to “On” and tap the days during which you wish to suppress notifications.

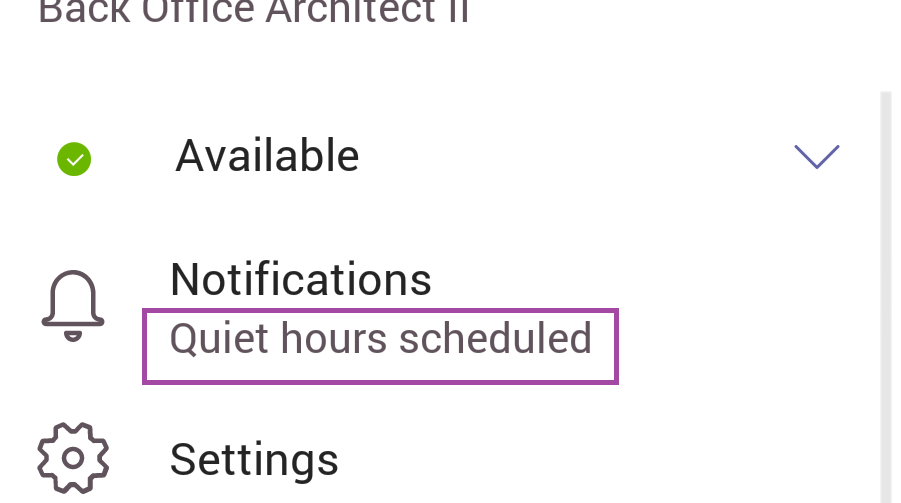
Return to the menu and you will see that quiet hours are scheduled.

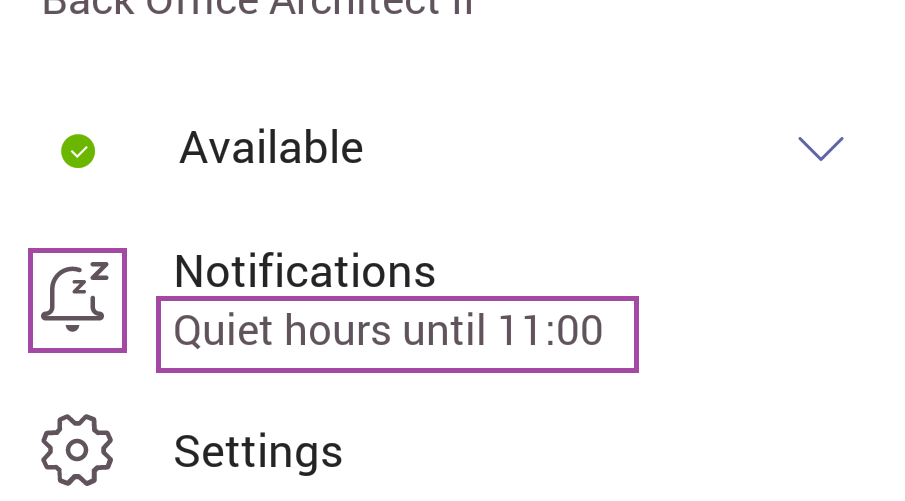
During quiet hours (or days), the notifications logo will indicate that notifications are disabled and tell you when notifications will resume.

The hamburger menu on the Teams app will also indicate that notifications are temporarily suspended.


Did you know … you can use Microsoft’s Whiteboard in your Teams meetings?

Microsoft Whiteboard, in Teams, is currently a public preview. Like other previews available in the Office 365 ecosystem, there will be glitches and things that don’t work properly. If something isn’t working quite right, turn off the preview and verify the problem persists before reporting an issue. You can submit feedback directly to Microsoft through their UserVoice site, but previews are not supported by Microsoft.

Now that the warning bit is out of the way – we’ve been using the Whiteboard for a week and the only oddity I’ve encountered occurs when both a Whiteboard and desktop are shared simultaneously. You must keep minimizing the Whiteboard to view the shared desktop.

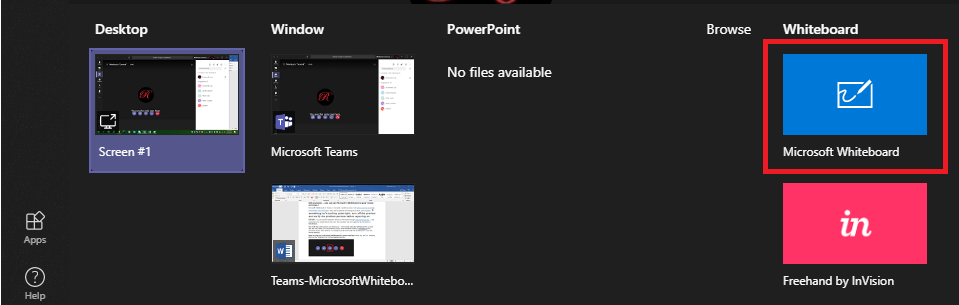
How do you use a Microsoft Whiteboard in your meeting? When you are in a meeting, click on the “Sharing Tray” in the meeting tool bar.

In the “Whiteboard” column, select “Microsoft Whiteboard”

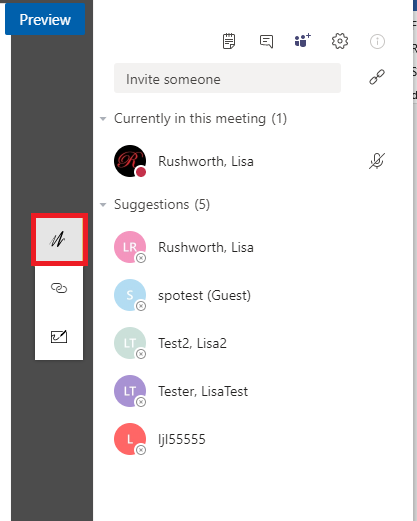
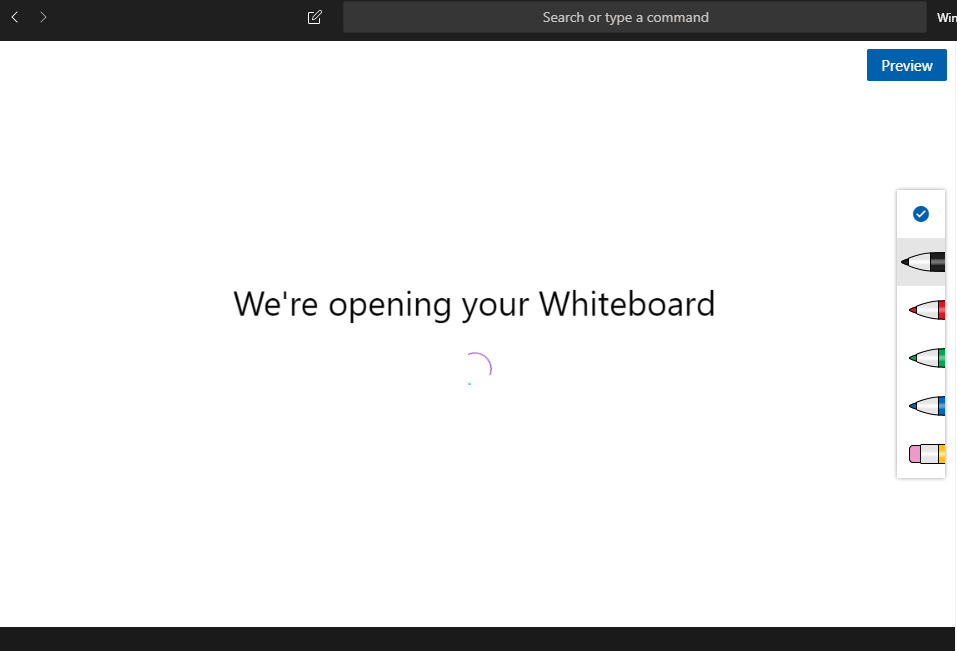
A whiteboard will be opened and shared with everyone on the call. To draw on the Whiteboard, select “Inking mode”

Click on a pen (or the eraser) along the right-hand side to select a pen color.

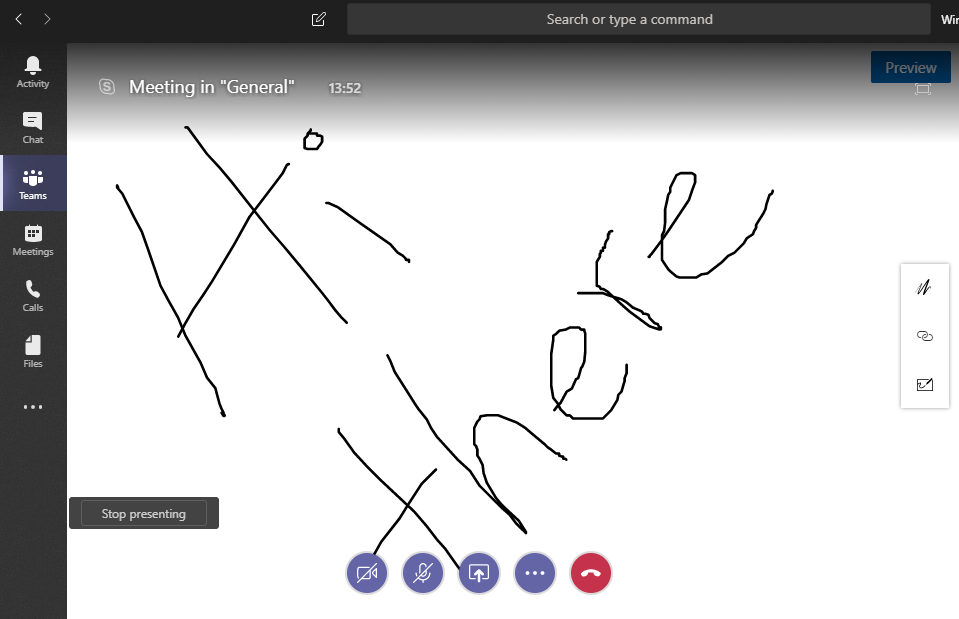
Draw on the screen. Click on the blue check-mark to leave inking mode. To close the whiteboard, click “Stop presenting”.

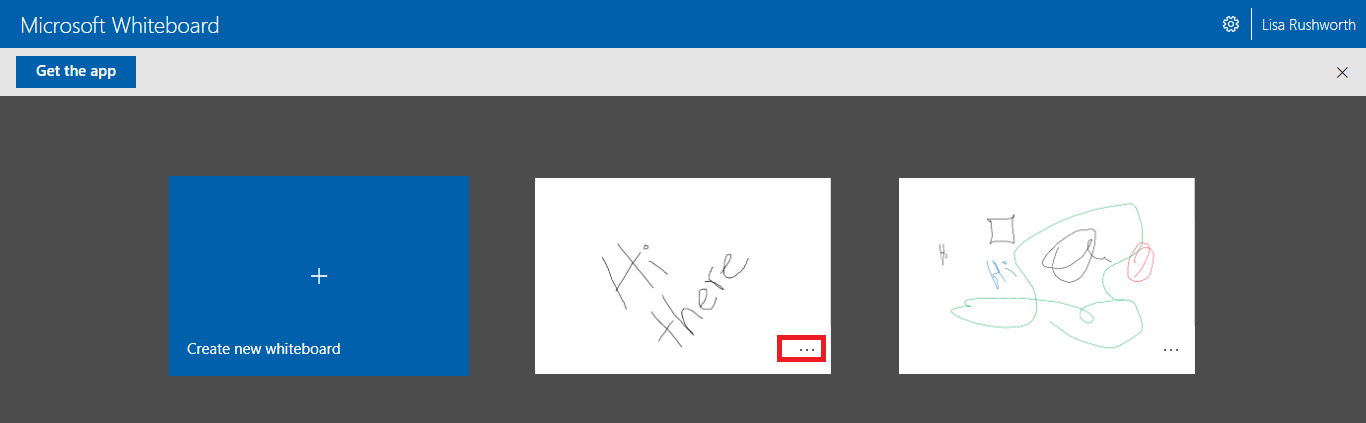
After the meeting, how do you access the Whiteboard? Visit https://whiteboard.microsoft.com – the Whiteboard will be stored for the person who initiated the Whiteboard in the meeting. To share it with others who had attended, click the ellipses on the Whiteboard preview.

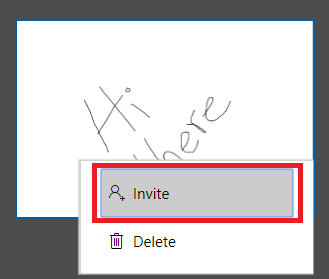
Select “Invite”

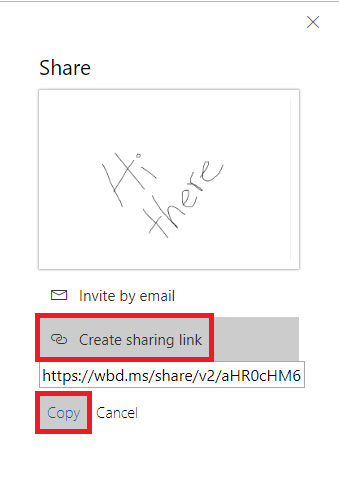
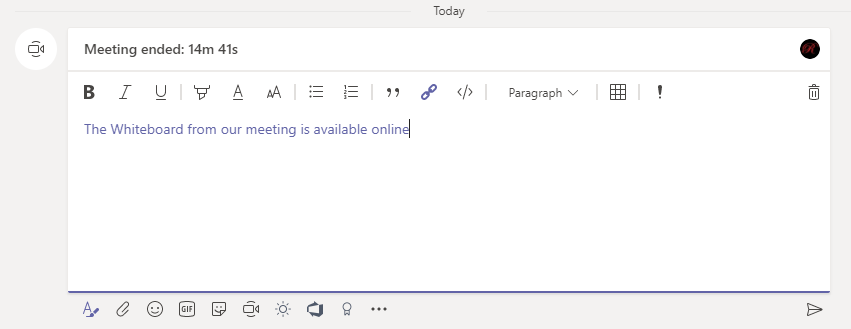
Select “Create sharing link” and paste the link into the Teams meeting chat.

Team members can use the link to view the Whiteboard.

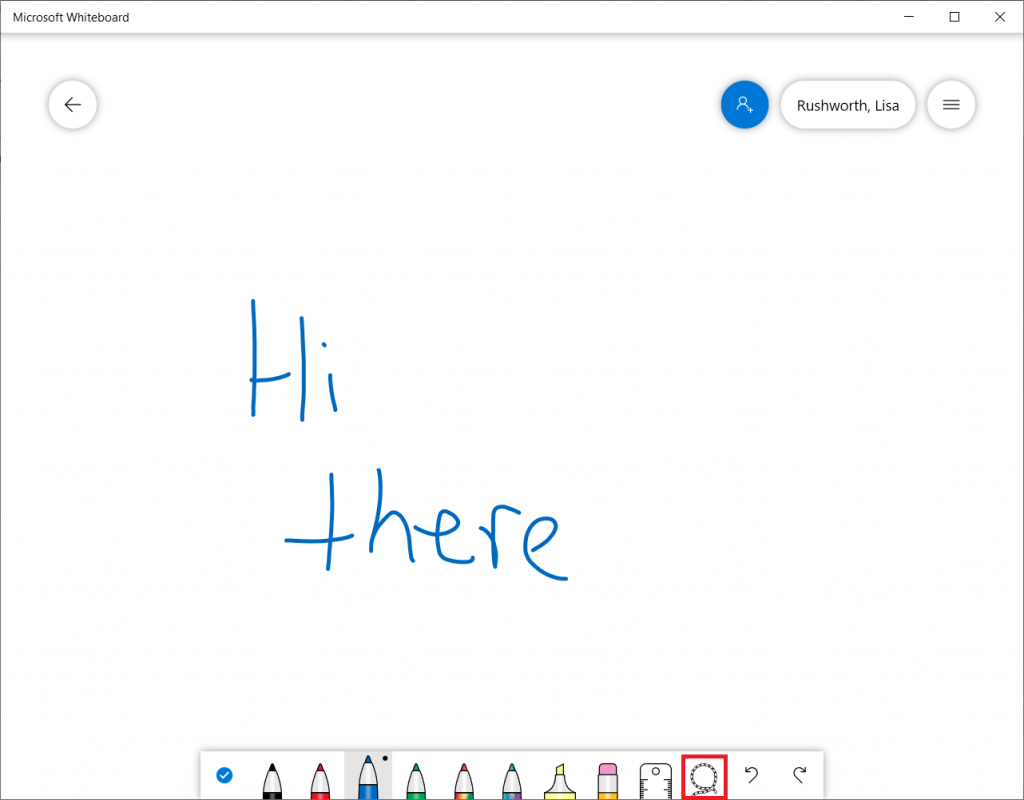
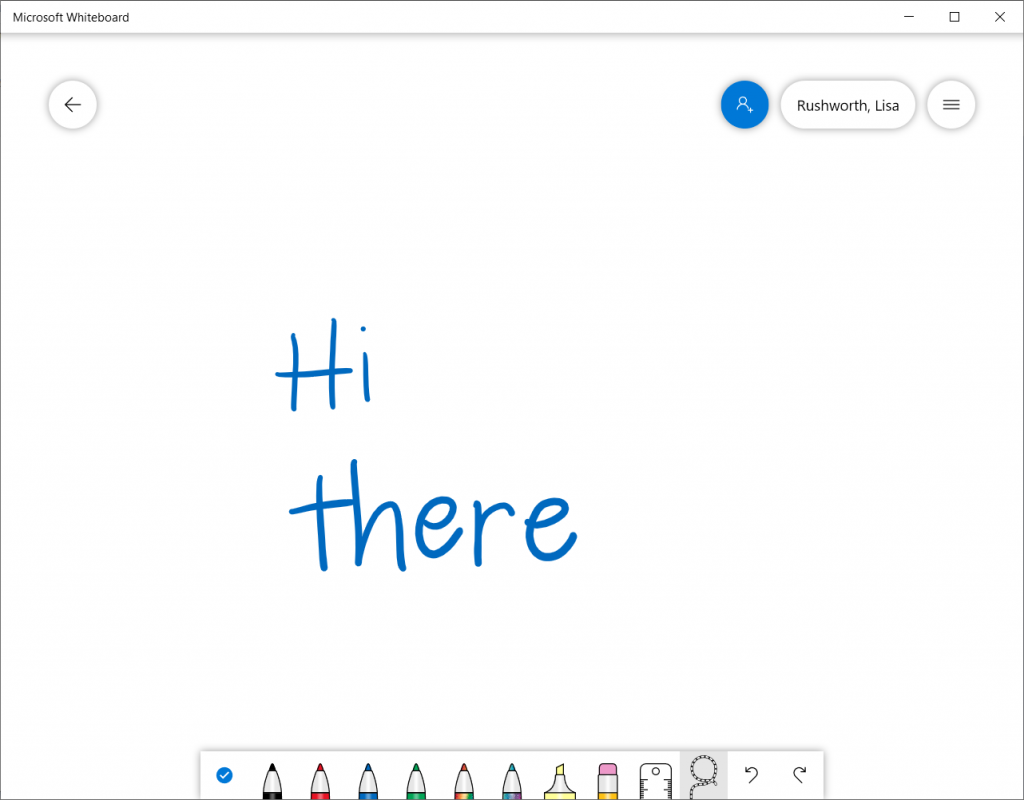
Whiteboards from Teams meetings are also available through the Whiteboard app. The app expands on the basic Whiteboard functionality available in Teams or online. In the app, you can select text ink and convert it to more readable text. Use the lasso tool to select a region of text ink.

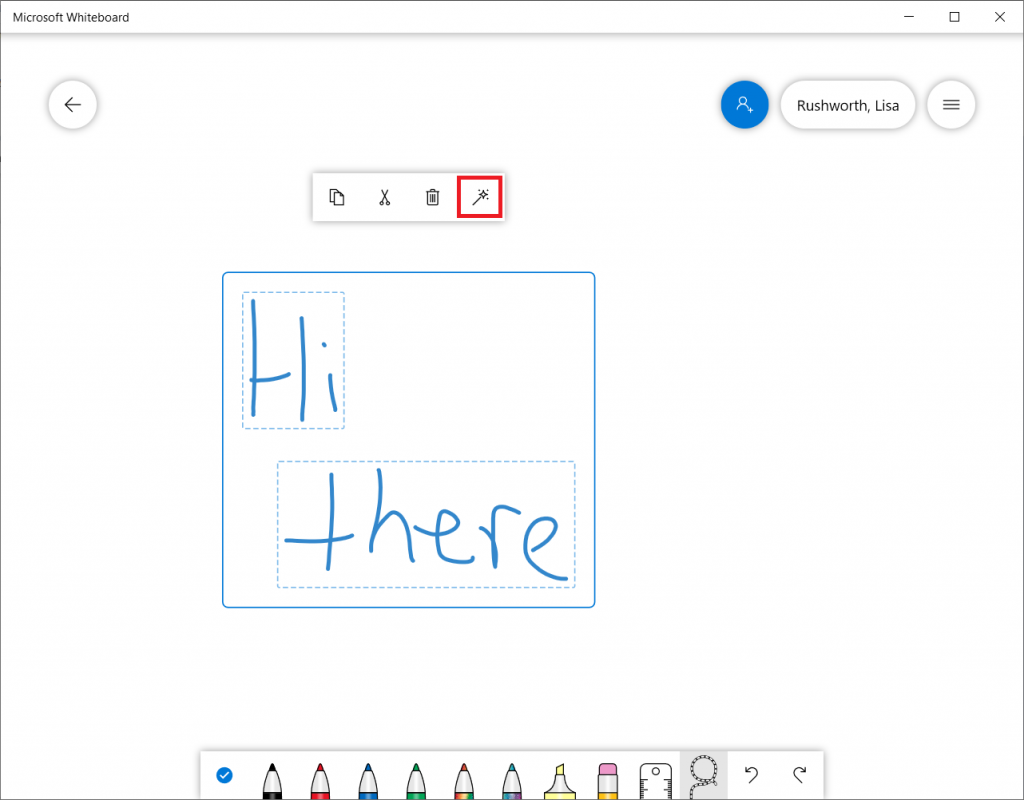
Click on the magic wand

Voila, more legible text!

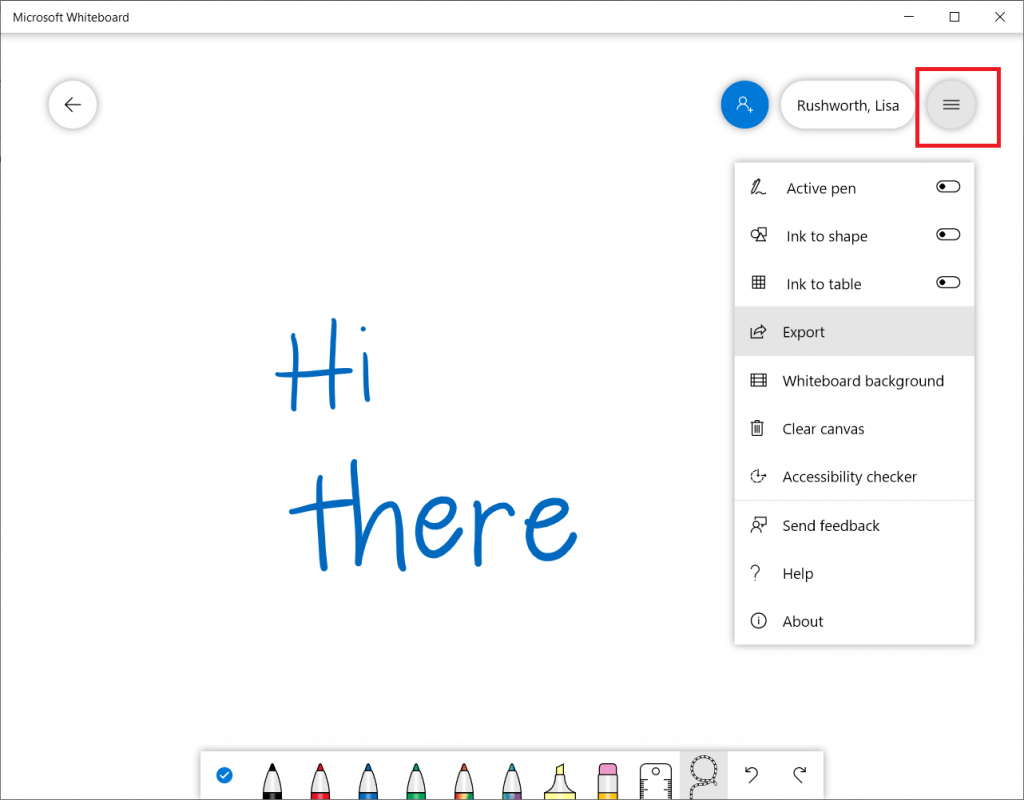
Click the hamburger menu in the upper right-hand corner of the screen for additional options — including “Export” which will create a PNG or SVG image from your Whiteboard data.

Did you know … Teams displays an alert when a new Planner task is assigned to you?

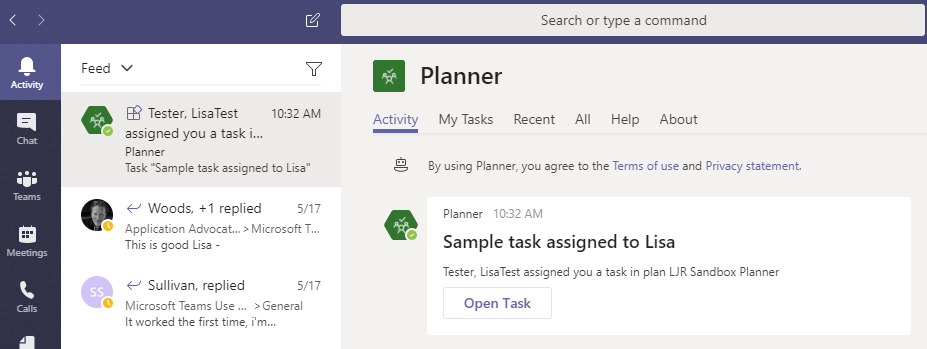
You will now be alerted in Teams when Planner tasks are assigned to you – this is another step toward making Teams the single hub for collaboration. Task assignment only creates activity when the Planner is a tab in one of your Teams spaces. If you create a Planner board that does not appear as a tab in a Teams space, new tasks assigned on that board will not create activity in Teams. To start getting Teams alerts for a board, just add it as a tab to a Teams space.

You’ll see an alert in your “Activity” feed

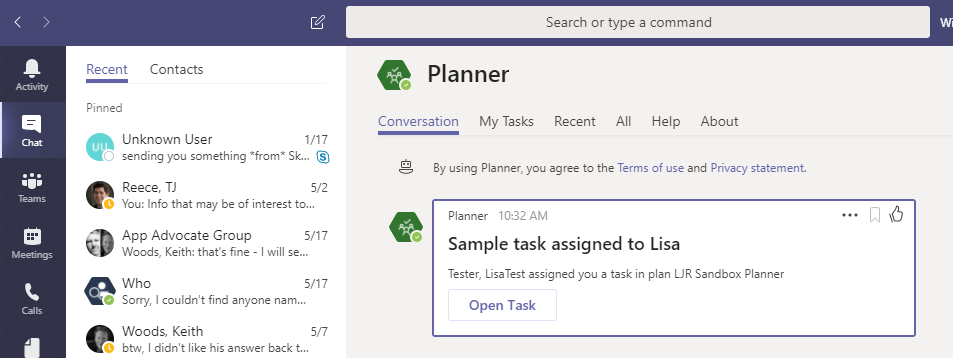
And in “Chat”. The card contains the task title, the name of the individual who assigned the task to you, the Teams space where the Planner is stored, and a link to view the task.

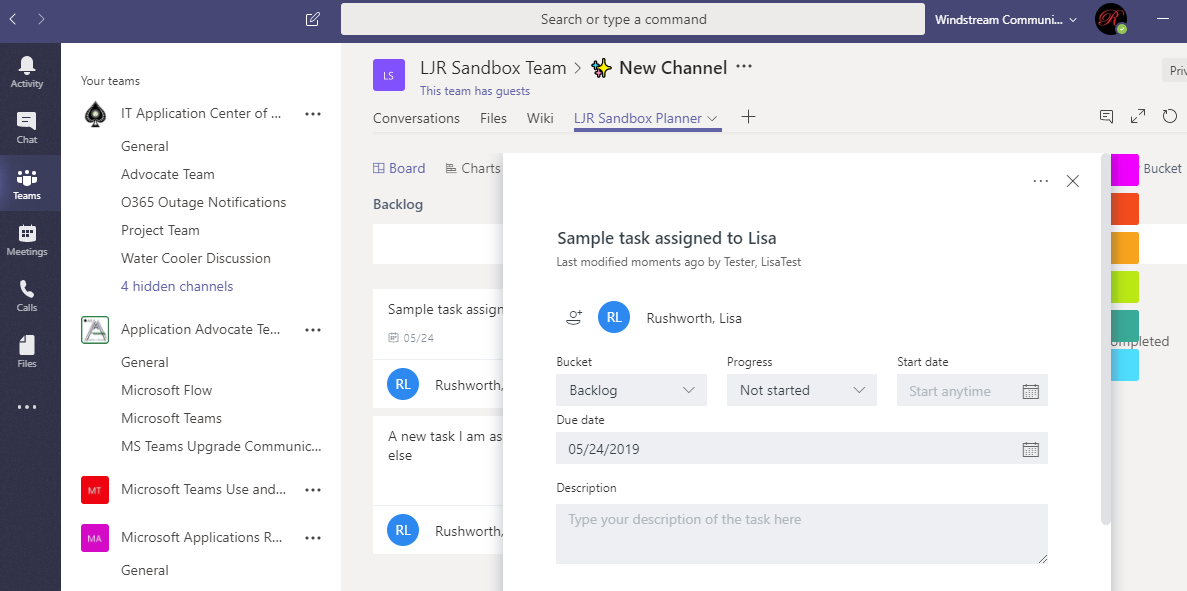
Click “Open Task” and you’ll be brought to the Planner board within the appropriate Teams space. The task will be open and ready to edit.

* If you have the mobile Planner app installed, you will receive push notifications in addition to seeing the task in your Teams activity.


Did you know … e-mails can be sent to a Teams channel?

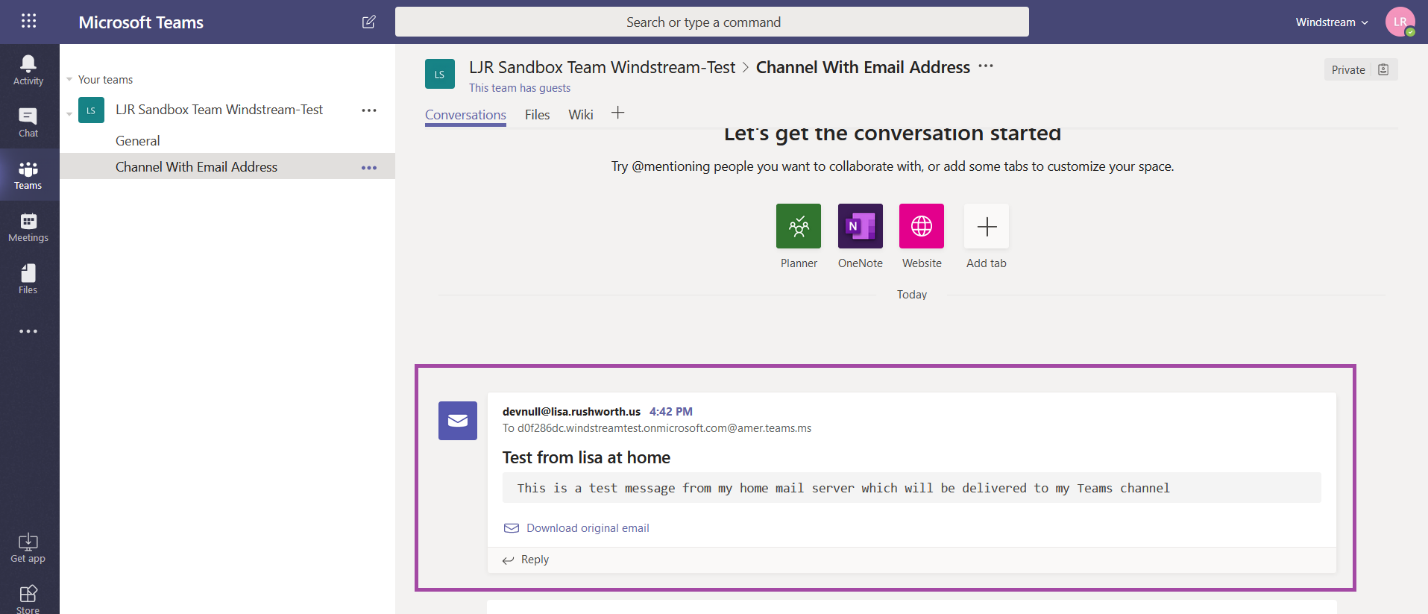
I’ve mentioned before that we can send e-mails to a Teams channel – forward a message in my mailbox to a channel so we can discuss it. But did you know Teams channels can receive e-mail from outside of our Exchange Online environment too?

That doesn’t mean you’ll be seeing advertisements for low cost (and dodgy) prescription drugs or entreaties from the purported prince of far-far-away show up in your channel conversations. Until someone gets an e-mail address for a channel, it doesn’t have one.

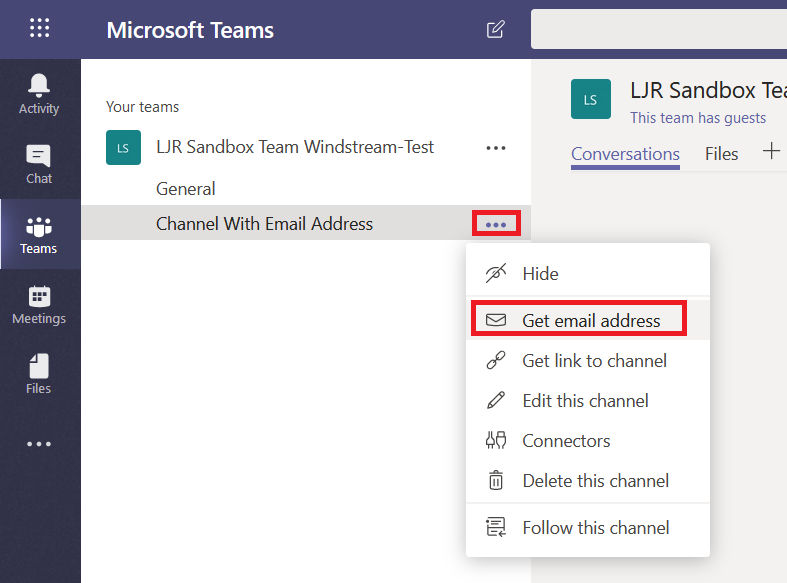
To associate an e-mail address, click the ellipsis next to a channel name and select “Get email address”

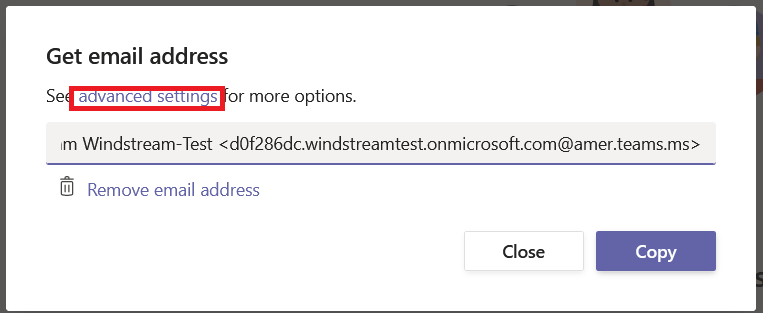
Copy the SMTP address. If you want to control which domains can send e-mails to the channel, click “advanced settings”

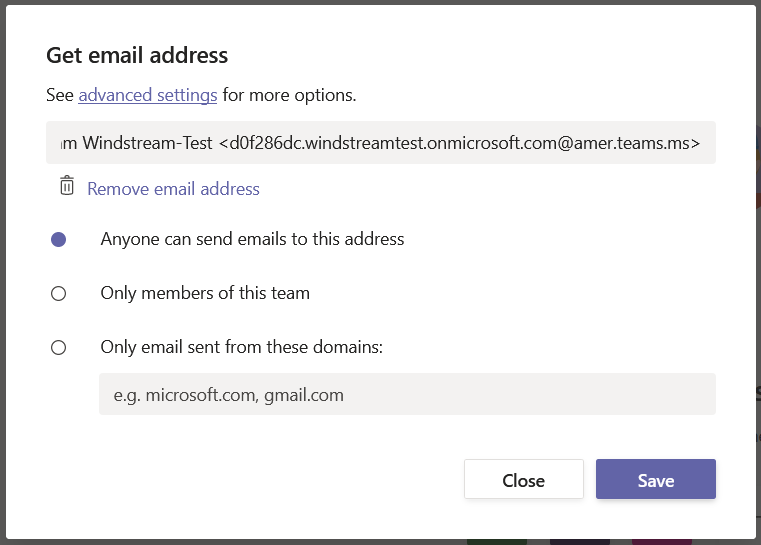
By default, anyone can send e-mails to the address. Simply select the appropriate radio button for the restrictions you want. “Only members of this team” lets members forward messages from their personal mailbox for discussion.

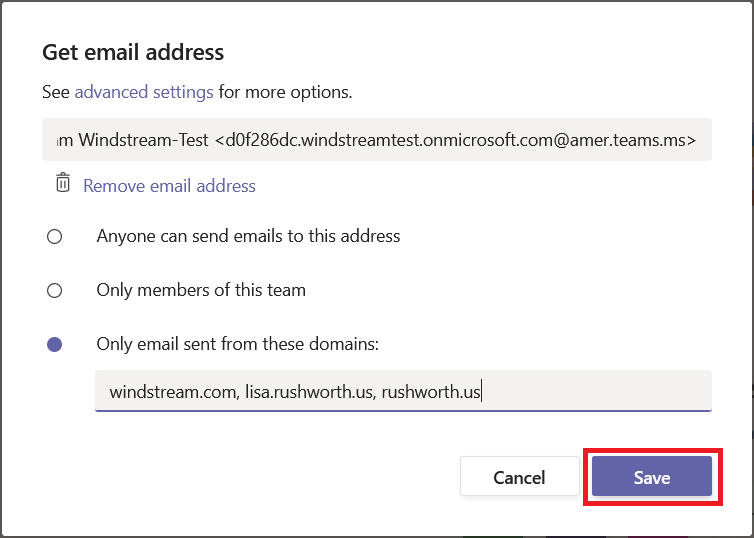
Selecting “Only emails sent from these domains” allows you to enter the list of domains from which you want to receive messages. Click “Save” to save your changes.

Send an e-mail message from an approved domain. Voila – a message from my home domain delivered to the Teams channel.

You can have monitoring systems, vendor ticketing systems, all sorts of e-mail sources deliver messages right into your Teams channels.


Did you know … you can add Teams channel meetings to your calendar?

Holding a meeting in a Teams channel allows channel members to attend if they have time and are interested in the meeting – it also lets Team members access meeting artifacts easily.

But when you schedule a meeting in a channel, only direct invitees see the meeting in their calendar. This is great for people who aren’t going to attend, but I end up joining the call ten minutes late because I didn’t see the meeting when I check my calendar to see what’s coming up.

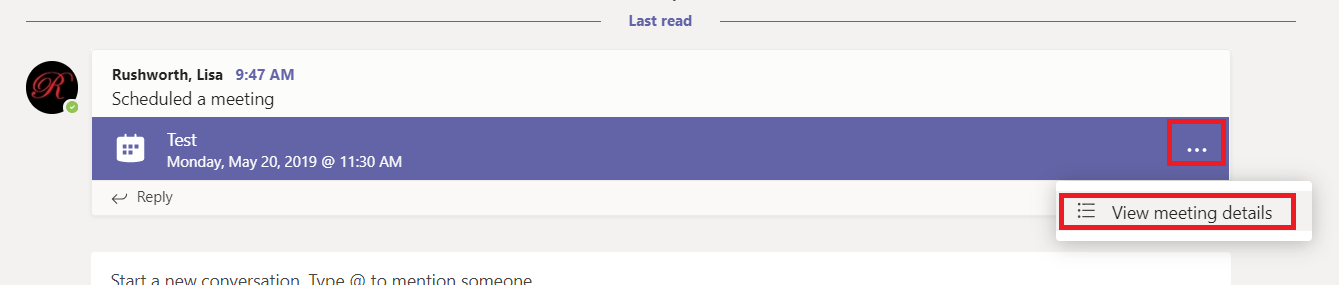
But you can add a channel meeting to your calendar – if you decide to attend the meeting, click the ellipses on the meeting item and select “View meeting details”

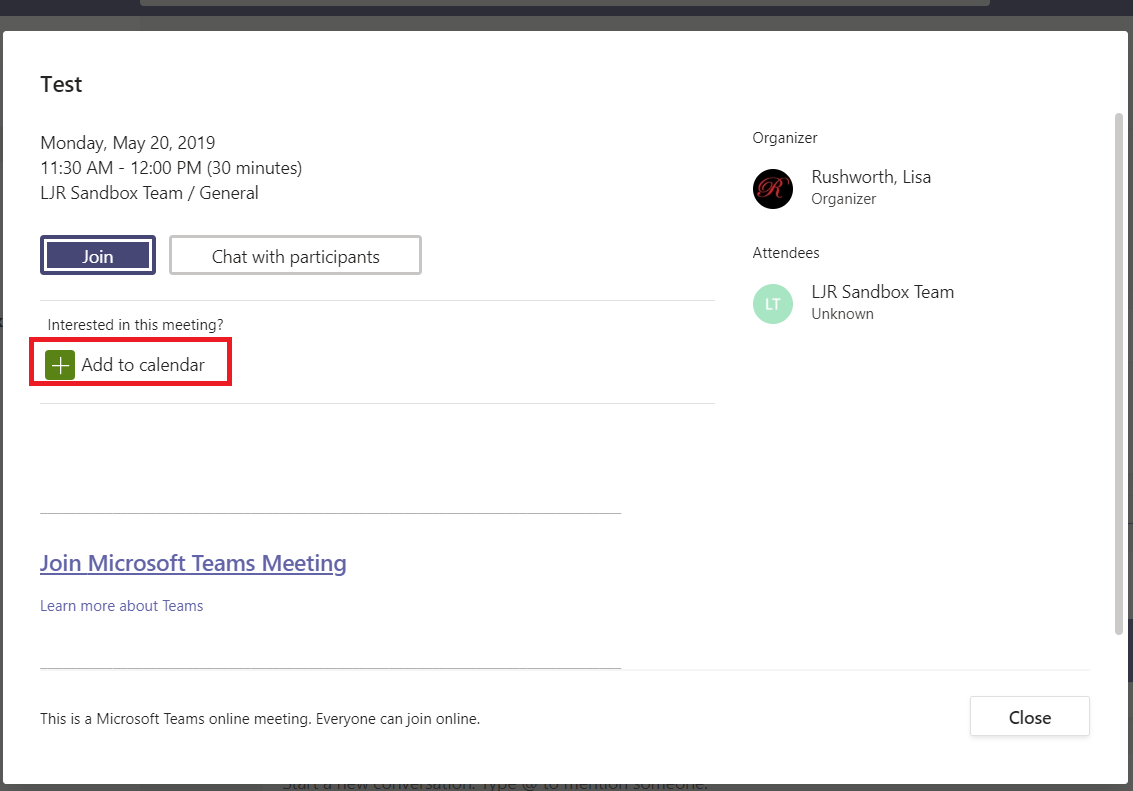
Click “Add to calendar”

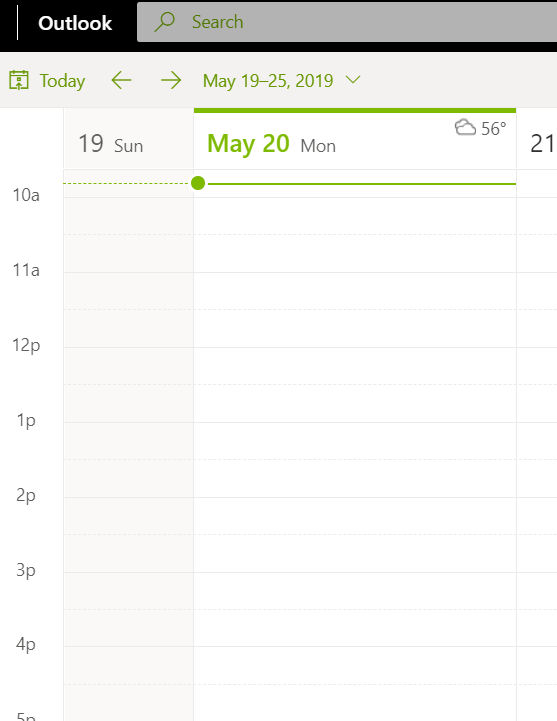
Voilà! Now the meeting appears in your calendar.


Information Barriers: Microsoft Teams

Information barriers preclude someone from communicating someone else (additional O365 services are going to implement it eventually, Teams just happens to be on the leading edge). Now there are lines of business where this is an awesome feature — law firm representing both sides of a case, for instance, don’t want people on side A chatting with people from side B. A company with a large front-line workforce may want to preclude the unwashed masses from communicating with Corporate.
If it were free and low effort to set up and maintain, I could come up with use cases for it here. Say, isolating the C11 people so someone unauthorized to talk to C11 people aren’t accidentally disclosing information. En mass blocking people from using federated communication is an interesting option — basically disallow it for everyone & have a specific request to be thrown into the “talks to people outside the company” group.
There’s some initial setup effort in building out the policies and applying them, and there would be effort in getting some mechanism for people to be moved into and out of policies. So it probably passes the ‘low effort’ test. Cost, not so much. It looks like, while anyone with an E3 SKU can use it during this preview, barrier’d accounts need an E5 or an add-on compliance/regulatory license once this goes GA.
Based on cost, I’m thinking we don’t want go dig into it. It’s an additional 8$/month for the compliance add-on license. Something like 15$/month to go from an E3 to an E5. And I don’t particularly care 8$ a user if people in our call center are inviting their friends from the MS call center to lunch over the chat federation.
Anyone else see a use case where it’d be worth the additional money for the technologically enforced barrier?

Did you know … you can use Teams to collaborate with vendors?

There were a few organizations set up to “federate” with Skype for Business – from your Skype client, you could send messages to their Skype for Business account. This will continue to work when you move to Teams. Microsoft calls each company’s Office 365 environment a “tenant” – you are able to send messages from Teams in our tenant to a federated partner’s Skype or Teams in their tenant.

** If your account is upgraded to Teams Only, messages sent from federated partners will be delivered to you in Teams. Otherwise messages sent from federated partners will be delivered to you in Skype.

To chat with a federated partner, simply address a new chat message to them. The “We didn’t find any matches” message lets you know there wasn’t anyone found in our organization. Click to search for the account externally.
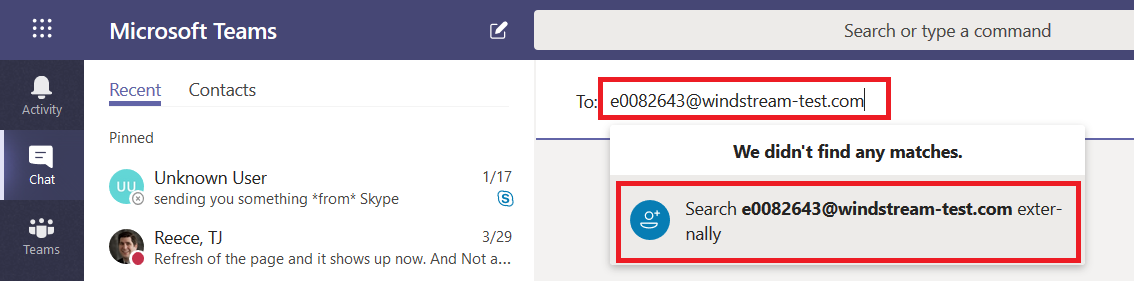
If you get an error indicating that the conversation cannot be set up, you may be mistyping the address. It is also possible that the organization is not on our list of allowed federation partners.

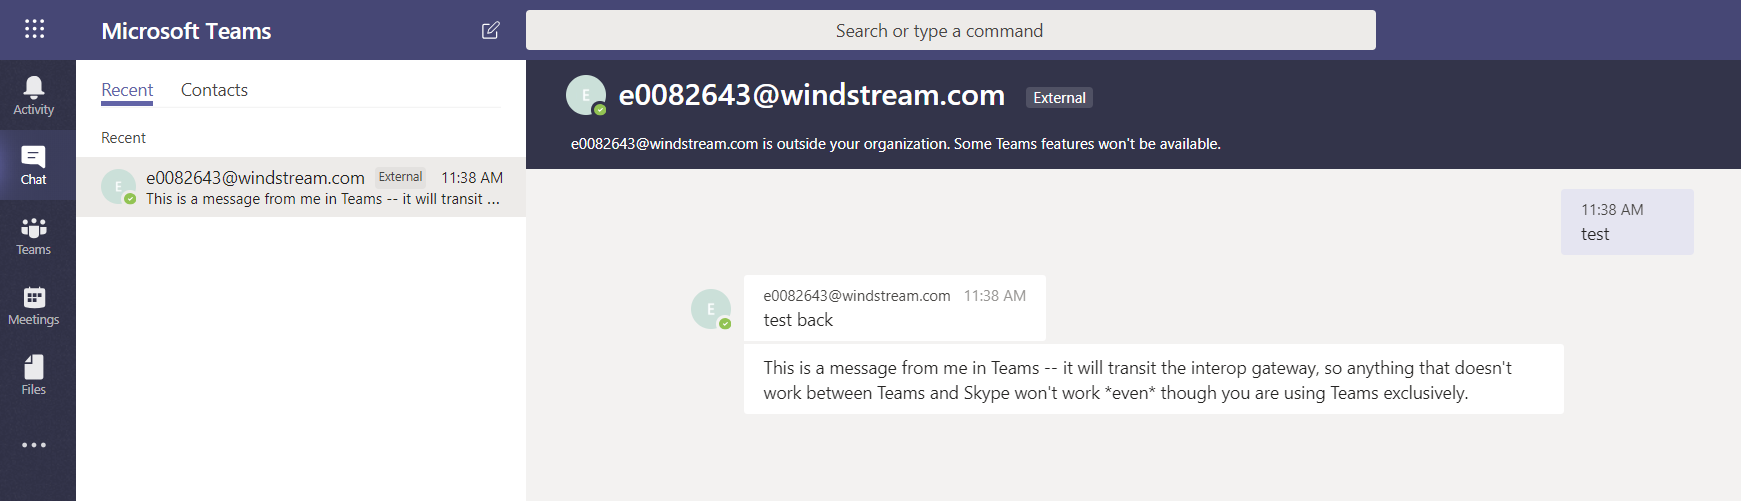
If their organization is on the allowed partner list, you’ll be able to start a new conversation. Along the top banner, there are a few indicators to ensure you realize you are sending information outside of our organization. Messages sent to external recipients transit Microsoft’s Skype/Teams interop gateway. Anything that is not supported through the interop gateway – screen sharing, file sharing, multi-party chat, rich text messages – will not be available when you are chatting with an external recipient.
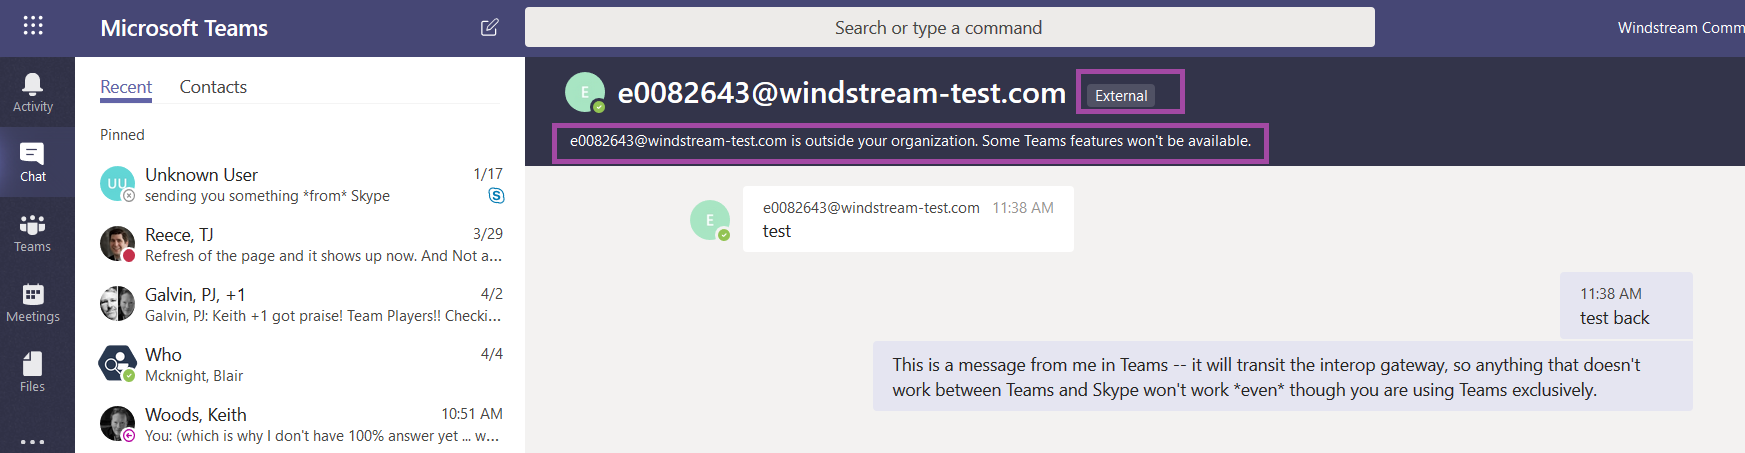
The other person will see your message in their Skype or Teams application – if they’ve been upgraded to Teams Only, the message will be delivered to them in Teams, otherwise it will be delivered in Skype.
Teams expands on Skype’s federated messaging functionality – accounts from allowed organizations can be “guests” in our Teams. This means vendors can participate in collaborative discussions and access shared documents without having an “n99” account with an Office license. Federated partners can add you as a guest in their Teams spaces too.

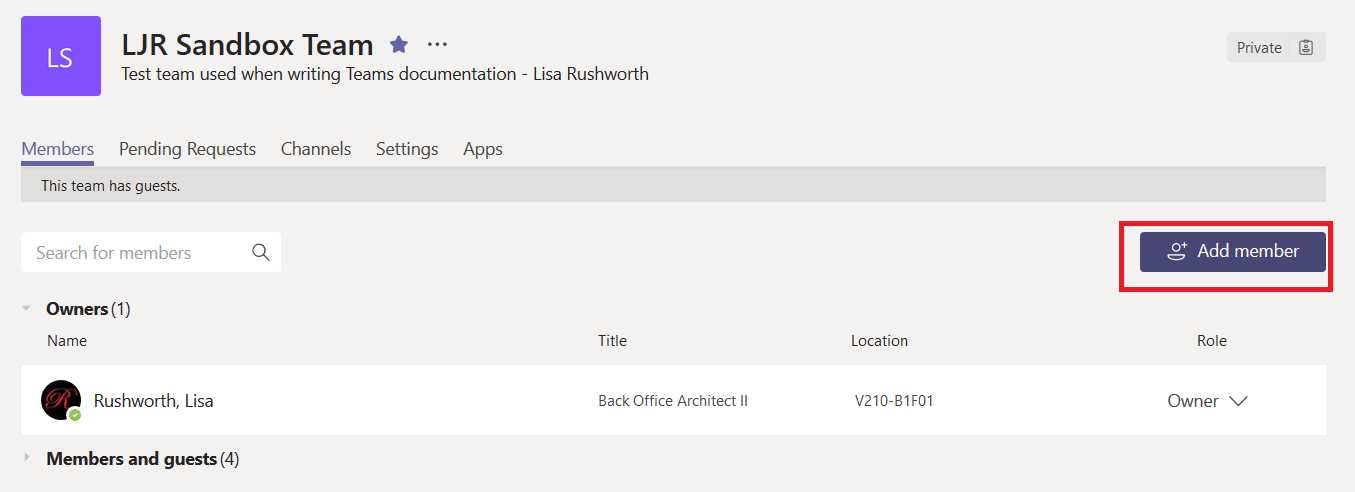
Team owners add guests the same way they add internal Team members.
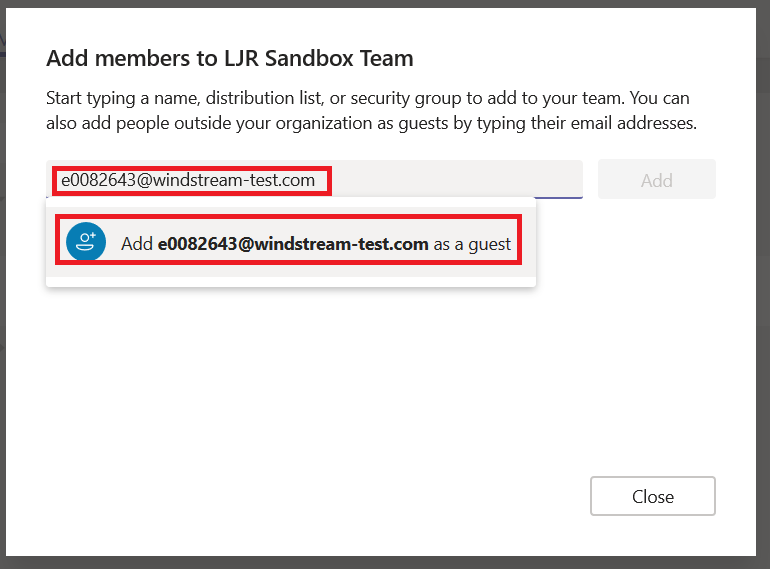
When you type the guest’s address, it will not match any records in our tenant and the option to add them as a guest will be displayed.
Once someone has been added as a guest to a Teams space, there are two ways you can send them chat messages – the external account and the guest account.
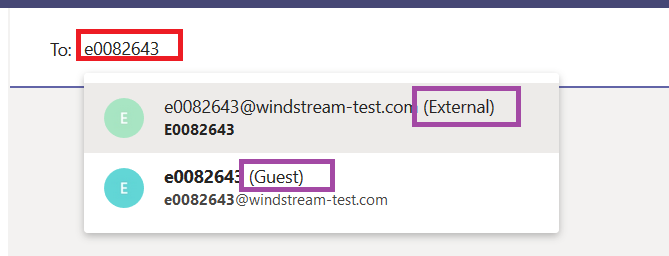
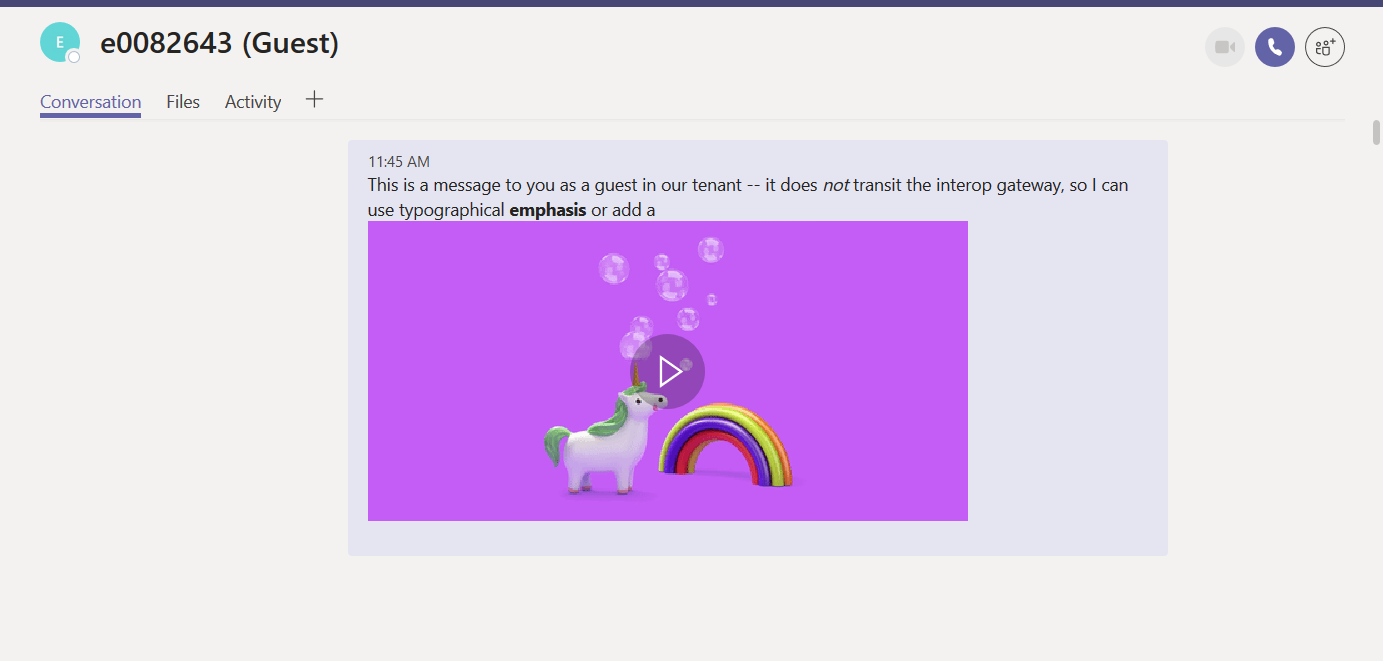
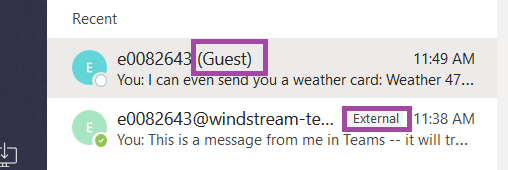
What’s the difference? Where the “external” listing delivered your chat message to Skype or Teams (depending on the individual’s account configuration) in the other person’s tenant, “Guest” will deliver the chat message to Teams within *our* tenant.

Good news – that means you can use features that aren’t supported through the interop gateway. Bad news – the person may not check our Teams tenant regularly to see if there are new messages.
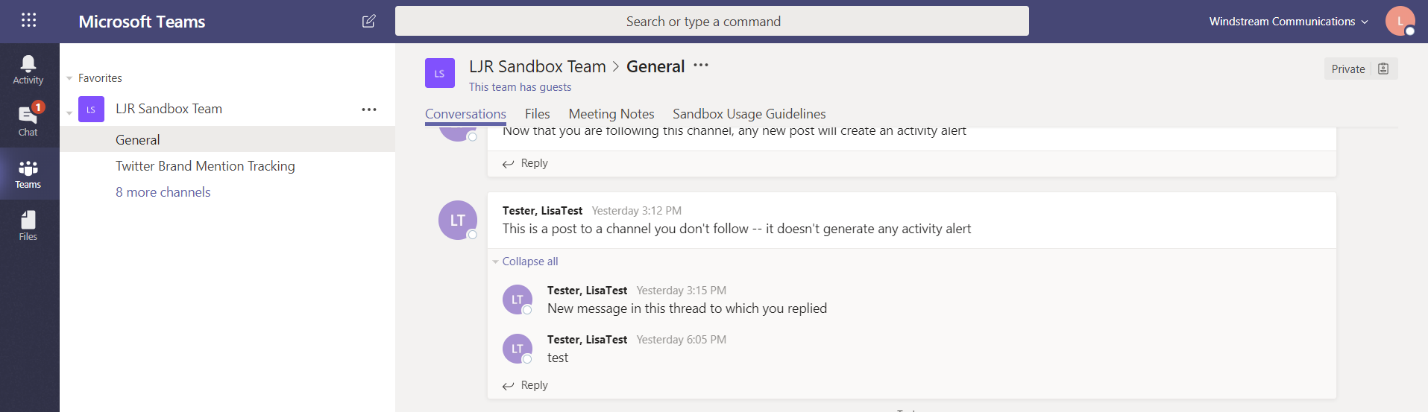
A person added as a guest to our organization will see a drop-down tenant selector next to their avatar in Teams. They’ll be able to click the drop-down and switch contexts to our tenant.

They will be able to see our Teams … well, the ones of which they are a member anyway!
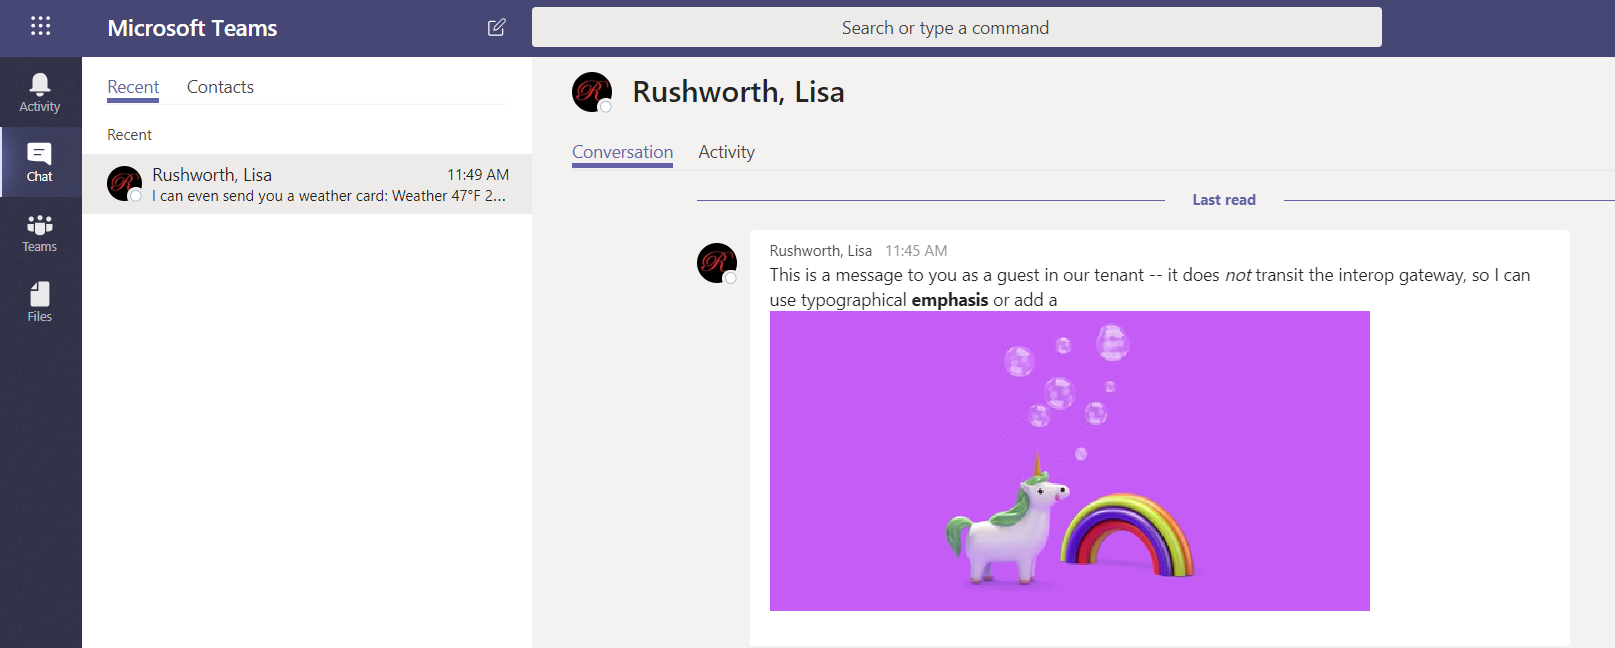
They’ll also see chat messages sent to their guest account.
You may notice that the person appears twice in your chat history – the guest account in our tenant and the external account in their tenant are separate entities.
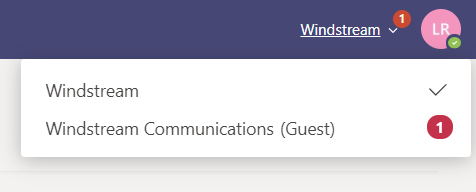
How will the person know they’ve got messages waiting for them in our tenant? A message count indicator will appear on the tenant selector. If they’re a guest in multiple tenants, clicking the drop-down will show them how many new messages are in each tenant.
Usage Tip: This notification isn’t immediate (and sometimes the notification is significantly delayed), so time-sensitive communication should be sent to the ‘External’ listing instead of the ‘Guest’ one.
Warning: Conversations and documents in our tenant are under our purview. This means we can restore access if data becomes orphaned, our retention policies apply to the data, documents and conversations will be included in legal discovery activity, etc. Activity in partner tenants are under their purview. Be cognizant of communication and file content before storing information outside of our tenant.