Progress: New Raised Beds

We had a day-long break in the rain yesterday, so I put some work into rebuilding the raised beds. I transported all of the small blocks to the new garden area. There’s a pile of not-yet-composted material (and some clay soil) that will need to get hauled over to our new compost area … but that’s the last step.

I also got a tightly packed leaf layer along the bottom of the bed. Reading about building raised beds on existing lawn, people put down a layer of cardboard or newspaper to prevent the existing plants from invading the garden. It’ll rain all day today, and we’ll stomp it down again tomorrow. Then there’s a bunch of dirt to haul before I can get some plants out into the new garden space.

Oven Roasted Mushrooms

Oven Roasted Mushrooms

Recipe by LisaCourse: DinnerCuisine: AmericanDifficulty: Easy
Prep time

20

minutes
Cooking time

30

minutes
Total time

50

minutes

Ingredients

  • Mushrooms

  • Olive oil

  • Salt / pepper

Method

  • Preheat oven to 400 degrees F
  • While oven heats, clean mushrooms and slice
  • Toss mushrooms with olive oil (about a tablespoon per pound of mushroom) and a light sprinkling of salt and pepper
  • Change to convection at 400 degrees. Roast mushrooms for 10-15 minutes, stir and flip, and roast for another 10-15 minutes.
  • Season to taste with salt and pepper

Notes

  • Pan roasted mushrooms take a long time — there’s only so much space in a pan, and raw mushrooms are much larger than their cooked counterparts. Scott loves strogonoff, but it takes me HOURS to make it simply because two pounds of mushrooms take HOURS to cook. Using two large roasting pans, I was able to roast three pounds of mushrooms in under an hour (including washing, cutting, and cooking). By making the sauce and egg noodles while the mushrooms roast, I had strogonoff ready in about an hour (and that’s because I let the mushrooms simmer in the sauce for about fifteen minutes to absorb flavours).

Filtering HTML Drop-down

I’ve got a few drop-downs that I’ve added filtering on the drop-down – start typing and you’ll see the options that match your string. But I needed to mirror an application functionality where you select a category and are then presented with a list of options that fit the category.

Here’s the drop-down selector for the categories

    echo "      <div class=\"row\">\n";
    echo "          <div class=\"col-md-12 col-sm-12 col-lg-12 col-xs-12\">\n";
    echo "              <div class=\"row\">\n";
    echo "                  <div class=\"row\">\n";
    echo "                      <div class=\"col-md-2 col-sm-2 col-lg-2 col-xs-2 text-left\">\n";
    echo "                          <span><strong>Animal Category:</strong></span>\n";
    echo "                      </div>\n";
    echo "                      <div class=\"col-md-10 col-sm-10 col-lg-10 col-xs-10 text-left form-group\">\n";
    echo "                          <select name=\"strAnimalType\" id=\"strAnimalType\" readonly/> \n";
    echo "                              <option class=\"NoSelection\" value=\"-----\">-----</option>\n";
    echo "                              <option class=\"Feline\" value=\"201\">Feline</option>\n";
    echo "                              <option class=\"Canine\" value=\"202\">Canine</option>\n";
    echo "                              <option class=\"Equine\" value=\"203\">Equine</option>\n";
    echo "                              <option class=\"Other\" value=\"204\">Other</option>\n";
    echo "                          </select>\n";
    echo "                      </div>\n";
    echo "                  </div>\n";

And here’s the drop-down selector I want to filter based on category — there are a lot of options. The class for each option includes the category selectors that will include the option in the drop-down.

    echo "      <div class=\"row\">\n";
    echo "          <div class=\"col-md-12 col-sm-12 col-lg-12 col-xs-12\">\n";
    echo "              <div class=\"row\">\n";
    echo "                  <div class=\"row\">\n";
    echo "                      <div class=\"col-md-2 col-sm-2 col-lg-2 col-xs-2 text-left\">\n";
    echo "                          <span><strong>Pet Breed:</strong></span>\n";
    echo "                      </div>\n";
    echo "                      <div class=\"col-md-10 col-sm-10 col-lg-10 col-xs-10 text-left form-group\">\n";
    echo "                          <select name=\"strPetBreed\" id=\"strPetBreed\" readonly/> \n";
    echo " <option value=\"-----\" class=\"selectors All\">-----</option>\n";
    echo " <option value=\"101\" class=\"selectors Feline\">Domestic Shorthair</option>\n";
    echo " <option value=\"1275\" class=\"selectors Feline\">Flame Point Siamese</option>\n";
    echo " <option value=\"1069\" class=\"selectors Equine\">Arabian</option>\n";
    echo " <option value=\"1071\" class=\"selectors Equine\">Tennessee Walking Horse</option>\n";
    echo " <option value=\"1072\" class=\"selectors Other\">Chicken</option>\n";
    echo " <option value=\"1073\" class=\"selectors Other\">Snake</option>\n";
    echo " <option value=\"1074\" class=\"selectors Canine\">Australian Shepherd</option>\n";
    echo " <option value=\"1075\" class=\"selectors Feline\">Burmese</option>\n";
    echo " <option value=\"1076\" class=\"selectors Canine\">Siberian Husky</option>\n";
    echo " <option value=\"1077\" class=\"selectors Feline\">Sphinx</option>\n";
    echo " <option value=\"1078\" class=\"selectors Other\">Rabbit</option>\n";
    echo "                          </select>\n";
    echo "                      </div>\n";
    echo "                  </div>\n";
    echo "              </div>\n";
    echo "          </div>\n";
    echo "      </div>\n";

In the JavaScript, I’ve got a quick function that repopulates the rather long drop-down menu based on the selected category

// Filter strPetBreed options based on strAnimalCategory value
$(document).ready(function () {    
    var allOptions = $('#strPetBreedoption')
    $('#strAnimalCategory').change(function () {
        $('#strPetBreed option').remove()

        var classN = $('#strAnimalCategory option:selected').prop('class');
        var optsCat = allOptions.filter('.' + classN);
        $.each(optsCat, function (i, j) {
            $(j).appendTo('#strPetBreed');
        });

        var optsAll = allOptions.filter('.All');
        $.each(optsAll, function (i, j) {
            $(j).prependTo('#strPetBreed');
        });

    });
});

Since it’s possible there are options you’d want to always appear (in my case, it’s just the “—–” to indicate no selection has been made … but there could be real items that fall into each category too), I’ve got an “All” classification that will get popped onto the top of the list.

Blueberries In The Ground

We planted all 20 of the blueberry plants today. There are two rows running North to South.

We alternated the two varieties going down the rows (so you can walk along and get some of each). The Western row starts with Blueray, and the Eastern row starts with Hardy Blue on the North end. We’ve got a lot more rain coming, so there’s no need to water our new hops or blueberries.

Blueberry Mud Pies

The down side to ordering plants online is that you don’t have much control over when they arrive. I probably wouldn’t purchase a lot of shrubs a few days before a week of rain (I might because it saves watering new plantings … but that’d be some light rain, not a few days where we’ll be getting an inch or so per day). But we found ourselves with the blueberry bushes on Friday and twelve of the next thirteen days in the forecast calling for rain. With Sunday and Monday looking rather torrential.

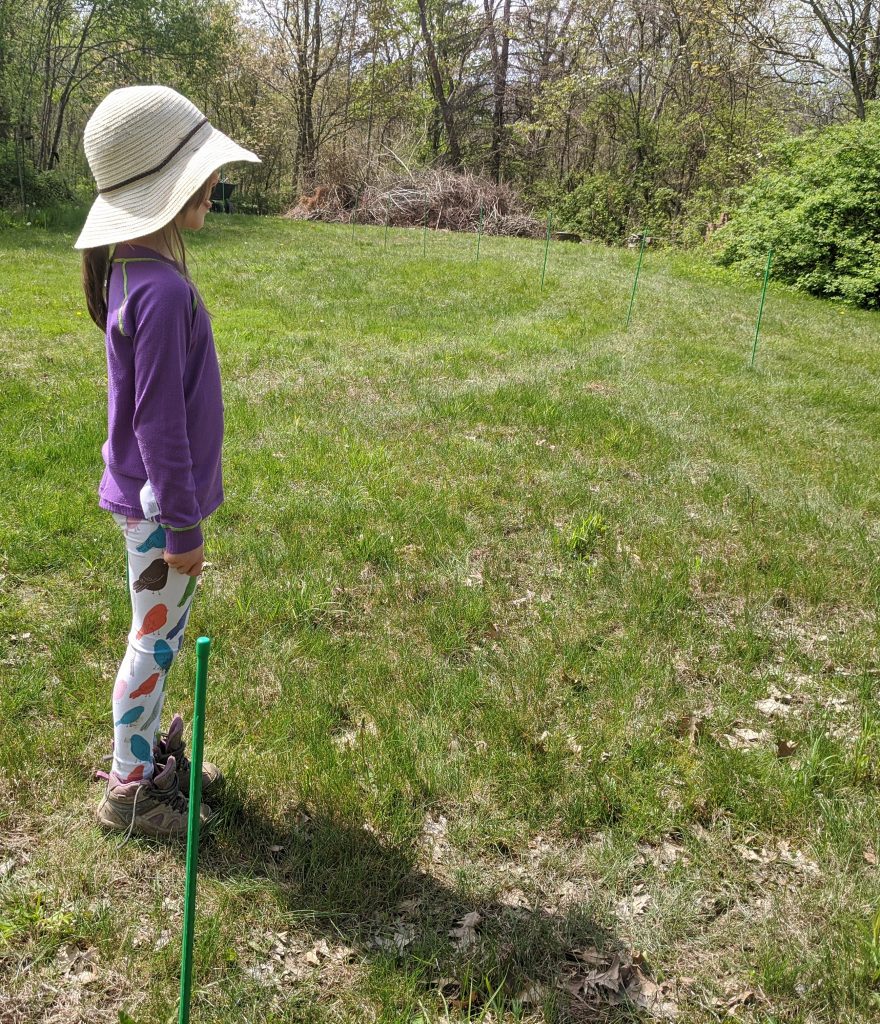
Anya and I staked out where we were going to put plants. We locked a tape measure along the line we wanted for the row and she popped in a stake every 6 feet. And then again every 5.5 feet. The tape measure line let us get straight rows without a bunch of fiddling around.

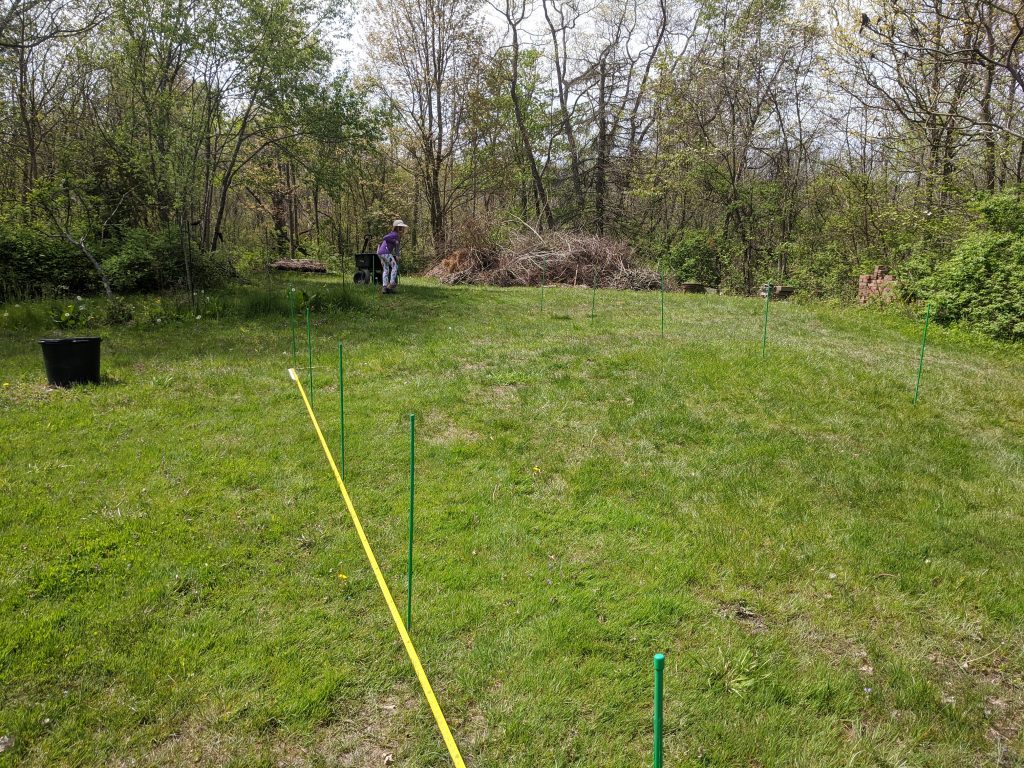
Sometimes Anya was a blueberry plant … so I could see how they’d look once they grew?

The first challenge was figuring out some way to dig twenty holes in the ground — we had planned on renting a tiller from Home Depot (well, we wanted to buy one of those big 70’s beasts, but didn’t find a good price anywhere locally and figured the best prices on tillers are probably later in the year); but, without a truck, that also meant either losing the one sunny day until someone with a truck could help out or renting the truck too. I wondered if an earth auger could be used — seemed like basically the same function, but in a format that fits in the boot of our car. So we hired a one-person gas-powered auger from Home Depot.

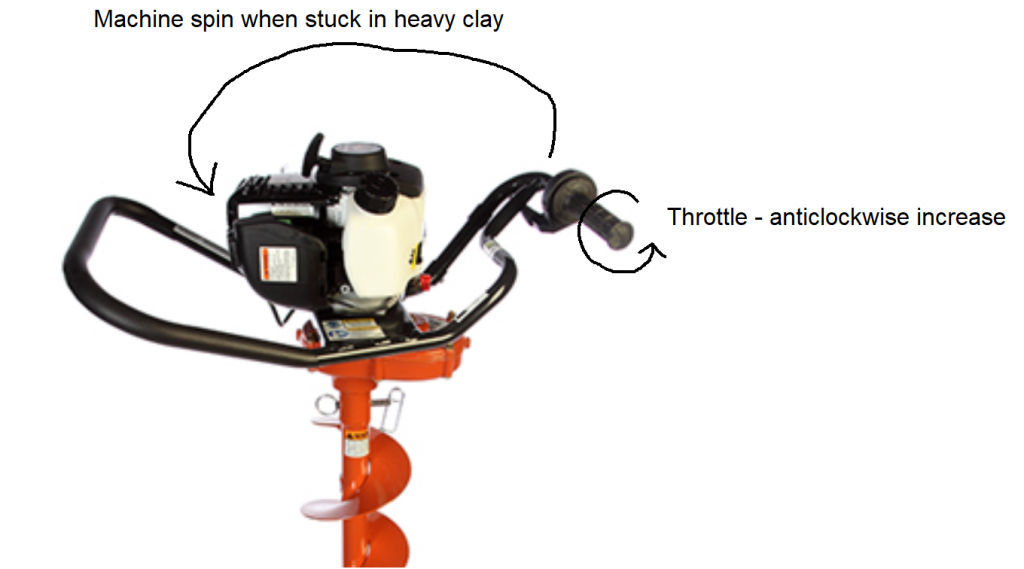
I don’t have any experience in tool design, but industrial design projects in which I’ve participated have all involved both people sitting around and thinking about how the thing should work and prototyping to allow the intended users to test how it works “in the real world”. This auger seems to have skipped one of these steps. The throttle spins anticlockwise to “go”. Unfortunately, the direction of the machine’s spin when the auger bit gets stuck (i.e. the motor cannot turn the bit so the motor component starts spinning instead) means you increase the throttle as the machine rips at your arms. Obviously the idea is to release the thing, and I could see where “let’s increase the throttle when it’s stuck to help it power through that obstacle” might seem like a decent idea in a design meeting. But the real world result, for someone without the upper body strength to just hold the thing in place, is that your arms get whipped around along with the machine, your forearms smash into each other, and the whole thing just hurts. I operated the thing braced against my left hip to prevent its spin and still managed to get banged up.

My approach avoided the other design flaw — the exhaust blew directly into Scott’s face when he held it as it was intended to be held. That’s not a great experience when digging holes for a few hours. Design flaws aside, we were able to mangle up the ground for a third hop bed and mix in a bunch of compost pretty well. The auger bit had trouble when the tip is clogged with grass, but Scott was able to lean into it. Once it got into clay, it ripped right through it. Then we started on the blueberry field. We had initially planned on drilling nine holes in a grid for each plant. It took hours. On a overcast-but-still-sunny, 80 degree, humid day. Scott brought a bucket of water and a towel — we took turns boring holes so each of us got some rest/re-hydrate/cool off time, but it was going to take days to do 9 x 20 holes.

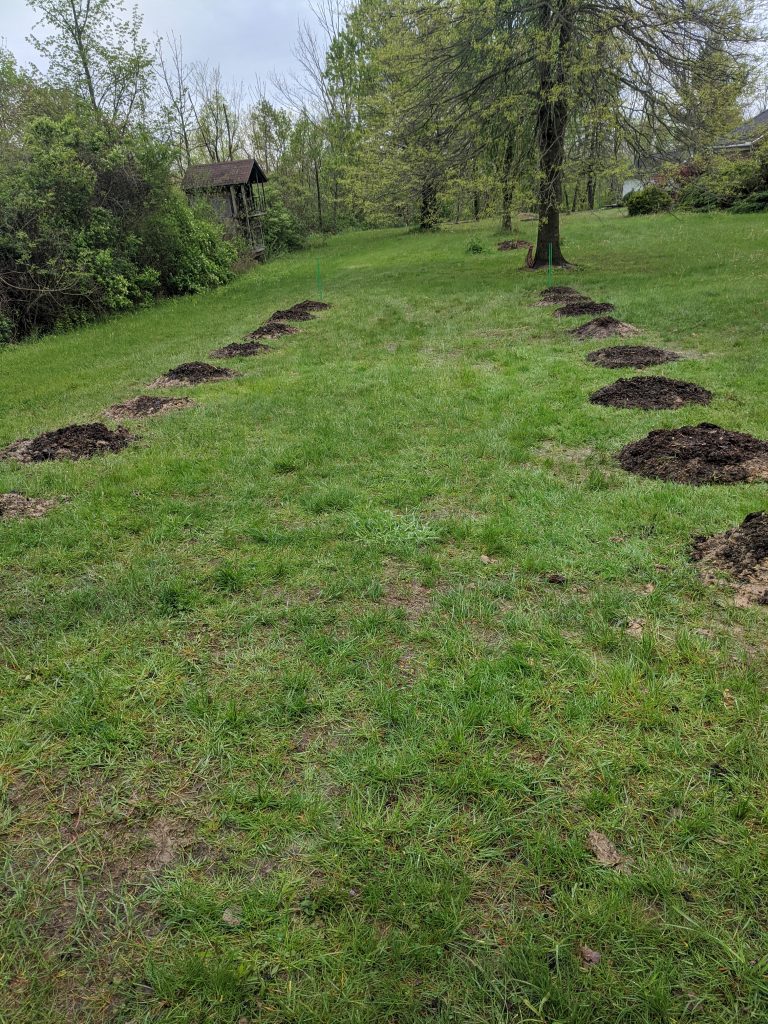
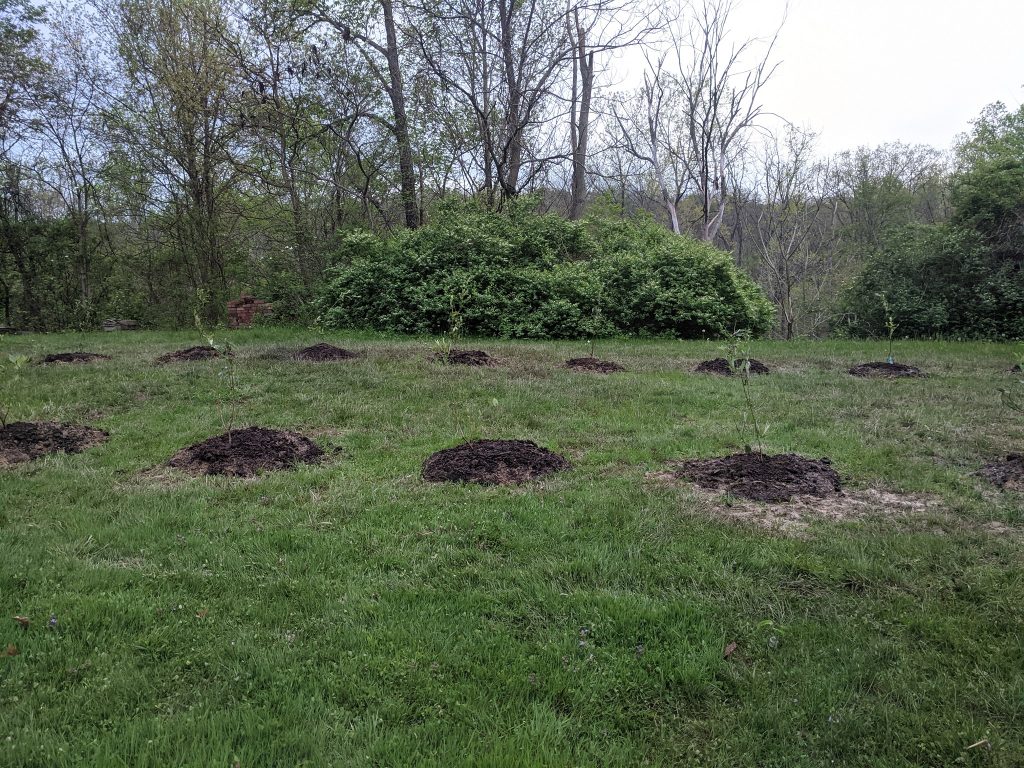
The biggest time suck was getting sod off of the auger bit so you could drill quickly. I wondered if we could dig the center hole and then angle the tool over to widen the hole. That worked wonderfully. We ended up with deeper holes than originally planned — the hole got deeper as the tool ran to widen out the hole — but loosening up more soil isn’t a bad thing. And we could drill around eight holes in the amount of time it took to do a set of nine for one plant. And, bonus, rotating the tool around in the clay cleared off the sod from the initial bore. We finished up just as the rain started and returned the tool. Took a break for a bit, got some dinner, and then hauled some compost over to mix with the clay from the hole. That was a terrible job. The clay was wet and difficult to mix in. We got two holes finished up before dark. And then it rained. And rained. And rained some more. There are standing pools of water in the yard, and each hole turned into a little pond. This, we thought, was going to be a challenge. We’ve got plants that need to get in the ground, so we cannot just wait for the rain to stop, wait another day, and give it a go.

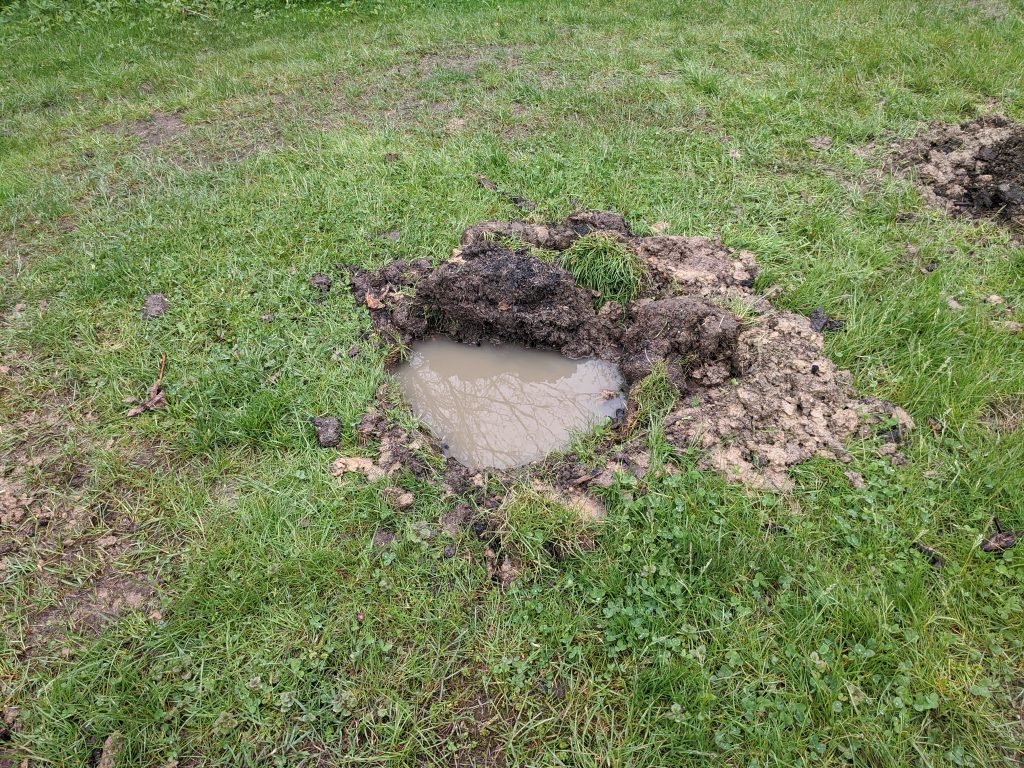
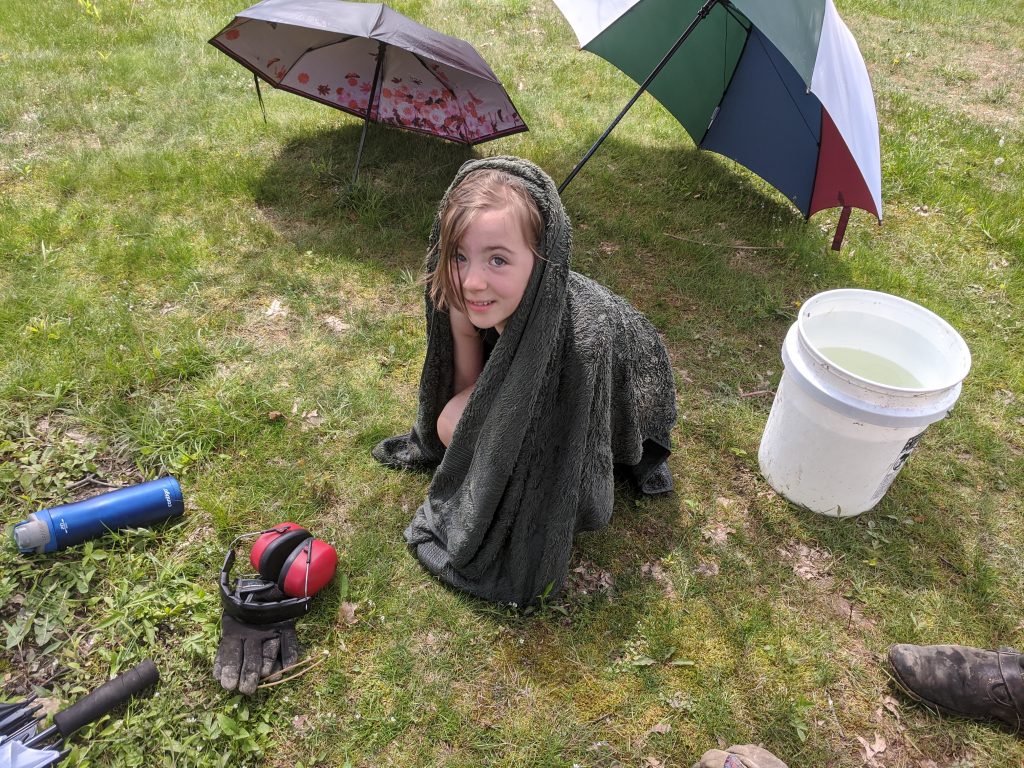
It was actually easier than the just-wet-clay mixing we did on Sunday. Yesterday, we spent hours (6p-10p … so four hours) making the biggest mud pies ever. Used a shovel to clear out the mud that slid into the hole, then took a cart full of compost and threw a few scoops into the pond. Mixed it around, shoved in some clay from around the hole, mixed some more. It was soupy. Added a few shoves of compost and more clay, mixed … repeated a few times, the muddy clay/compost mixture started to thicken up. Water got pushed out of the hole and drained across the yard and over the ridge. And it was an Anya task — she helped me fill the cart with compost and worked on a mud pie of her own.

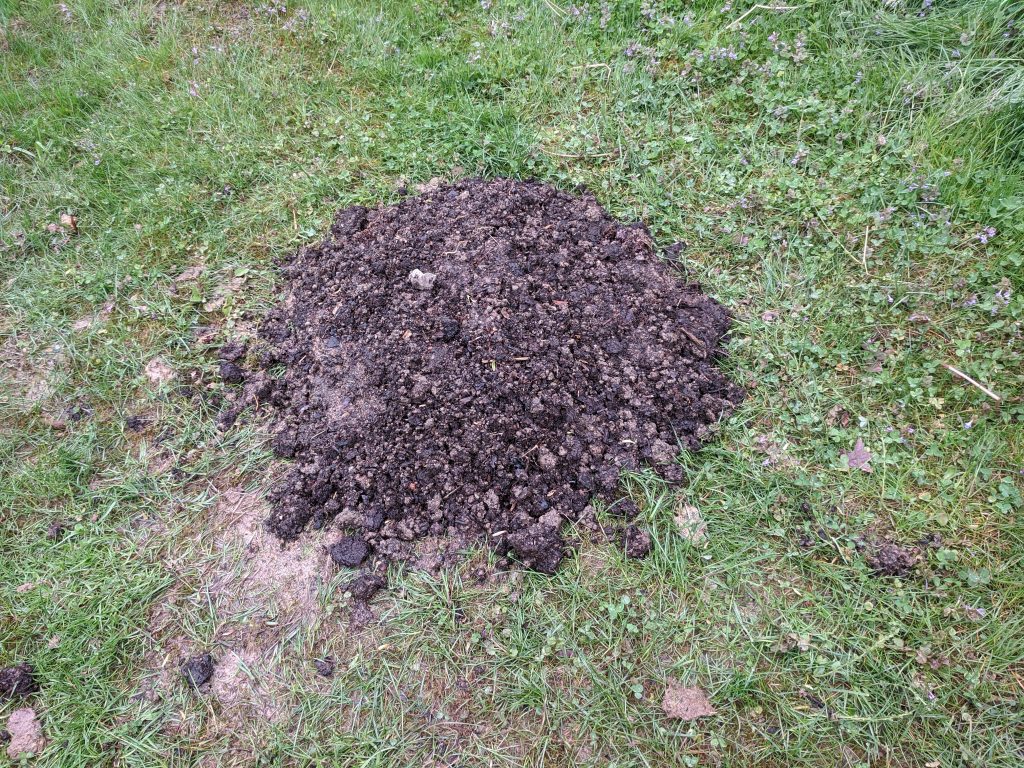
Once all of the clay was mixed with compost, we had nice mounds. The grass was easily scraped clean with a shovel (and rain will certainly get any little bits remaining). Then we topped the mound with a sprinkle of compost. I found a down side to working in water-proof Muck boots — rain that falls into the boot? Doesn’t go anywhere. I spent hours slogging around with a few cups of water inside my shoes! Also found that there are removable insoles, so our insoles are laying out and the boots are upside down in the garage to dry out.

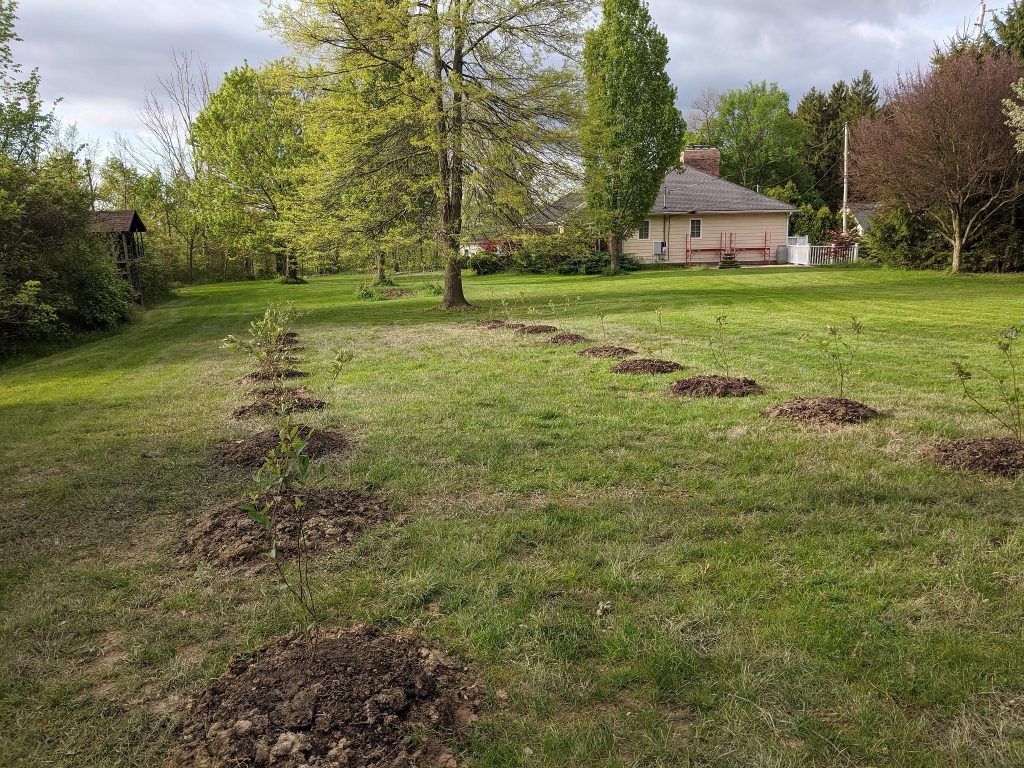
Scott wanted to plant the bushes last night, but I wanted to give it all some time to dry out. By Tuesday morning, the mounds have drained out a little bit and we’ve got nineteen holes ready for blueberries! (we encountered and old root in one hole, so we’ve still got to chop that thing out.

Masking the Free Market

I’ve noticed that dedication to “free market” seems highly correlated to “you made the decision I support” … if we make an a priori assumption that requiring a mask be worn is somehow an infringement of individual liberties (not a stance I take, but accept it for the sake of argument), isn’t each individual’s ability to “vote with their dollars” a main tenant of the so-called ‘free market’?
 
I’m close to getting a Costco membership *because* they’re the only grocery joint around here that was making customers wear masks. It’s out of the way, I don’t think they’ve got the convenient order-online-drive-through-pickup thing, and I have no idea what their vegetarian selection is like. But I hate giving my money to support Giant Eagle’s lax enforcement of actual requirements (employee wearing mask does not mean around their neck) and refusal to require common-sense safety precautions like masks for customers. And that’s the free market. Enough people go one way or the other, the companies will change their stance.
 
And *forcing* a company not to require a mask violates that company-person (thanks, Citizens United) liberties too, doesn’t it?

Baked Breaded Fish

Baked Breaded Fish

Recipe by LisaCourse: FoodCuisine: AmericanDifficulty: Easy
Servings

4

servings
Prep time

30

minutes
Cooking time

20

minutes

Ingredients

  • 4 fillets of tilapia

  • Panko Mixture
  • 1 tablespoon sea salt

  • 1 cup panko bread crumbs

  • 1/3 cup shredded Parmesan cheese

  • Egg Mixture
  • 2 eggs

  • 1 tablespoon chili seasoning

  • 1 teaspoon salt

  • 1/4 cup oil

  • Flour Mixture
  • 1/2 cup all-purpose flour

  • 1 teaspoon salt

  • 1/2 teaspoon pepper

Method

  • Heat the oven to 425 F
  • Oil a baking tray
  • Blend the egg mixture ingredients in a bowl
  • Blend the flour mixture ingredients in a bowl
  • Blend the panko mixture ingredients in a bowl
  • Dip fish filet in flour mixture, then egg mixture. Then dip in panko mixture and press to ensure crumbs adhere to fish.
  • Place each filet on oiled baking tray
  • Using convection oven at 400 degrees F, bake for 15 minutes, turn fish, and bake for 5 more minutes

Notes

  • Serve with tartar sauce and lemon wedges