There are many times I need to copy “stuff” from a website that is structured in such a way that simply copy/pasting the table data is impossible. Screen prints work, but I usually want the table of data in Excel so I can add notations and such. In these cases, running JavaScript from the browser’s developers console lets you access the underlying text elements.
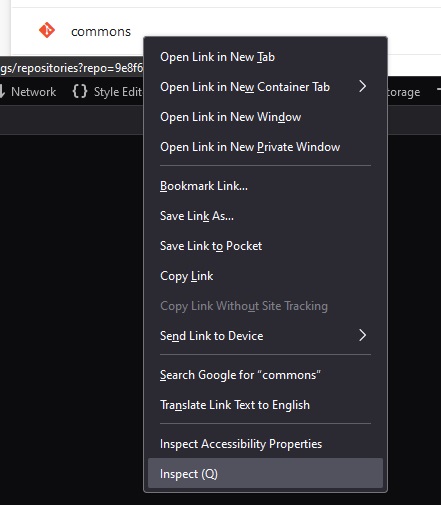
Right click on one of the text elements and select “Inspect”
Now copy the element’s XPath
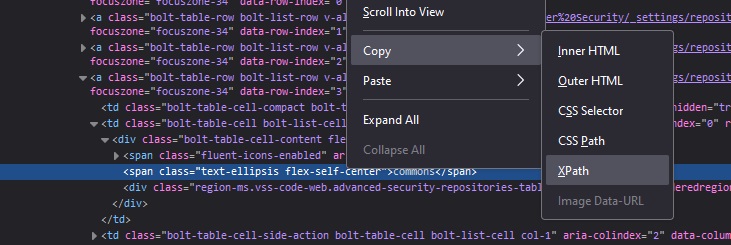
Read the value — we don’t generally want just this one element … but the path down to the “tbody” tag looks like a reasonable place to find the values within the table.
/html/body/div[1]/div/div/div[2]/div[2]/div[2]/div/div[3]/div/div/div[3]/div/div/div/table/tbody/a[4]/td[2]/div/span[2]
Use JavaScript to grab all of the TD elements under the tbody:
// Define the XPath expression to select all <td> elements within the specific <tbody>
const xpathExpression = "/html/body/div[1]/div/div/div[2]/div[2]/div[2]/div/div[3]/div/div/div[3]/div/div/div/table/tbody//td";

// Use document.evaluate to get all matching <td> nodes
const nodesSnapshot = document.evaluate(xpathExpression, document, null, XPathResult.ORDERED_NODE_SNAPSHOT_TYPE, null);

// Log the number of nodes found (for debugging purposes)
console.log("Total <td> elements found:", nodesSnapshot.snapshotLength);

// Iterate over the nodes and log their text content
for (let i = 0; i < nodesSnapshot.snapshotLength; i++) {
    let node = nodesSnapshot.snapshotItem(i);
    if (node) {
        const textContent = node.textContent.trim();
        if (textContent) { // Only log non-empty content
            console.log(textContent);
        }
    }
}
Voila! I redacted some data below, but it’s just a list of values, one per line.