A pawn … this little guy took quite a long time to get cat shaped, but I think I’ve got it!
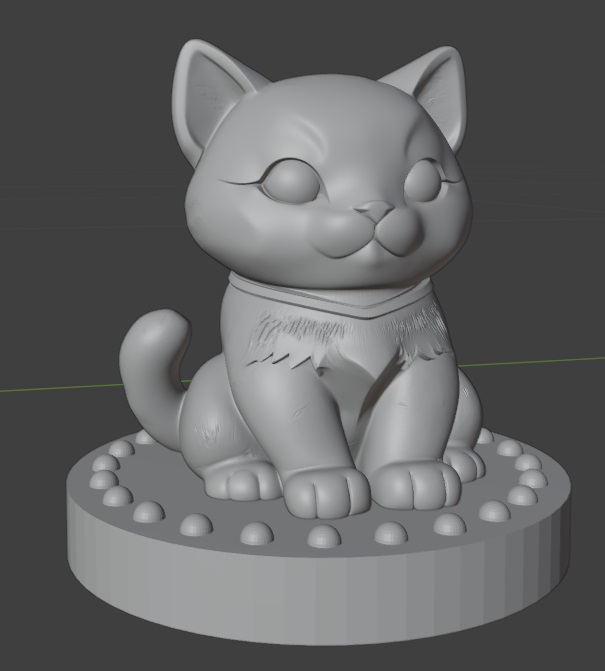
A pawn … this little guy took quite a long time to get cat shaped, but I think I’ve got it!
OK, so I don’t know that anyone would see this and say “cat!” … but it’s a start!
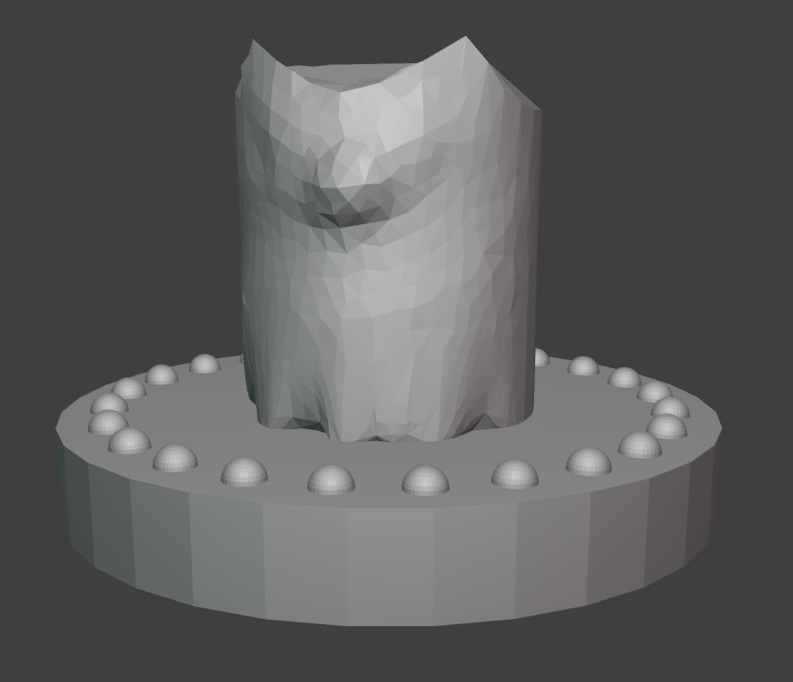
My idea is to have a king and queen, a knight pouncing on something, a bishop based on the beckoning cat, and a rook that is a cat sleeping in a little cat tree. Pawns will just be kittens. Should probably start there since they’re the least adorned.
I’ve got a start to my chess pieces — now I just need to figure out how to use all of these sculpting tools to nudge this cylinder into the shape of a kitten king!
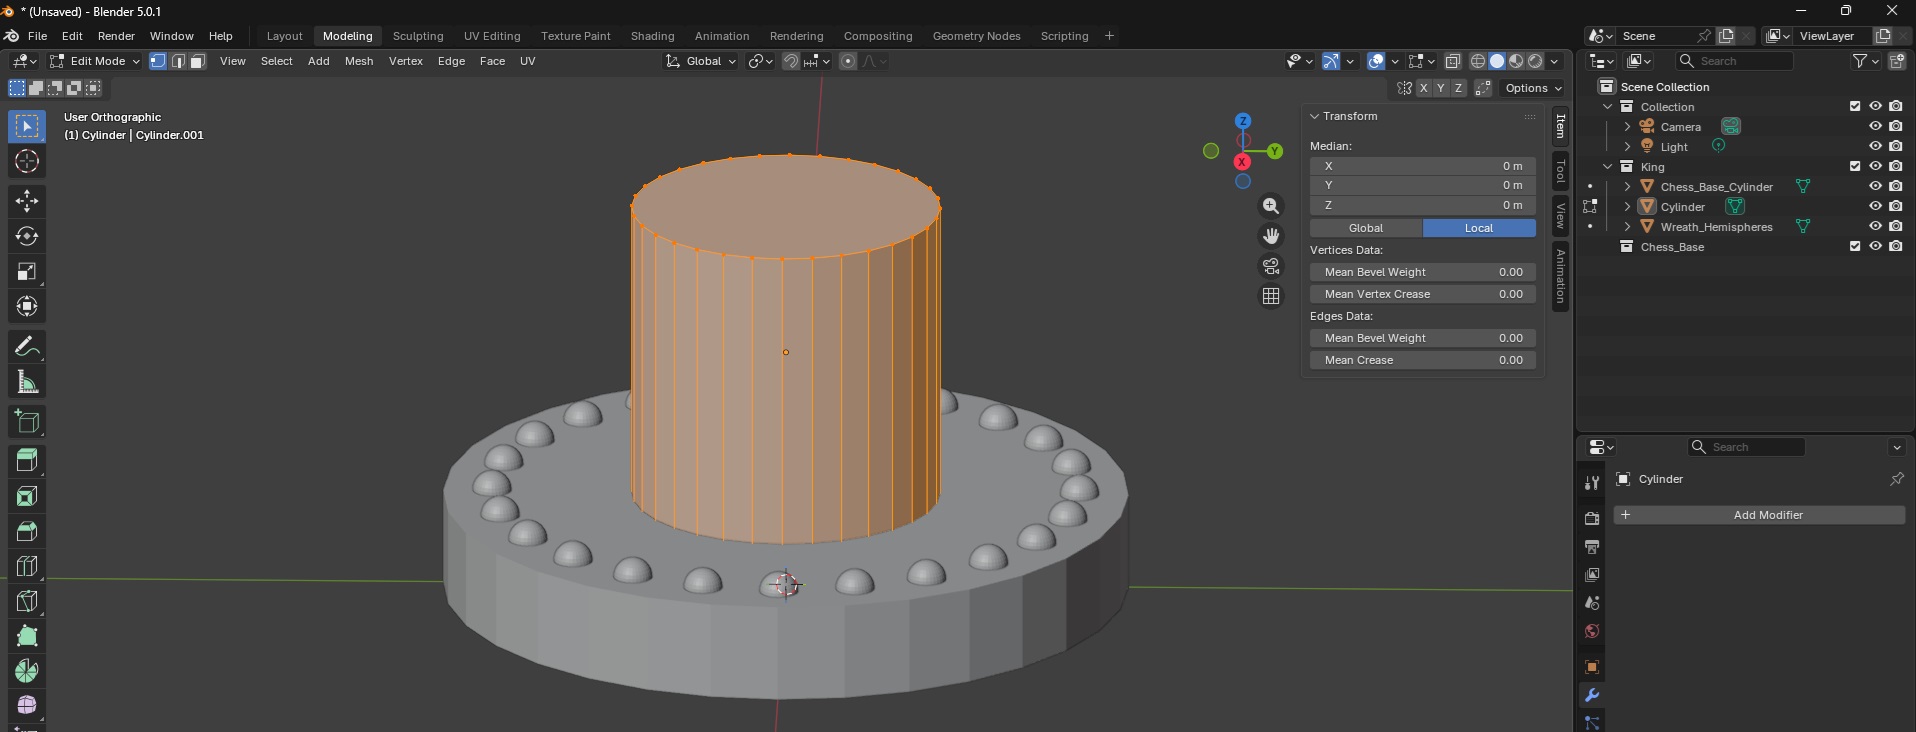
Originally, I wanted to sculpt the entire thing in python, but it appears that the programmatic interface only works in defined shapes. I guess I could construct millions of tiny triangles? polygons? to create cats … but I suspect that using the actual sculpting tools is going to be the easier approach.
However, the base of each piece seems perfect for a script. This will ensure consistency in my chess pieces (and let me play around with the Python approach since I think it is really cool that Blender takes Python code!). I am making decorated cylinders onto which my figures will sit.
import bpy
import bmesh
import math

INCH = 0.0254  # meters per inch

params = {
    # Cylinder base size
    "base_diameter_in": 1.75,
    "base_height_in": 0.25,

    # Wreath hemispheres
    "hemi_count": 24,
    "hemi_radius_in": 0.05,
    "hemi_offset_in": 0.125,  # inward from base outer edge

    # Collection
    "collection_name": "Chess_Base",
}

def inch(v):
    return v * INCH

def ensure_collection(name):
    if name in bpy.data.collections:
        return bpy.data.collections[name]
    col = bpy.data.collections.new(name)
    bpy.context.scene.collection.children.link(col)
    return col

COL = ensure_collection(params["collection_name"])

def build_base():
    base_r = inch(params["base_diameter_in"]) / 2.0
    base_h = inch(params["base_height_in"])
    # Place the base so its top is at Z = base_h (sitting on Z=0 plane)
    bpy.ops.mesh.primitive_cylinder_add(radius=base_r, depth=base_h, location=(0, 0, base_h / 2.0))
    base = bpy.context.active_object
    base.name = "Chess_Base_Cylinder"
    # Link explicitly to target collection (in case active collection differs)
    if base.name not in COL.objects:
        COL.objects.link(base)
    return base

def make_hemisphere_mesh(radius_m, segments=32, rings=16):
    bpy.ops.mesh.primitive_uv_sphere_add(radius=radius_m, segments=segments, ring_count=rings, location=(0, 0, 0))
    sph = bpy.context.active_object
    bm = bmesh.new()
    bm.from_mesh(sph.data)
    # Keep the top hemisphere: delete vertices with z < 0 (tolerance to avoid floating error)
    to_delete = [v for v in bm.verts if v.co.z < -1e-7]
    if to_delete:
        bmesh.ops.delete(bm, geom=to_delete, context='VERTS')
    bm.to_mesh(sph.data)
    bm.free()
    hemi_mesh = sph.data
    hemi_mesh.name = "Hemisphere_Mesh"
    # Remove the temporary object but keep the mesh datablock
    bpy.data.objects.remove(sph, do_unlink=True)
    return hemi_mesh

def build_wreath_hemispheres(hemi_mesh):
    base_r = inch(params["base_diameter_in"]) / 2.0
    base_h = inch(params["base_height_in"])
    ring_r = base_r - inch(params["hemi_offset_in"])
    count = params["hemi_count"]

    hemis = []
    for i in range(count):
        theta = (i / count) * 2.0 * math.pi
        cx = ring_r * math.cos(theta)
        cy = ring_r * math.sin(theta)
        obj = bpy.data.objects.new(f"Hemi_{i:02d}", hemi_mesh)
        # Flat face of hemisphere (its equator at local Z=0) sits on base top (Z=base_h)
        obj.location = (cx, cy, base_h)
        COL.objects.link(obj)
        hemis.append(obj)

    # Join hemispheres into a single object
    bpy.ops.object.select_all(action='DESELECT')
    for o in hemis:
        o.select_set(True)
    bpy.context.view_layer.objects.active = hemis[0]
    bpy.ops.object.join()
    wreath = bpy.context.active_object
    wreath.name = "Wreath_Hemispheres"
    return wreath

def build_all():
    base = build_base()
    hemi_mesh = make_hemisphere_mesh(inch(params["hemi_radius_in"]))
    wreath = build_wreath_hemispheres(hemi_mesh)
    print("Built:", base.name, wreath.name)

build_all()
Scott and I were learning enough Blender to modify a mount for the Ranger, and Anya had randomly borrowed a “Blender for Dummies” book from the library. As we’ve been learning more about Blender, I came across a video series showing how to create chess pieces as a way of learning the program. Which has sparked the family blender challenge — everyone is creating their own chess set. Anya spent some of her holiday break translating one of her wood carvings into a model to use as the pawns … now Scott and I are behind! I think I’ll make a cat themed set … I just need to learn how to sculpt in Blender since the python API interface only seems to create basic shapes.
We were playing with Blender this evening to modify a 3d model to mount the mirror on our Ranger — it reminds me a lot of learning vim where there’s just a lot of hidden “type this character and it does magic stuff“. Which, ironically, I love vim because of this … however I’ve also been using vi and vim since 1994. So I know the random character to type. Blender … not so much yet.
Oddity of the day — after scaling an object, you need take an additional step otherwise it’s not really scaled and measurements show up with unexpected values. To reset the scale:
Hit Ctrl + A
Select Scale in Object Mode to apply the current dimensions as the new scale of 1
They call this applying the scale. Which … I expected it did when I entered the scale factor and stuff changed size on the screen. But now I know!
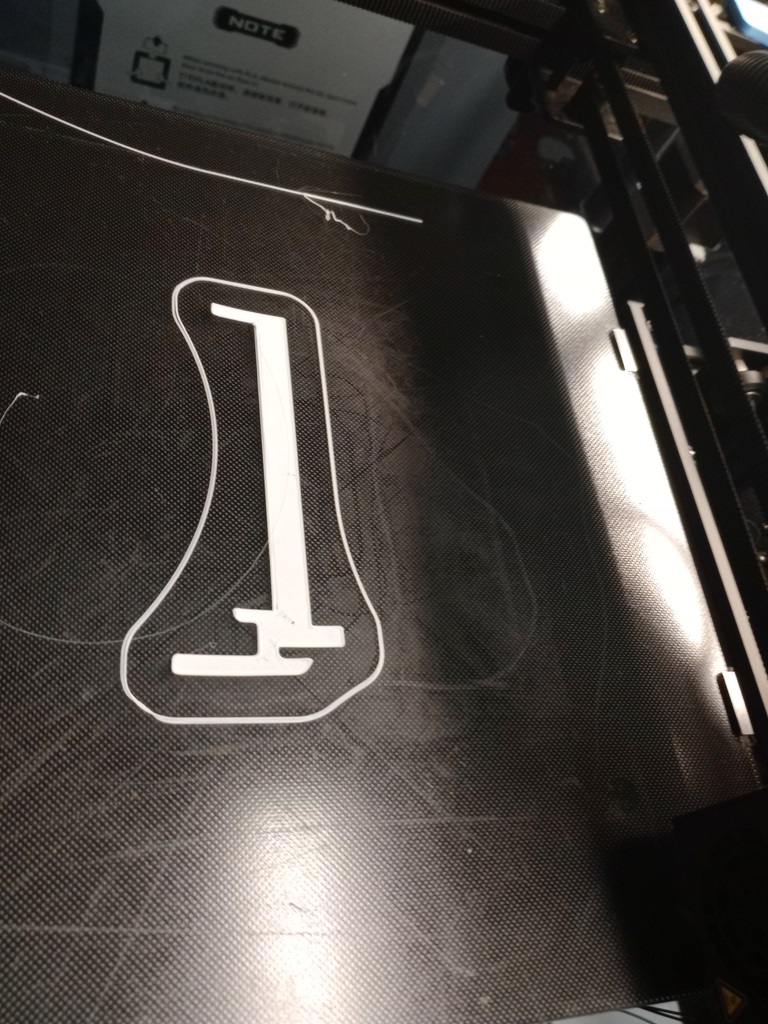
We finally have the Ender 6 printing – you need to keep the fan on any time the hot end is heating (or it clogs up), low retraction (2mm), and adjust the z offset as it prints the skirt (or brim, we’ve switched to using a brim to ensure adhesion)
There are things that are evidently too self-evident to bear mentioning — I’m certain I do it too. A friend of mine who taught computer programming used the example of telling a student how to get to the Bursar’s office v/s writing computer code to do it. You don’t have to tell the person to leave the room, go down the hall, down the stairs, and outside. There’s a lot of instruction humans will infer. A computer, on the other hand, will be completely stymied if you omit a few steps.
Well, 3D printing seems to be loaded with so-obvious-I-won’t-mention-it stuff. A lot of getting started guides and troubleshooting guides are out there in Internet-land — level the bed at the temp you’ll be printing, temperature guides for different materials, how to identify leveling or flow problems in prints. But to get started … there are a few vital pieces of info that seem to fall into the “so obvious it isn’t worth mentioning” category.
Loading the WanHao Duplicator i3 Plus / Monoprice Maker Select IIIp v2, you have to depress the little lever to load filament. Also — even though you’ve got a brand new 3D printer, they’ve run a test print on it. Nice way to confirm everything works … but it also means that brand new device you just pulled out of the box … has a clogged nozzle and needs to be cleaned.
Filament doesn’t start flowing perfectly immediately — add a couple lines of ‘skirt’ to your print. It does nothing to prevent warping or increase bed adhesion, but it makes a small loop that you don’t subsequently need to detach from your printout. If there are a couple of blobs before the extruder really gets going on that little loop? No big.
With three leveling screws, you are never going to get it perfect. Each little tweak throws all the others out of whack (three points define a plane, four over-define it). Get the bed level to the point you’re making little teeny tiny adjustments and you’re good.
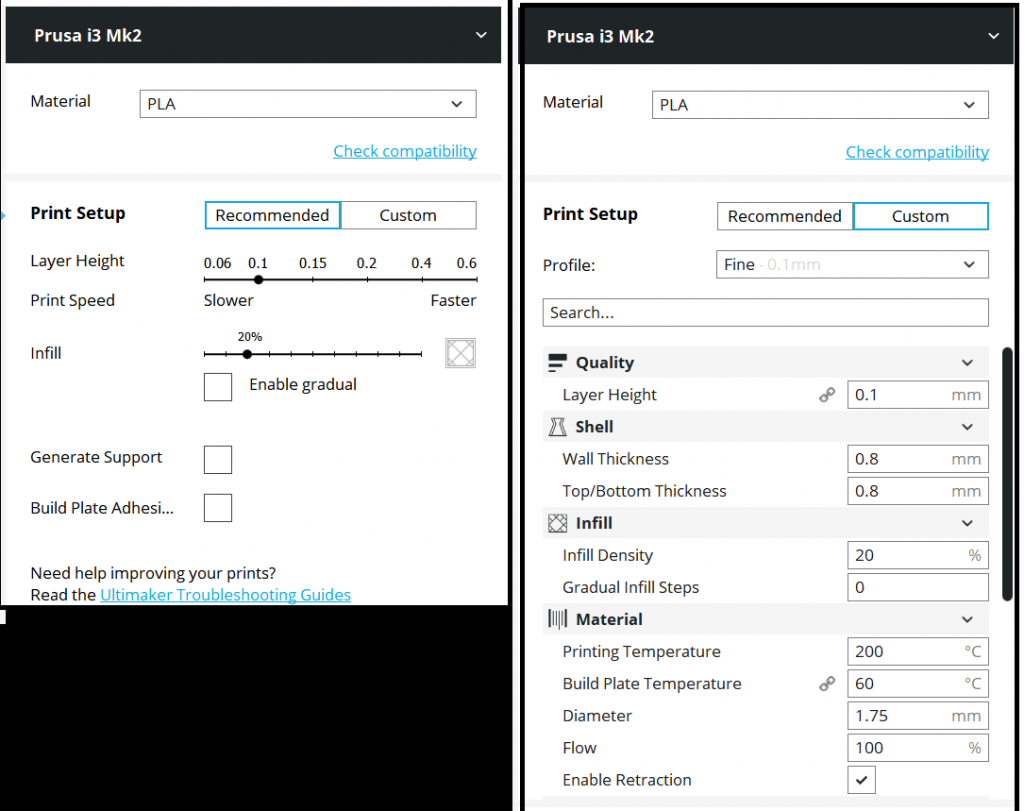
And in Cura – all of the good settings you need to tweak up to get adhesion (primarily temperatures, speed, and initial layer height) are hidden. The “Print Setup” section defaults to “Recommended”. Click “Custom” and you’ll see settings for all of the stuff people recommend to sort poor adhesion, poor print quality, etc.
And some gcode to wipe off the extruder tip before printing because I want to be able to find it again:
M107 ;turn off fan
G28 X0 Y0 Z0 ; home X, Y and Z axis end-stops
G29 ; initiate z-probing
G0 X0 Y0 F9000 ; Go to front
G0 Z0.15 ; Drop to bed
G92 E0 ; zero the extruded length
G1 X40 E25 F500 ; Extrude 25mm of filament in a 4cm line
G92 E0 ; zero the extruded length
G1 E-1 F500 ; Retract a little
G1 X80 F4000 ; Quickly wipe away from the filament line
G1 Z0.3 ; Raise and begin printing.
When we started setting up our 3D printer, I installed Cura on my laptop … but I don’t want to leave my laptop in the office & hooked up to the printer for a day or two. We could install Cura on the server and use it to print, but we’d also need to use something like xvnc so we could remotely initiate a print job and not need to stay connected to a redirected X session for a day or two. Thus began the quest for a server-based 3D printer controller. I think we’re going to use OctoPrint on our Fedora server.
There are a few prerequisities: python, python-pip, and python2-virtualenv, and git-core (well, you can just download/extract the project … but having a git client is quicker/easier).
In the directory where you want the OctoPrint folder, run “git clone https://github.com/foosel/OctoPrint.git”
Create a user for octoprint and add that user to the tty and dialout groups.
Create a python virtual environment: virtualenv venv
Install OctoPrint into the new environment: ./venv/bin/python setup.py install
Log into the octoprint service account (interactive logon or su), start a screen session for the server, then start the server with in the screen:
su – myserviceaccount
screen -d -m -S OctoPrintServer
screen -x OctoPrintServer
/path/to/OctoPrint/venv/bin/octoprint
Then access the web service and continue setup – the default port is 5000. My next step is to write an init script so the server will auto-launch on restart … but this is functional enough to start printing.
A 3D printer filament manufacturer, MakerGeeks, has been running a series of awesome deals since Black Friday. We placed an order for several of their their “grab bag” packages – which I assume to be production overruns and whatever isn’t selling. We want to make a few large prototypes – if it’s an amalgamation of oddball colours … whatever, it’ll still be functional. We can pay extra to select the colour once we’ve got a finished model file.
A few hours after placing my order, I got a mass e-mail saying essentially “we sold a lot more stuff than we expected, it’s gonna take a while to ship”. Wasn’t buying Christmas presents, so waiting a while … whatever. Two weeks later, I haven’t heard a thing from them. Odd. I sent a quick e-mail asking for someone to verify that my order didn’t get lost or something. And never heard back from them. Waited another week and sent a follow-up.
Checked them out on the BBB site and found out they’ve got a really bad reputation for non-existent customer service And not shipping ‘stuff’. Sent an e-mail to all of the contacts listed on the BBB site (the phone number is unanswered and rolls to a generic message). Another week with no response, and I filed a BBB complaint mostly to increase the number of people saying “these people don’t bother answering e-mail and suck at order fulfillment”.
Additional irony – I’d subscribed to their newsletter when we placed our order. The five weeks of no communication from the company did include an almost daily e-mail with information on their holiday promotion. So they’re not bothering to ship my stuff, but they’re actively soliciting new orders!?!
What bothers me, though, is that a simple automated job would be the difference between initiating a charge-back and waiting for my order to ship. There’s an order database somewhere. Pull a list of all open orders & send a message that says increasingly comforting versions of “we haven’t forgotten about you, we just haven’t gotten to you yet”. If it were me, I’d probably include something like “We currently have outstanding orders for 25,839 KG of filament that we’re working through. The machines are running as fast as they can, and we’re shipping 2,848 KG a day. We want to thank you for your patience as we work through this amazing volume of holiday orders.”. Actual message content is almost irrelevant. The point is a few dozen development hours would be saving orders and improving the company’s reputation.
Instead I get nothing. With no faith that the company will ship me anything ever … and since I don’t want to try disputing a charge six months after it was made (had problems with that before – prepaid a CSA membership through PayPal, waited eight months for the new cycle to start, but I wasn’t on their list and they claimed to have no record of my payment. Tried to dispute it through PayPal and was told the window to dispute the charge was up … but I didn’t know I wasn’t going to be part of the new year until the first delivery!), I presented my communication and their complete lack of response to the credit card company. About 24 hours later, the charge-back was completed.
