As I’ve been writing these “Did you know” blog posts, I’ve needed
sample data to demonstrate how a function works. In Excel, that’s easy enough
as there are RAND()
and RANDBETWEEN(iLow,iHigh)
functions. But how do you get sample text in Word? I used to just paste in part
of a public domain work (as a cultural aside – the twenty years of copyright
protection added under the Sonny Bono Copyright Term Extension Act are up this
year, so the list of public domain works is expanding again). But what if you
don’t have the original Anglo-Saxon Beowulf laying around?
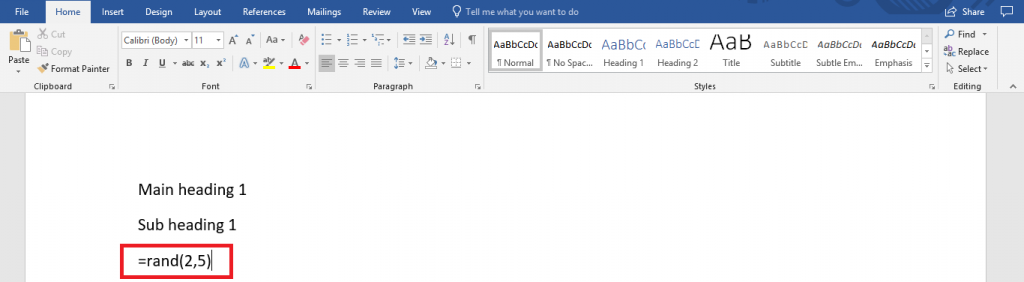
Microsoft Word has a rand() function too – type =rand(#Paragraphs,#Sentences)
The example here generates two paragraphs that are five
sentences each.
Hit enter – the formula is replaced with random text.
(This works in PowerPoint too). If you want some different text, try the lorem(#) function — the number in the parenthesis is the number of paragraphs — that uses the lorem ipsum paragraph as the content source.
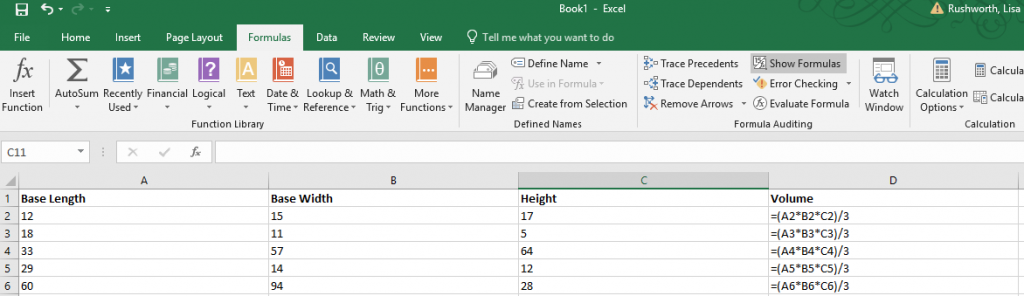
Formulae in Excel aren’t always easy to decode – even a
relatively simple formula, like the volume of a right rectangular pyramid below,
can be a little cryptic with the A2 type cell identifiers.
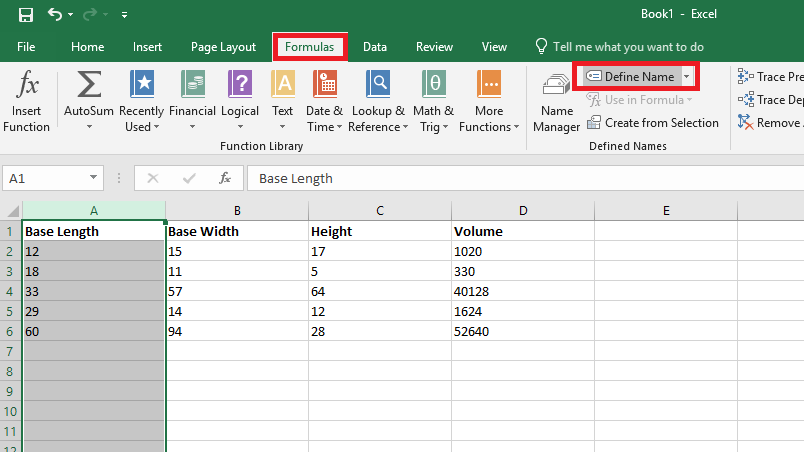
You can name ranges and use range names to make a formula easier to understand. Highlight a data set – in this case, I am highlighting the “length” values – column A. On the “Formulas” ribbon bar, click on “Define Name” (you don’t need to hit the inverted caret on the right of the button – just click the ‘define name’ text).
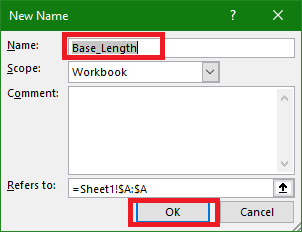
Supply a name for the range – in this case, I am calling it “Base_Length”
(range names need to start with a letter or underscore and cannot contain
spaces). Click OK to save the range name. Repeat this operation with all of the
other data groups – in my case, I named Column B “Base_Width” and Column C “Height”.
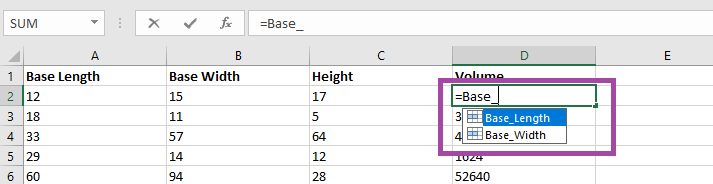
Use the name instead of the cell identifier – as you type
your formula, the range names matching your typed text will appear.
It is now a lot clearer
what this formula means – base length
times base width time height all divided by three. Which is the formula to calculate the volume of a right rectangular
pyramid.
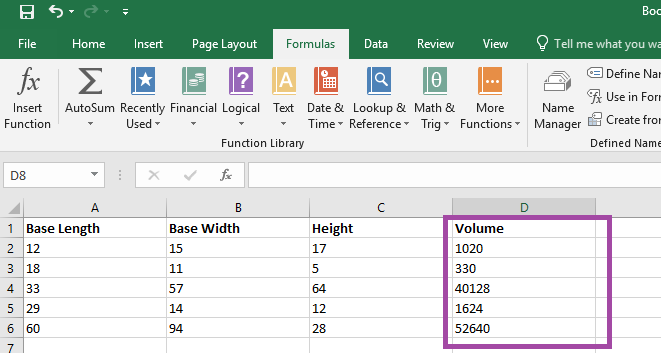
The calculated answer is the same either way – but this
makes it easier to figure out what exactly you were computing when you open the
spreadsheet again in six months 😊 (Or share the
spreadsheet with others).
There are times when it is easy to tell who is speaking – there aren’t a lot of women in my group, so “the female voice” is usually me. My friend Richard is generally the only person with a New Zealand accent on any call (although someone who didn’t grow up in a Commonwealth country may have trouble distinguishing him from the guy from Australia). And after you work with someone for a while, you learn the voice and lexical nuances of colleagues. The rest of the time? I end up pausing the conversation to check who it was that volunteered to serve as my tester and clarify who is going to be getting back to me next week. In a Teams meeting, though, you can quickly tell who is speaking – and respond with a much friendlier “thanks, Jim, for offering to help”.
When you join a Teams meeting, you’ll see up to four large tiles
with meeting participants. If there are more than five participants (you don’t show
up on your own view!), the remaining people will be represented by smaller
images in the lower right-hand corner of the screen.
When someone is speaking, their tile will be highlighted in
a purply-blue and a brighter highlight circumscribes their image.
The four large tiles represent the most recent speakers, so
you will notice who is in these four tiles change throughout the call. And, yeah,
it’s possible for more than one person to be talking at a time – you’ll have
multiple highlighted tiles.
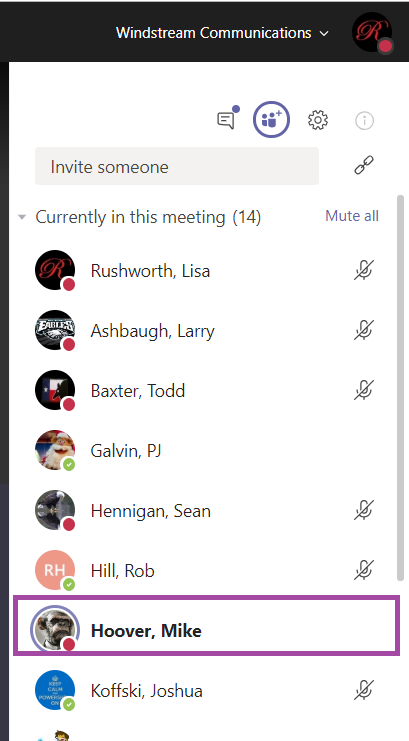
There is another place to view who is speaking. On the right-hand
column, click to enter the participant pane.
The current speaker will be bolded.
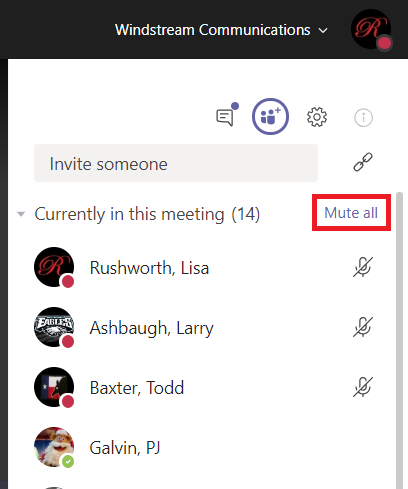
Bonus Features: Sometimes
I’ll start a large call and have trouble getting everyone’s attention to start the call. In the participant pane,
you can click “Mute all” to mute all
participants. N.B. Any participant can do this – so don’t test it in the
middle of a real discussion!
And just like meetings through the PSTN system or other web-meeting
platforms, you’ll get the occasional person typing without hitting mute. Or speaking
to someone who popped into their office. Or experiencing feedback on the connection.
In Teams, it’s easier to identify who
is causing a disruption – they are going to be highlighted as speaking.
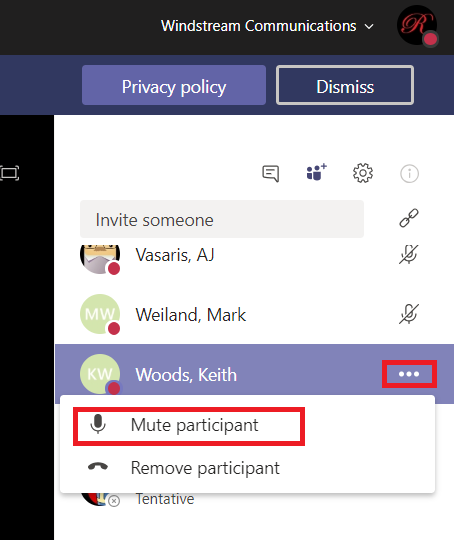
Once you’ve identified the source of the noise, click the
not-quite-a-hamburger-button next to their name and select “Mute participant”.
Applications can generate data in formats that aren’t quite useful – glomming multiple fields
together to make something unusable. And asking people to type information can
yield inconsistent results – is my name Lisa Rushworth, Lisa J Rushworth, or
just Lisa? Excel has several functions that allow you to produce consistent,
usable data (without copy/pasting or deleting things!)
Flash Fill
Flash
Fill will try to figure it out for you. Add an empty column (or more) and manually
type one or two values. On the “Data” ribbon bar, select “Flash Fill” and Excel
will use the data you’ve entered into the row to figure out what should go in
the rest of the row.
The guesses aren’t 100% accurate – especially if your
information is not consistent – but it’s a lot
easier to delete the handful of things that are obviously not zip codes …
Than to work out a formula that extracts the same
information
Text to columns
Text to columns uses the fixed-length file and delimited
file import wizard on a column of data – essentially treating that column as a
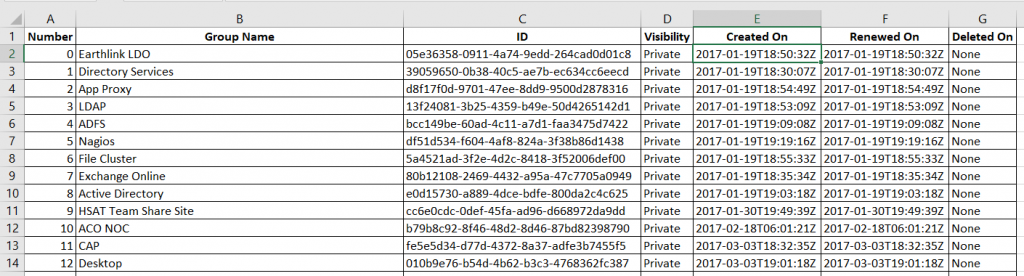
file to be imported. In this example, a DateTime value is provided in a way
that Excel only sees it as a string. And, frankly, I am not interested on the
exact hundredth of a second the event occurred. What I really want to do is group these creation dates by day, so all I
need is the date component.
If you want to retain all the data, you’ll need to insert empty
columns to the right – otherwise the data being split out can overwrite existing data. In my case, I only want to keep one of the new columns.
Highlight the column that holds your data. On the “Data”
ribbon, select “Text to columns”
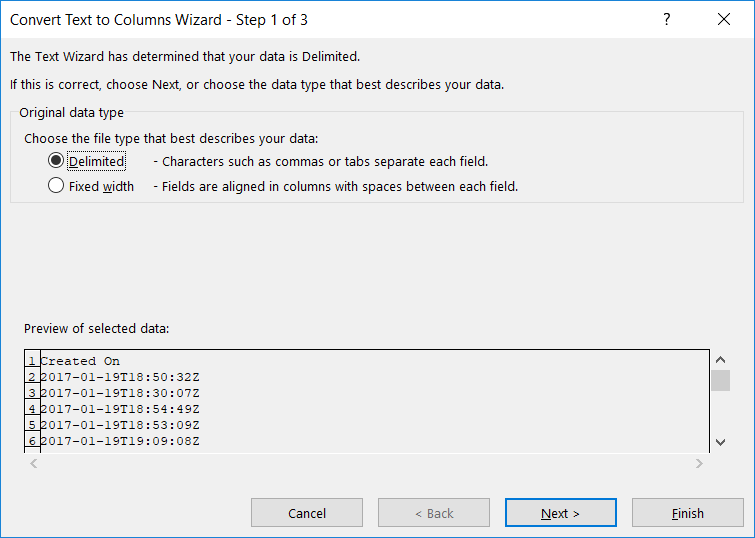
Select if the column should be split based on a fixed width
definition or a delimiter and click ‘Next’
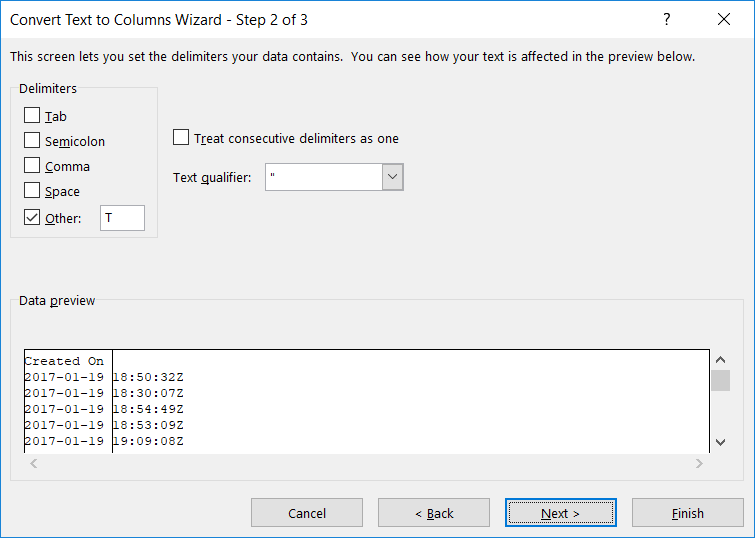
Indicate the proper delimiter – in this case, I need to use ‘Other’
and enter the letter T. A preview of the split data will appear below – make sure
it looks reasonable. Click “Next”.
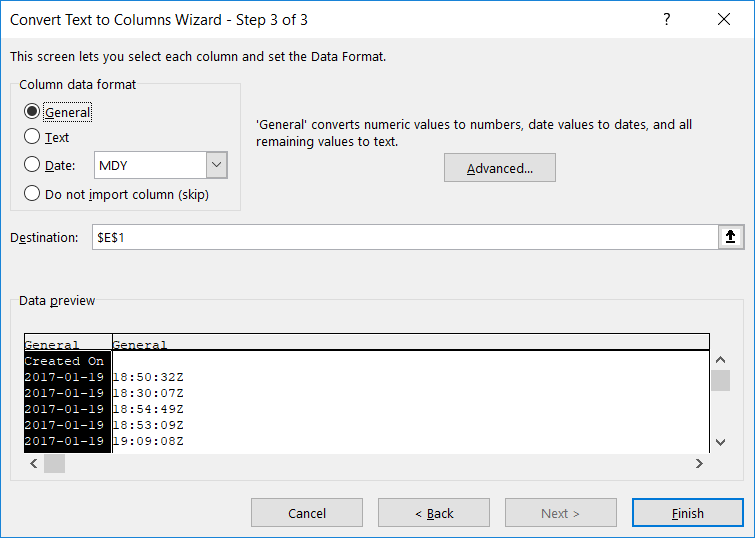
For each new row, you can
specify a data type. Or leave the type set to “General” and Excel will try to
figure it out.
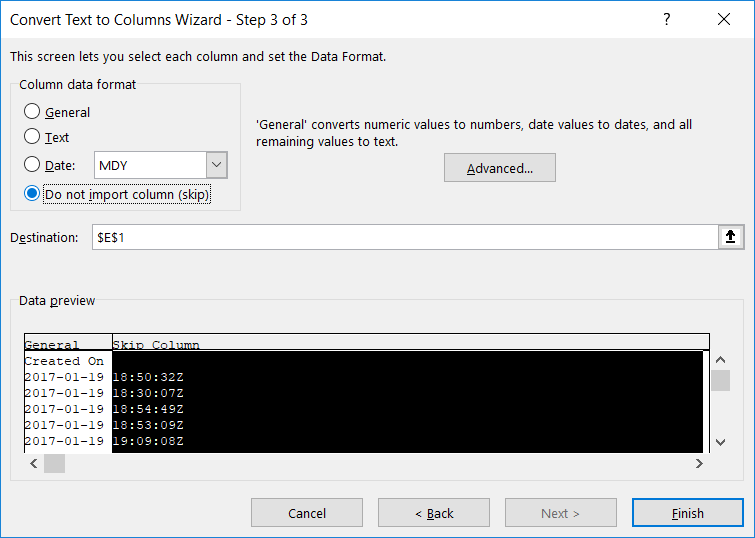
If you do not need to retain the data, select “Do not import
this column (skip)”. Click “Finish” to split your column.
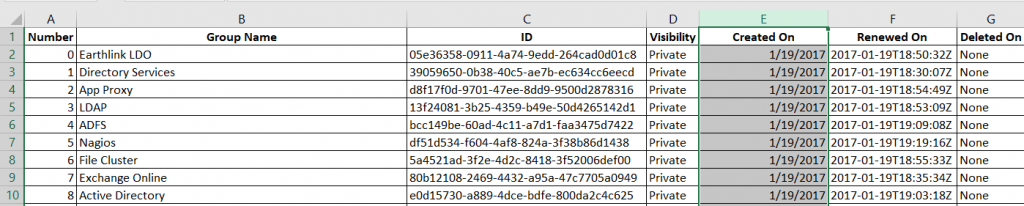
Voilà – I’ve got a usable date value.
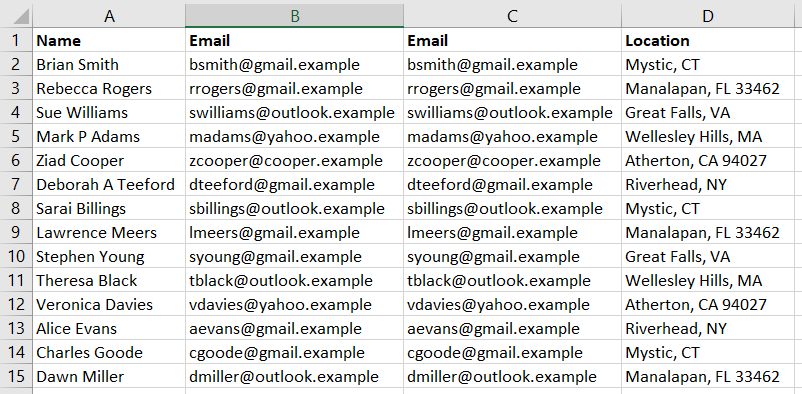
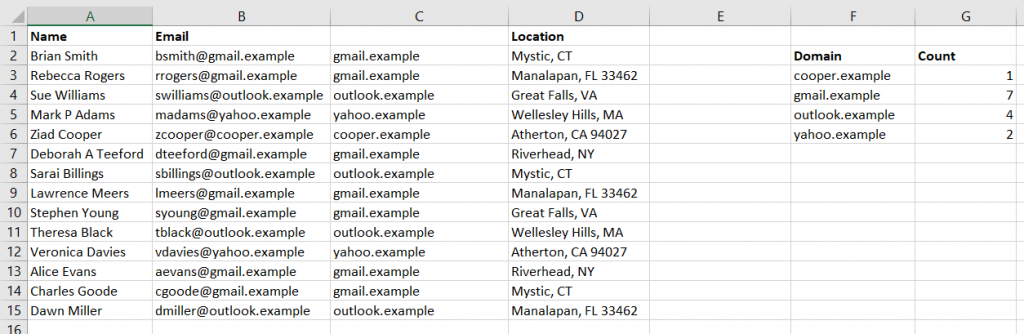
Notice, though, I have lost my original data. If you want to
retain the original data, create a
copy of the column. In this example, I want to know how many e-mail addresses
use each domain, but I want to have the e-mail addresses in a recognizable and
usable format too.
Text to columns will still replace the values from the selected column. But the copy will
contain the original text.
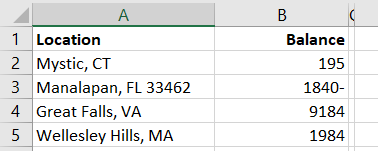
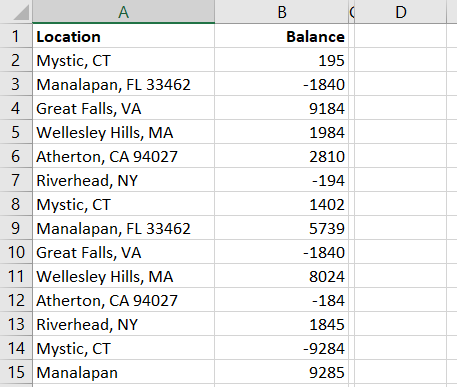
You can even use Text to columns to sort out odd data that doesn’t actually get split into multiple
columns. In this example, negative values have the minus sign after the number …
which isn’t actually a negative
number and isn’t usable in calculations.
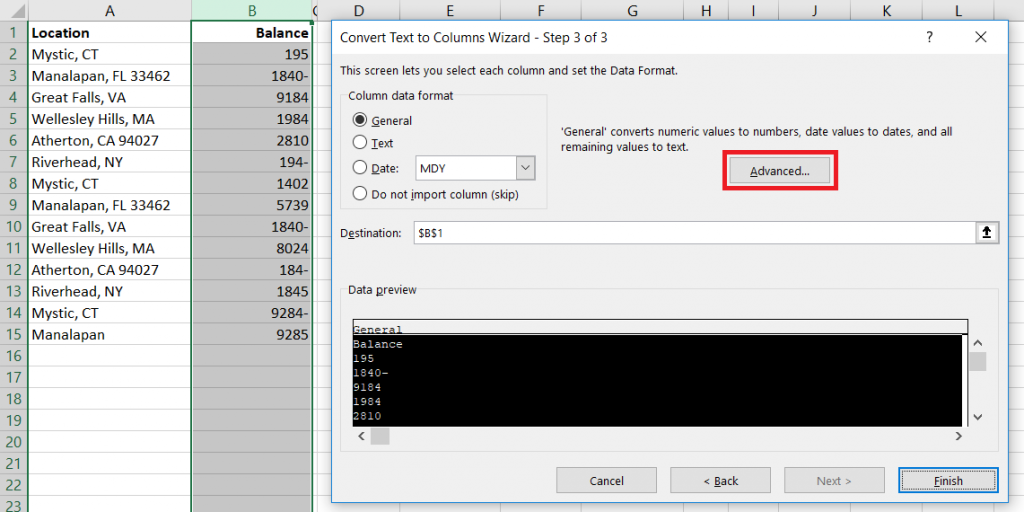
Pick a delimiter that doesn’t appear in your data, and you’ll
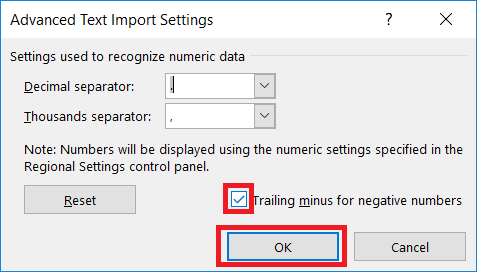
only have one column. When selecting the data format, click “Advanced”
Make sure the “Trailing minus for negative numbers” checkbox
is checked and click OK.
And we’ve got negative
numbers
Right, Left, Mid, and Search Functions:
You can also use the Search
function in conjunction with Right,
Left,
and Mid
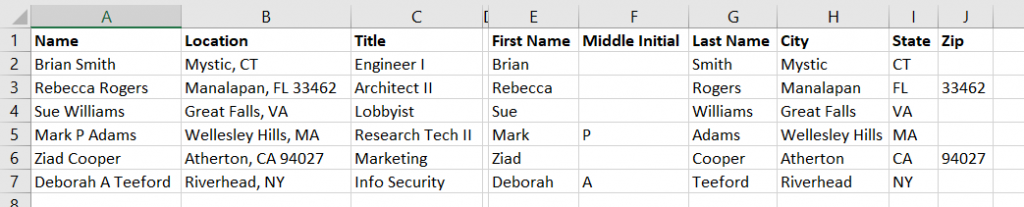
to extract components of column data. In this example, we have first and last
names. Since there are a few middle initials in there, we cannot just split on
the space character.
These formulae aren’t perfect – Mary Ann will have ‘Mary’ as
a first name – but
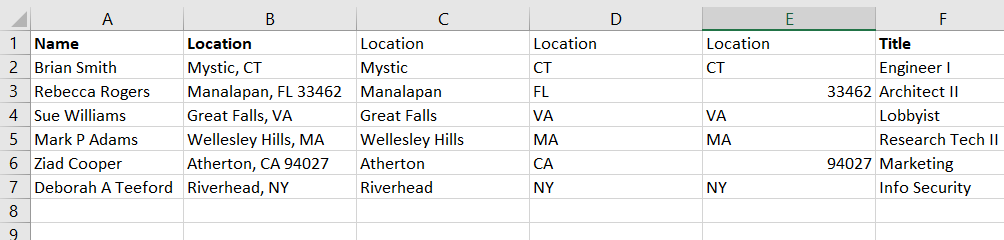
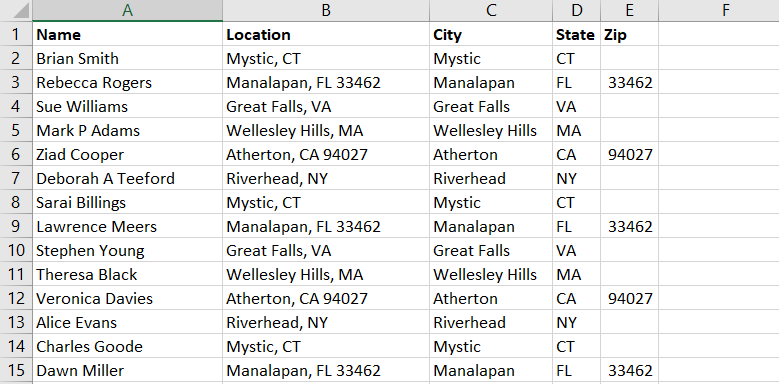
Working out where to start the text extraction and the number
of characters to extract can get complex. I’ll usually include the Substitute
function to simplify things a little – the zip code, in this case, is whatever
is left over after we find the city and state.
Producing columns with the city, state, and zip code from
the ‘Location’ column.
This post contains more niche “for developers” information than most of my Teams info series 😊
You’ve seen third-party services with connectors in Teams – both services with connectors published to Teams and services that can use the “Incoming Webhook” connector to post data. Youcan use the “Incoming Webhook” connector within your code too. If you want to allow others to post information into their Teams spaces, you’ll need a configuration option that allows end-users to supply the webhook URL. If you want to post information into your Teams space, then you can include it directly in your code. If you are doing the former, provide something like the “Creating a Teams Webhook URL” instructions below to your end users. In this example, I am doing the later. The example script is Python code that gathers statistics and posts a summary to my Teams space.
Creating a Teams Webhook URL:
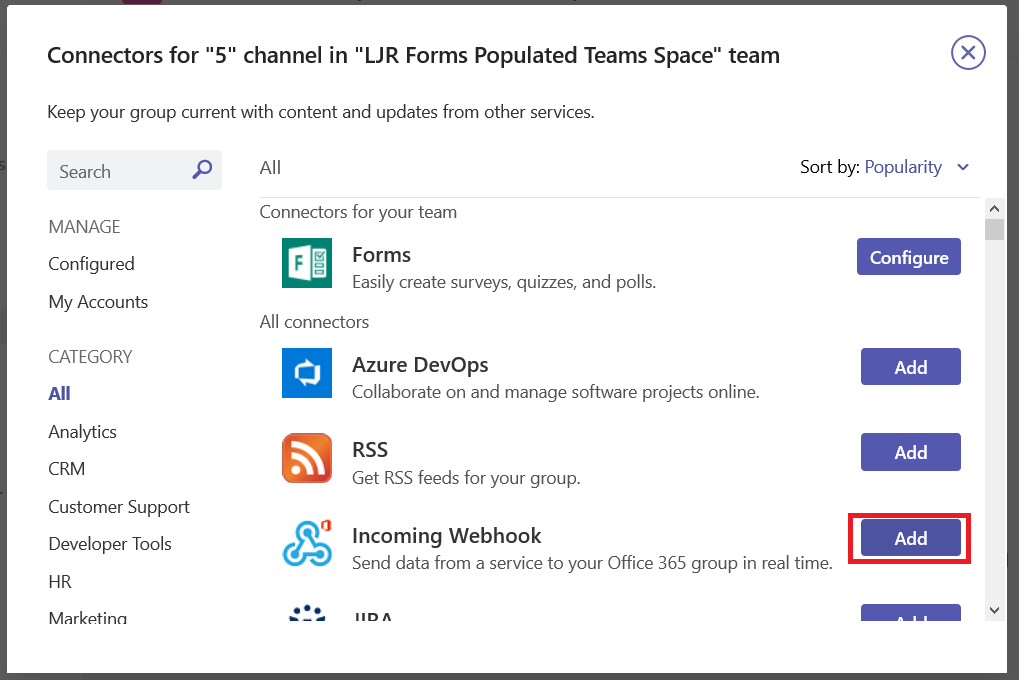
Create a URL for your incoming webhook – from the not-quite-a hamburger menu next to the channel into which you want to publish your data, select “Connectors”, find “Incoming Webhook”, and click “Add” (if you have already configured a webhook in your Teams space, you will see “Configure”instead, and will not have to ‘install’ the webhook)
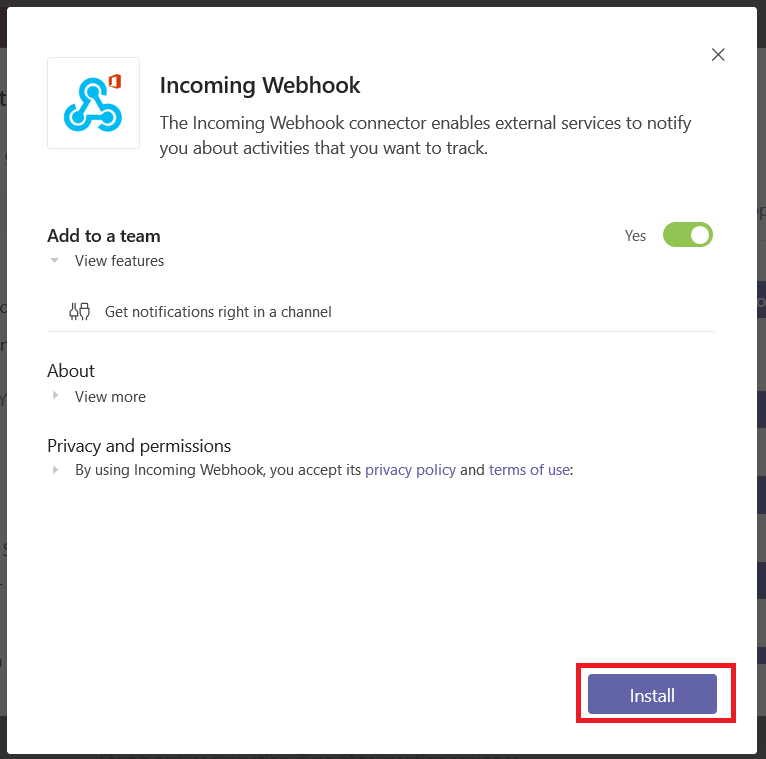
Read the privacy policy and terms of use, and if they are acceptable click “Install”
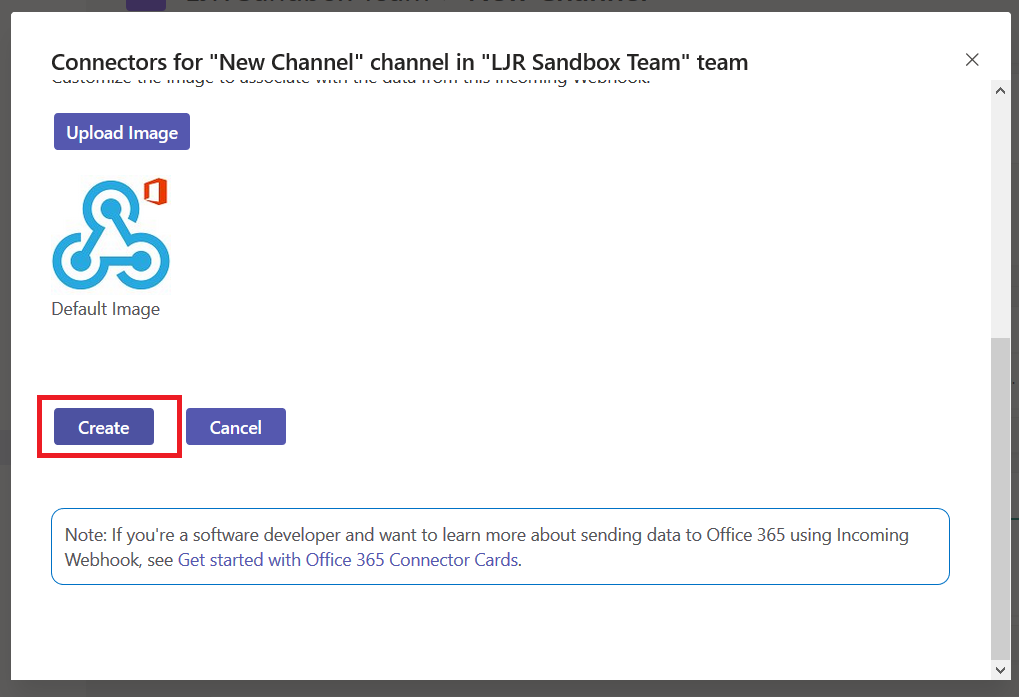
Provide a name for your webhook – this name will be displayed on all posts made via this webhook. Scroll down.
You can customize the logo associated with your webhook posts – nice if your application has a well-known logo. Click create to generate the webhook URL.
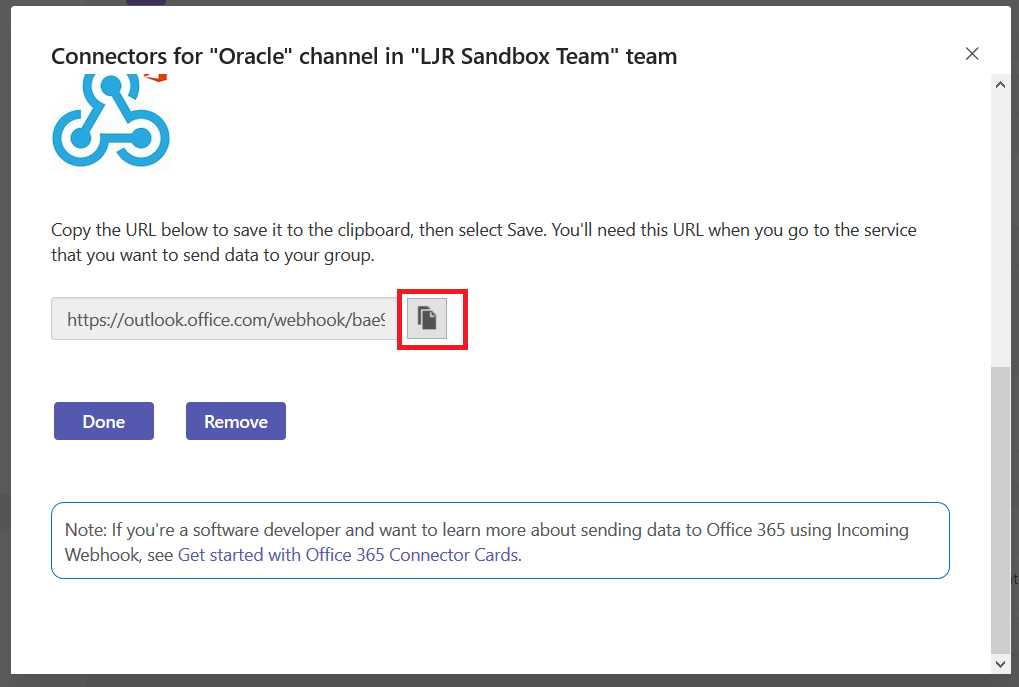
Copy the URL somewhere, then click ‘Done’.
Using Teams Webhooks Within Code:
OK, now you’ve got something like this in a text document (no, I didn’t post a real webhook to the Internet – the long pseudo-random alphanumeric string is hex, and there aren’t a whole lot of m’s and q’s in hex!):
What do you do with it? You make a POST call to that URL and supply JSON-formatted card content in the data. Microsoft provides a complete card reference, but you’ll need to use the O365Connector Card with the incoming webhook connector.
The card requires “summary” or “text” be included – you’ll get a bad data HTTP response if you fail to set one of these values. Card text can be formatted in markdown or HTML – if you want to use HTML, you need to set markdown to false.
You’ll need a function that POSTs data to a URL:
################################################################################
# This function POSTs to a URL
# Requirements: requests
# Input: strURL -- URL to which data is posted
#        strBody -- content to be sent as data
#        strContentType -- Content-Type definition
# Output: BOOL -- TRUE on 200 HTTP code, FALSE on other HTTP response
################################################################################
def postDataToURL(strURL, strBody, strContentType):
    if strURL is None:
        print("POST failed -- no URL provided")
        return False
    print("Sending POST request to strURL=%s" % strURL)
    print("Body: %s" % strBody)
    try:
        dictHeaders = {'Content-Type': strContentType}
        res = requests.post(strURL, headers=dictHeaders,data=strBody)
        print(res.text)
        if 200 <= res.status_code < 300:
            print("Receiver responded with HTTP status=%d" % res.status_code)
            return True
        else:
            print("POST failed -- receiver responded with HTTP status=%d" % res.status_code)
            return False
    except ValueError as e:
        print("POST failed -- Invalid URL: %s" % e)
    return False
And you’ll need something to create a card and call the HTTP POST function. Here, I define a function that takes statistics on a Microsoft Teams usage, formats a card with the values, and POSTs it to my webhook URL.
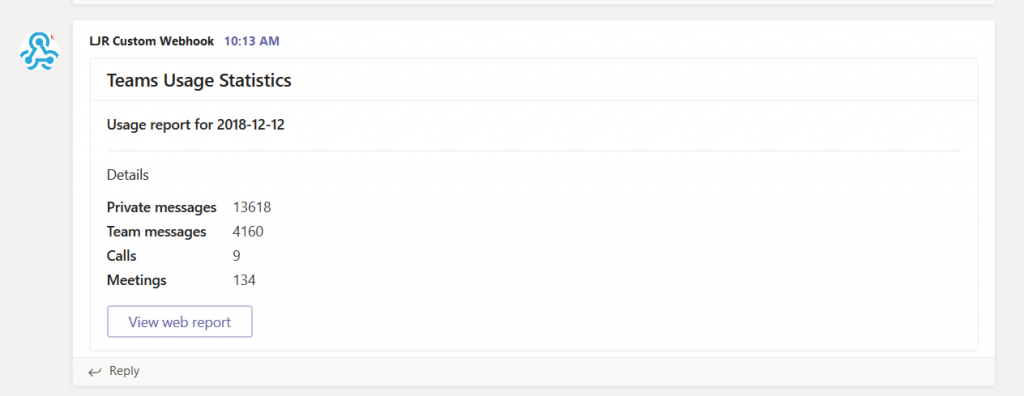
################################################################################ # This function posts usage stats to Teams via webhook # Requirements: json # Input: strURL -- webhook url # iPrivateMessages, iTeamMessages, iCalls, iMeetings -- integer usage stats # strReportDate - datetime date for stats # Output: BOOL -- TRUE on 200 HTTP code, FALSE on other HTTP response ################################################################################ def postStatsToTeams(strURL,iPrivateMessages,iTeamMessages,iCalls,iMeetings,strReportDate): try: strCardContent = '{"title": "Teams Usage Statistics","sections": [{"activityTitle": "Usage report for ' + yesterday.strftime('%Y-%m-%d') + '"}, {"title": "Details","facts": [{"name": "Private messages","value": "' + str(iPrivateMessages) + '"}, {"name": "Team messages","value": "' + str(iTeamMessages) + '"}, {"name": "Calls ","value": "' + str(iCalls) + '"}, {"name": "Meetings","value": "' + str(iMeetings) + '"}]}],"summary": "Teams Usage Statistics","potentialAction": [{"name": "View web report","target": ["https://webhost.example.com:1977/o365Stats/msTeams.php"],"@context": "http://schema.org","@type": "ViewAction"}]}' jsonPostData = json.loads(strCardContent)
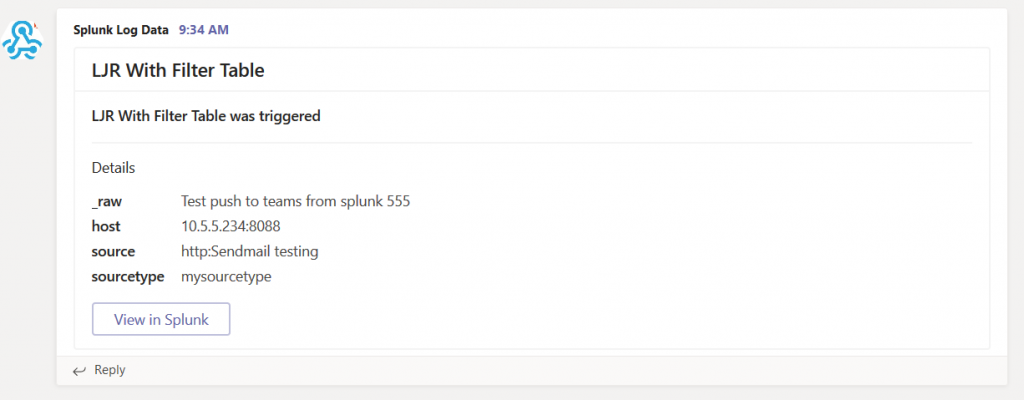
Run the program, and you’ll see information in Teams:
A personal recommendation based on my experience with third-party code that uses generic incoming webhooks — have a mechanism to see more than a generic error when the POST fails. It takes a lot of effort to pull apart what is actually being sent, turn it into a curl command to reproduce the event, and read the actual error.Providing a debug facility that includes both the POST body and actual response from the HTTP call saves you a lot of time should your posts fail.
Microsoft publishes outage notifications several places –there’s a web portal that provides general status for major Office 365 outages,a customer-only portal that provides a LOT of details on every diminished service state, a Twitter feed with status on wide-spread outages. The common feature of all of these, though, is *checking* to see if there’s an outage –start seeing several calls for the same problem, check the outage site. It works, but it is not proactive.
Twitter could be proactive, but I don’t want to be diving for my phone every time a friend posts some random musing. But Microsoft Teams connects to Twitter, and it posts filtered content into a channel,so I only see pertinent information in our Teams channel. The connector can also search hash tags – useful for tracking brand mentions.
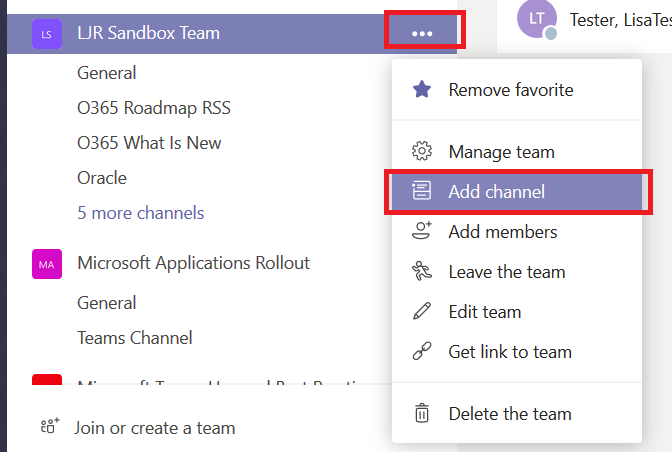
You can include Twitter posts into an existing channel or create a new one. I am creating a new channel to separate Twitter posts from other conversations.
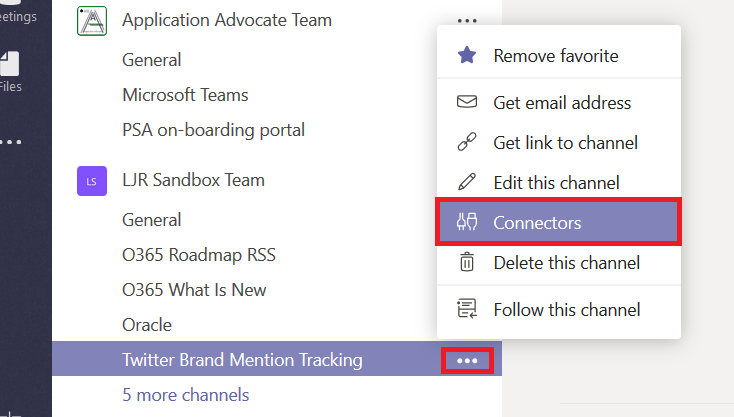
Click the not-quite-a hamburger menu next to the channel into which you want Twitter posts to appear and select “Connectors”.
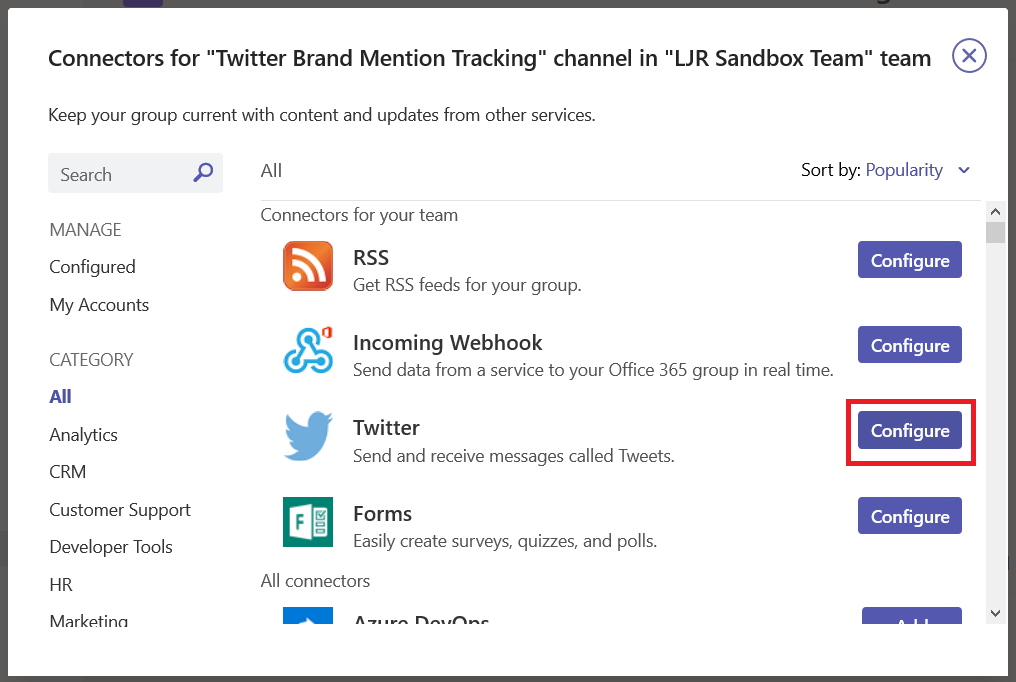
Locate “Twitter” and click “Configure”
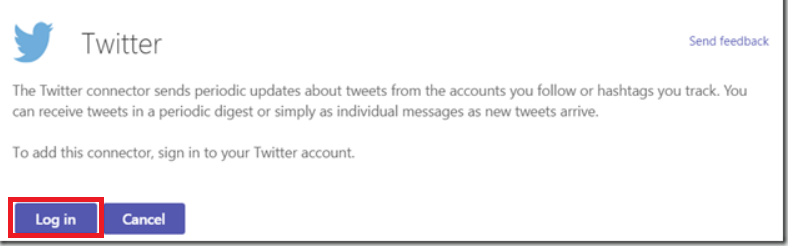
You will need to configure a Twitter account before you can configure the connector. I recommend not using your personal account. Create a new account to be used by your Teams space. If ownership of the Teams space changes, the new owner can take over the Twitter account too. Click “Log in”
Click “Continue” to proceed with Twitter authentication
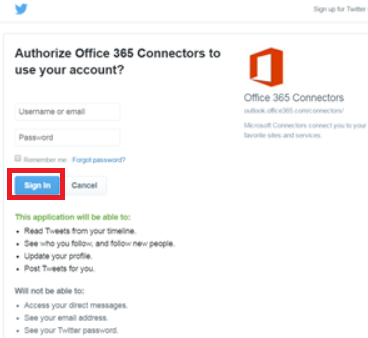
You are allowing the Twitter connector to use your account – read the access request and sign in if the usage is acceptable.
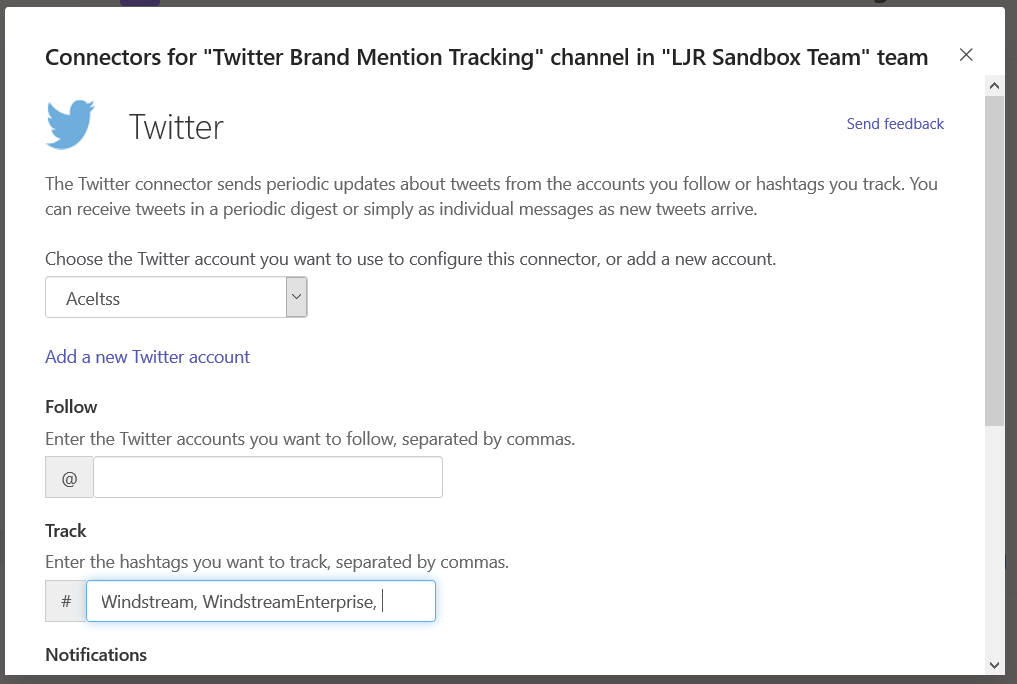
Once you have authenticated to Twitter, you will be able to configure the Teams connector. Enter accounts or tags to see Teams posts for relevant activity – do not put spaces after the commas!
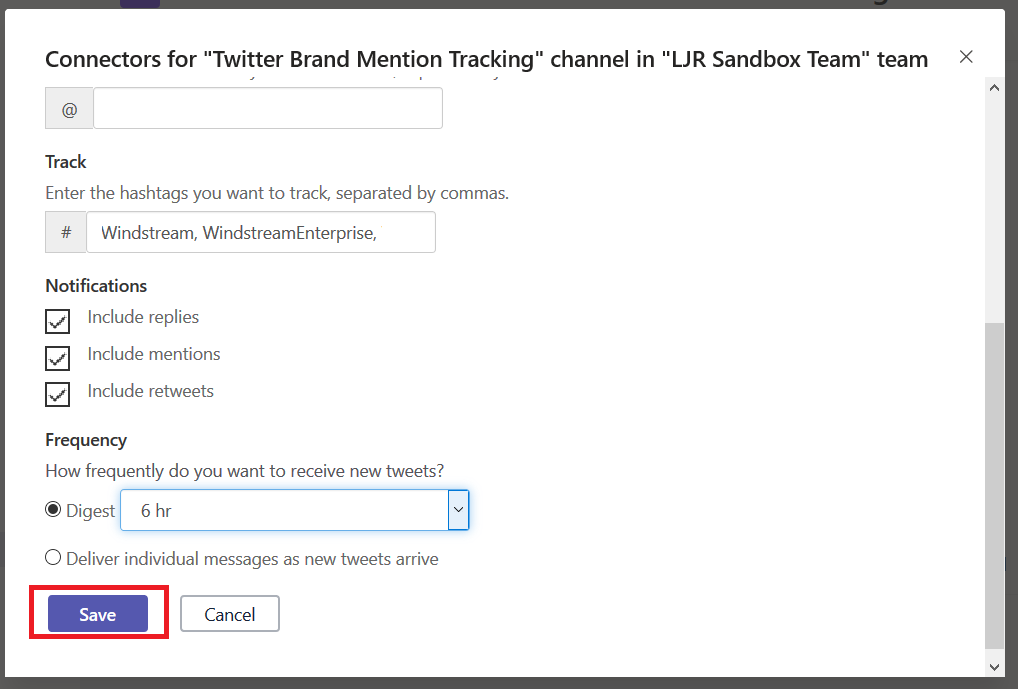
Decide if you want Teams posts for replies, mentions, or re-tweets. Select the frequency with which you want the Teams connector to check for updates – our Microsoft outage notification connector is set to “Deliver individual messages as new tweets arrive”, but I configure most other connectors to create a digest every 1 or 6 hours. Once you have completed the connector configuration, click “Save”.
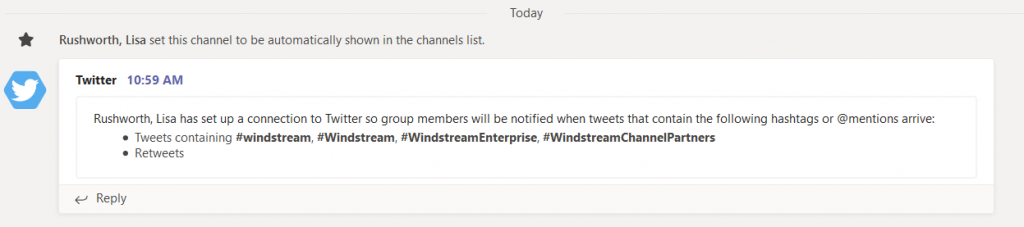
In your selected channel, you will find a post summarizing the connector configuration.
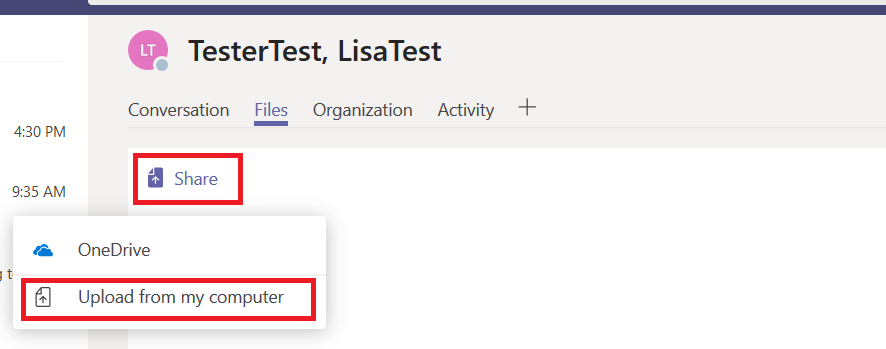
You can share files in both individual and group chats. In the chat, click on “Files”
Then click on “Share” and “Upload from my computer” to share a new file.
While it is uploading, you’ll see a status indicator.
And once the upload completes, you will get a desktop notification.
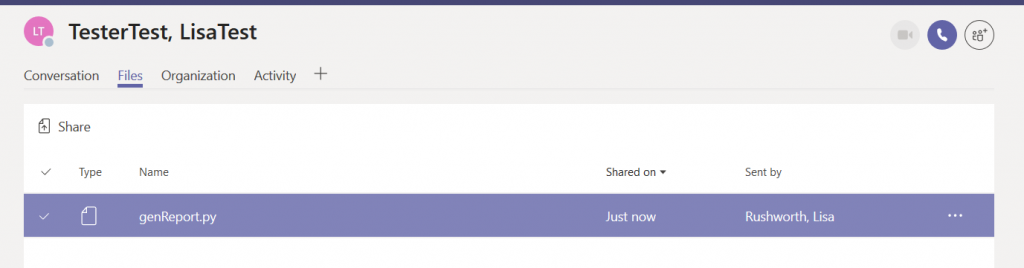
Voila – a shared file.
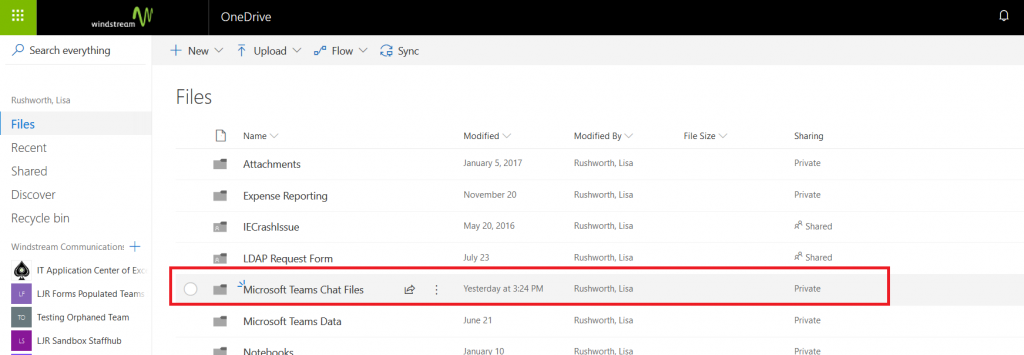
Where is that file? It’s been uploaded to your OneDrive for Business. Open the OneDrive web app and you’ll see a folder titled “Microsoft Teams Chat Files”.
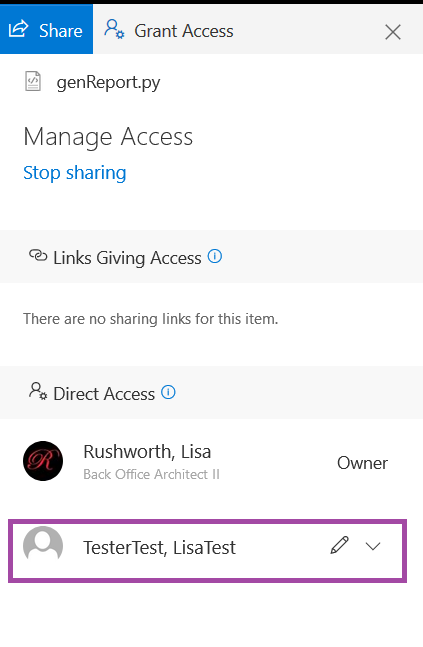
In there, you’ll see all of the files you’ve shared in Teams. Click on “Shared”
And you can see with whom the file was shared.
If you shared a file in a group chat, everyone in the chat will be added to the file permission. If you shared a file in an individual chat, just that individual will be added.
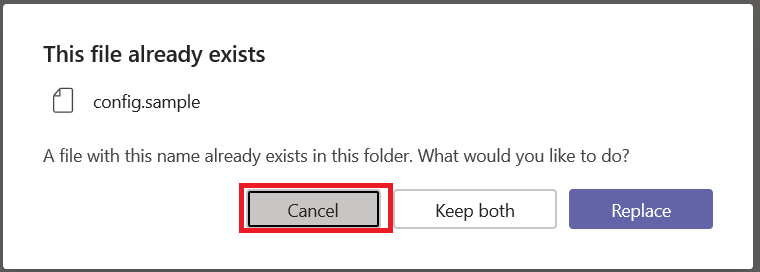
If you want to share the same file with a second person, there’s no need to upload it again … doing so would remove the original permissions. When you see a warning that the file already exists, cancel.
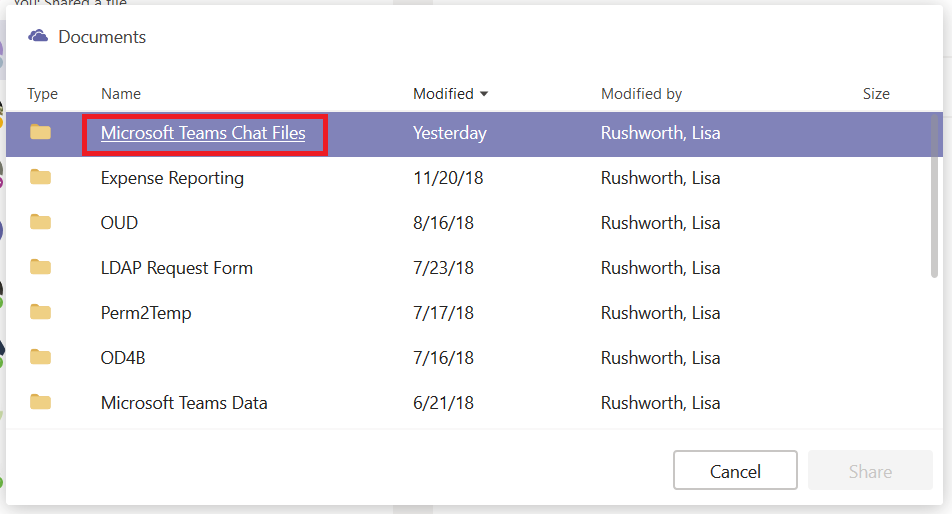
Instead of uploading the file from your computer, select “OneDrive”
from the “Share” menu.
Navigate into the “Microsoft Teams Chat Files” folder.
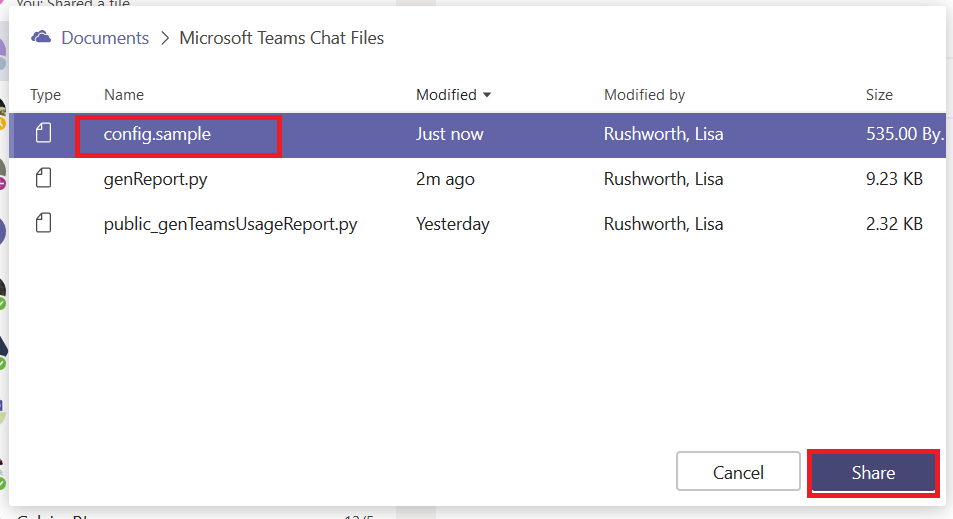
And select the file you wanted to share.
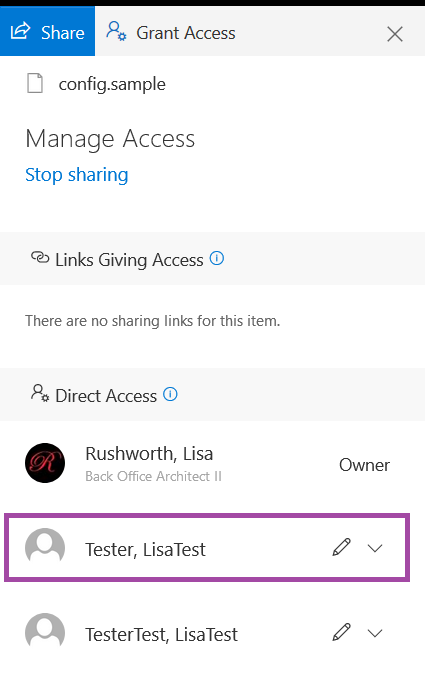
The new person with whom you want to share the file is added to the share list, and both individuals will see the file in the “Files” section of your Teams chat.
Be careful — deleting the file from your OneDrive space does not remove it from the Teams files list. The chat participants will get an error when they attempt to view the file.
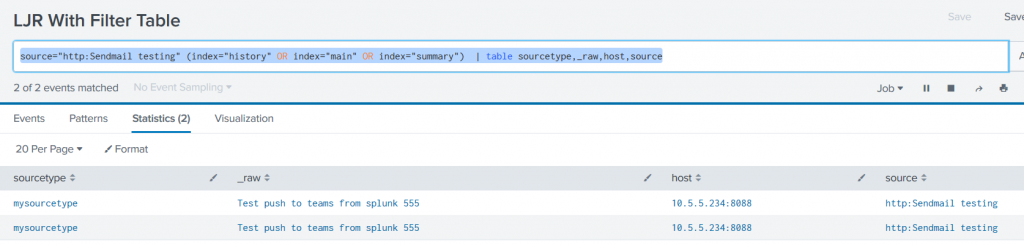
We managed to use the stock Teams webhook app in Splunk — just needed to modify the search being used. Adding “|table” and specific fields to be included in the table avoids having to filter the list data within the Python code
There still is a tweak to the code that I prefer — Python lists aren’t in any particular order. I’d like to be able to look the same place in the Teams post to see a particular field. Adding a sort when the facts array is put into the post body ensures the fields are in the same order each time.
Using either the default webhook action or the Teams-specific webhook, Splunk searches can post data into Microsoft Teams. First, you need to get a webhook URL for your Teams channel. On the hamburger menu next to the channel, select “Connectors”. Select Webhook, provide a name for the webhook, and copy the webhook URL.
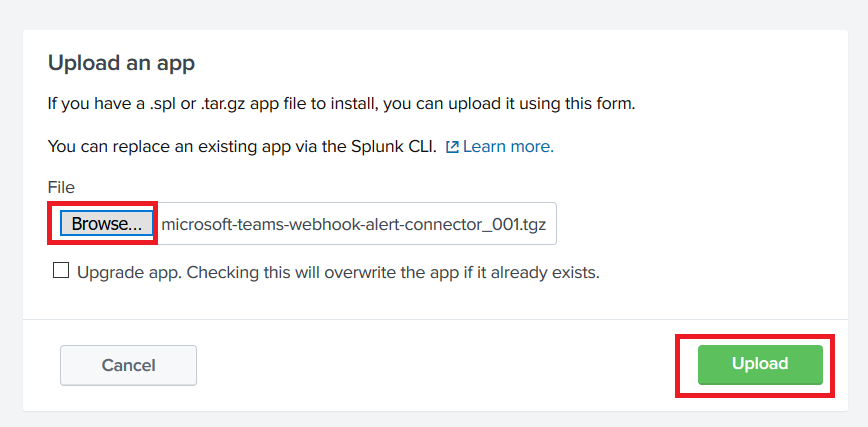
If you intend to use the generic webhook app, there is no need to install the Teams-specific one. The Teams-specific app gives you prettier output & a “view in splunk” button. Download the app tgz. To install the app, go into “Manage Apps” and select “Install app from file”.
Click ‘Browse…’ and find the tgz you downloaded. Click ‘Upload’ to install the app to Splunk.
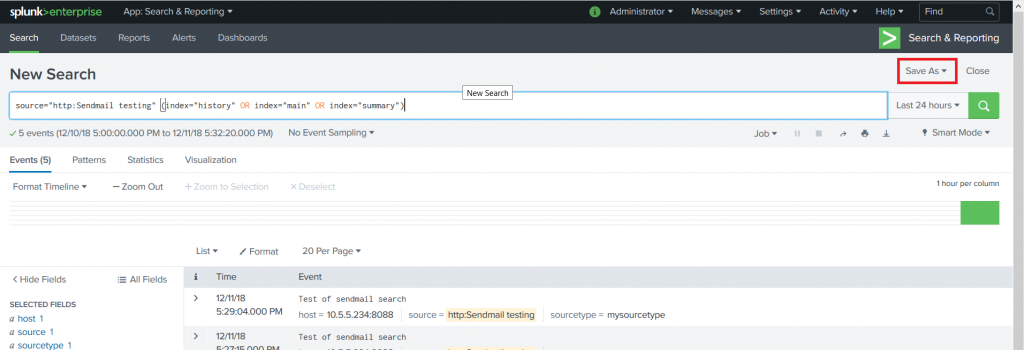
Now create a search for which you want to post data into your Teams channel. Click “Save As” and select “Alert”
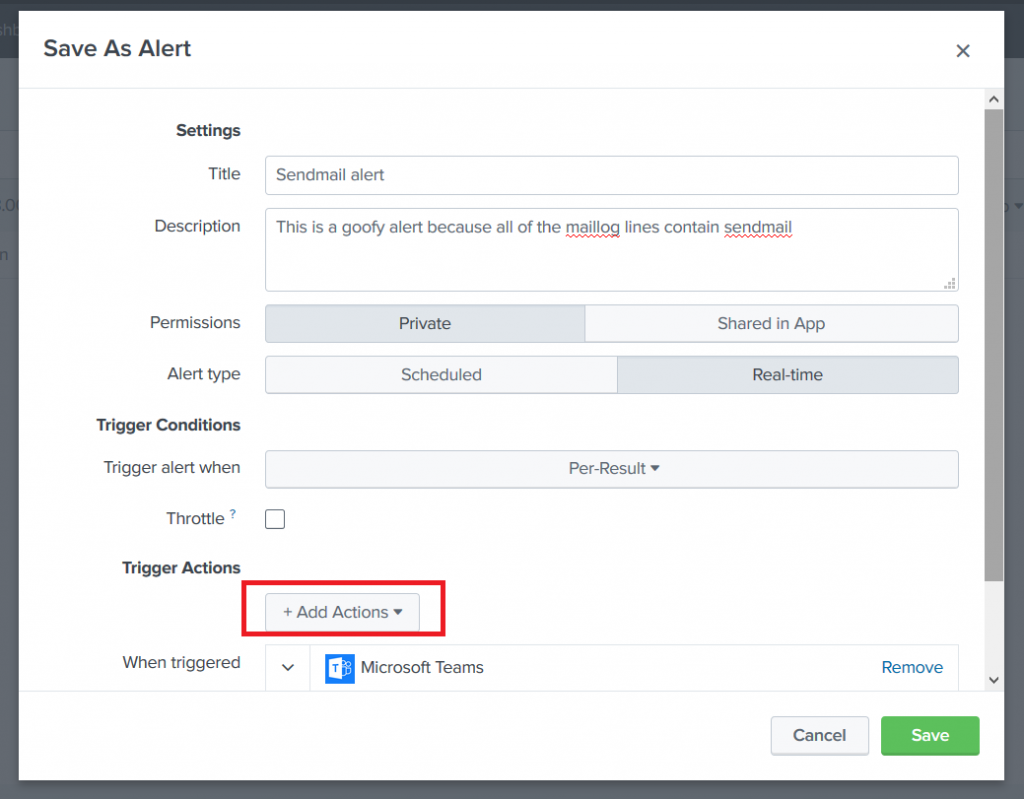
Provide a title for the alert — you can use real-time or scheduled alerts. Once you’ve got the alert sorted, select “Add Actions” and select the Teams webhook action (or the generic webhook action if you intend to use that one). Paste in the URL from your Teams channel webhook and click “Save”.
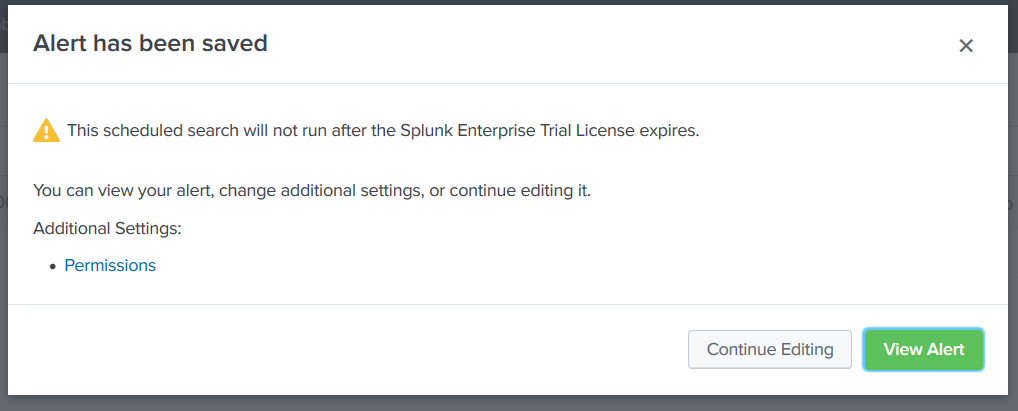
You”ll see a confirmation that the alert has been saved. Close this.
Now you would think you’d be ready to use it … but wait. Neither one works out of the box. In the Splunk log, you see error 400 “Bad data” reported.
For the default webhook app, edit the Python script (/opt/splunk/etc/apps/alert_webhook/bin/webhook.py in my case). Find the section where the JSON body is built. Teams requires a summary or title within the POST data. I just added a static summary, but you could do something fancier.
        body = OrderedDict(
            sid=settings.get('sid'),
            summary='LJRWebhook',
            search_name=settings.get('search_name'),
            app=settings.get('app'),
            owner=settings.get('owner'),
            results_link=settings.get('results_link'),
            result=settings.get('result')
For the Teams-specific webhook, edit the Python script (/opt/splunk/etc/apps/alert_msteams/bin/teams.py in my case) and find the section where the facts list is populated. There’s too much data being sent through. There’s probably a way to filter it out in Splunk, but I don’t know how 🙂
The right way to do it is select the most important items from settings.get(‘result’).items that you want to be displayed within Teams and populate facts with those elements. I used a new list, strWantedKeys, to determine which keys should be added to the facts list. The quick/ugly way is to just take the first n items from the result items (settings.get(‘results’).items()[:7] gets seven … 8 produced a ‘bad payload received by generic incoming webhook’ error from Teams.
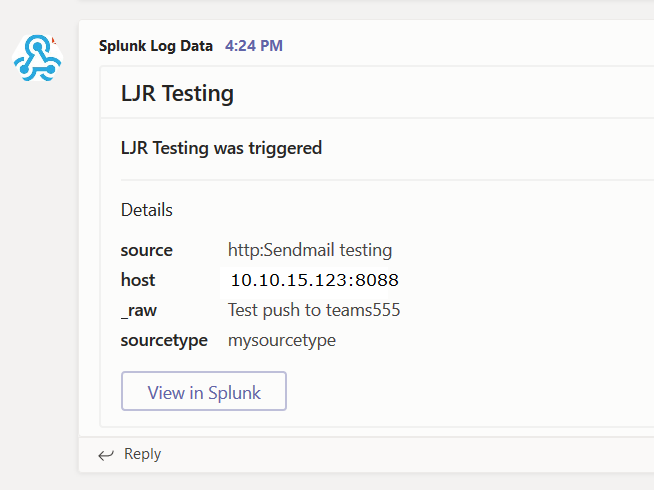
try:
    settings = json.loads(sys.stdin.read())
    print >> sys.stderr, "DEBUG Settings: %s" % settings
    url = settings['configuration'].get('url')
    facts = []
    strWantedKeys = ['sourcetype', '_raw', 'host', 'source']
    for key,value in settings.get('result').items():
        if key in strWantedKeys:
            facts.append({"name":key, "value":value})
    body = OrderedDict(
Once you have started a Microsoft Teams meeting, click the not-quite-a-hamburger menu in the meeting control and select “Start recording.
You will see a confirmation that your meeting is recording – and, as the message mentions, make sure everyone knows they are being recorded.
If you are attending the meeting using a web browser, the browser tab will have a little red circle indicating that recording is active.
If you no longer wish to record the meeting, click the not-quite-a-hamburger-menu button again and select “Stop recording.
Now where is that recording?? Open the meeting chat
And you’ll see a post indicating that the recording is saving. Once the recording has been saved, a link to the recording will appear in the conversation. You can get a link to share with others.
If you would like a transcription to be created for your meeting, select “Open in Microsoft Stream”. This will open the recording in a web browser. Under the meeting information, click the not-quite-a-hamburger menu and select “Edit”
On the edit page, select the video language. Ensure “Captions” is checked.
Scroll up to the top of the page and click “Apply”.
Wait for it – the transcription process can take a loooong time. Once the transcription is done, you can click the gear icon in the video information and select “Show transcript” (if the transcript isn’t done yet, this option is still available. But the transcript pane will just tell you to come back later)
Read through the transcript – an AI engine is used to perform the natural language processing, and the transcription accuracy *should* improve as you use the service. Click on “Edit”, make any corrections
Click “Done” to save your changes.
When your video is played, there is now a button to display closed captioning.
And the transcript will be displayed as the video progresses.
When you view the transcript, you can copy the entire thing & paste the transcript into OneNote or the meeting chat to have computer-generated meeting notes. I usually edit the transcript to remove the timestamps (and remove any tangential discussions).