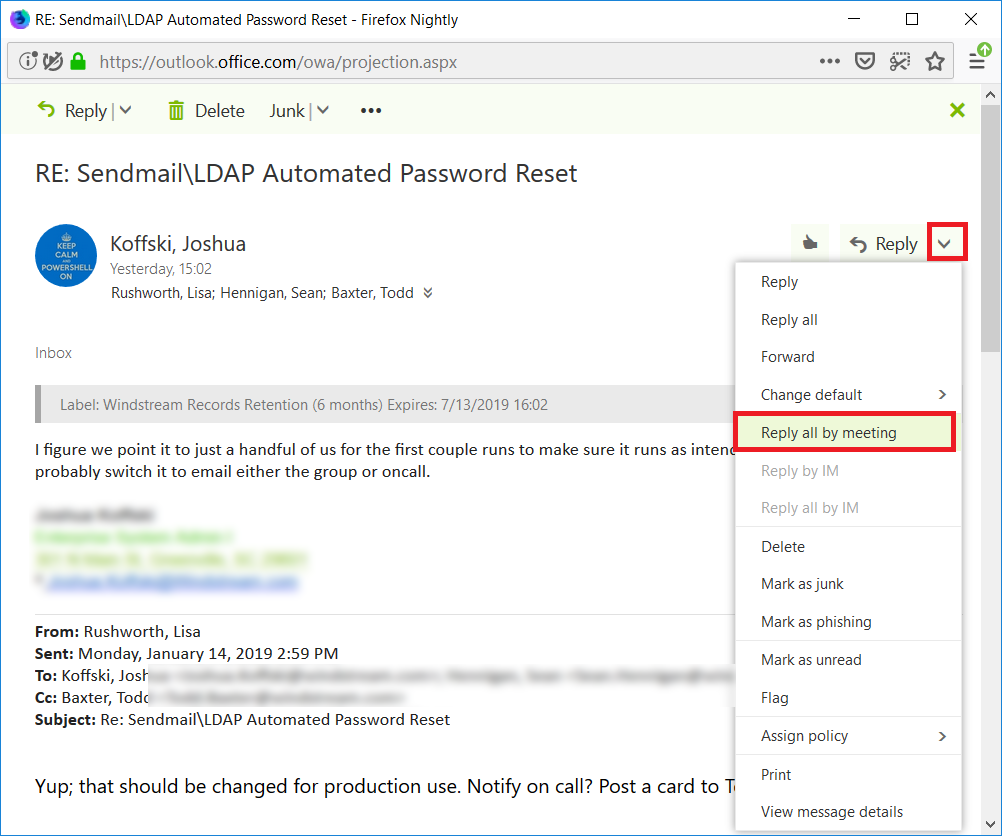
Sometimes it is easier to take a few minutes, get everyone together, and talk about something. Switching from an e-mail thread to a meeting invitation, though, means you’ve got to copy/paste all of the recipients and provide a message summary so attendees have a clue about what you want to meet. Did you know that you can reply to a message with a meeting request? All message recipients are included in the invitation, and the message content is copied into the meeting request.
Web Mail:
Click
the drop-down next to reply and select “Reply all by meeting”
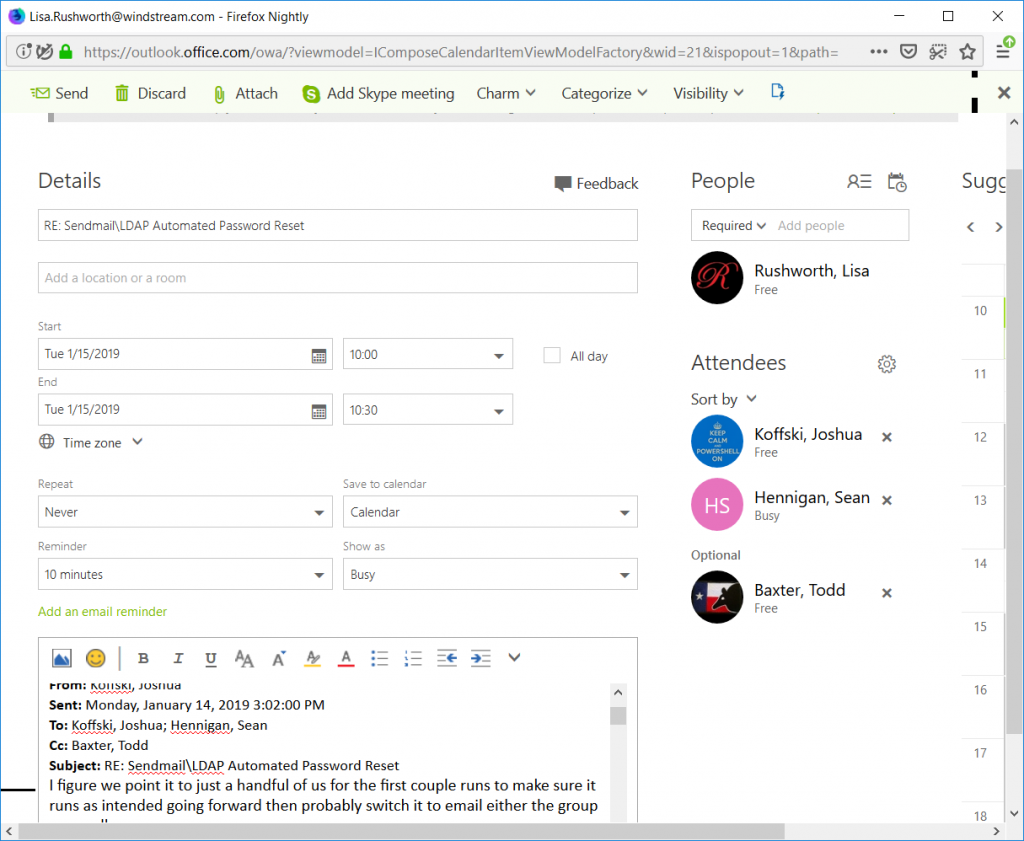
A new
meeting request will be constructed – complete with attendees (addresses in he ‘to’
line become required attendees, cc’s become optional attendees), a meeting subject,
and the entire e-mail thread in the meeting body.
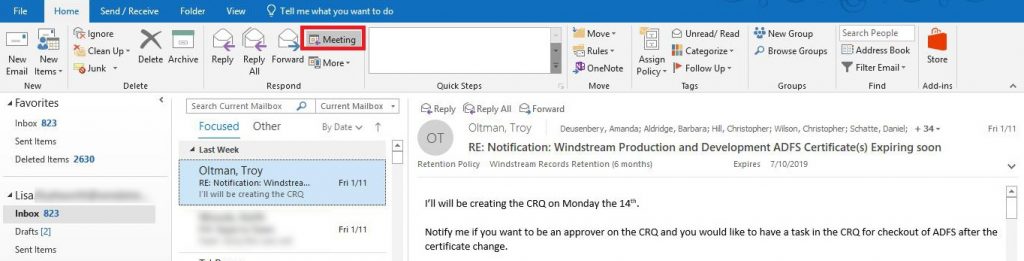
Outlook:
In
Outlook, click on the “Meeting” button in the ‘Home” ribbon bar.
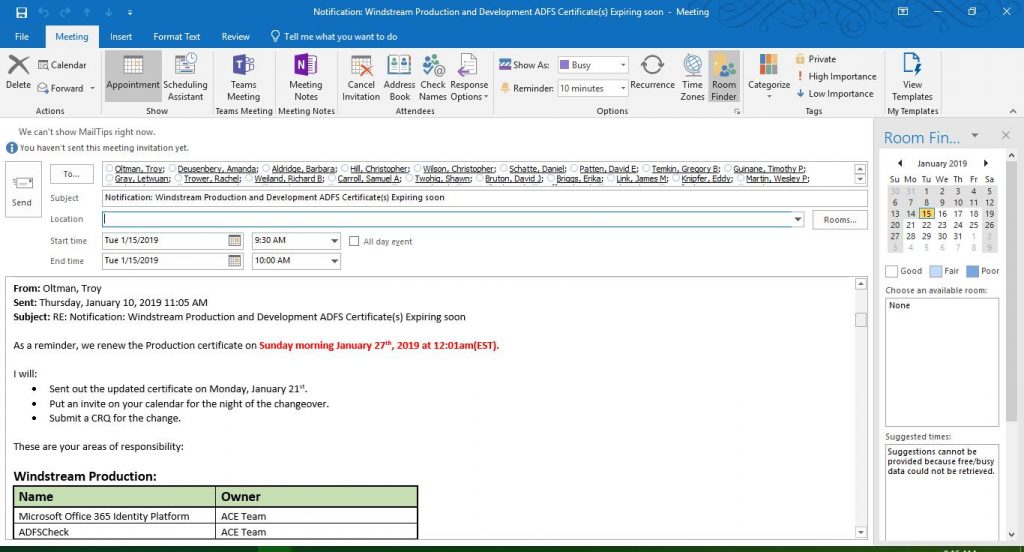
Again,
a meeting request is created with attendees, subject, and message content.
Anything
you can do in a manually created meeting request can be done here – if you want
to add a Teams meeting space or set up recurrence … this is a normal meeting
request, it’s just got a lot of information pre-populated.
For Anya’s new book bag, I need piping — which is basically paracord wrapped in bias tape. My last few projects, making the bias tape has been an all day endeavor. ALL.DAY.LONG. Lining up, sewing, pressing, lining up, making sure I have the seams facing the right way, sewing, pressing …
I had seen people talk about one-cut methods for making loads of bias tape, so I decided to research alternate techniques. This is SO easy, I feel a little silly about the amount of time I put into quilt bindings and piping.
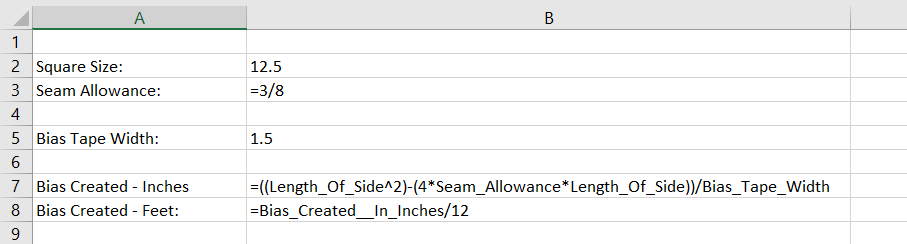
You start with a square of fabric — how much fabric? That depends! How much bias tape do you want? The number of square inches of bias tape is almost the number of square inches of the square with which you start — you’ve got to subtract out the square inches lost to the seam allowance. The seam is sewn along the sides of the square, and there is 2x the seam allowance per seam. Which means we’re subtracting 4x (two seams!) the length of the square’s side times the width of the seam allowance. Subtract that from the square inches of the original square and you’ve got the remaining square inches. To find the length of the tape, divide by the width of the tape. You could reverse the equation so an input desired length of tape produces a measurement for your square. Or make a quick spreadsheet and try different square sizes until you get close. Now the fabric will stretch, and your measurements won’t be perfect … but you should be close to the calculated length.
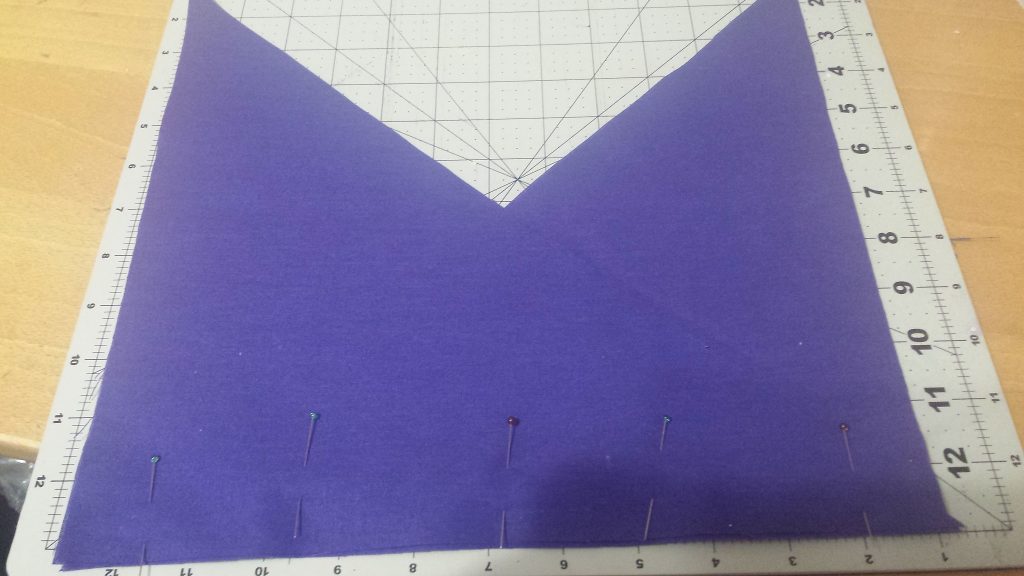
Now how do you make it? Start with a square, bisect it so you have two right triangles. Place the triangles so the right angles are on opposite sides — the 45 degree angle on one should be nested in the 90 degree angle of the other. Sew along the bottom edge — where the pins are below. Now you’ve got a parallelogram.
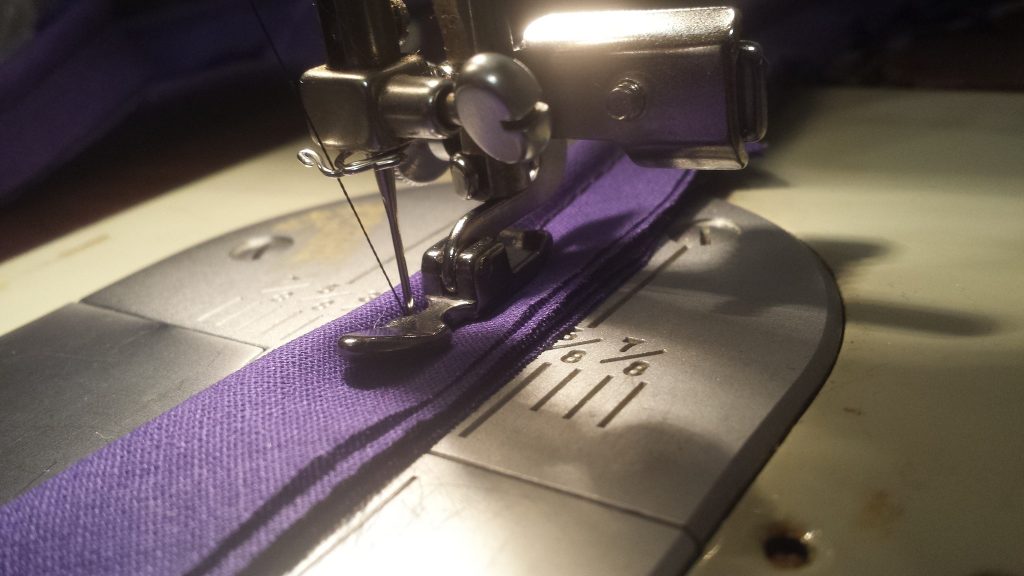
Draw lines the width you want your bias tape to be. I drew on both the front and back of the fabric so i was easy to line up. Pull the long corners of the parallelogram past the center — they’ll overlap a bit. You want each set of lines on one side to match up to the next line on the other side. But not meet up at the edge — you want them to meet up at your seam allowance. This is a little tricky, and it took me a time or two pinning and checking before the met at the right spot. Make sure both of your seams are on the same side of the tube. Stitch the two sides together. Cut along the line.
And you’ve got a long strip of bias tape. Fold it! To make piping, I folded it in half around paracord (yes, I’m sure cotton piping is cheaper, but I’ve got lots of paracord already, and it works).
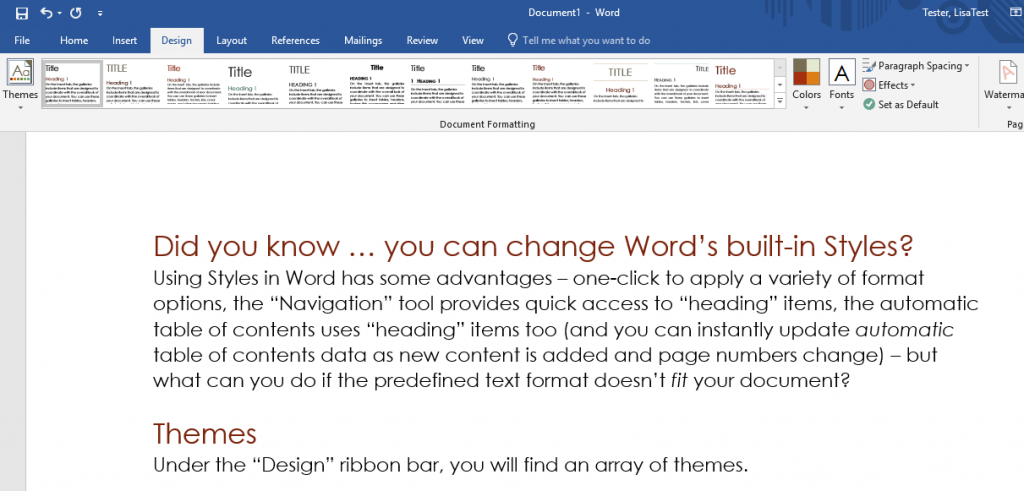
Using Styles in Word has some advantages – one-click to
apply a variety of format options, the “Navigation” tool provides quick access
to “heading” items, the automatic table of contents uses “heading” items too
(and you can instantly update automatic
table of contents data as new content is added and page numbers change) – but
what can you do if the predefined text format doesn’t fit your document?
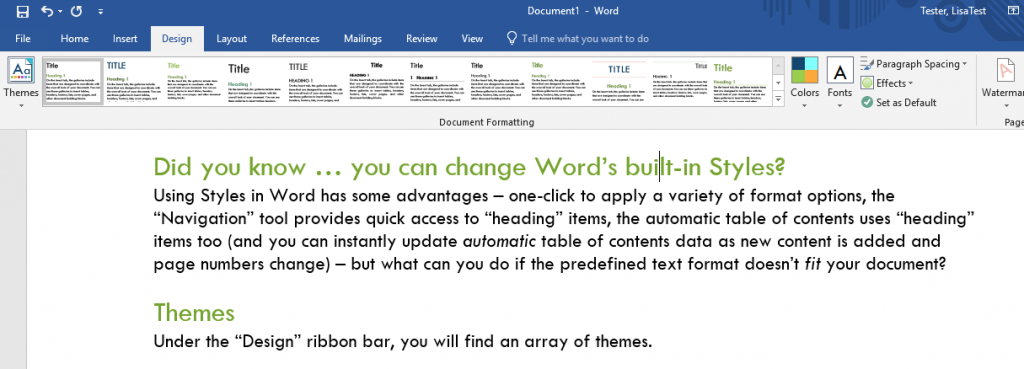
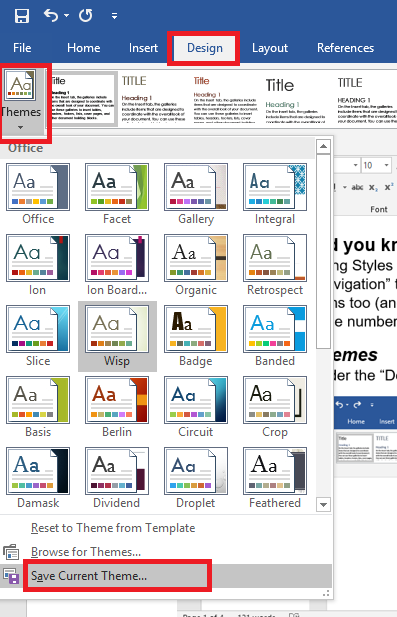
Themes
Under the “Design” ribbon bar, you will find an array of
themes.
Selecting a different one changes the colors, font faces, font
weight, and font sizes used throughout the document. You can change your document
to look like this
Or this
Customize Styles
What if the styles still
don’t fit your document? I, as an example, prefer my headings bolded and
sub-headings both bolded and italicized. You can customize a theme to match
your specific preferences.
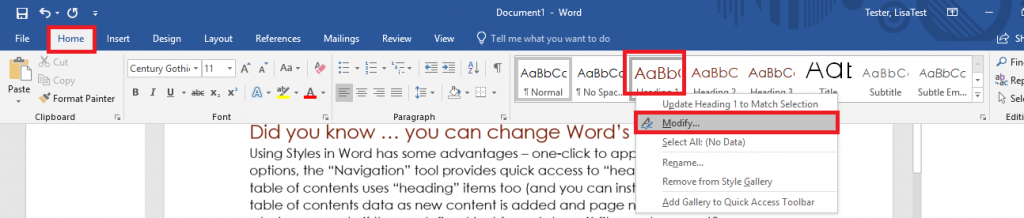
On the ribbon bar, select “Home”. In the “Styles” section,
right-click on the style component you want to change and select “Modify”.
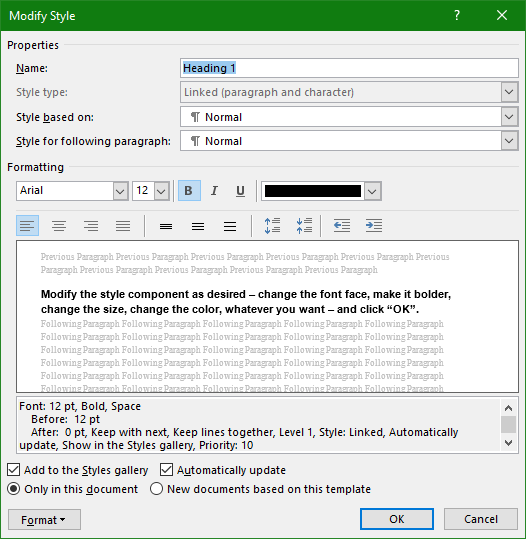
Modify the style component as desired – change the font face,
make it bolder, change the size, change the color, add a little more space
between lines, whatever you want. Click the box to ‘Update Automatically’ and,
if you want to use this customization in other documents, select the radio
button that says ‘new documents based on this template’. Click “OK”.
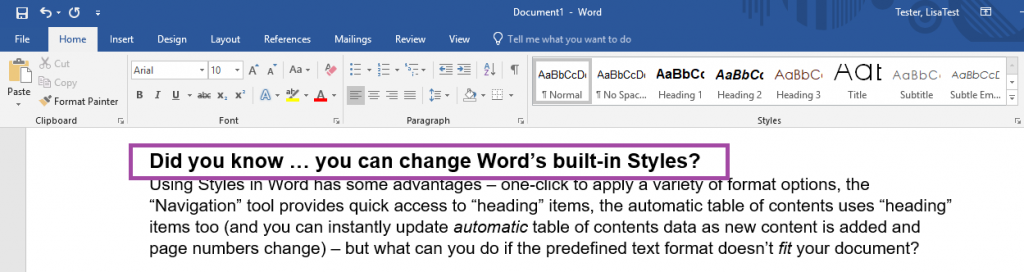
Sections of your document using that style component will be
updated. I have customized all of the
style components – normal, headings, title and subtitles, quotes, etc.
On the ribbon bar, select “Design”. Click the “Themes”
drop-down and select “save current theme”.
If you want to use your theme on every document you create,
click “Set as Default”.
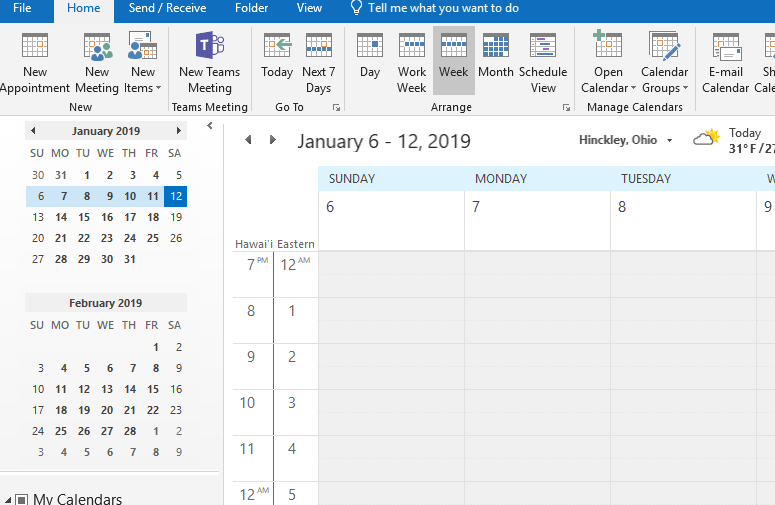
In one of my prior jobs, I worked in Boston. I had
colleagues in Hawai’i. Scheduling a meeting was a mental undertaking – 8AM in
Honolulu is 1PM in Boston (and I had to count through Alaska, the west coast,
the mountains, the next one over, and then me all.the.time). Beyond the time
wasted figuring out what time it is elsewhere … you forget to think about it
when you’re in a hurry. I’d book the guys in Hawai’i for mid-morning meetings
at dark-o-clock, and the guys in Hawai’i would schedule mid-afternoon meetings
that were 8PM for me. The Outlook calendar can show two time zones concurrently
– both reminding you that time zones are a ‘thing’ and quickly showing you what
time it is over there.
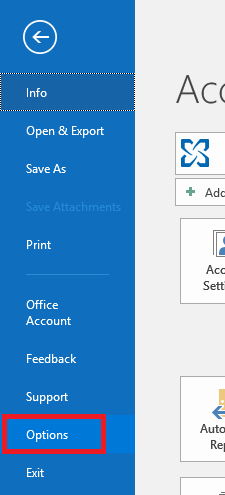
Click “File” on the ribbon bar
Select “Options”
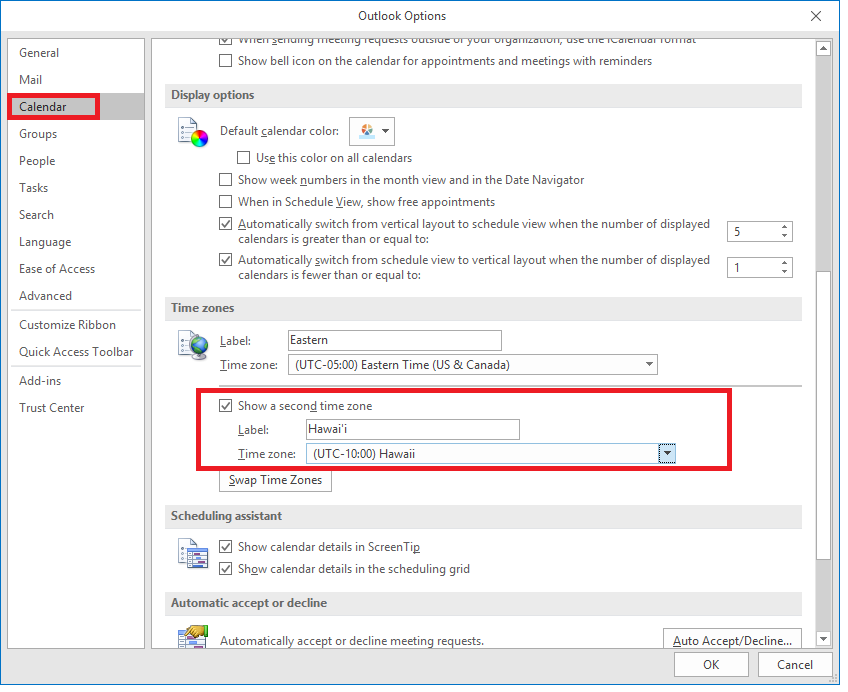
Select “Calendar” from the left-hand navigation bar. Scroll down and find the ‘Time Zones’ section. Check the box to ‘show a second time zone’, and select that other time zone. I add a label both to my time zone and the secondary one. Click OK. If you have the monthly update channel, you’ll be able to select a third time zone too.
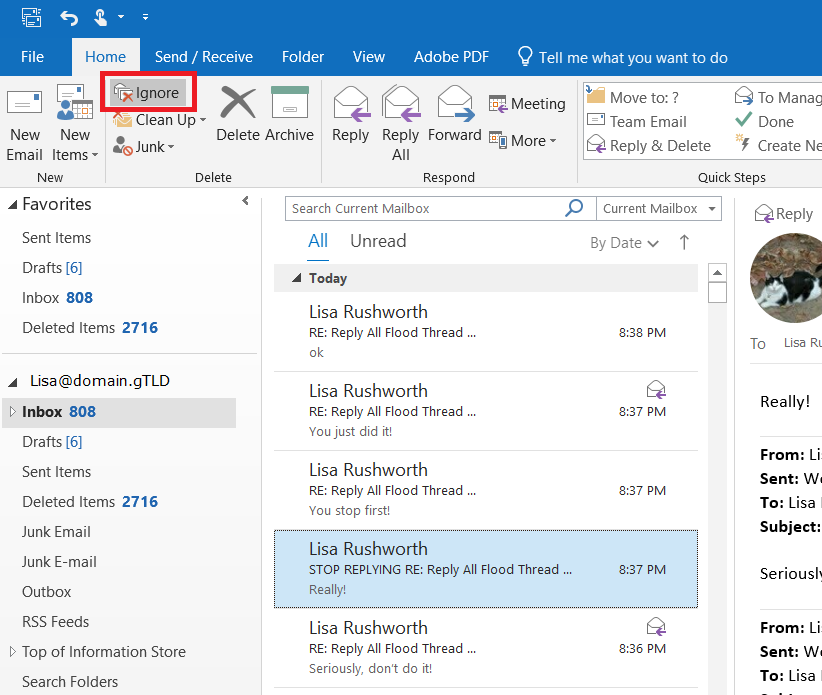
You can! Of course, you don’t want to ignore important conversations; but we’ve all
been accidentally included on message (or been caught up in the dreaded
reply-all blizzard) and been inundated with messages that really can be ignored.
Within the Outlook client, click on one of the messages. On
the left-hand side of the ‘Home’ ribbon, click “Ignore”
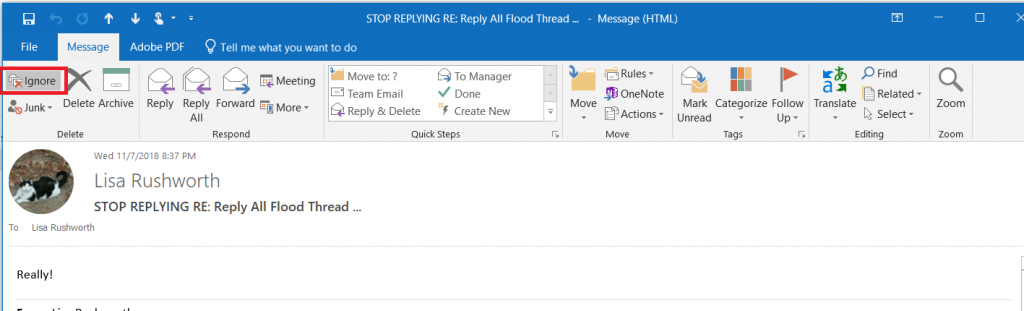
Or from within the
message, “Ignore” appears on the left-hand side of the “Message” ribbon bar.
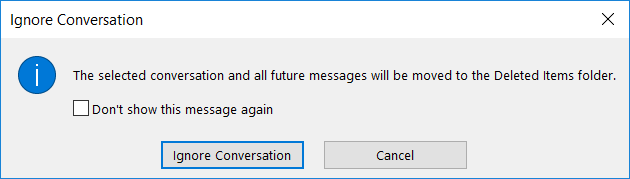
If you haven’t previously selected “Don’t show this message
again”, you will see a warning that the entire conversation and all future messages will be moved to
“Deleted Items” … click “Ignore Conversation”
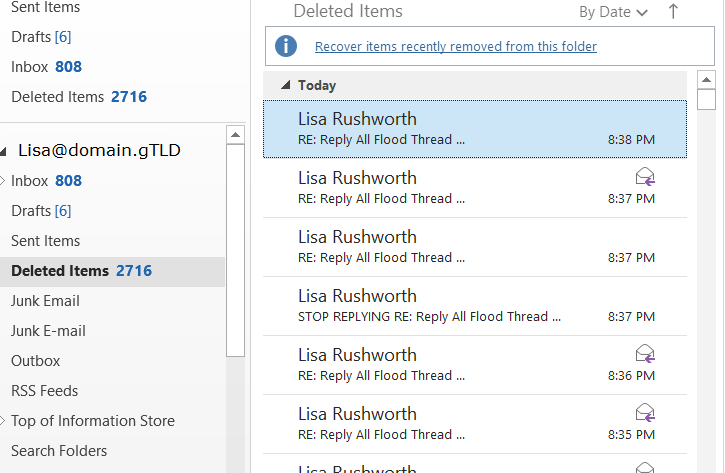
If you change your mind, all of those messages are in
“Deleted Items” and you can easily move them back.
If someone changes the message subject, those messages become a new thread that you’d need to ignore again.
When you’ve been erroneously included on some message, the subject rarely
changes … but I usually have to block five or six different threads in
reply-all blizzards.
I am a big fan of “undo” – highlighted something to copy it but missed the ‘ctrl’ part of ctrl-c? Undo! Editing an image and drew a line the wrong place? Undo! Change some verbiage and regret the modifications? Undo! (I’ll generally copy the stuff I’ve added into a new document before I start hitting ctrl-z {the keyboard shortcut for undo} and incorporate a few of the new ideas into the original text.) Occasionally, you run out of undo-able operations. If you are saving to OneDrive, SharePoint, or Teams, you can use the version history to get back to your original content. But did you know that PowerPoint allows you to increase the number of undo operations available?
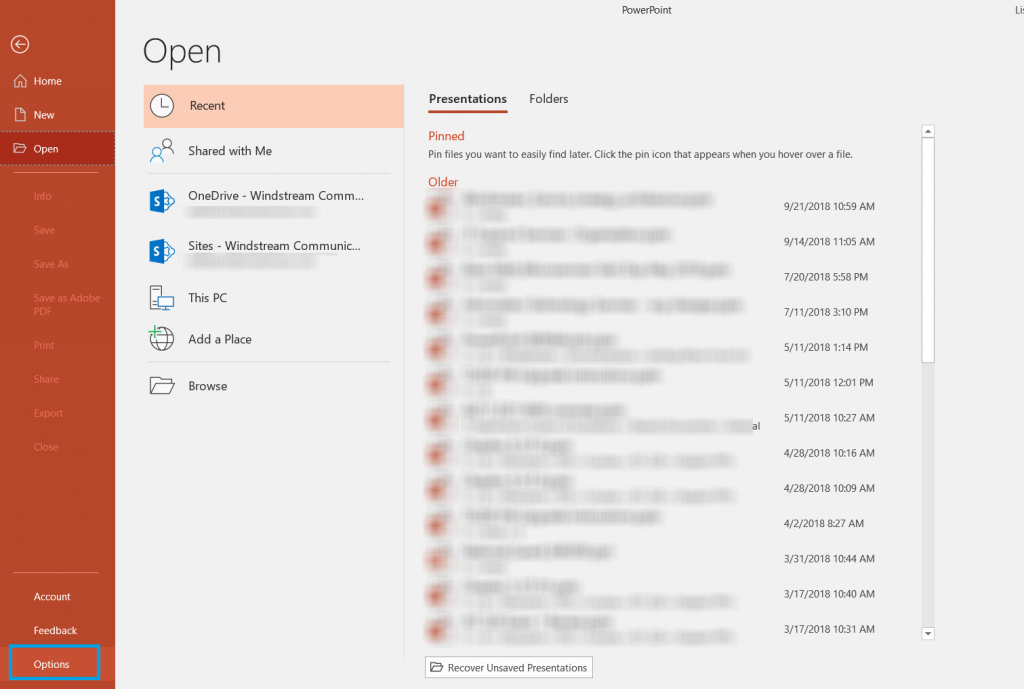
Click “File” on the ribbon bar and select “Options”
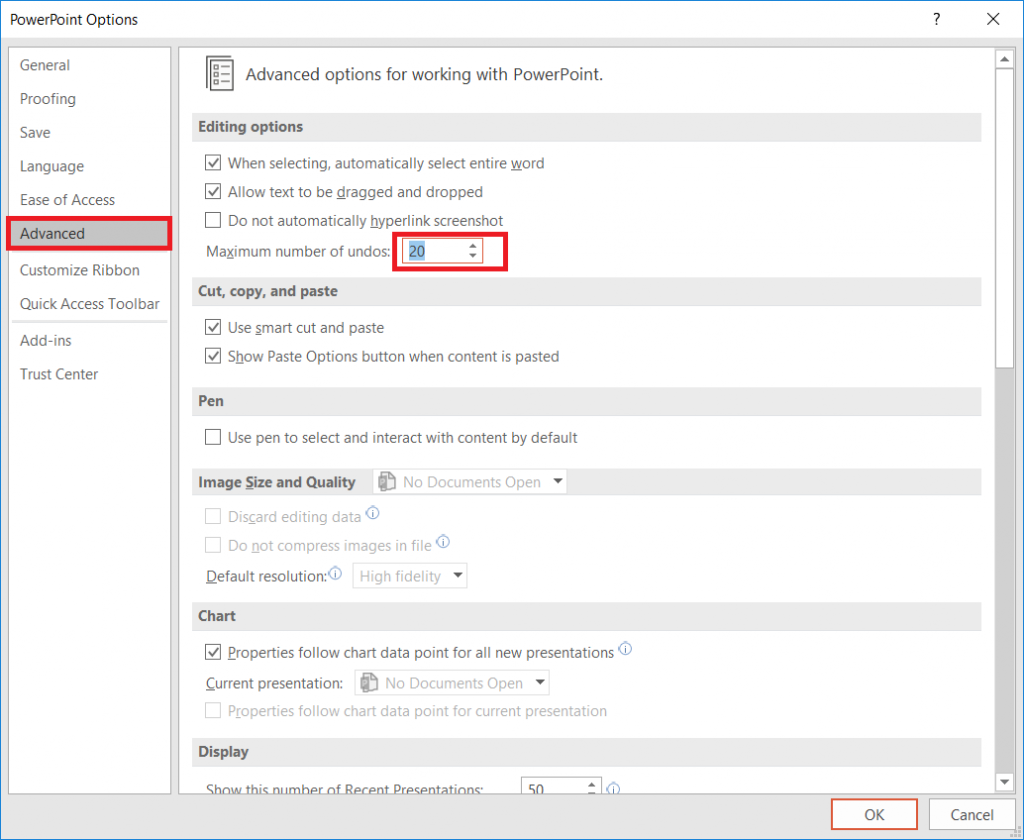
Select “Advanced”. Under “Editing options”, you will see a
maximum number of undos – this value defaults to 20.
You can increase it up to 150 – although higher numbers can
adversely impact performance, so stick to a lower number unless you really want to undo a hundred operations!
My magic cloudy AD workstation association is screwed up. Doesn’t bother me that much, but as more people are starting to use magic cloud apps … I’m seeing more people with the exact same problem. So I volunteered myself to get it sorted. But the dsregcmd to join again needs to be run as NT Authority\System
There are a lot of tools we use at work that are silly
overkill in your personal life – I don’t want to open a Remedy ticket for every
squeaky hinge! But some of our tools are quite helpful away from work too – making
flyers in Word or using Excel to keep track of the softball league standings. “Is
Teams useful in my personal life” seems like a purely hypothetical question –
it’s not like I can invite the rest of the Parent Teacher Organization to join
us here in Teams (and even if I could, that’s hardly an appropriate use of
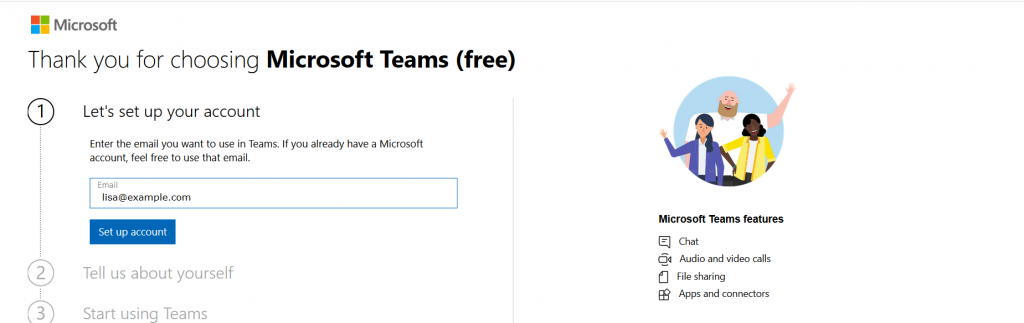
company resources!). But did you know Microsoft offers a free version of Teams?
Signing up for a free account, you don’t get access to all of the Teams features we’ve got here – you cannot schedule meetings, record meetings, there isn’t a Planner board, you don’t have access to the full suite of Office 365 applications. But you do have a Teams space, can use the integrated apps and connectors, have some file storage space, have persistent chats in channels, and can even have group audio/video calls.
Don’t use your company e-mail address to sign up – this will
need to be your personal address.
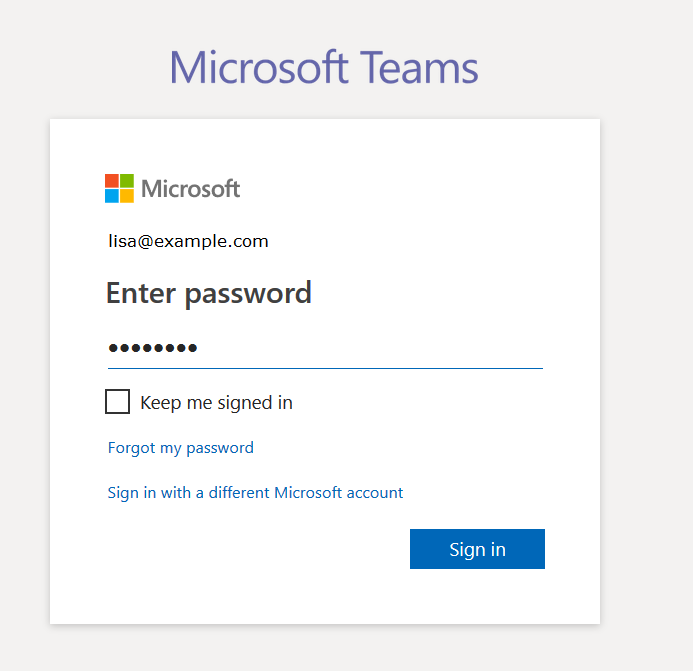
If you don’t already have a Microsoft account associated
with the e-mail address, you’ll be asked to create a new Microsoft account.
Otherwise you’ll be asked to sign in to your Microsoft
account.
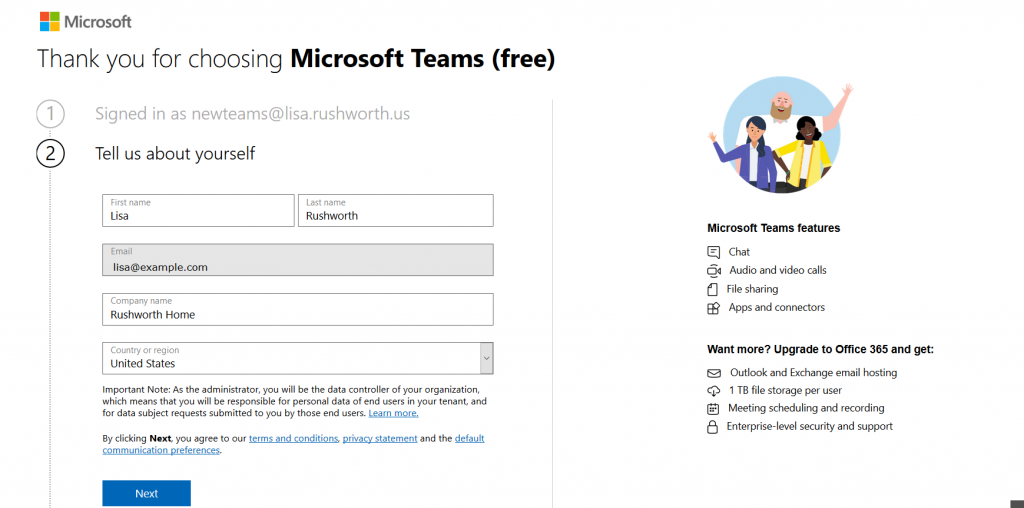
Supply your name, organization name, and country of origin.
Read the terms of use and privacy statement. Assuming your use complies with
the terms of use and the privacy policy is acceptable, click “Next”
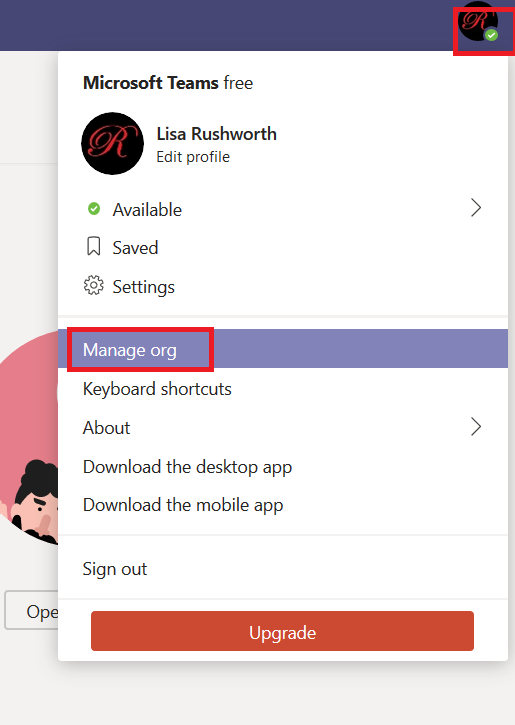
It will take a few minutes for everything to be set up. Once
your personal Teams organization is built, you can invite others to join. Click
on your avatar in the upper right-hand corner of the screen and select “Manage
org”
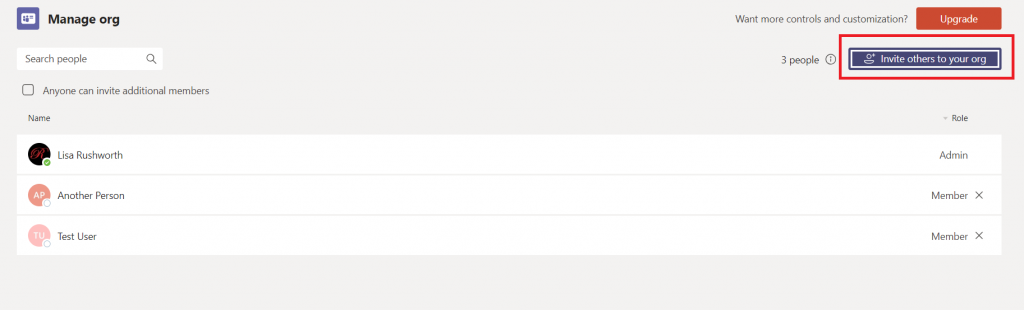
Click “Invite others to your org”
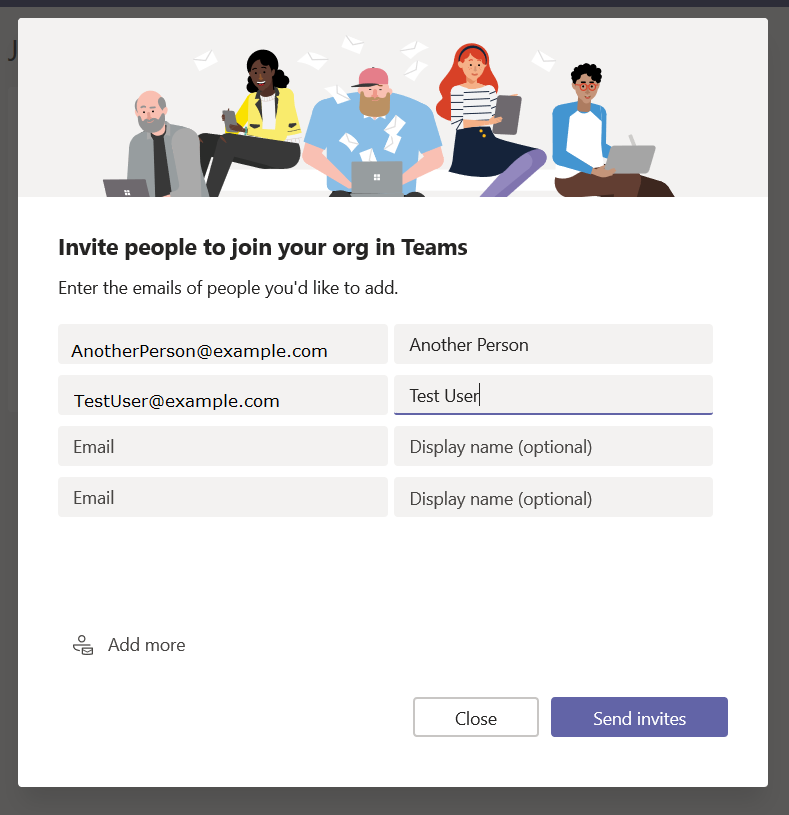
And enter their e-mail addresses
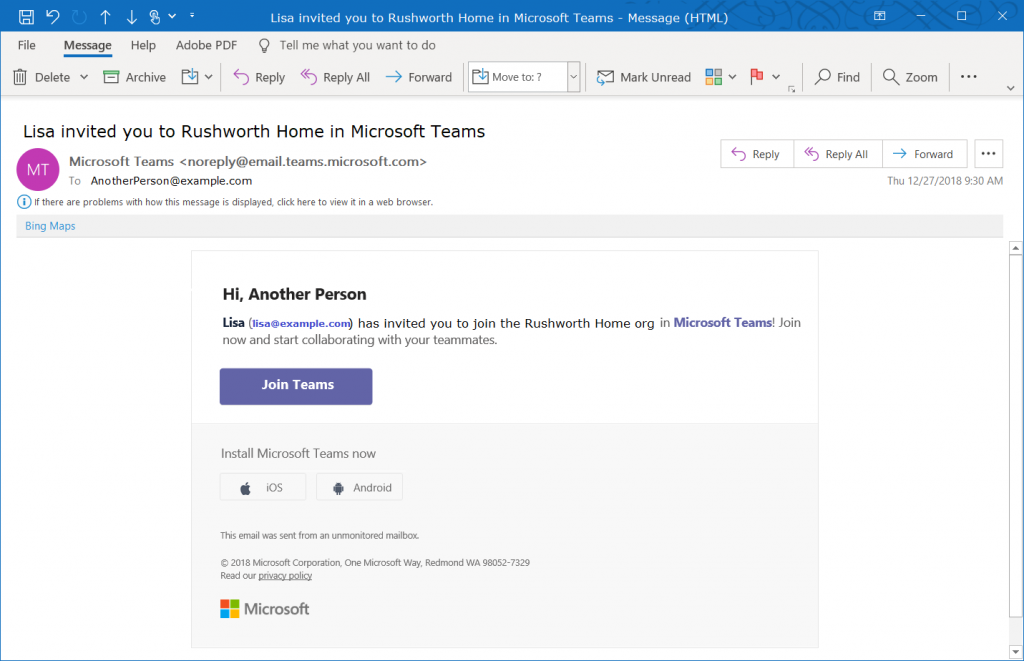
They will get an e-mail message inviting them to join your
Teams org.
You’re ready to start using Teams – add tabs to websites
your group commonly uses, set up connectors, create new channels, chat, video
calls, share files. You can even add new Teams to your organization.
Everyone added to your org is automatically able to access
the default Teams space (the one with the name of your org). Teams spaces you create can be private or public,
just like at work – but you can also select “Org-wide” which automatically
joins any newly-added individuals to the Teams space.
One drawback to retaining all of your chat and team discussion content is that there’s a LOT
of content … which makes it challenging to find a specific discussion or
comment. Luckily, Teams data is easily searched. At the top of your Teams
application (or website), there is a long gray bar. Click in it and type a word
or phrase to begin searching. Using multiple words will find conversations
containing both words, to find a phrase place the phrase “in quotes”. Hit enter.
You’ll see messages that contain the words or phrase –
notice this includes both chat messages and channel discussions. Each search
result has a reference letting you know where the discussion is located, and
you can click on the item to switch to the chat or channel discussion.
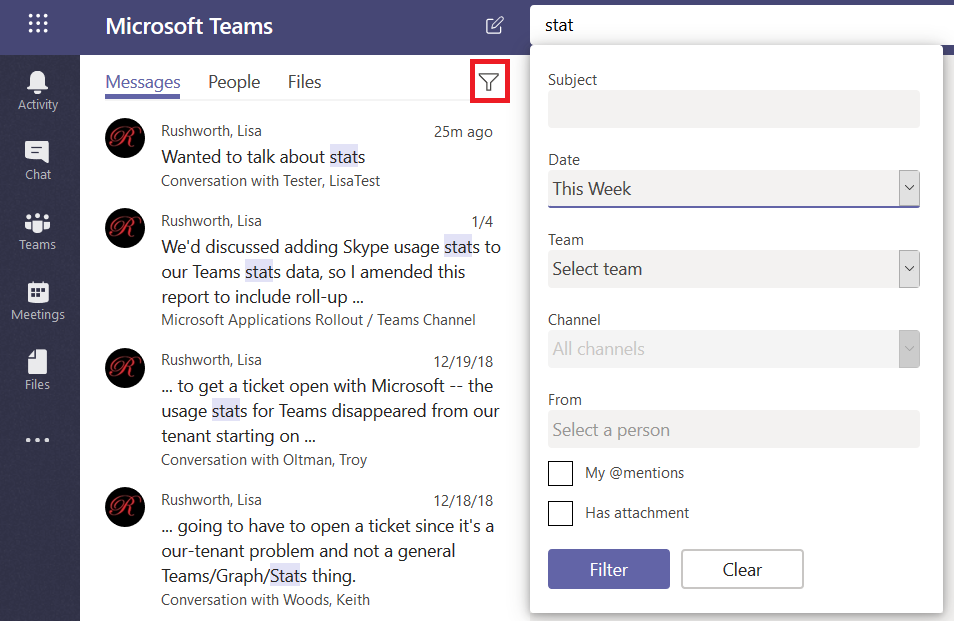
If your search returns too many results, click on the little
funnel – you can refine your search results with a filter – a specific
individual, a time frame.
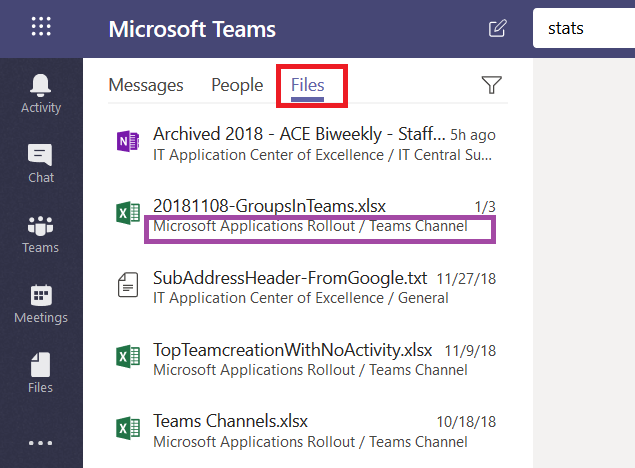
In addition to searching chat messages, you can search files.
Just click on “Files” and you’ll see files with names or content that contain
your search terms. Again, you can see where the file is located, and you can
click on the file to preview the file.
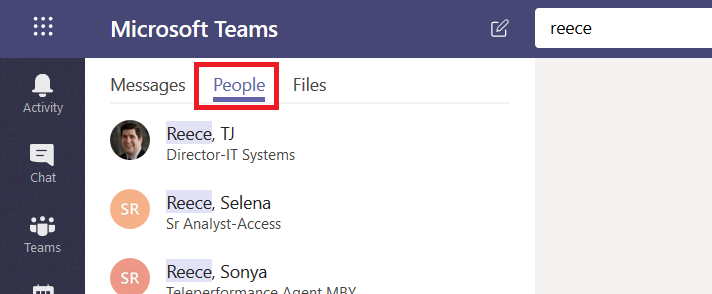
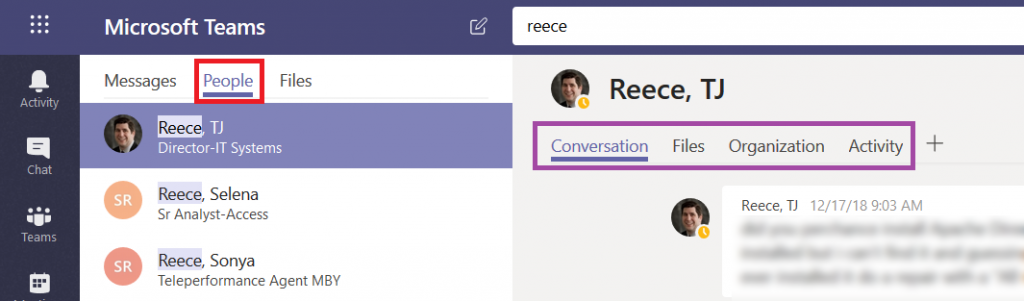
Click on “People” and you’ll find, well, people who work here.
This is a name search – you cannot search for “stats” and see people with whom you’ve
had discussions about statistics. Search for a last name, a first name, or a
name in “last, first” format.
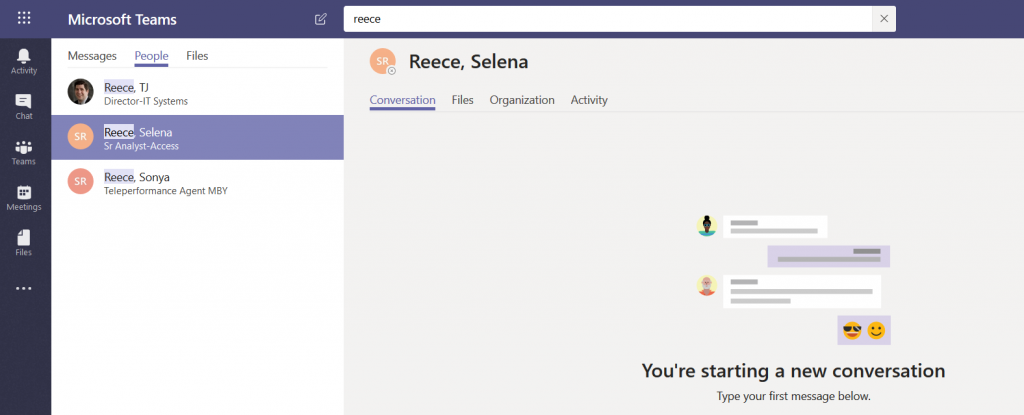
If you click on a person, you’ll see the conversations you
have had with them, as well as any shared files, an org chart for their
position in the company, and their channel posts for the past two weeks (‘Activity’).
If you haven’t chatted with them before, you can start a new
conversation too.
I am trying to use Microsoft Graph to read/write an Excel spreadsheet stored in SharePoint. It’s an ugly process to start with — they don’t exactly make it easy to find the right ID numbers so you can reference the spreadsheet in the first place, but I finally got the proper URL. And then I tried to do the password-based token authentication.
Hint: the password isn’t wrong. I’ve seen a lot of comments online about this meaning the secret is wrong — which seemed reasonable, since I’m not seeing any auth traffic against the user account. But if you put in a known bad secret, there is a different invalid secret error.