Good news, we know know Trump’s secret plan to defeat ISIS — have Erdogan do it! Now I don’t think we’ve got much business in the Middle East (or Afghanistan). And “have countries in the region – Syria, Turkey, Iran, Iraq, Lebanon, Jordan – sort it” isn’t exactly a novel approach. But it is especially ironic for someone who touted their secret plan to subsequently say anyone else told him they’d take care of it.
All and all, it’s just another brick in the wall
Good news — at this rate, they’ll have collected enough money for “the wall” sometime before the fourth millennium.

The wall costs 5 bill (ha!). They raised 6 mil between 16 Dec and 3PM today — which I’m calling three and a half days because today isn’t over & maybe he created it at 23:58 on the 16th. A five billion dollar wall would be fully funded in a mere 8 years — or the year 2026. But there’s also the half billion a year to maintain the wall — failing to maintain the thing creates a dilapidated monument to Trump’s … oh, wait, that’s fitting. Their daily contribution rate exceeds the estimated operating run rate, so they’ll need to keep raising funds until they’ve got a trust to cover the wall’s expenses.
And the whole thing is pointless since there’s a GoFundMe to buy ladders too 🙂
In all seriousness, *this* is the only way I’d be OK building the wall. In fact, I think government services should move into a new non-profit category where donations are exempted from AMT and offset tax dollars owed. I could give 10k to the EPA (provided they’re actually enforcing regulations to, ya know, protect the environment) and owe nothing else in taxes. Otherwise I’ll fund arts, broadcasting, WIC, civil rights … I’ll find some agency Trump doesn’t know exists to ruin.
Did you know … you can lock “Format Painter” on?
How many times have you clicked a second time expecting to “paint” your format only to realize the format painter is a one-click deal-e-o. Well, it’s not — you just have to know the trick to ‘locking’ it on. Double click the format painter button — now you can paint as many things with the format as you like.
Microsoft Teams: Creating A Bot – No Code Method
If you want to create a simple bot that uses natural language processing training to allow users to ask questions that aren’t exactly what has been attached to the answer (i.e. I could say “I forgot my password”, “I don’t remember my password”, or “what’s my password” and be directed to the password portal URL without anyone having to come up with every possible iteration of the query),you can create one without actually programming a bot. You’ll need to enter some questions and answers – and it’s best to have a few questions associated with each answer so the bot can ‘learn’ what a real user might ask.
Before we start, understand how the billing works for Microsoft’s cloud services. There are generally free tiers for selections, but they are resource limited. When you first start with the Azure magic cloudy stuff, you get a 200$ credit. A message indicating your remaining credit is shown when you log into the Azure portal. Pay attention to that message – if you think you are using free tiers for everything but see your credit decreasing … you’ll need to investigate. Some features, like usage analytics,cost extra too.
Instead of programming a bot, you can use a pre-built bot and a question/answer knowledgebase maintained at https://www.qnamaker.ai/ Sign in to your company account

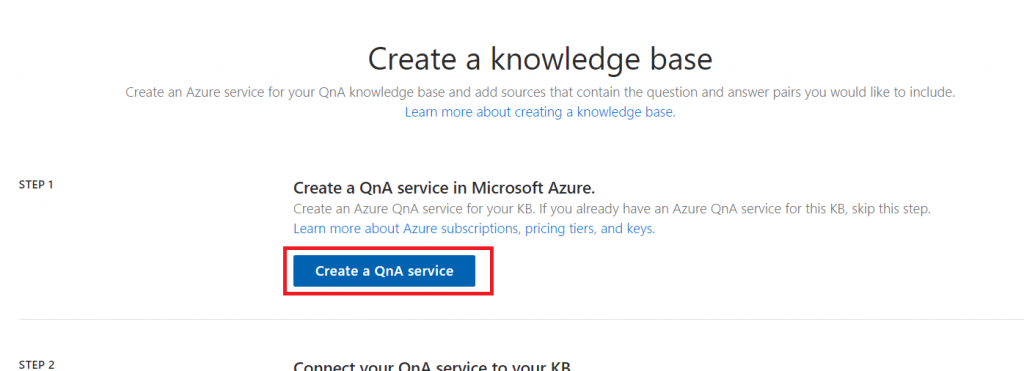
Select “Create a knowledge base” to start.

Click the button to “Create a QnA service”
A tab will open to the Azure portal, and you’ll see a wizard to create a QnA Maker resource. Provide a name and select your subscription – you may be walked through creating a new trial subscription. For the management pricing tier and search pricing tier, select the free plans unless you expect high usage or need to store a lot of documents. The selections below are the free tiers.
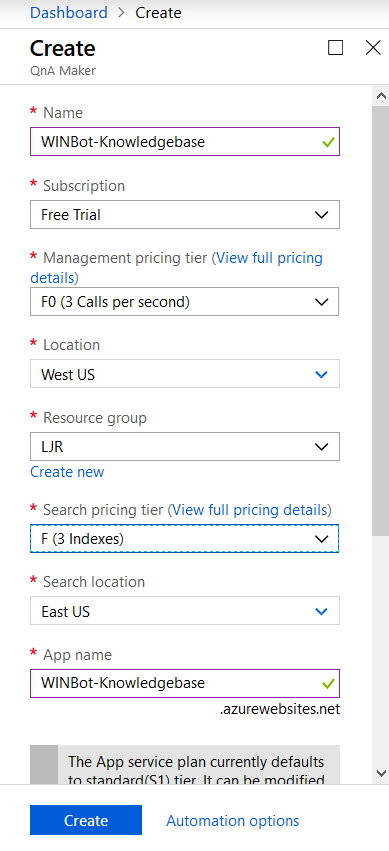
Disable app insights unless you want to study usage of the q&a – app insights is a paid add-on. Click create to create.

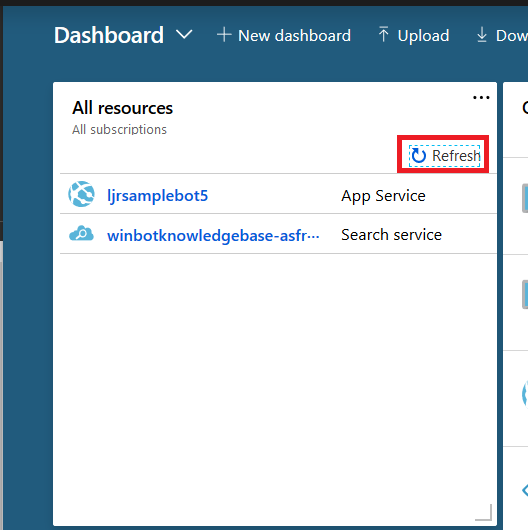
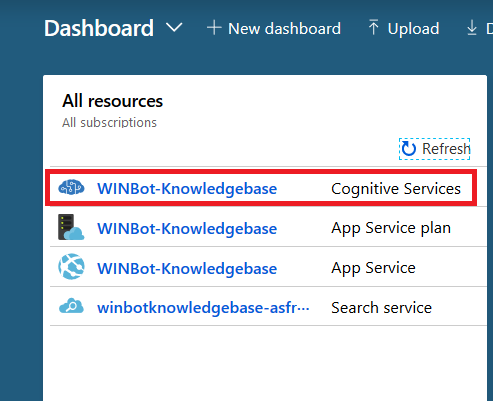
Return to the Azure Portal dashboard and click “Refresh” in the “All resources” section. Eventually, you will see your knowledge base appear.
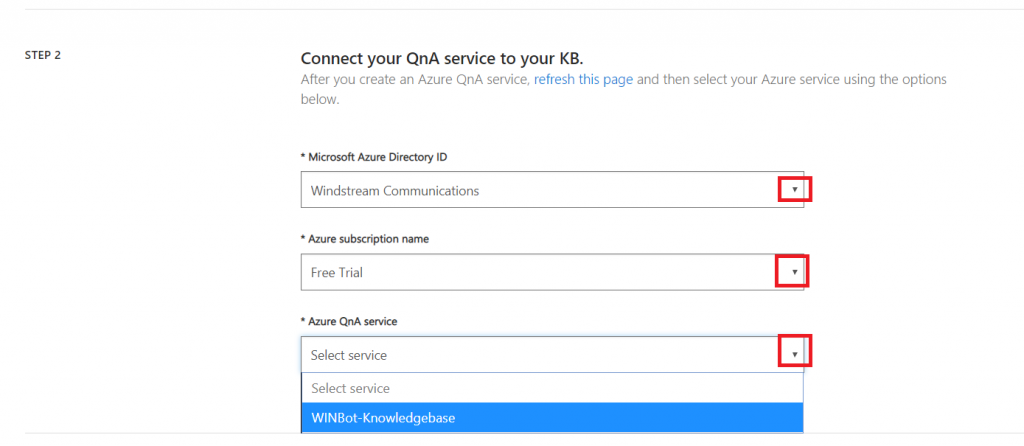
Return to the QnA Maker tab. In “Step 2”, click the drop-down arrows to select the Azure Directory (you should just see our company), the subscription (again, probably just the one), and the knowledge base we just created.
In “Step 3”, provide a name for your knowledge base. If you have an existing Q&A file, or a URL with Q&A pairs, you can import them here. I will enter question/answer pairs manually later.

Optionally, add ‘chit chat’ – this allows your bot to respond to common things users type like “do you know Siri” or “how are you”. It isn’t needed, but it saves adding answers to “are you there” manually. This imports question sets to your KB, so you can remove any you don’t feel are appropriate for your implementation.

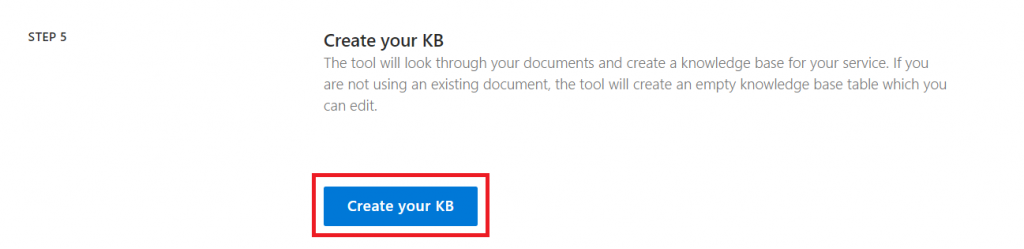
Click “Create your KB”.
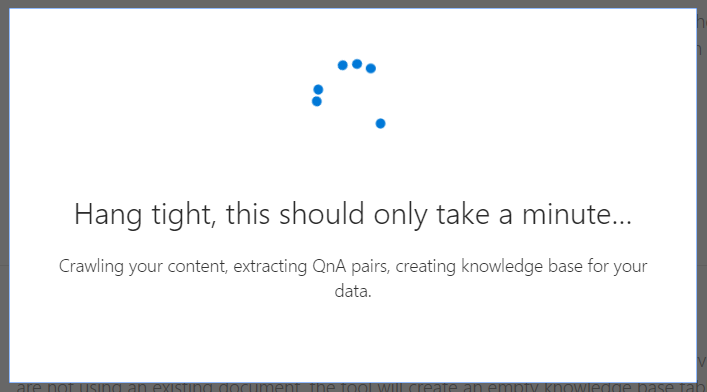
And wait a few minutes.
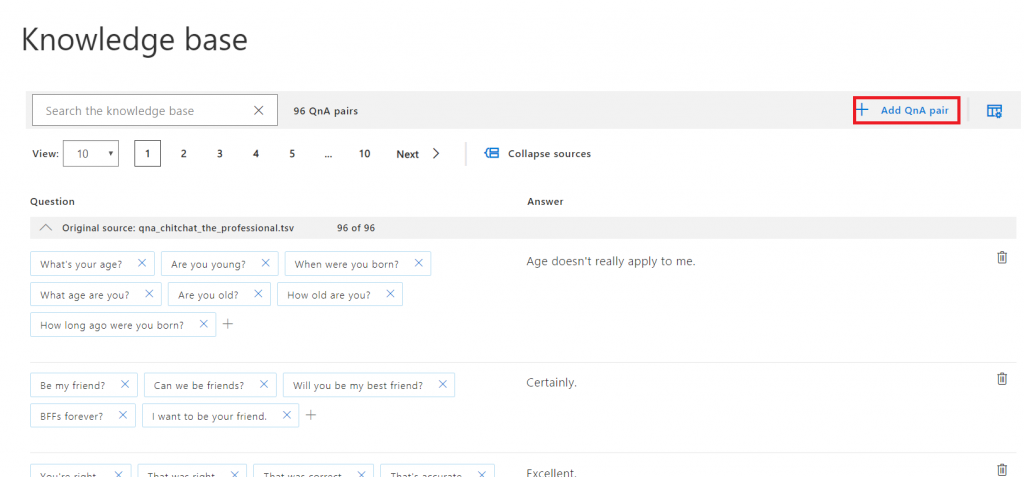
Once the KB has been created, click “Add QnA pair” to begin adding questions. You can also scroll through the imported “chit chat”questions and modify/remove any you don’t like.
Answers use markdown formatting, so you can add hyperlinks, italics, bold, numbered lists.

Once you have added your question/answer pairs, click “Save and train” – training allows the bot to respond with an appropriate answer when the question isn’t exactly one of the questions provided.

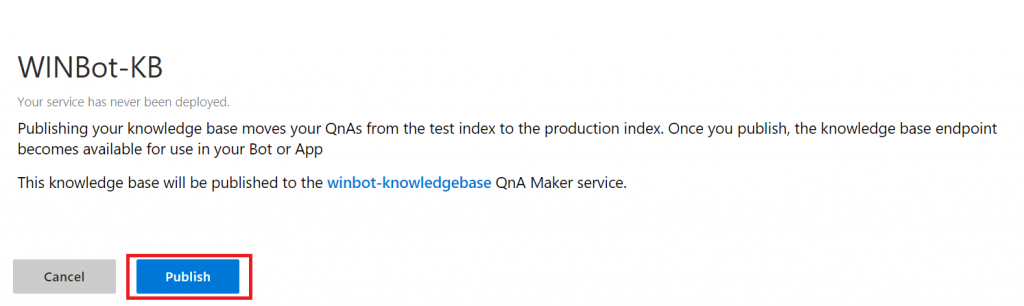
Wait again … when you are returned to the q&a pair screen, click “Publish” – this implements your changes in production. You can stage changes, allowing others to review them, by waiting to click Publish.

Read the warning – assuming you actually want your changes to be in production, click “Publish”.
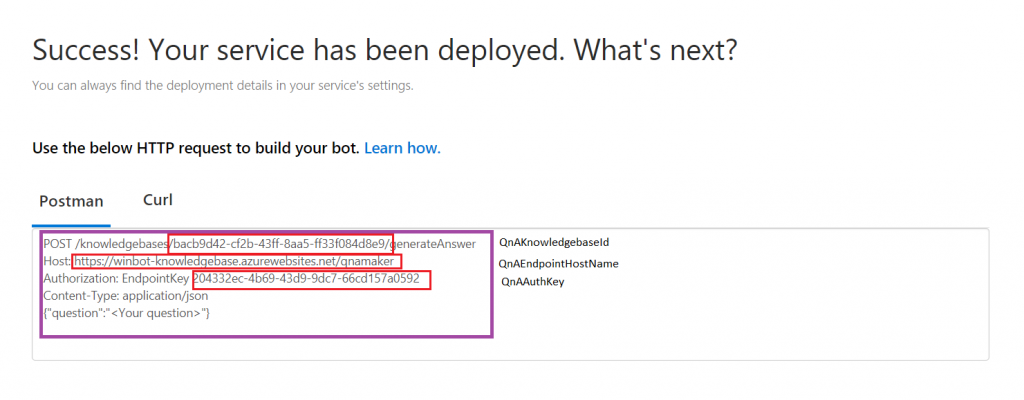
Wait some more, and you have an endpoint!
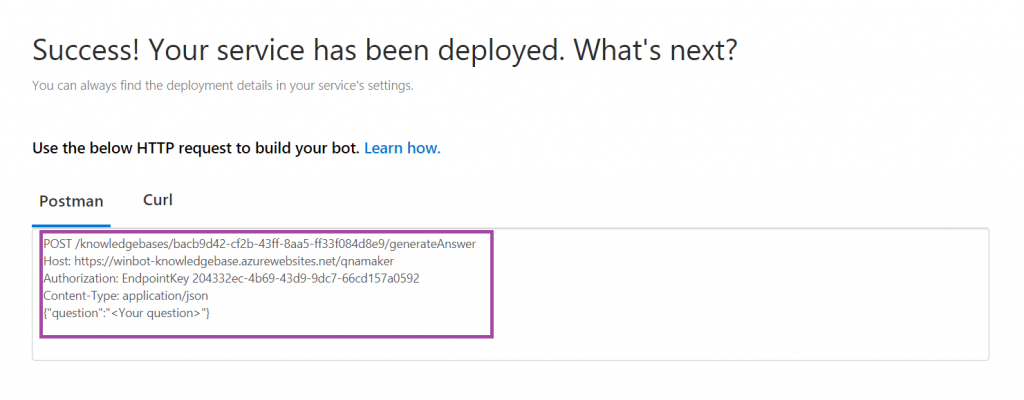
Copy the ‘stuff’ from the box into a text file somewhere. Find your QnAEndpointHostName, QnAKnowledgebaseId, and QnAAuthKey
Unless you are going to be the *ONLY* person editing your KB (and never go on holiday, never ring up sick), you’ll want to share access with others. Log into https://portal.azure.com and locate your “cognitive service”. Click on its name to edit it.
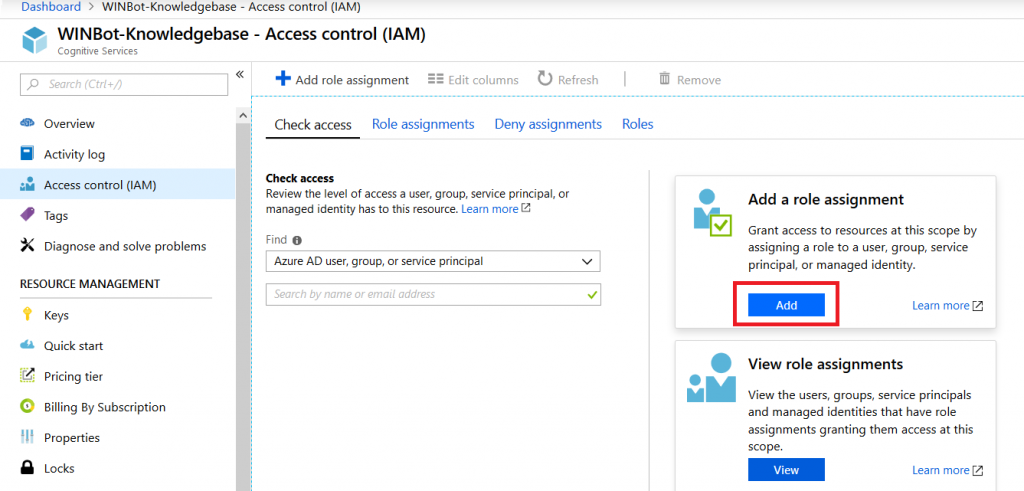
Click on “Access control (IAM)”
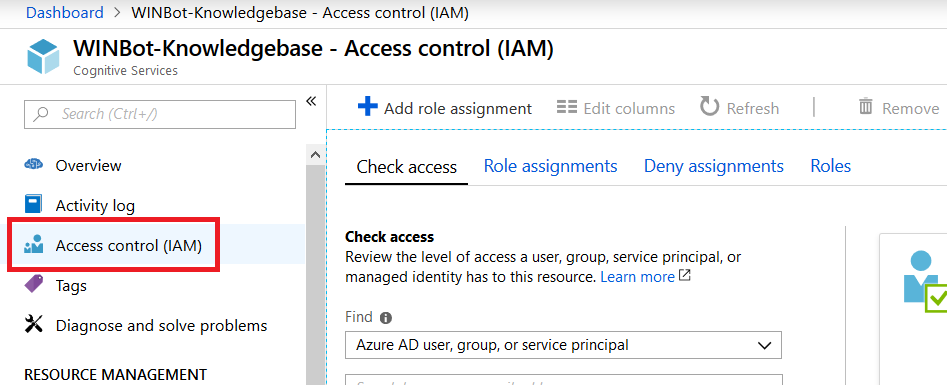
In the “Add a role assignment” section, click “Add”.
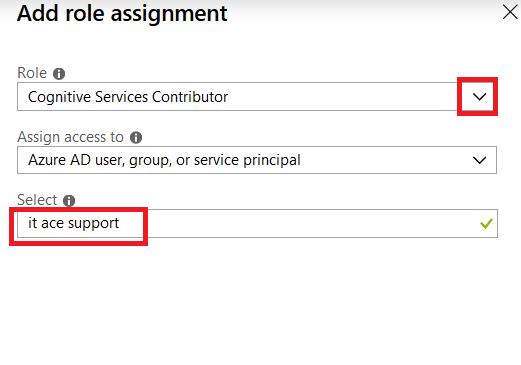
Select either “Cognitive Services Contributor” or “Owner” as the role (owners are allowed to manage all settings, including permissions whereas service contributors can only manage data within the knowledge base). Enter an Active Directory group name – you can enter individual people, but then someone will need to manually edit the permissions as people join and leave your group.
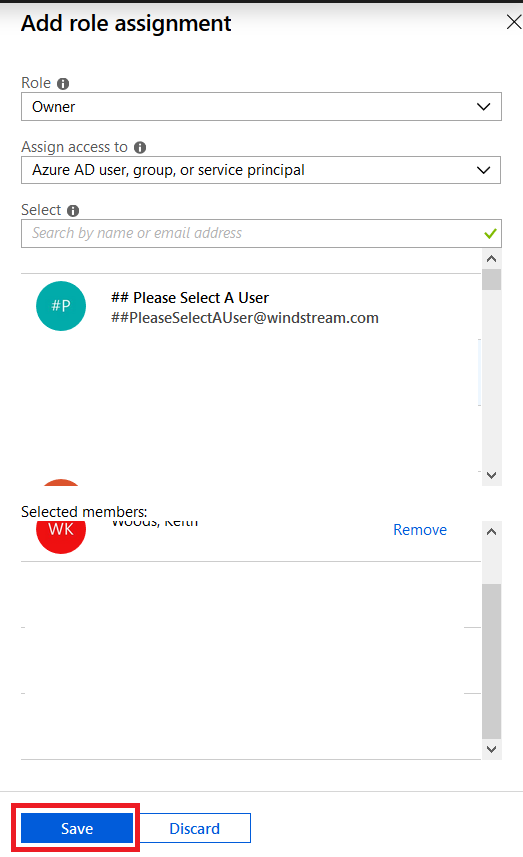
If you didn’t select owner, make sure you add some other owners (either a group or a few people)
Now we’re ready to set up a bot …
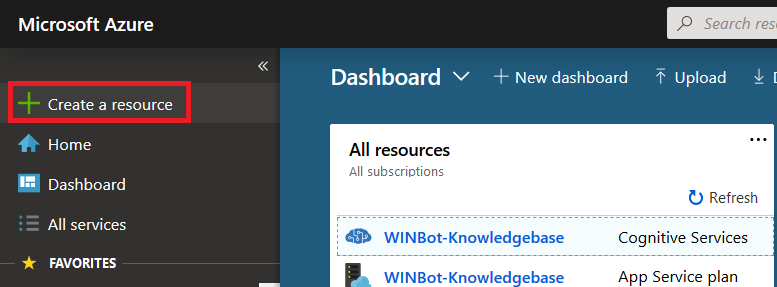
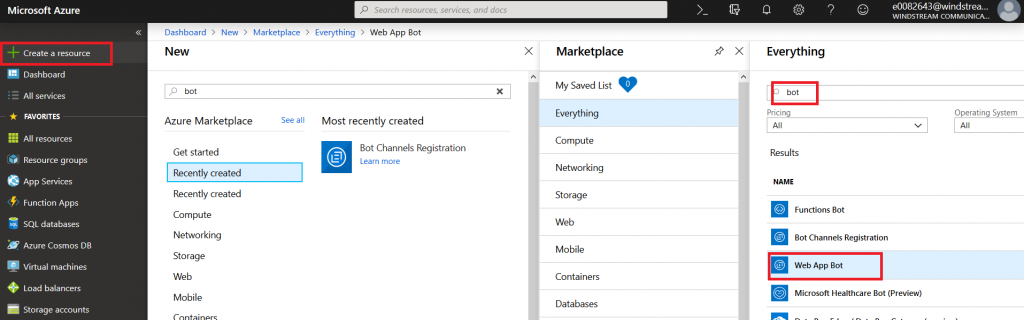
Microsoft Teams uses Azure bots – so you’ll need to create an Azure bot. From https://portal.azure.com, click on ‘Create a resource’.
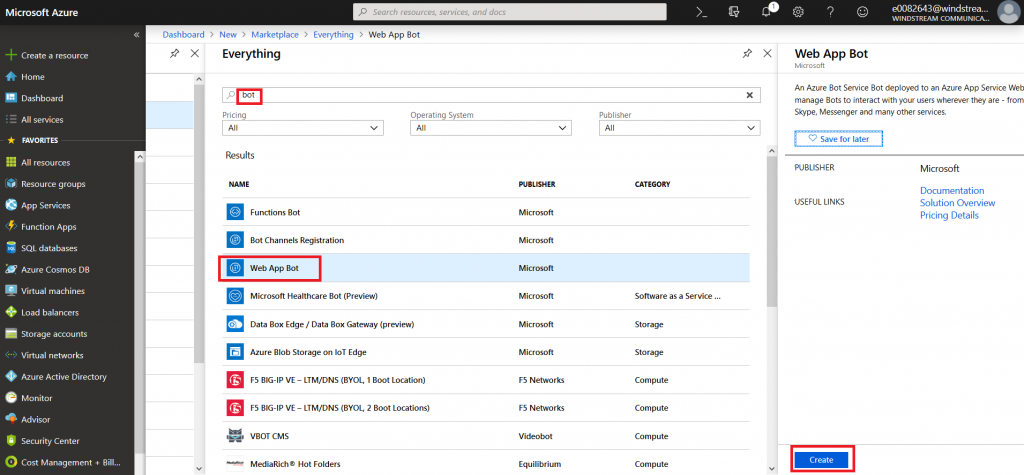
Search for “bot” and find the bots you are looking for. Either “Functions Bot’ and “Web App Bot” can be selected – I am using a WebApp bot because that’s what I’ve used for other bots I’ve coded. Functions bots use Azure functions, which are C# scripts, for logic processing; WebApp bots use WebAPIApp Service for logic processing (C# or NodeJS). If you’re not planning on tweaking anything … doesn’t much matter. Click “Create” to create the bot.
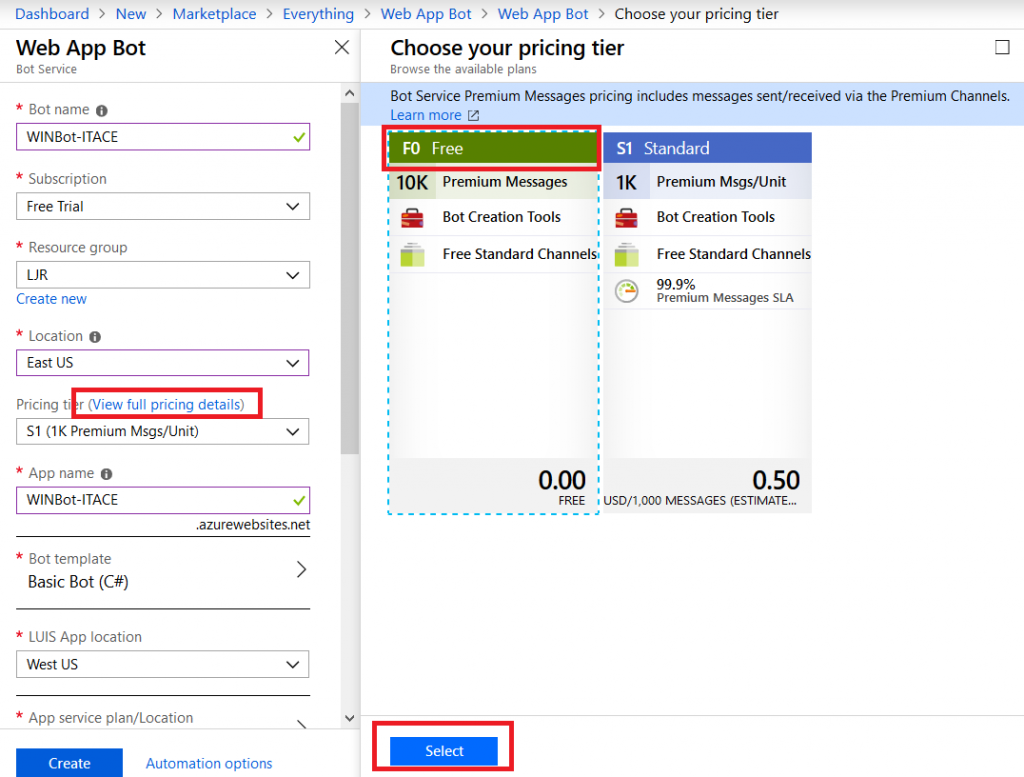
Give your bot a name – this needs to be unique. In the pricing tier, click on “View full pricing details” to see the options. Again, I am selecting the free tier. Don’t forget to hit ‘select’, or your selection will not be updated.
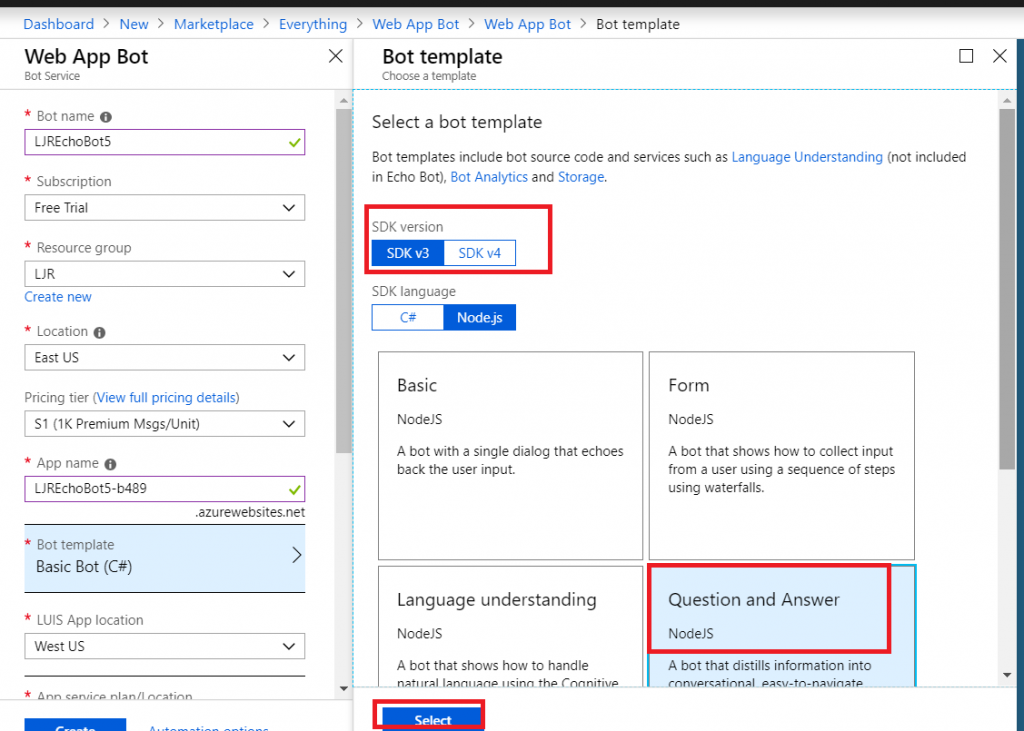
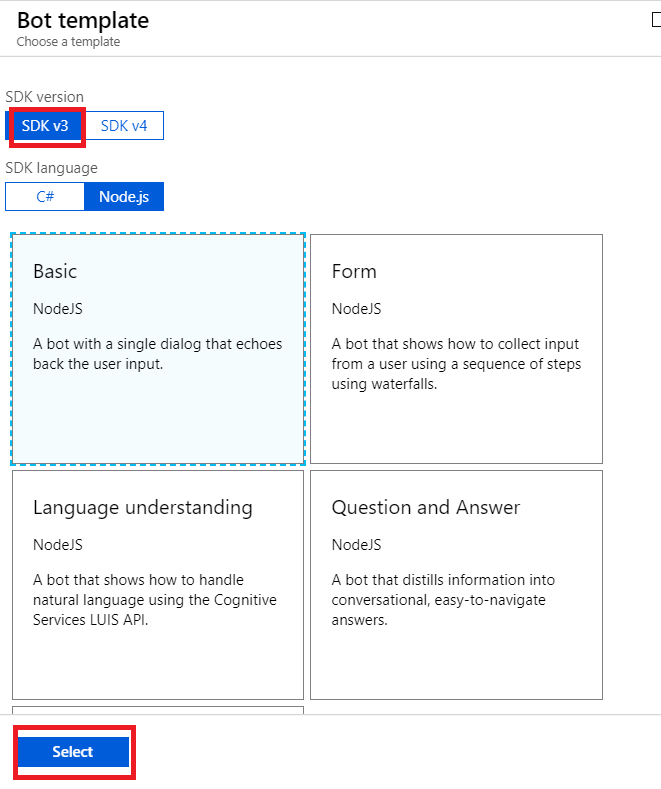
When you get to the bot template section, you can pick either C# or NodeJS – again, if you don’t plan on tweaking anything … doesn’t much matter. I am using C# because I know C#. Select the SDK v3, then find the “Question and Answer” bot template. Again, don’t forget to click “Select” or your selection won’t be saved.
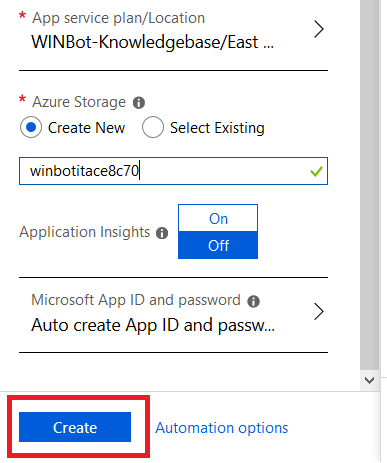
Create a new storage location, disable application insights (it’s a for-fee add-on), and click “Create”.
Wait for it …. You’ll see a blue bar running under the bell icon in the upper right-hand corner of the site.

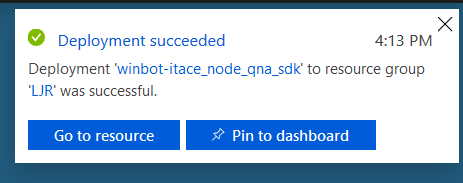
Soon, you’ll see a success message in the upper right-hand corner.
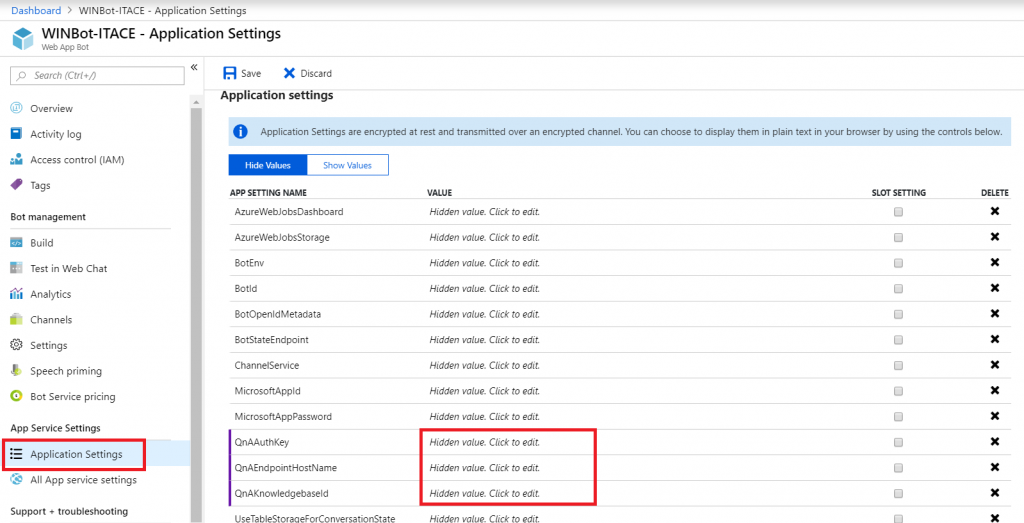
Refresh the resources on the dashboard and select the “WebApp Bot”. Under ‘App Service Settings’, go into “Application Settings”. Here’s where you enter the QnA information we saved after your knowledge base was published. Click in the “Value” column to paste in the values for QnAAuthKey, QnAEndpointHostname, and QnAKnowledgebaseId. Don’t have them? No big – go back to QnA Maker, open your KB, and select the “Settings” tab. There it is again!
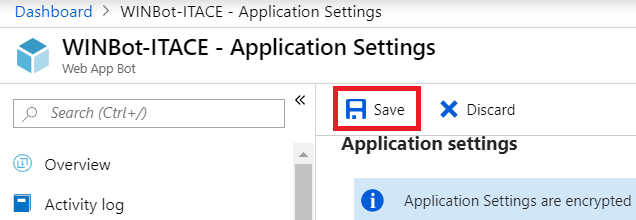
Click “Save” to commit your changes.
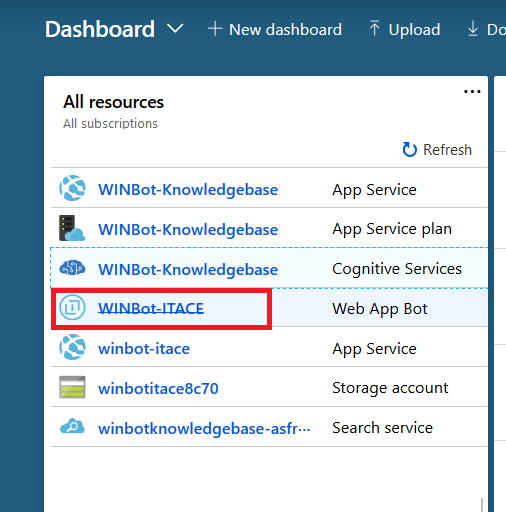
Return to the Dashboard and select your “Web App Bot”
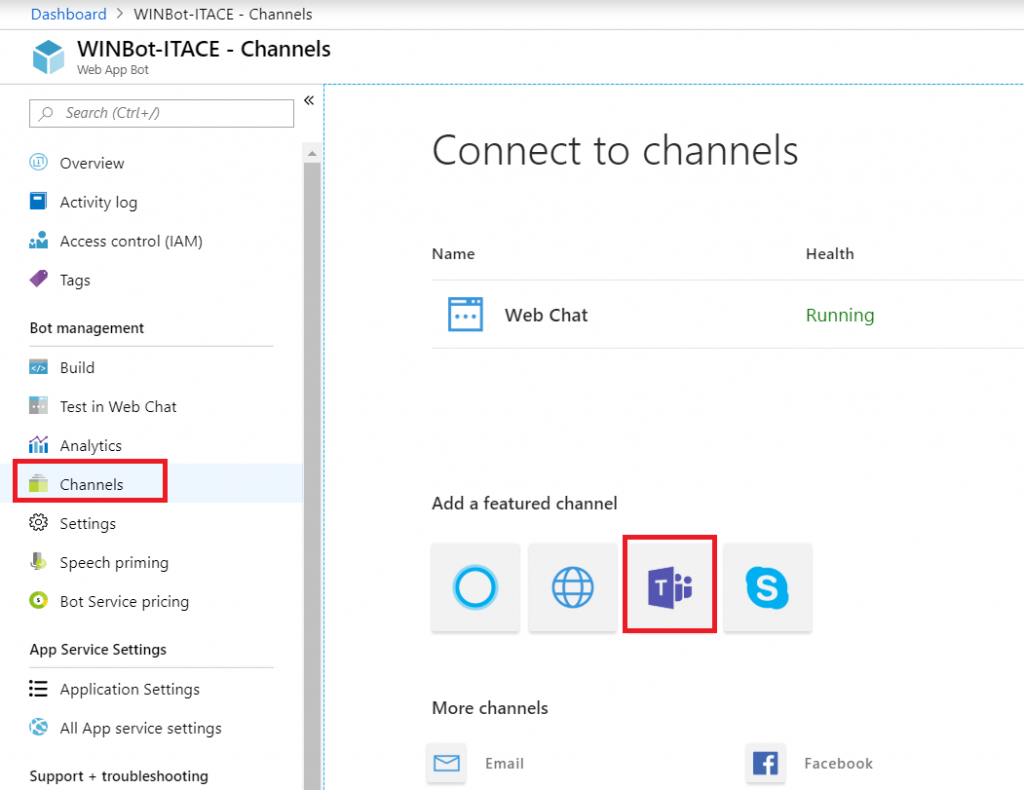
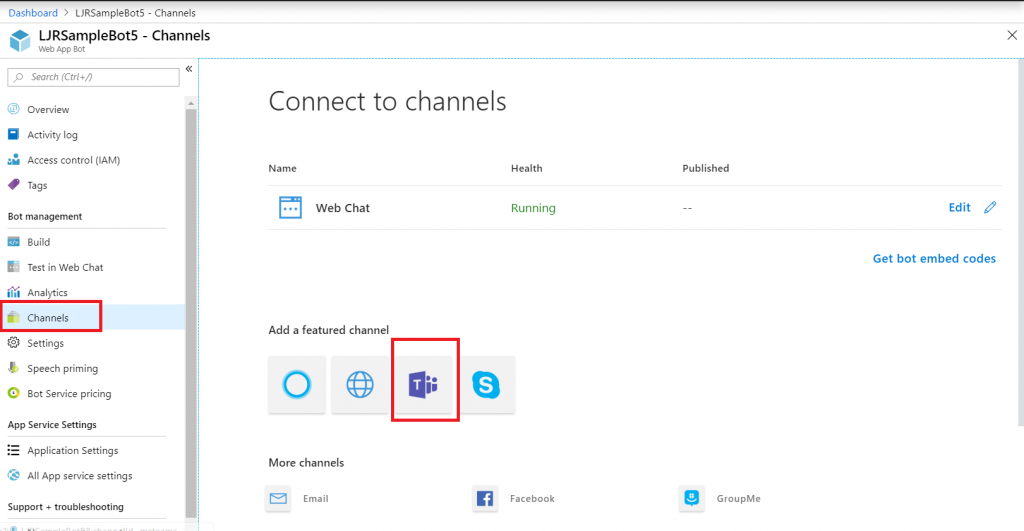
In the left-hand navigation column, select “Channels”. Click on the Teams logo.
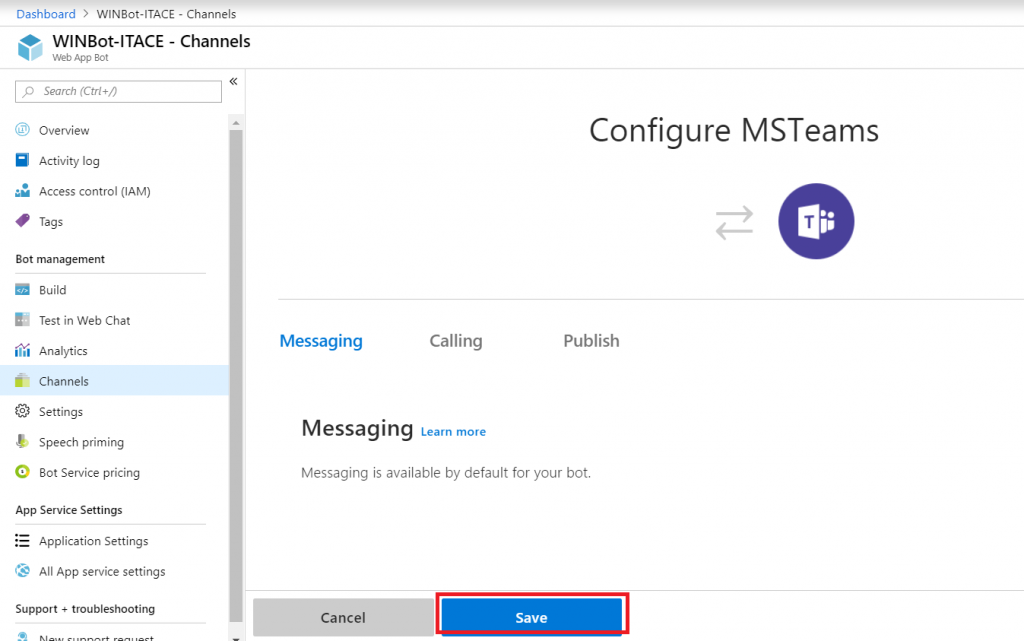
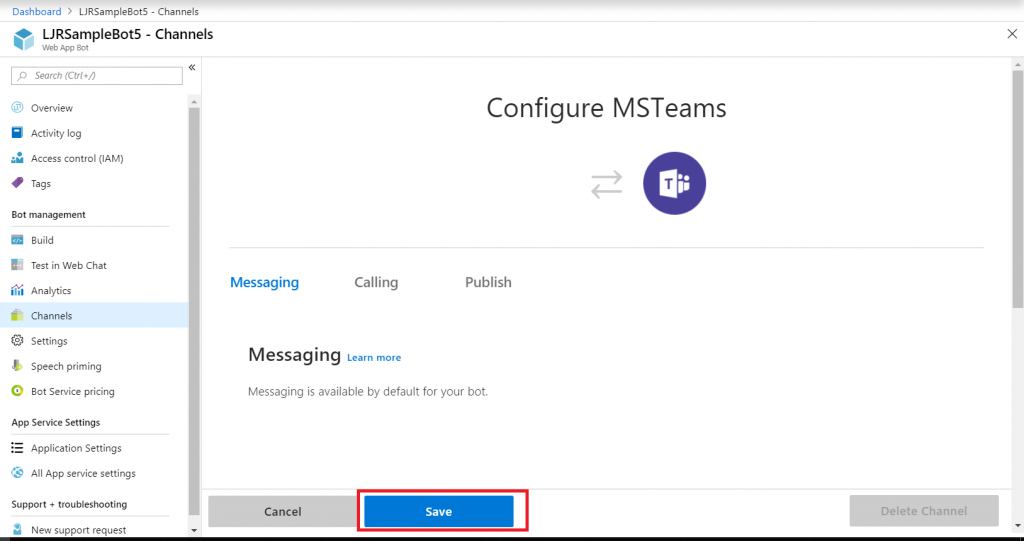
The “Calling” tab will enable IVR or real-time media interaction with your bot – I have never done this, it may not be possible with our product set. “Publish” is to publish your Bot in the Microsoft store – not something I want to do with a bot designed to answer employee-specific questions, but I could see creating a Enterprise Customer Q&A bot that enterprise customers can add to their Teams spaces … in which case, making the bot available in the Microsoft Store would be convenient. Click “Save” to create a Teams channel for communication with your bot.
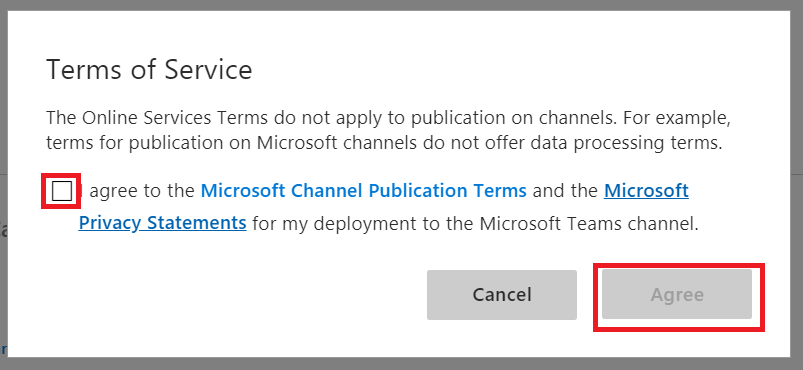
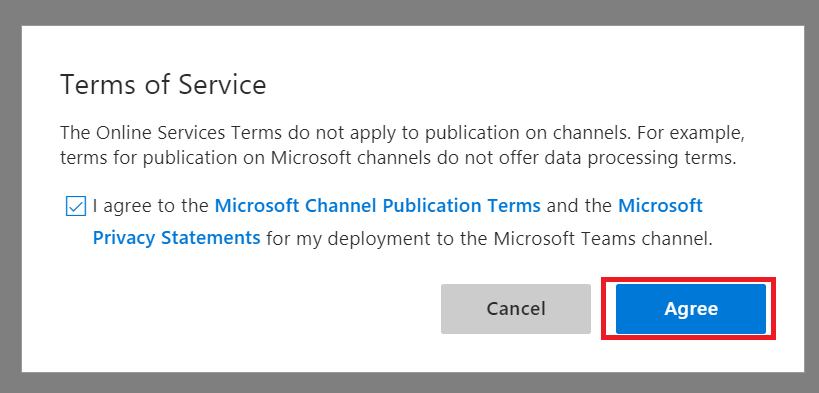
Read the publication terms and privacy statement. If you agree, check the box and click “Agree”.
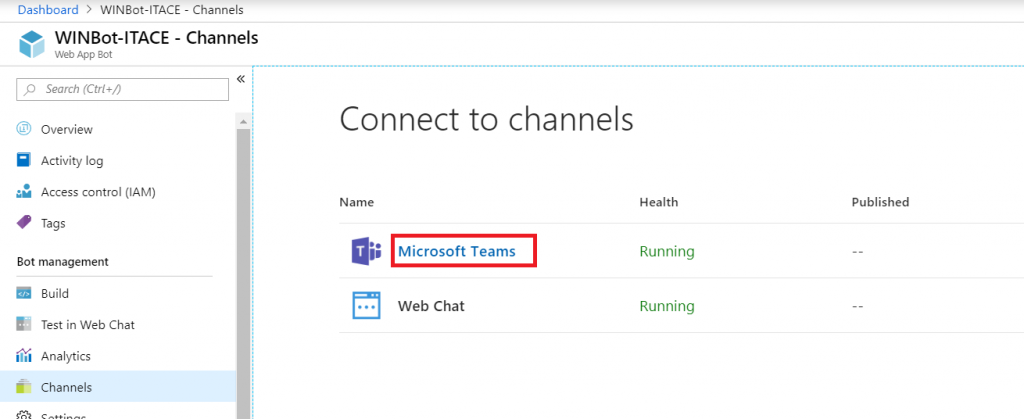
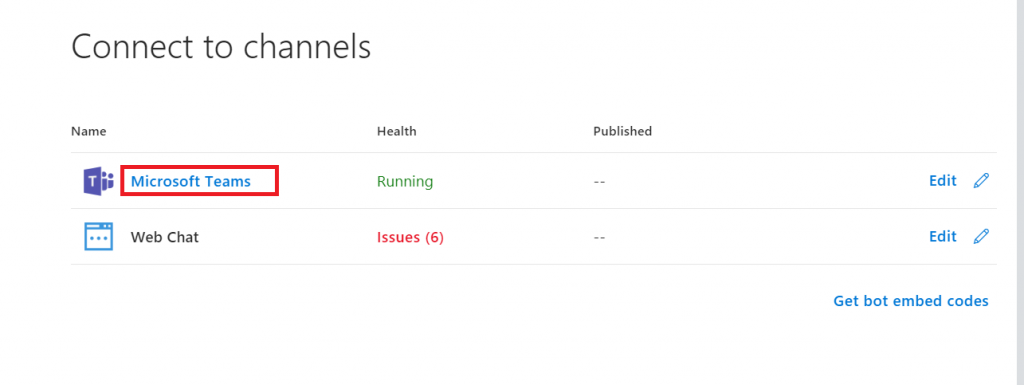
In the Channel section, click the “Microsoft Teams” hyperlink.
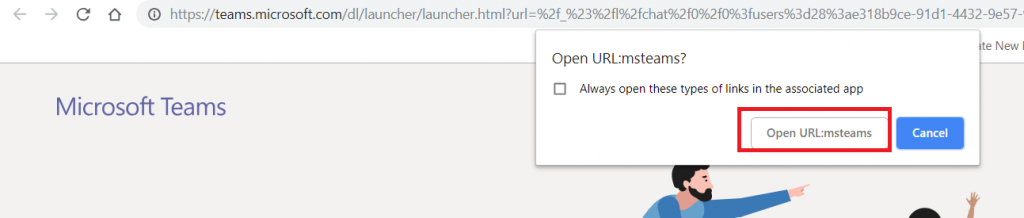
This will open a new browser tab. Click “Cancel” so you can copy the URL.
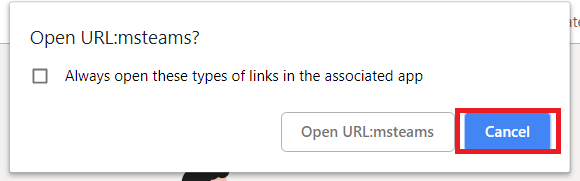
Once you’ve copied the URL, click “Open in Teams web app” to interact with your bot using the Teams web client (or ‘launch it now’ for Teams desktop client)

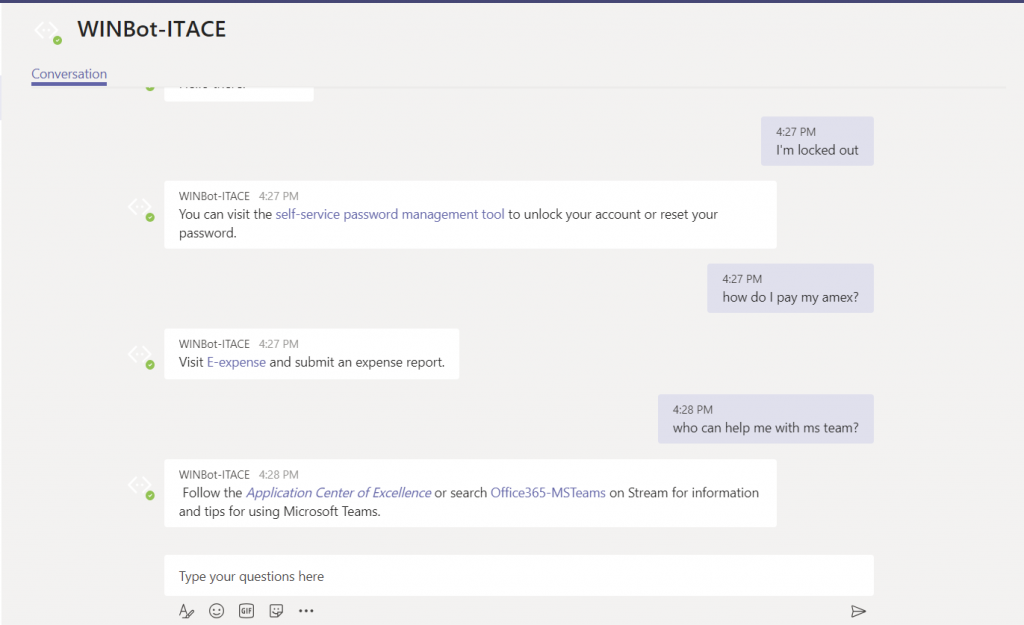
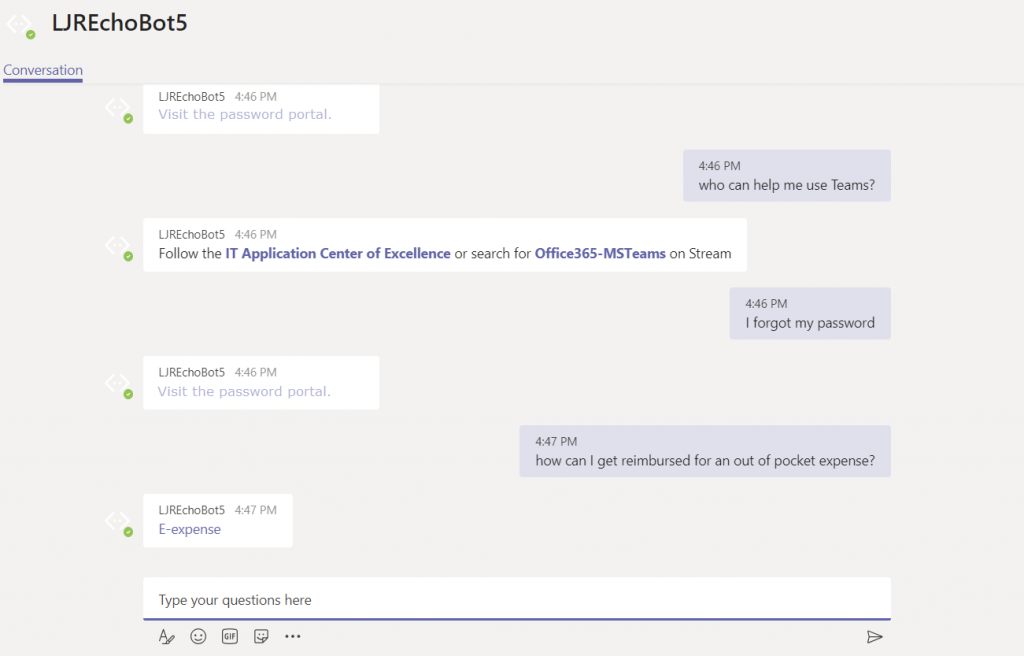
It’s alive! Ask some questions and verify that your answers are being delivered. Check for formatting problems or bad hyperlinks.
I don’t want a bunch of people attaching to my test data, so the resources created above have been deleted. I’ve created a new bot with different details. Open https://teams.microsoft.com/dl/launcher/launcher.html?url=%2f_%23%2fl%2fchat%2f0%2f0%3fusers%3d28%3aab23fc5a-3151-495c-a02c-592b38148599&type=chat&deeplinkId=64b01c1e-5a2a-4456-a673-c02c3e04b532&directDl=true&msLaunch=true&enableMobilePage=true in Teams, you’ll be able to interact with my bot.
Q&A Maintenance
Anyone you have set as “Cognitive Service Maintainer” or“Owner” should be able to use QnA Maker to maintain the question and answer set. Log in to https://www.qnamaker.ai, select the “My knowledge bases” tab, and click on the knowledge base name. Modify/add question/answer pairs, then click “Save and train”, then “Publish”.
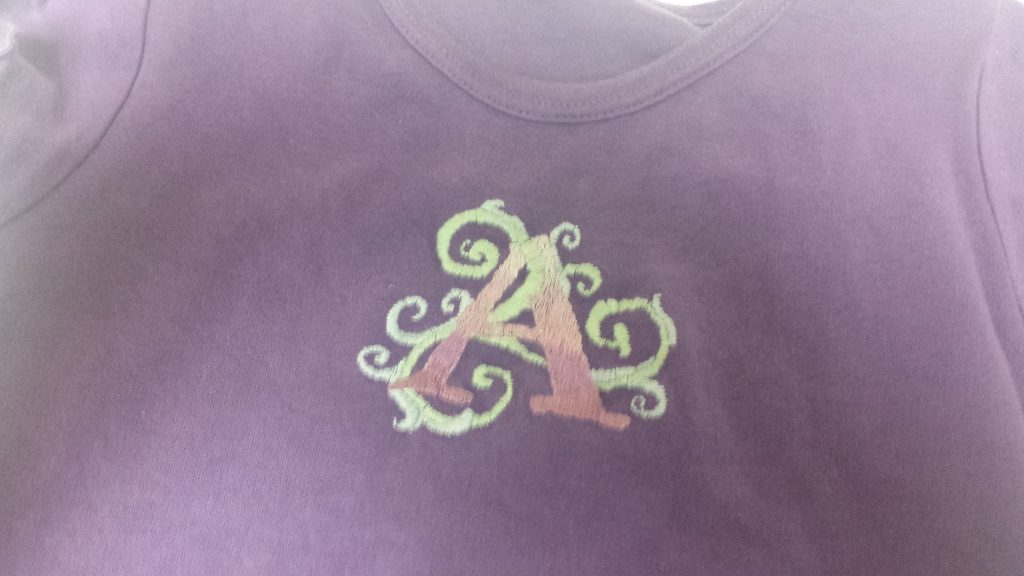
A is for Anya
Another thread painting project — the ‘A’ has an ombre effect.
Did you know … Microsoft Teams Chat can help you find messages others post into Teams spaces?
I am a member of multiple Teams, and I can remember that Keith posted something about creating a Q&A a few days ago … but I don’t remember where he posted that message. I cannot reply to it until I find it. Search can help — chat conversations are searchable. But did he type QnA, Q&A, Q and A …
Instead of clicking through all of the channels in all of my Teams spaces trying to find a single post or working my way through the various ways of phrasing “questions and answers”, I can look at my chat with Keith. Click the “Activity” tab. Now I am looking at things Keith has posted to our shared Teams spaces in the past two weeks.
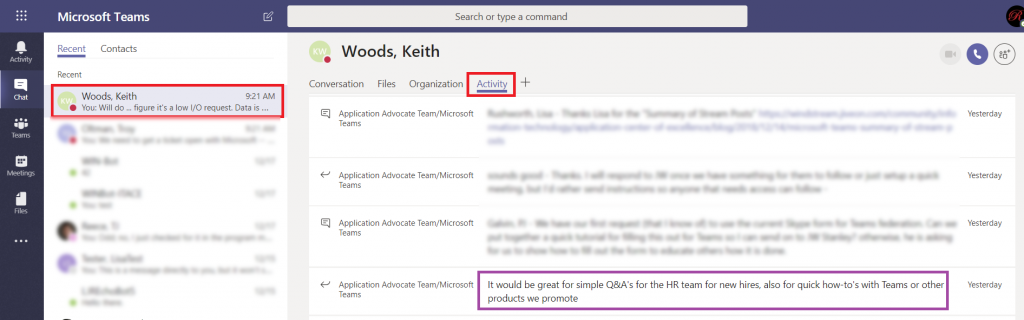
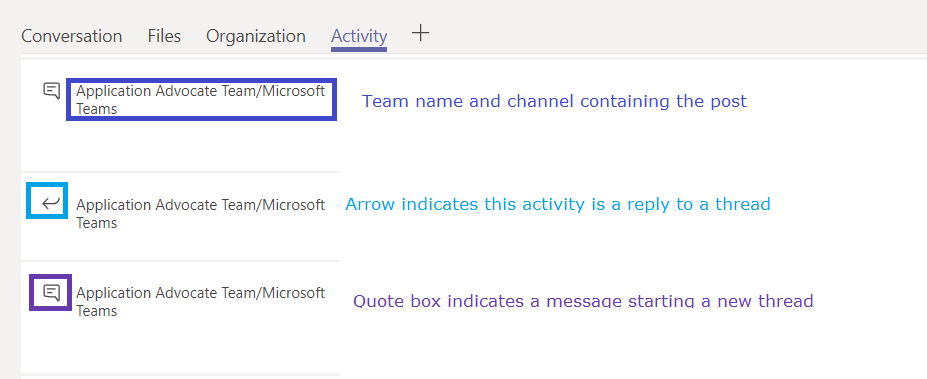
The Team and channel into which the activity was posted is included before each message. An icon indicates if the activity is a reply to an existing thread or a message starting a new thread.
You can click on any entry in the activity log.

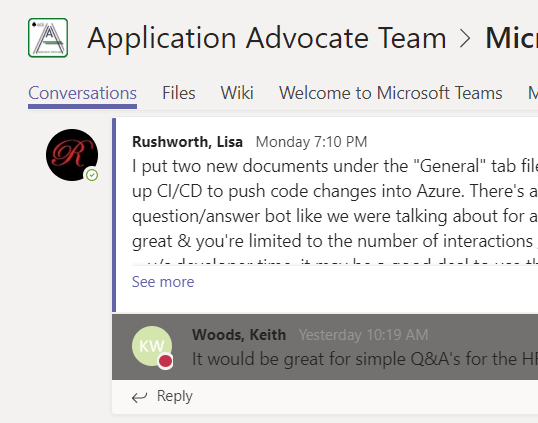
Your Teams client will show you the message in its context – you are in the correct Team and Channel, and the message is briefly highlighted. This makes replying to the message we found in the activity feed quite quick.
What if you’ve never chatted with the person? Start a new chat and type in their name. You don’t have to send a message to them (although I could totally see myself writing “ignore this message – I just needed to get you listed in my recent conversations”), just click away and there will be a draft chat with them. Click on that draft chat, and you’ll have an “Activity” tab.
Azure App Service Plan: Free Tier
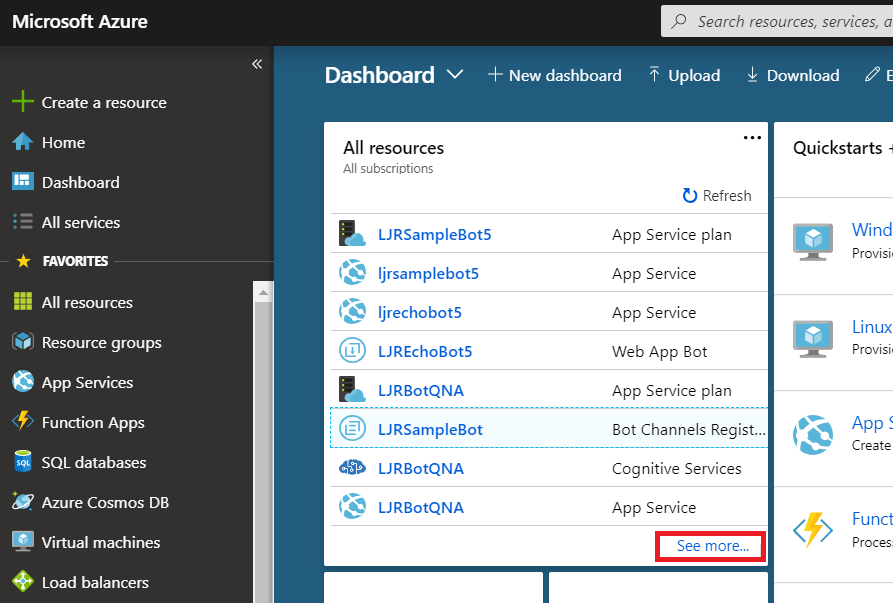
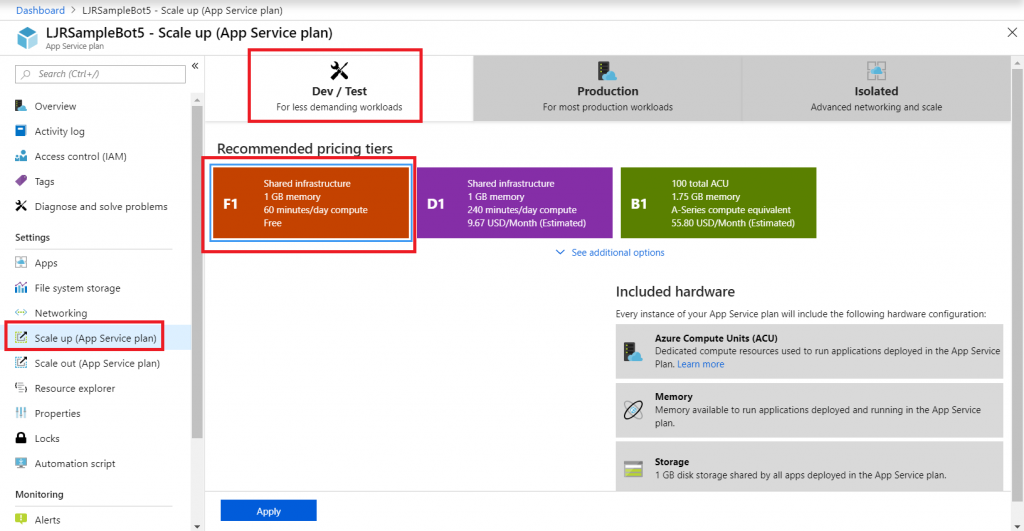
If you’re just playing around with something in Azure, ensure your service plan is using the free tier. Yes, it’s resource limited. It’s free. From the https://portal.azure.com dashboard, click “See more…” to see all of your resources.
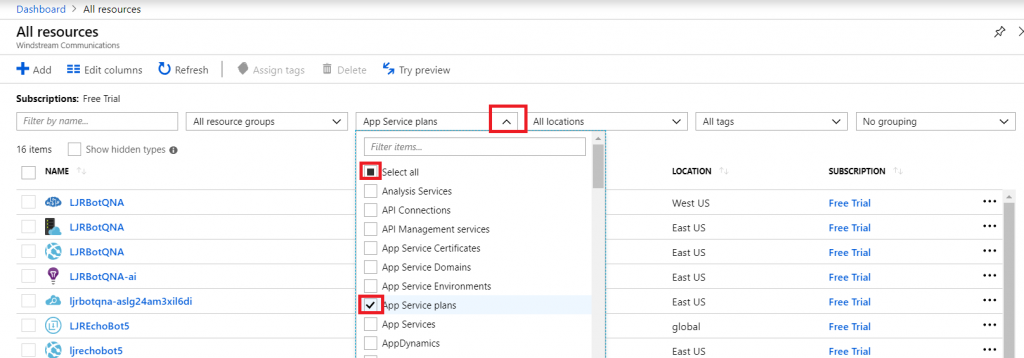
Filter to view only app service plans.
In each app service plan, go into “Scale up”. Click on the “Dev/test” tab and select F1 – the free tier. Click “Apply”.
Microsoft Teams: Creating A Bot
Before you start, understand how billing works for Microsoft’s cloud services. There are generally free tiers for selections, but they are resource limited. When you first start with the Azure magic cloudy stuff, you get a 200$ credit. A message indicating your remaining credit is shown when you log into the Azure portal. Pay attention to that message – if you think you are using free tiers for everything but see your credit decreasing …you’ll need to investigate. Some features, like usage analytics, cost extra too.
Microsoft Teams uses Azure bots – so you’ll need to create an Azure bot to get started. From https://portal.azure.com, click on ‘Create a resource’. Search for “bot” and find the bots you are looking for. To host your bot on Azure, select either the “Functions Bot’ or “Web App Bot”. Functions bots use Azure functions, which are C# scripts, for logic processing; WebApp bots use WebAPI App Service for logic processing (C# or NodeJS). To host your bot elsewhere, select “Bot Channels Registration”. In this example, we are using a “Web App Bot”.
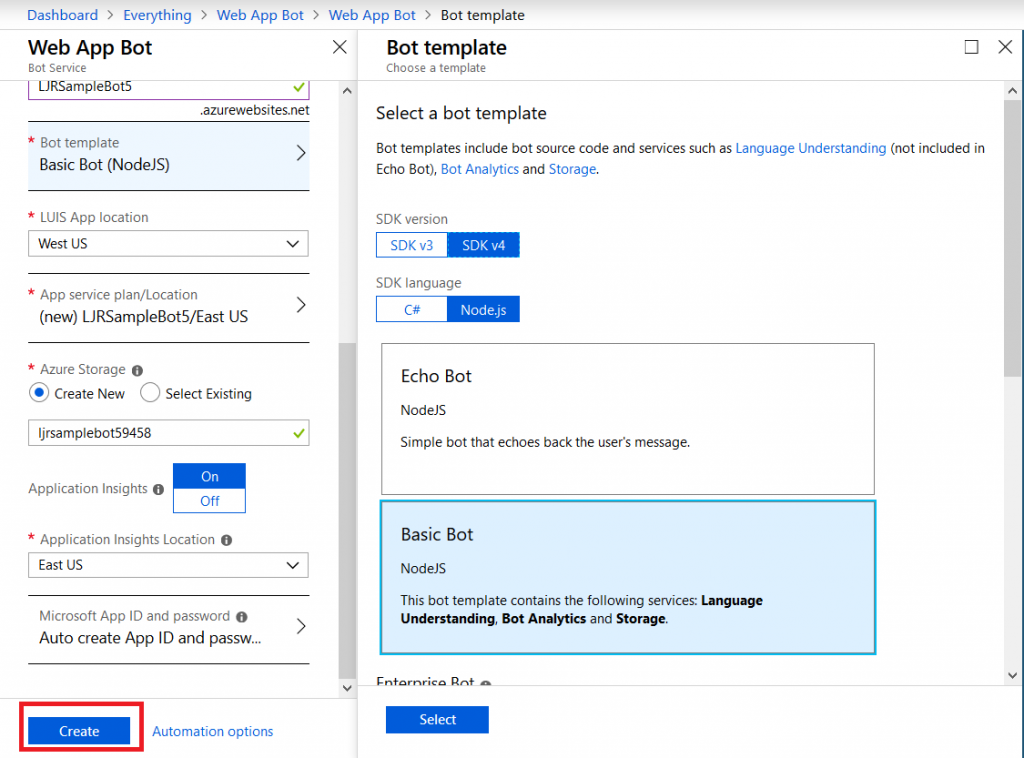
Give your bot a name– there will be a green check if the name is unique. Pick your language – C# or Node.JS – and then decide if you want an Echo bot (which gives you a starting place if you’re new to developing bots) or a blank slate (basic bot). Don’t forget to click “Select” otherwise you’ll be back to the defaults. You’ll need to create a resource group. Click on “Bot template” and select what you want to use as the basis for your bot. As of 14 Dec 2018, use v3 unless you need something new in v4 – there’s a lot more available there, and the Bot Builder extensions only work with v3 (https://github.com/OfficeDev/BotBuilder-MicrosoftTeams)
You may need to create a service plan
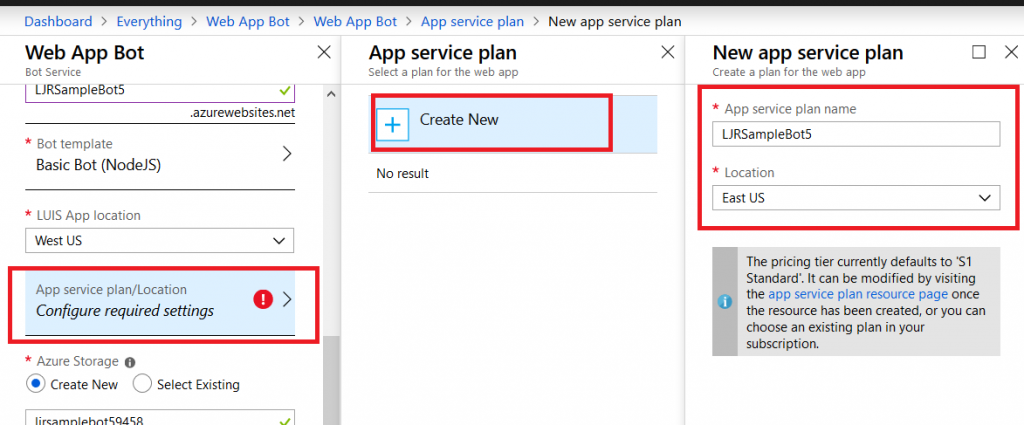
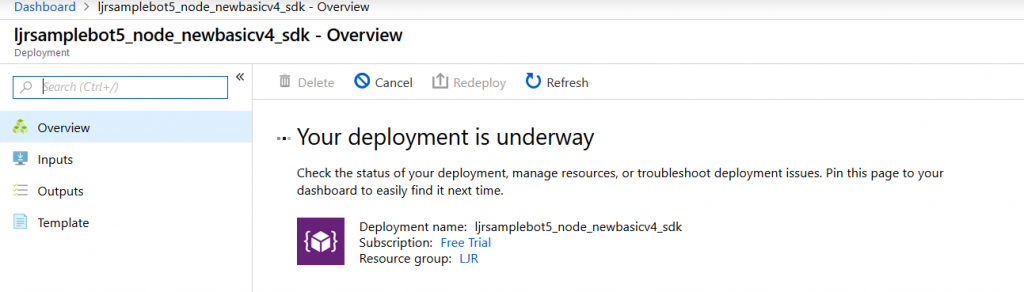
And storage configuration. Once you have completed the bot configuration, click “Create” and Azure will deploy resources for your bot.
You’ll see a deployment process message, and your messages will have a similar notification. Wait a minute or three.
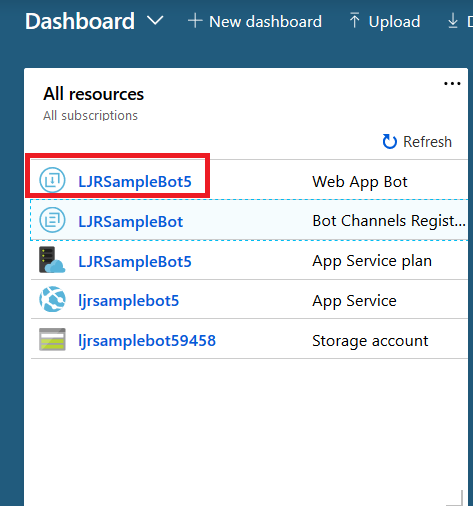
Return to the dashboard & you’ll see your bot services. Go into the bot that you just created.
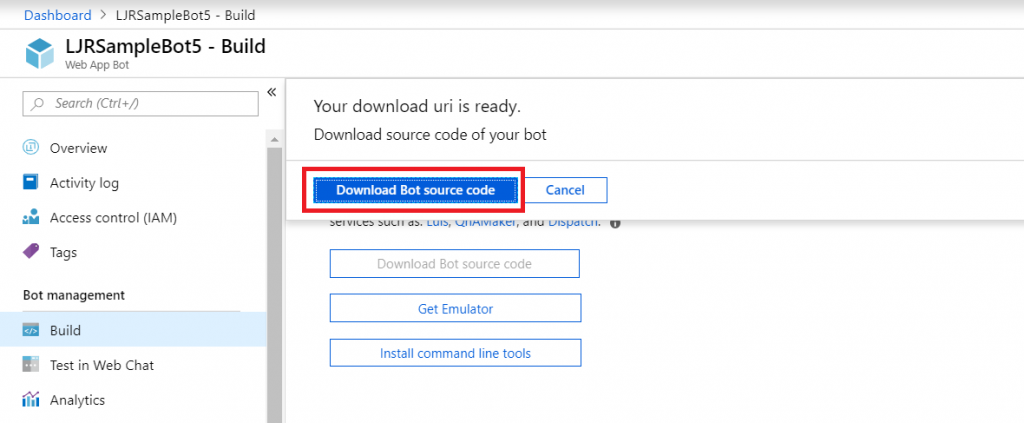
Select “Build” – you can use the online code editor or use an existing source repository and configure a continuous integration. I will be setting up a continuous integration – don’t click the link under “Publish”, it goes to an old resource. Click to download the source code – it takes a minute to generate a zip file for download.
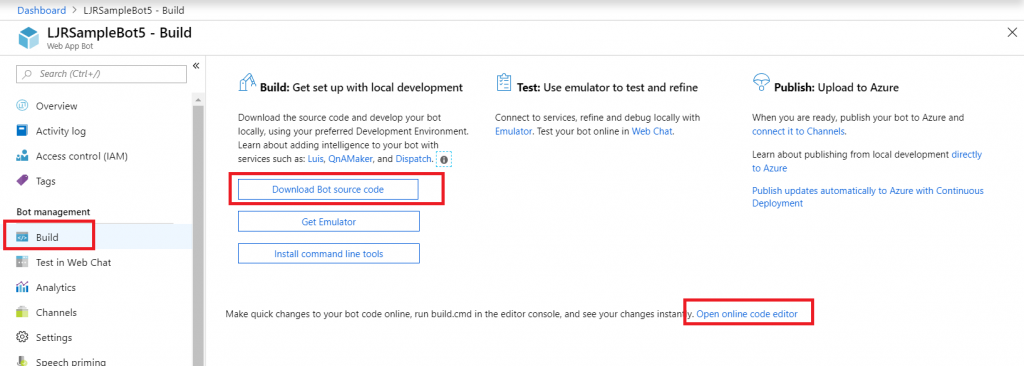
Once the download link is available, download and extract the file – this will be the base of your project. Put it somewhere – in this example, I’ll be using a GitHub project. Extract the zip file and get the content into your source repository.
Return to your dashboard and open the App Service for your bot. Select the “Deployment Center”.
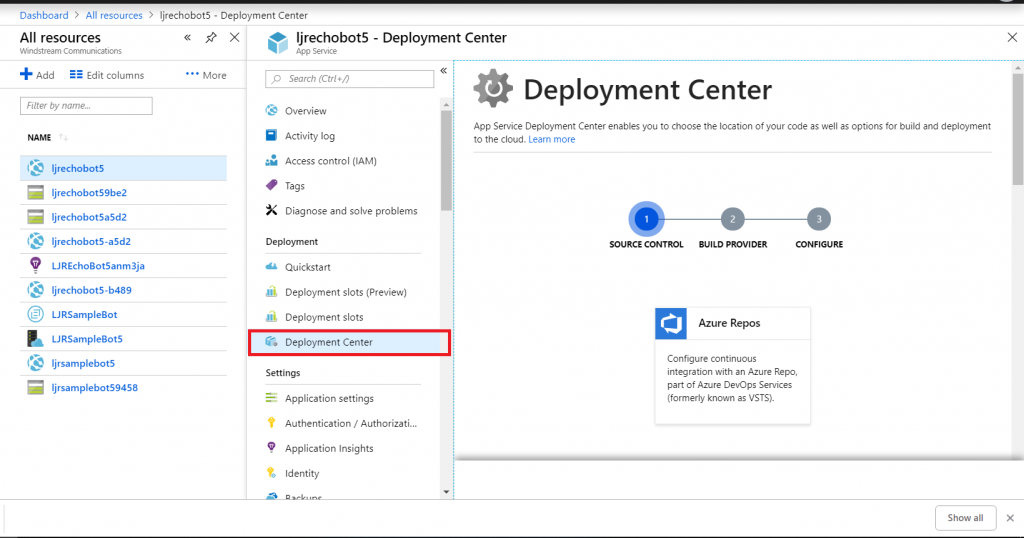
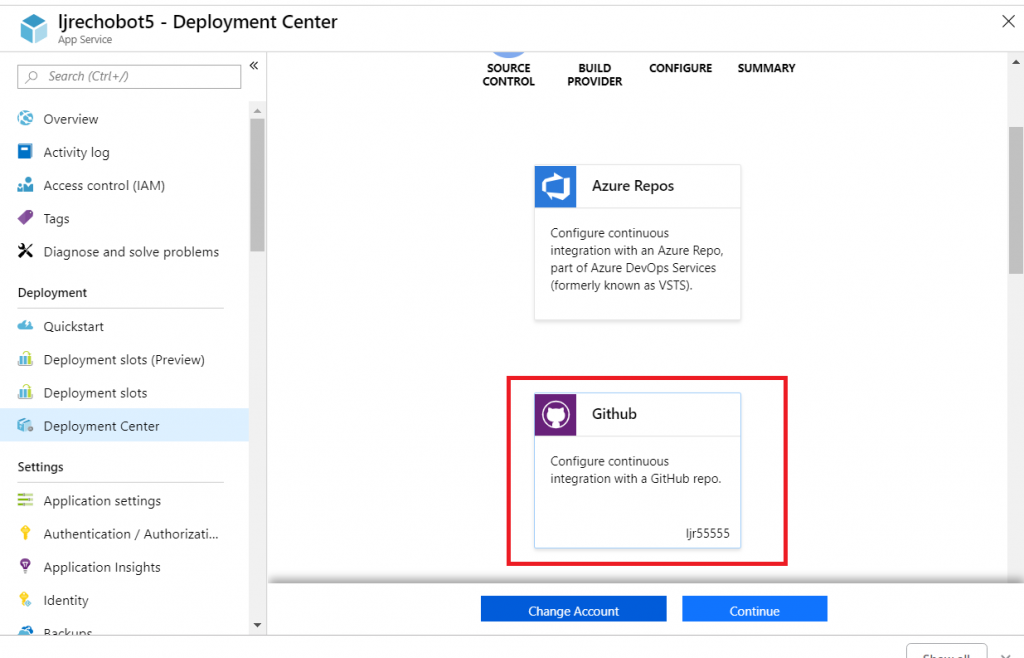
Select the appropriate source repository. When GitHub is used, you will need to sign in and grant access for Azure to use your GitHub account. Click “Continue” once the repository has been set up.
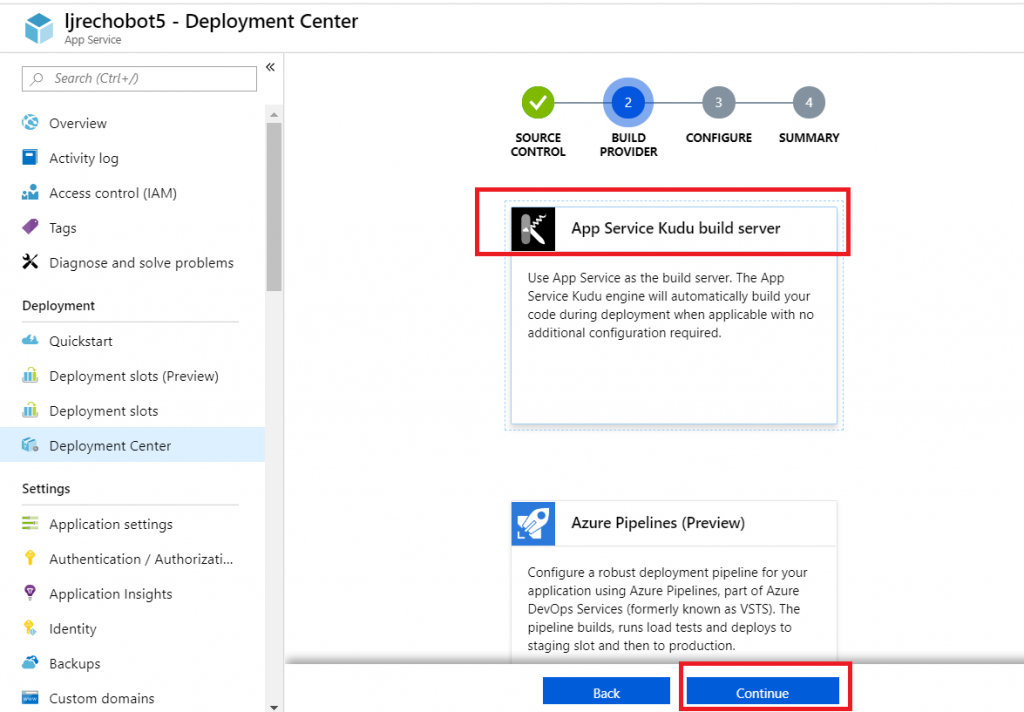
Select the build provider – Kudu or Azure Pipelines. Which one – that’s a personal preference. Azure Pipelines can deploy code stored in git (at least GitHub, never tried other Git services). Kudu can build code housed in Azure DevOps. Kudu has a debugging console that I find useful, and I’ve successfully linked Kudu up with GitLab to manage the build process elsewhere. Azure Pipelines is integrated with the rest of the Azure DevOps (hosted TFS) stuff, which is an obvious advantage to anyone already using Azure DevOps. It uses WebDeploy to deploy artifacts to your Azure websites (again, an advantage to anyone already doing this elsewhere).
The two build environments can be different – MS doesn’t concurrently update SDK’s in each environment, so there can be version differences. It’s possible to have a build fail in one that works in the other. Settings defined in one platform don’t have any meaning if you switch to the other platform (i.e. you’ll be moving app settings into a Build Definition file if you want to switch from Kudu to Azure Pipelines) so it’s not always super quick to swing over to the other build provider, but it might be an option.
I prefer Kudu, so I’ll be using it here.
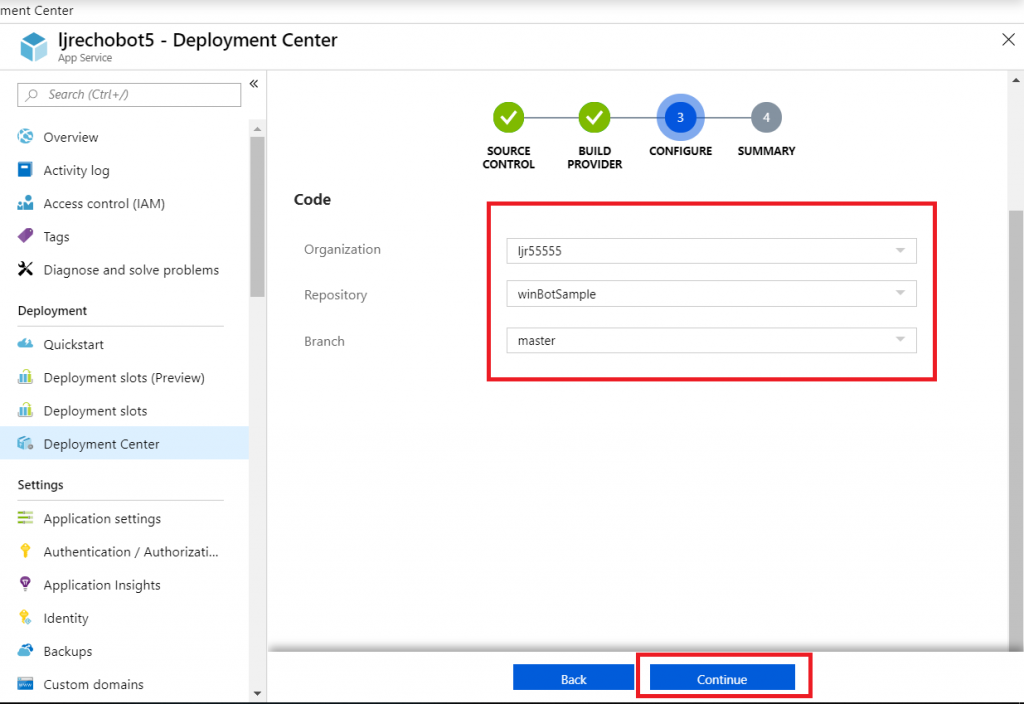
Select your repository name from the drop-down, then select the project and branch you want to use for deployment. In my repository, the master branch has functional code and there is a working branch for making and testing changes.
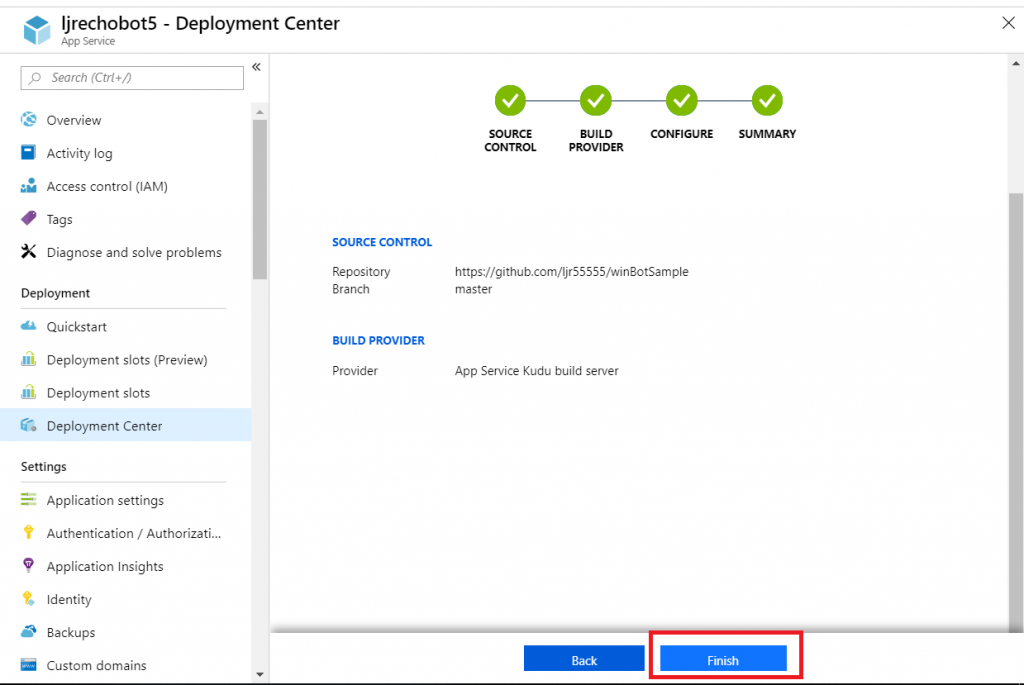
Review the summary and click “Finish”.
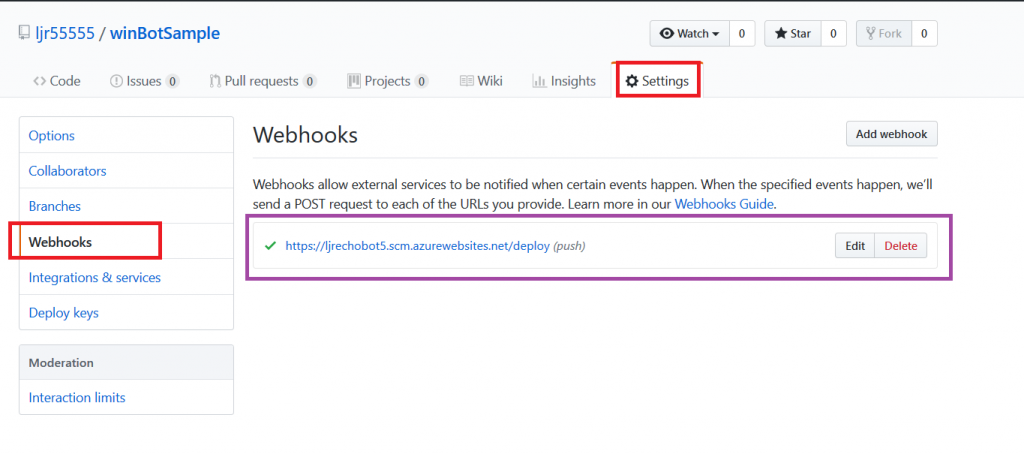
In GitHub, you confirm a webhook has been added to your project on push events. From your project’s settings tab, select “Webhooks” and look for a azurewebsites URL that includes your bot name. You can view the results of these webhook calls by clicking “Edit” and scrolling down to “Recent deliveries”.
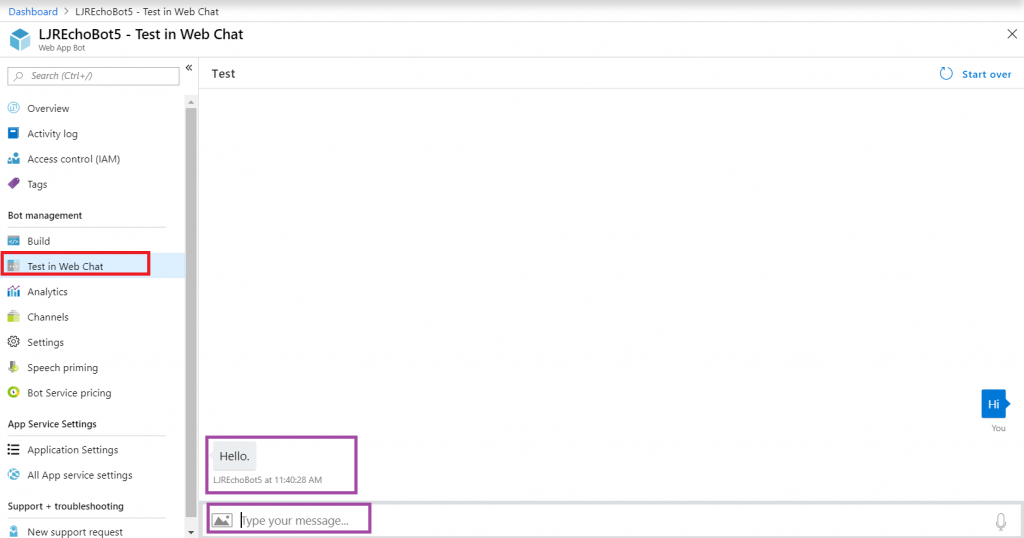
Add the interactions you want – information needs to be accessible from the Azure network, otherwise your bot won’t be able to get there. You can test your bot from the Azure portal to identify anything that works fine from your local computer but fails from the cloud. From the Web App Bot (*note* we are no longer in the App Service on the Azure portal — you need to select the bot resource), select “Test in Web Chat” and interact with your bot.
Once you have your bot working, you need to add the Teams channel to allow the bot to be used from Teams. Select “Channels” and click on the Teams logo.
There’s not much to set up for a bot – messaging is enabled by default. I don’t want IVR or real-time media functionality … but if you do click on the “Calling” tab. The “Publish” tab is to publish your bot in the Windows store – this might be a consideration, for instance, if you wanted to create a customer service interaction bot that enterprise customers could add to their Teams spaces (i.e. something you want random people to find and use). Since I am answering employee specific questions, I do not want to publish this bot to the Internet. Click “Save” when you have configured the channel as needed (in my case, just click ‘save’ without doing anything).
Review the publication terms and privacy statement. If these are agreeable, click “Agree”.
You’ll be returned to the Channels overview. Click on the hyperlinked “Microsoft Teams” – this will open a new URL that is your bot.
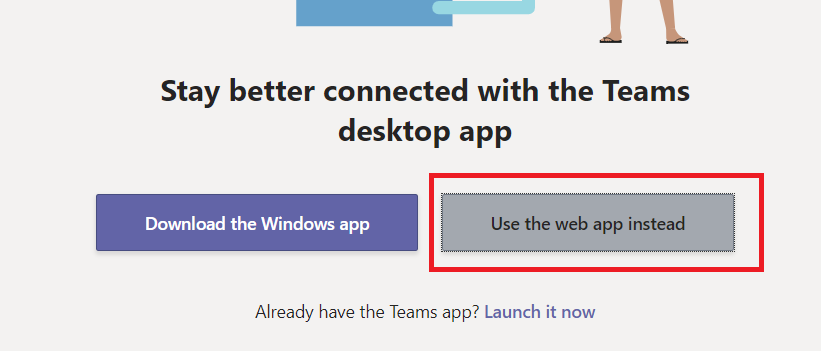
You can copy the URL here – others can use the same URL to use your bot. Either open the link in the Teams app
Or cancel and click “Use the web app instead” at the bottom of the screen.
Wait for it … your bot is alive!
That’s great … how do I interact with company resources? Quick answer is “you don’t” – this bot uses resources available on the Internet. To interact with private sources, the magic cloudy Microsoft network must be able to get there. Personally, I’d host my own bot engine. Expose the bot to the Internet and create a “Bot Channels Registration” instead.
Enlarging A Pattern
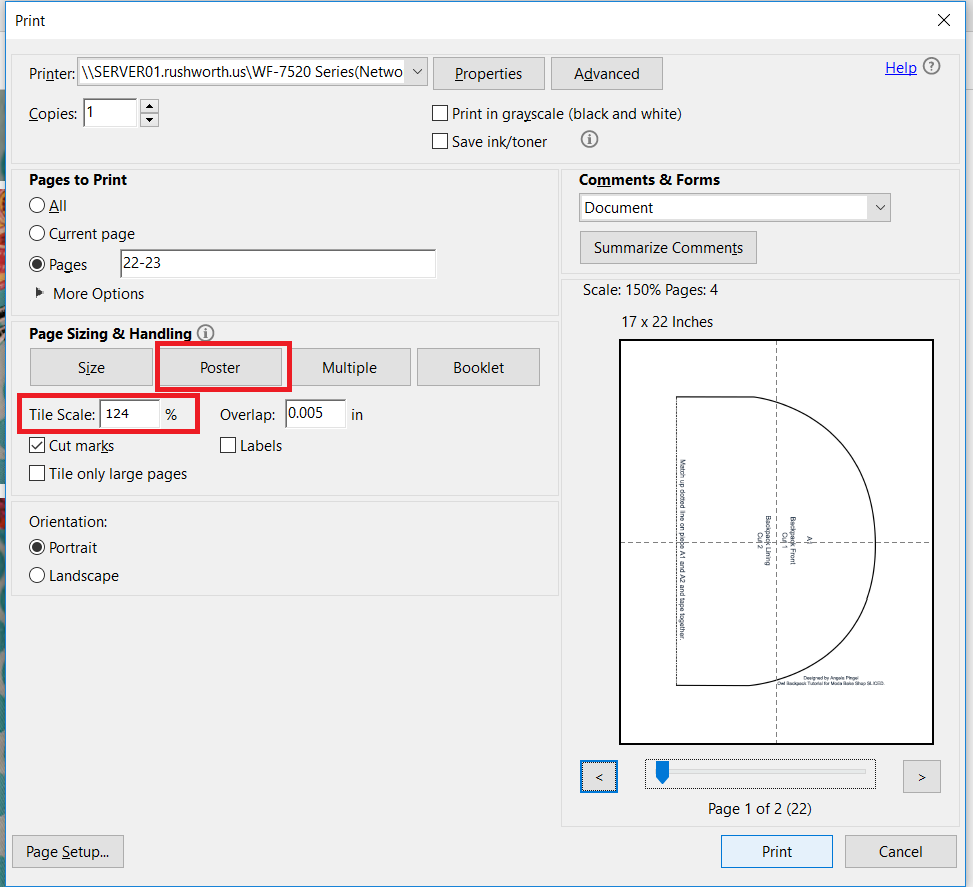
There are tricks to sizing clothing patterns — people don’t grow proportionally — but to make non-clothing patterns proportionally bigger, Adobe PDFs can just be turned into posters in the print menu.
In the print menu, select “Poster” and then enter the factor by which you want to scale the original pattern.
What’s that percentage? I use Excel to figure it out. Enter the original dimensions, a formula to multiply the original size by the scale factor … I usually add a cell subtracting the scaled size from the seam allowance to ensure my new object will be the size I wanted.
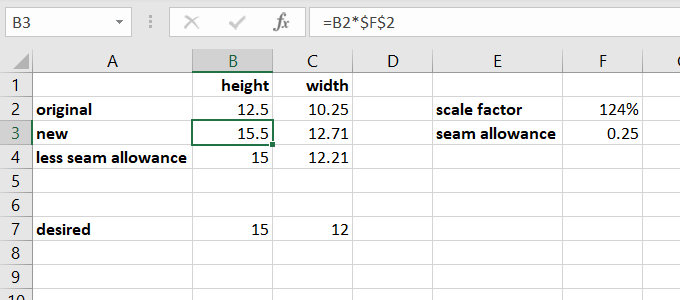
I select “Cut marks” on the print menu so I’ve got something to line up when assembling the pages. Print, and you’ve got a bigger pattern. And now to make Anya a bigger backpack (the little owl one I made her a few years ago doesn’t fit the 10×12 notebook or some of the larger library books!).
Summary of MS Teams Card Support
Full card reference can be found at https://docs.microsoft.com/en-us/microsoftteams/platform/concepts/cards/cards-reference. Below is a summary of where various card types are supported in Microsoft Teams
| Card Type | Bots in Teams | Messaging X10ns | Connectors | Bot Framework |
| Adaptive | ✔ | ✔ | ✖ | ✔ |
| Hero | ✔ | ✔ | ✖ | ✔ |
| List | ✔ | ✖ | ✖ | ✖ |
| O365 Connector | ✔ | ✔ | ✔ | ✖ |
| Receipt | ✔ | ✔ | ✖ | ✔ |
| Sign-in | ✔ | ✖ | ✖ | ✔ |
| Thumbnail | ✔ | ✔ | ✖ | ✔ |