In one of my prior jobs, I worked in Boston. I had
colleagues in Hawai’i. Scheduling a meeting was a mental undertaking – 8AM in
Honolulu is 1PM in Boston (and I had to count through Alaska, the west coast,
the mountains, the next one over, and then me all.the.time). Beyond the time
wasted figuring out what time it is elsewhere … you forget to think about it
when you’re in a hurry. I’d book the guys in Hawai’i for mid-morning meetings
at dark-o-clock, and the guys in Hawai’i would schedule mid-afternoon meetings
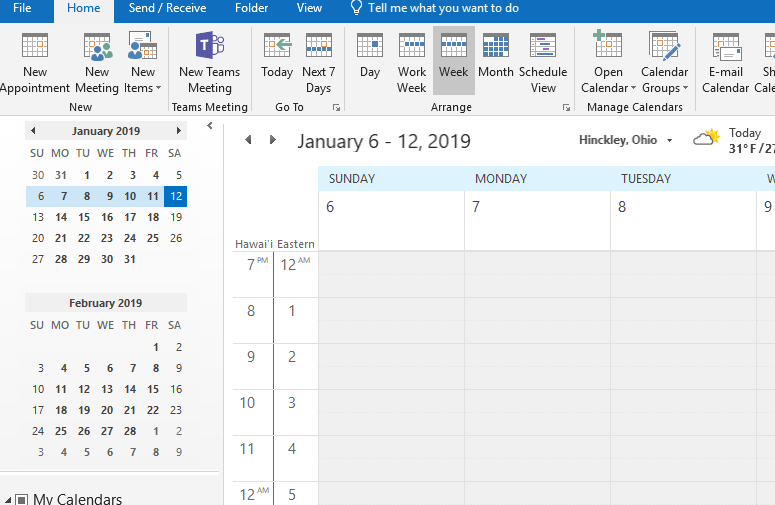
that were 8PM for me. The Outlook calendar can show two time zones concurrently
– both reminding you that time zones are a ‘thing’ and quickly showing you what
time it is over there.
Click “File” on the ribbon bar
Select “Options”
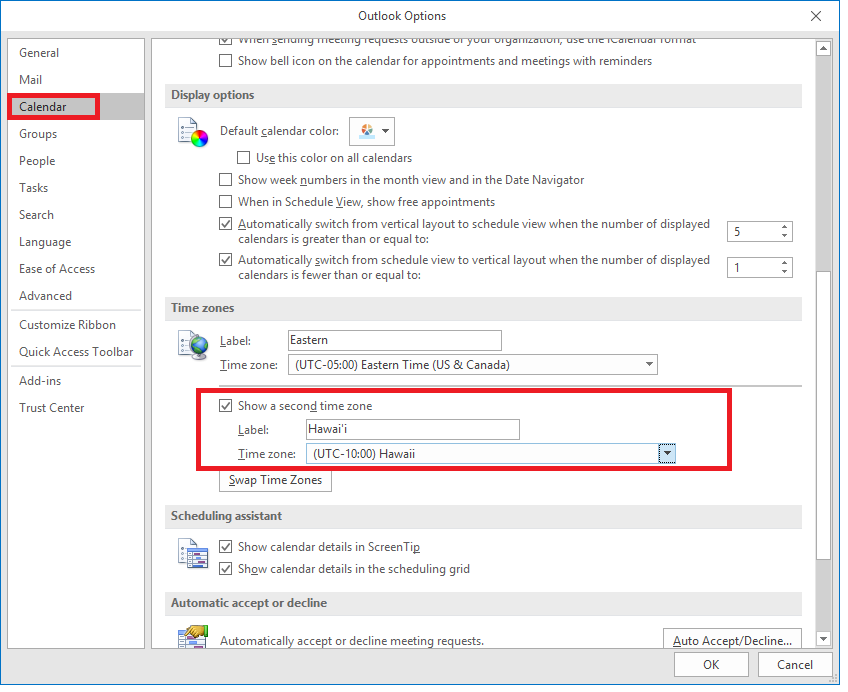
Select “Calendar” from the left-hand navigation bar. Scroll down and find the ‘Time Zones’ section. Check the box to ‘show a second time zone’, and select that other time zone. I add a label both to my time zone and the secondary one. Click OK. If you have the monthly update channel, you’ll be able to select a third time zone too.
You can! Of course, you don’t want to ignore important conversations; but we’ve all
been accidentally included on message (or been caught up in the dreaded
reply-all blizzard) and been inundated with messages that really can be ignored.
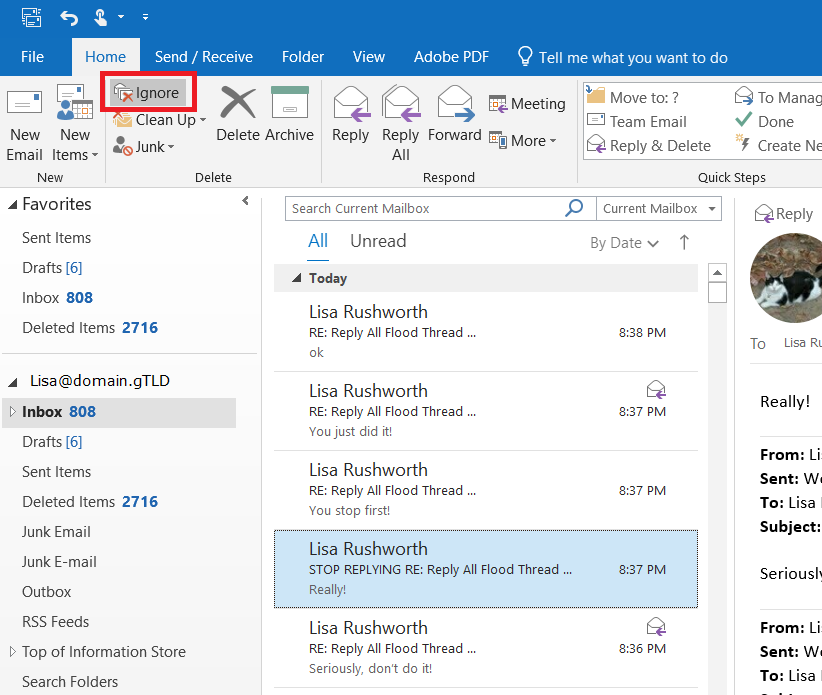
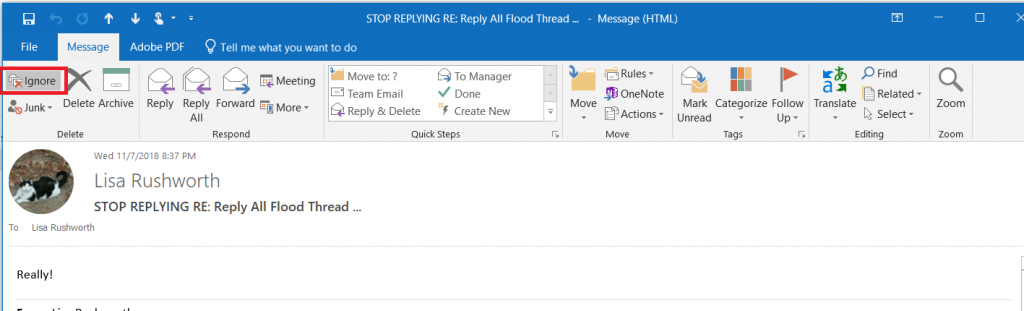
Within the Outlook client, click on one of the messages. On
the left-hand side of the ‘Home’ ribbon, click “Ignore”
Or from within the
message, “Ignore” appears on the left-hand side of the “Message” ribbon bar.
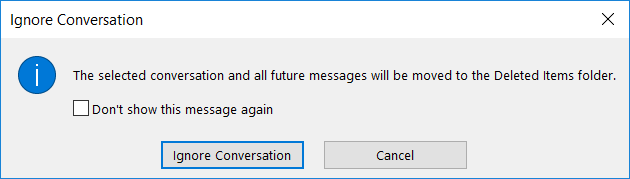
If you haven’t previously selected “Don’t show this message
again”, you will see a warning that the entire conversation and all future messages will be moved to
“Deleted Items” … click “Ignore Conversation”
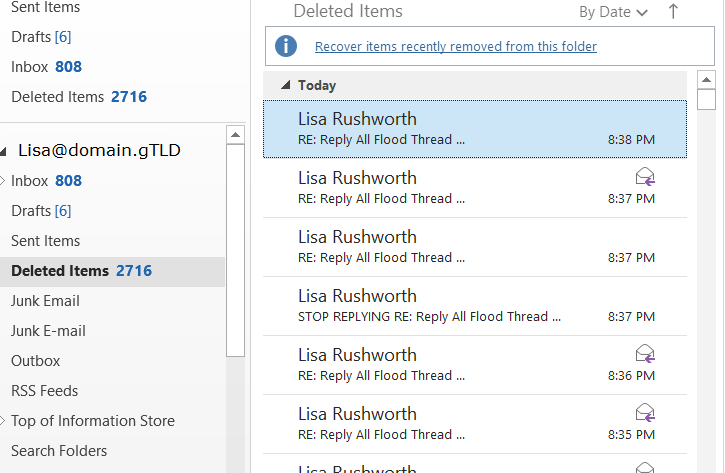
If you change your mind, all of those messages are in
“Deleted Items” and you can easily move them back.
If someone changes the message subject, those messages become a new thread that you’d need to ignore again.
When you’ve been erroneously included on some message, the subject rarely
changes … but I usually have to block five or six different threads in
reply-all blizzards.
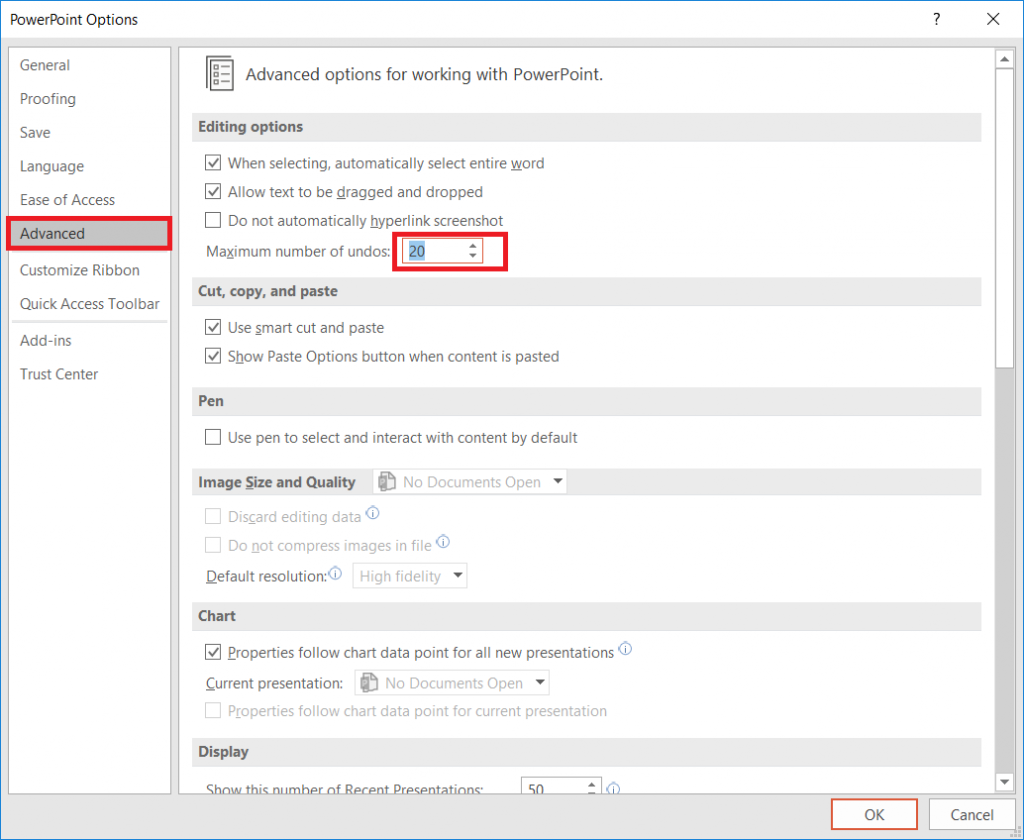
I am a big fan of “undo” – highlighted something to copy it but missed the ‘ctrl’ part of ctrl-c? Undo! Editing an image and drew a line the wrong place? Undo! Change some verbiage and regret the modifications? Undo! (I’ll generally copy the stuff I’ve added into a new document before I start hitting ctrl-z {the keyboard shortcut for undo} and incorporate a few of the new ideas into the original text.) Occasionally, you run out of undo-able operations. If you are saving to OneDrive, SharePoint, or Teams, you can use the version history to get back to your original content. But did you know that PowerPoint allows you to increase the number of undo operations available?
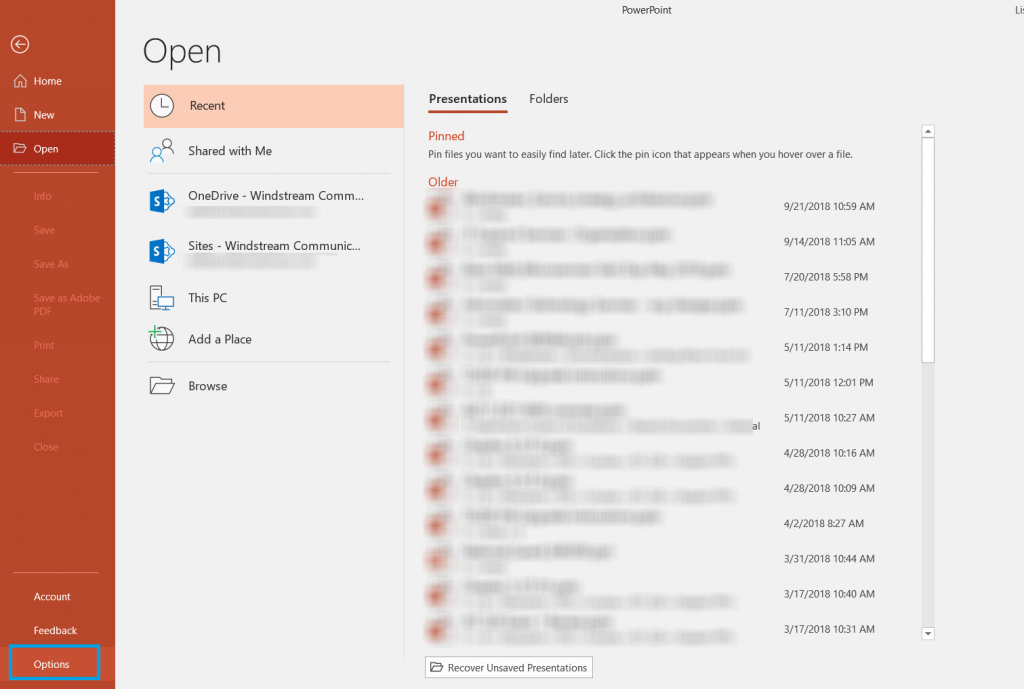
Click “File” on the ribbon bar and select “Options”
Select “Advanced”. Under “Editing options”, you will see a
maximum number of undos – this value defaults to 20.
You can increase it up to 150 – although higher numbers can
adversely impact performance, so stick to a lower number unless you really want to undo a hundred operations!
My magic cloudy AD workstation association is screwed up. Doesn’t bother me that much, but as more people are starting to use magic cloud apps … I’m seeing more people with the exact same problem. So I volunteered myself to get it sorted. But the dsregcmd to join again needs to be run as NT Authority\System
There are a lot of tools we use at work that are silly
overkill in your personal life – I don’t want to open a Remedy ticket for every
squeaky hinge! But some of our tools are quite helpful away from work too – making
flyers in Word or using Excel to keep track of the softball league standings. “Is
Teams useful in my personal life” seems like a purely hypothetical question –
it’s not like I can invite the rest of the Parent Teacher Organization to join
us here in Teams (and even if I could, that’s hardly an appropriate use of
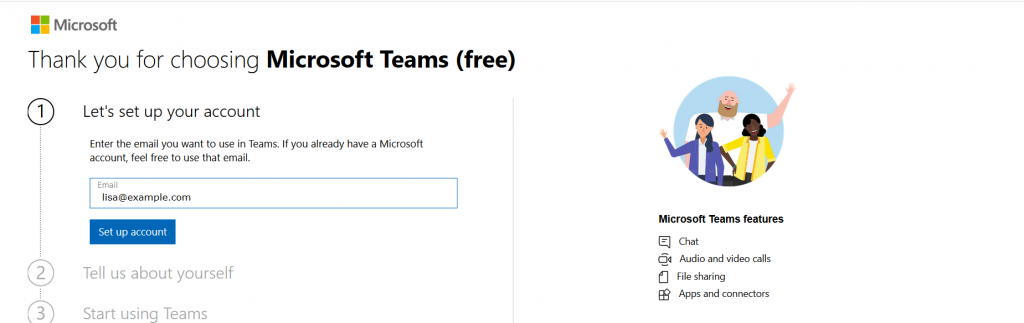
company resources!). But did you know Microsoft offers a free version of Teams?
Signing up for a free account, you don’t get access to all of the Teams features we’ve got here
– you cannot schedule
meetings, record
meetings, there isn’t a Planner board, you don’t have access to the full
suite of Office 365 applications. But you do
have a Teams space, can use the integrated apps and connectors, have some file
storage space, have persistent chats in channels, and can even have group
audio/video calls.
Don’t use your company e-mail address to sign up – this will
need to be your personal address.
If you don’t already have a Microsoft account associated
with the e-mail address, you’ll be asked to create a new Microsoft account.
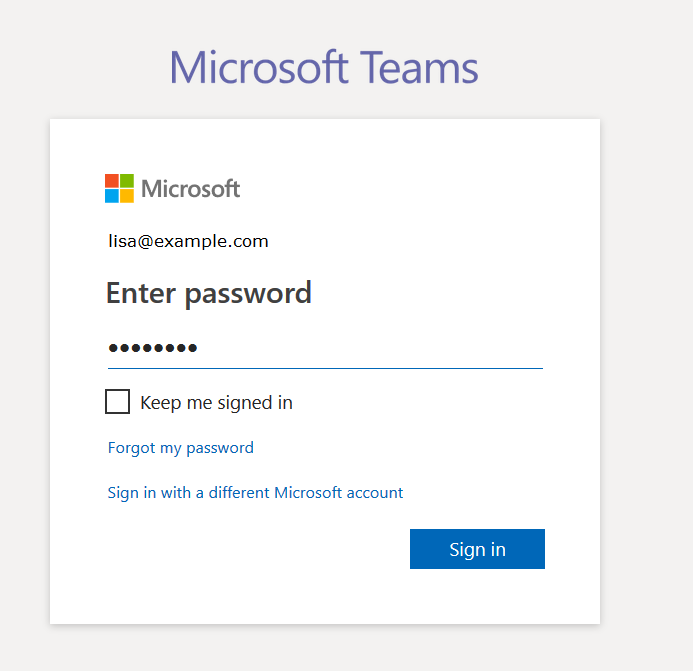
Otherwise you’ll be asked to sign in to your Microsoft
account.
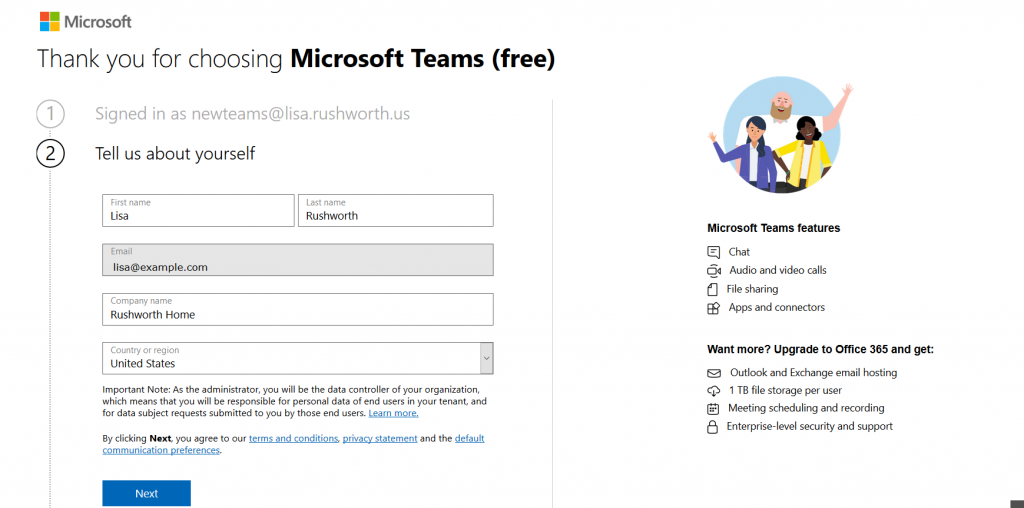
Supply your name, organization name, and country of origin.
Read the terms of use and privacy statement. Assuming your use complies with
the terms of use and the privacy policy is acceptable, click “Next”
It will take a few minutes for everything to be set up. Once
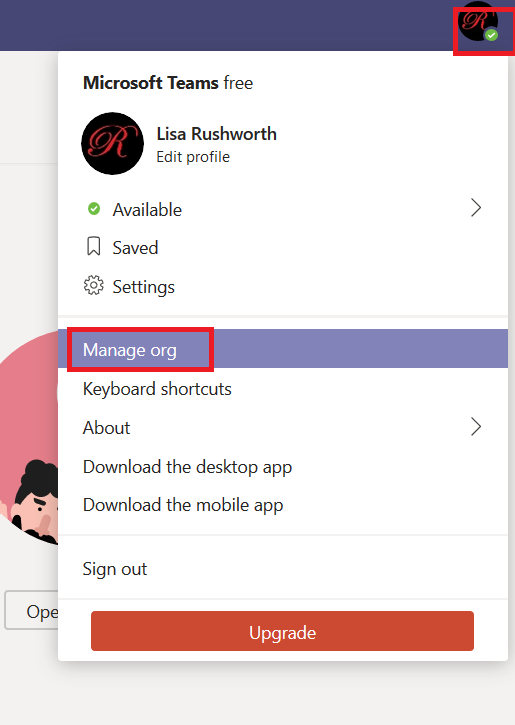
your personal Teams organization is built, you can invite others to join. Click
on your avatar in the upper right-hand corner of the screen and select “Manage
org”
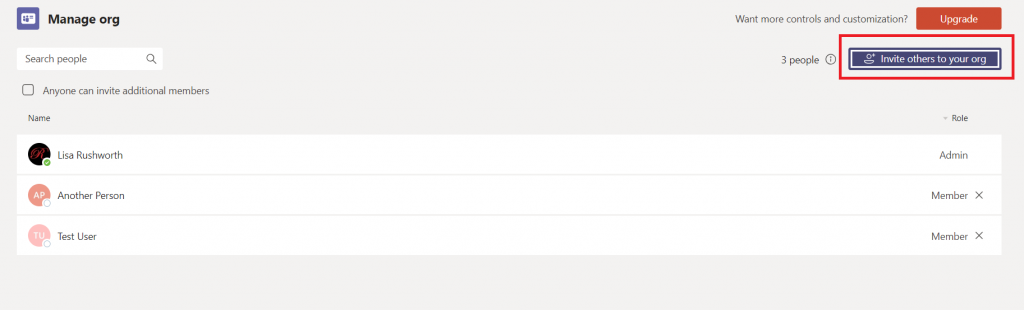
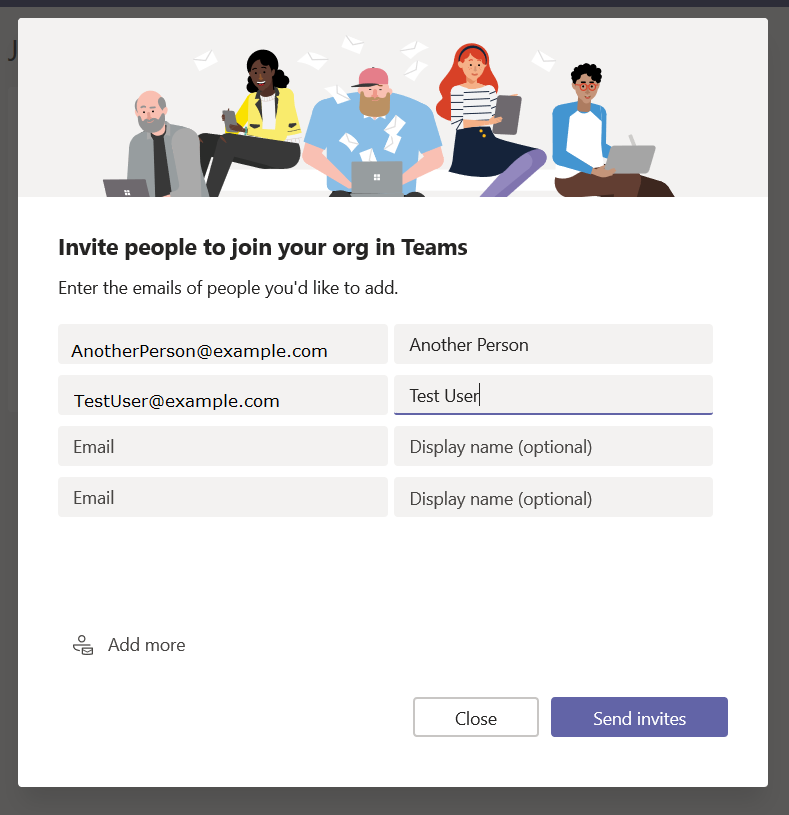
Click “Invite others to your org”
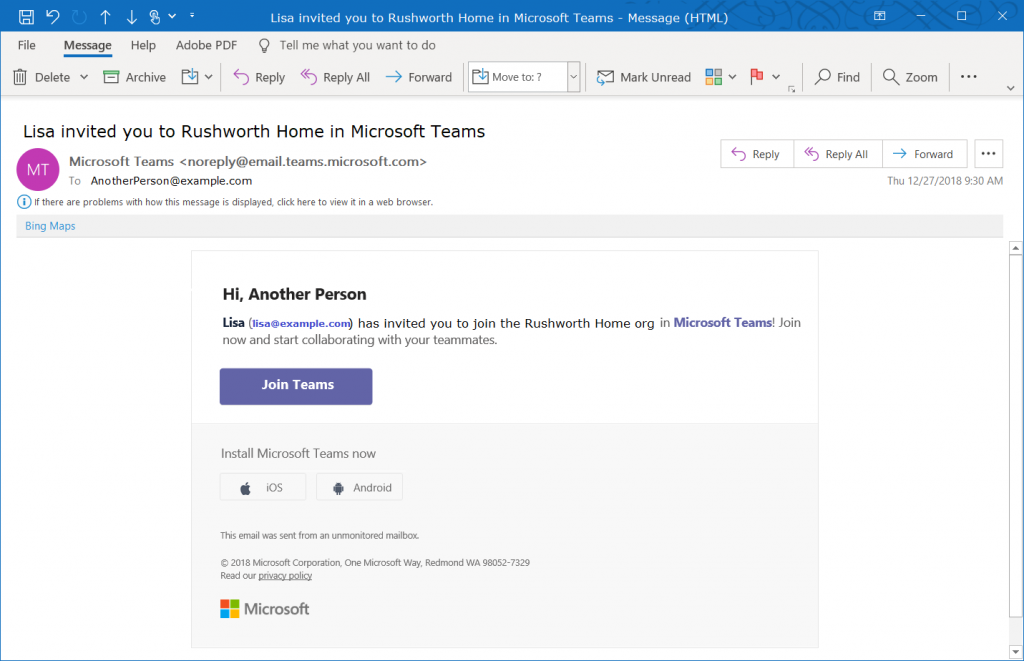
And enter their e-mail addresses
They will get an e-mail message inviting them to join your
Teams org.
You’re ready to start using Teams – add tabs to websites
your group commonly uses, set up connectors, create new channels, chat, video
calls, share files. You can even add new Teams to your organization.
Everyone added to your org is automatically able to access
the default Teams space (the one with the name of your org). Teams spaces you create can be private or public,
just like at work – but you can also select “Org-wide” which automatically
joins any newly-added individuals to the Teams space.
One drawback to retaining all of your chat and team discussion content is that there’s a LOT
of content … which makes it challenging to find a specific discussion or
comment. Luckily, Teams data is easily searched. At the top of your Teams
application (or website), there is a long gray bar. Click in it and type a word
or phrase to begin searching. Using multiple words will find conversations
containing both words, to find a phrase place the phrase “in quotes”. Hit enter.
You’ll see messages that contain the words or phrase –
notice this includes both chat messages and channel discussions. Each search
result has a reference letting you know where the discussion is located, and
you can click on the item to switch to the chat or channel discussion.
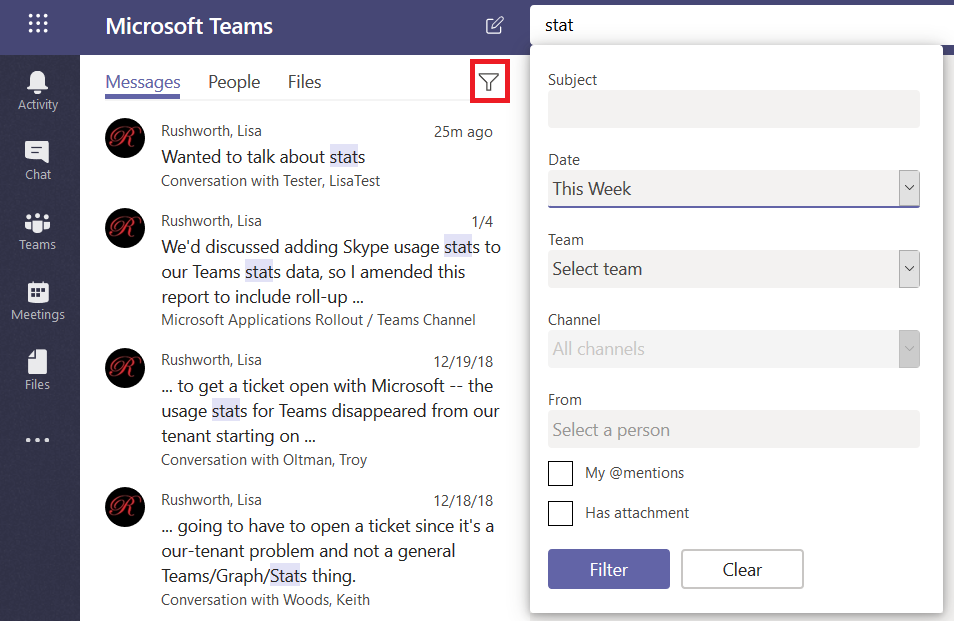
If your search returns too many results, click on the little
funnel – you can refine your search results with a filter – a specific
individual, a time frame.
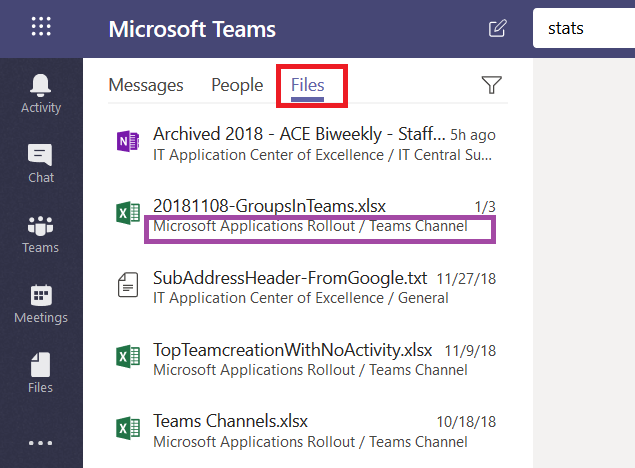
In addition to searching chat messages, you can search files.
Just click on “Files” and you’ll see files with names or content that contain
your search terms. Again, you can see where the file is located, and you can
click on the file to preview the file.
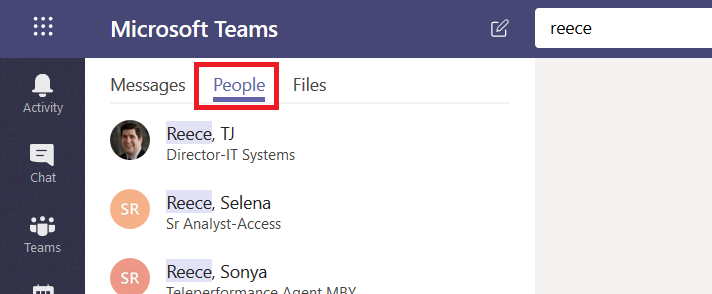
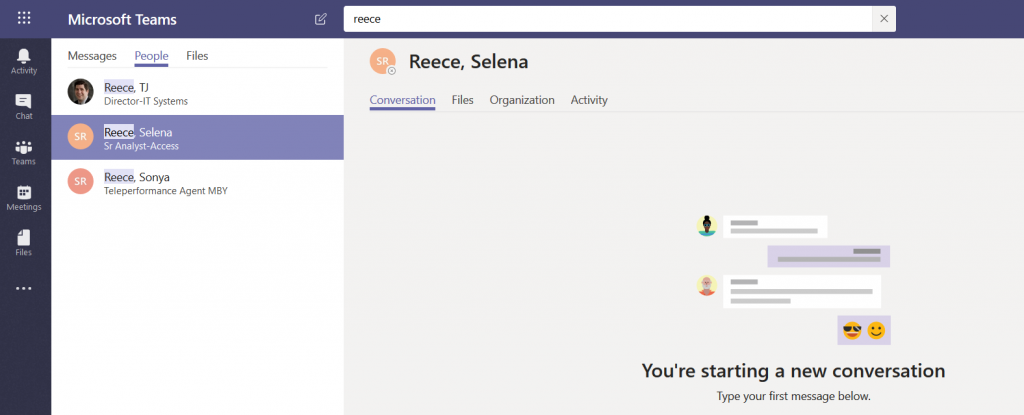
Click on “People” and you’ll find, well, people who work here.
This is a name search – you cannot search for “stats” and see people with whom you’ve
had discussions about statistics. Search for a last name, a first name, or a
name in “last, first” format.
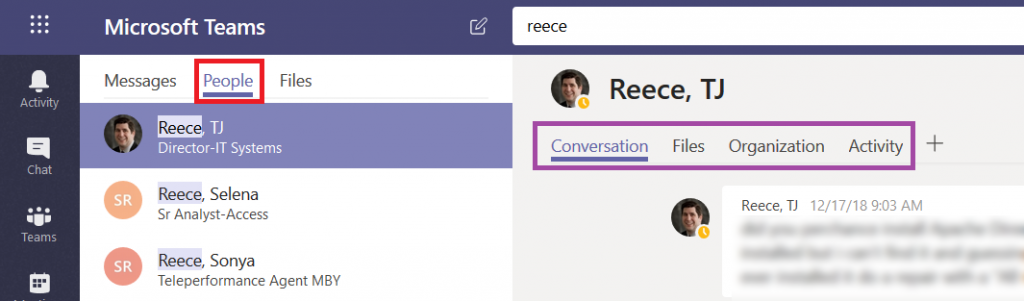
If you click on a person, you’ll see the conversations you
have had with them, as well as any shared files, an org chart for their
position in the company, and their channel posts for the past two weeks (‘Activity’).
If you haven’t chatted with them before, you can start a new
conversation too.
I am trying to use Microsoft Graph to read/write an Excel spreadsheet stored in SharePoint. It’s an ugly process to start with — they don’t exactly make it easy to find the right ID numbers so you can reference the spreadsheet in the first place, but I finally got the proper URL. And then I tried to do the password-based token authentication.
Hint: the password isn’t wrong. I’ve seen a lot of comments online about this meaning the secret is wrong — which seemed reasonable, since I’m not seeing any auth traffic against the user account. But if you put in a known bad secret, there is a different invalid secret error.
As I’ve been writing these “Did you know” blog posts, I’ve needed
sample data to demonstrate how a function works. In Excel, that’s easy enough
as there are RAND()
and RANDBETWEEN(iLow,iHigh)
functions. But how do you get sample text in Word? I used to just paste in part
of a public domain work (as a cultural aside – the twenty years of copyright
protection added under the Sonny Bono Copyright Term Extension Act are up this
year, so the list of public domain works is expanding again). But what if you
don’t have the original Anglo-Saxon Beowulf laying around?
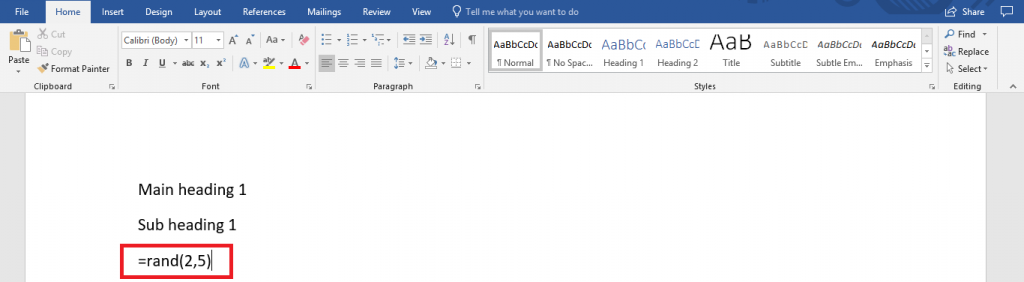
Microsoft Word has a rand() function too – type =rand(#Paragraphs,#Sentences)
The example here generates two paragraphs that are five
sentences each.
Hit enter – the formula is replaced with random text.
(This works in PowerPoint too). If you want some different text, try the lorem(#) function — the number in the parenthesis is the number of paragraphs — that uses the lorem ipsum paragraph as the content source.
There is finally a Windows server-side solution to prevent “unauthenticated bind” requests (detailed in LDAP RFC 4513 section 5.1.2 with a note regarding the subsequent security considerations in section 6.3.1) from allowing unauthorized users to successfully authenticate.
It has always been possible to handle in code (i.e. verify that username and password are both non-null prior to communicating with the directory server) and is my personal preference as a developer cannot predict how individual directory services will be configured.
But for the third-party apps that don’t prevent unauthenticated binds, a setting to disallow unauthenticated bind operations to Active Directory was added in Windows 2019 — in your Configuration partition, open the properties of CN=Directory Service, CN=Windows NT, CN=Services, CN=Configuration — find the msDS-Other-Settings attribute, and add a new entry DenyUnauthenticatedBind=1
Anya’s little owl bag is, well, small now that she’s in school school. They’ve got a folder that doesn’t quite fit, there’s no room for her lunch, and she’s a lot bigger than she was two and a half years ago. I’m making a bigger bag for her — using essentially the same pattern, but increasing the size a bit horizontally and a lot vertically.
The first decision — what do we want it to look like? She decided on a cat — a cat pocket, maybe cat charm on the zipper, and paw print fabric. I found a cute cat fabric for the lining, but I couldn’t find any paw print fabric that I liked. So I made my own on SpoonFlower. I had my design printed on their eco canvas — it is a stout fabric and black ink showed up well.