Shifts, a schedule management tool that replaces StaffHub, can be used to plan shift schedules that team members can access from Teams. If you currently use StaffHub, be aware that it will be retired on 01 October 2019.
While Microsoft bills Shifts as a tool for “frontline” workers, this tool can be used for any scenario where responsibility is scheduled – on call rotations, manning the company booth at a convention, coordinating job share situations.
Getting Started
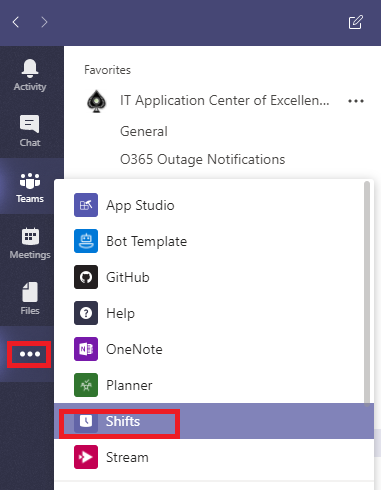
To access Shifts, click the not-quite-a-hamburger menu below the Teams function tiles and select “Shifts”.
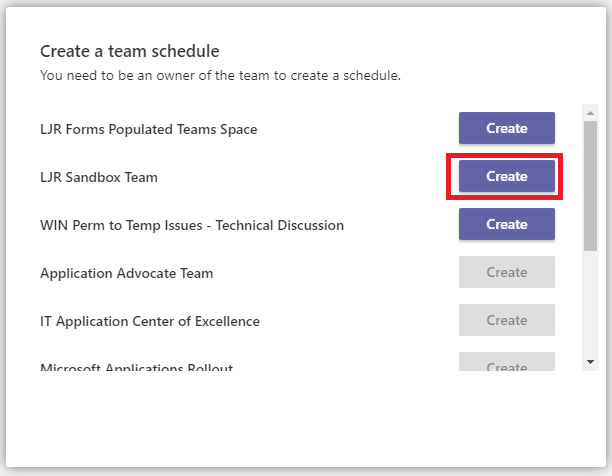
Select the Teams space in which you want to create the schedule – only Team Owners can create schedules, so some Teams spaces may be grayed out. You’ll be asked to select a time zone for the schedule.
Schedules are organized by group – supply a name for the group. You may only have one group, but managing multiple call queues or ensuring coverage for multiple locations at a convention is easier with multiple schedule groups. To create additional groups, click “Add group” below the schedule.
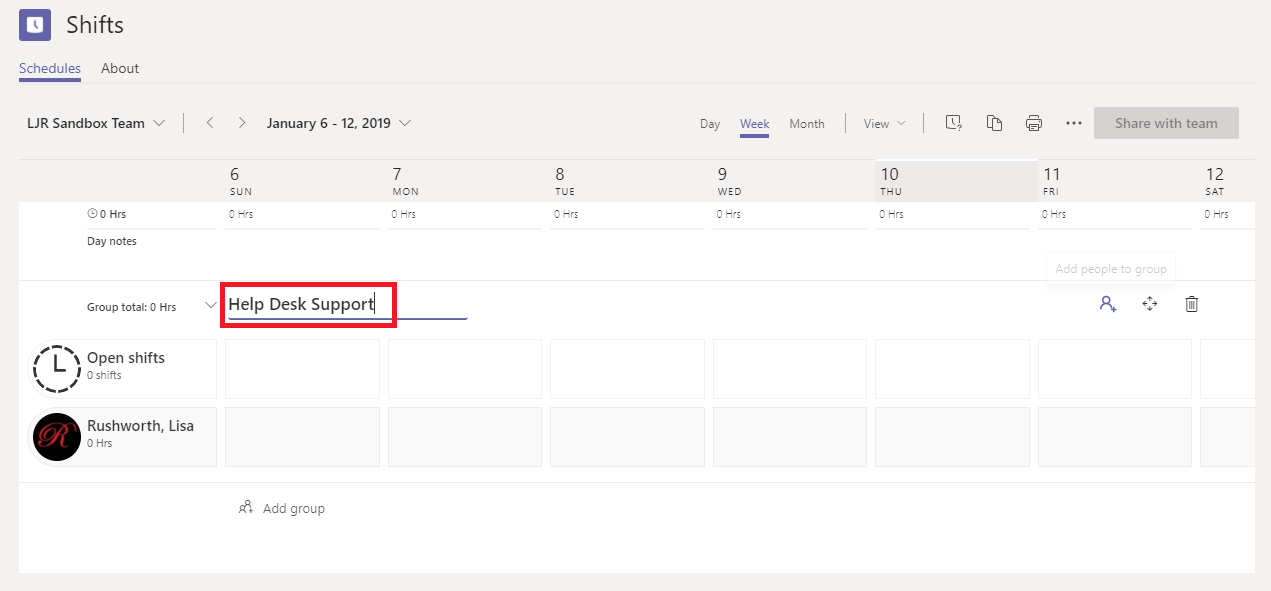
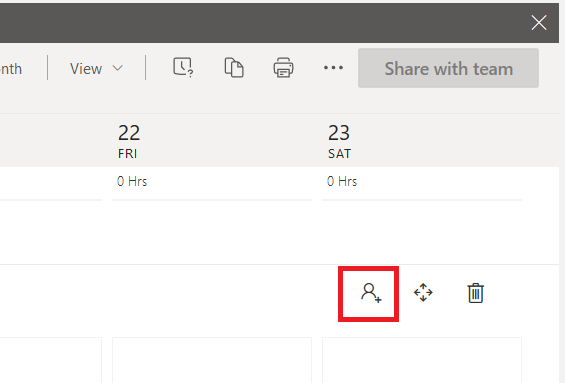
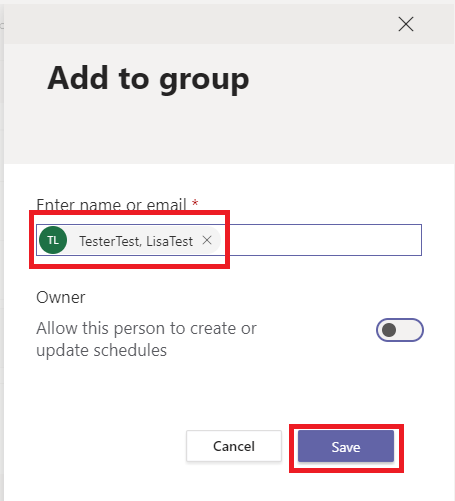
Across from the schedule name, click the “Add people to group” icon.
You can add anyone from the organization but be aware that adding an individual to the schedule also adds them to the Teams space that holds your schedule. Similarly, you can denote any individual as an owner (thus allowed to create and update schedules) – they will become an owner in the Teams space.
Creating a Schedule
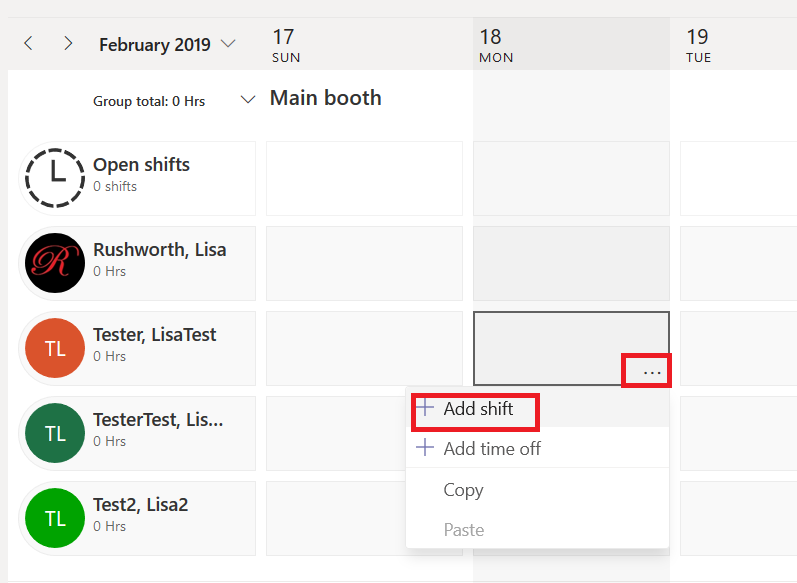
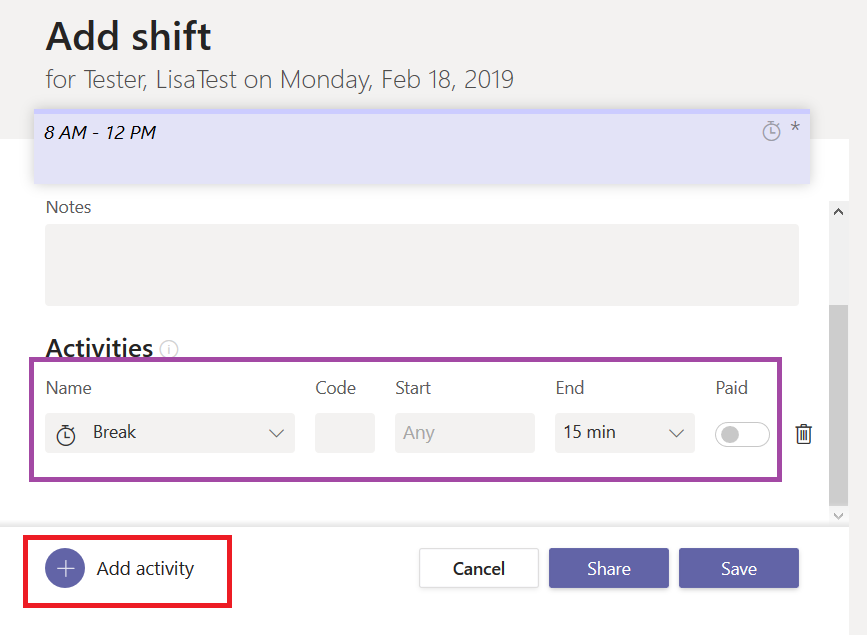
To schedule someone for a shift, you can double-click in their row under the date you want to add or click the ellipses and select “Add shift”.
Set the start and end time for the shift. You can add a color code to visualize the schedule. Notes are useful for denoting tasks that need to be completed during the shift.
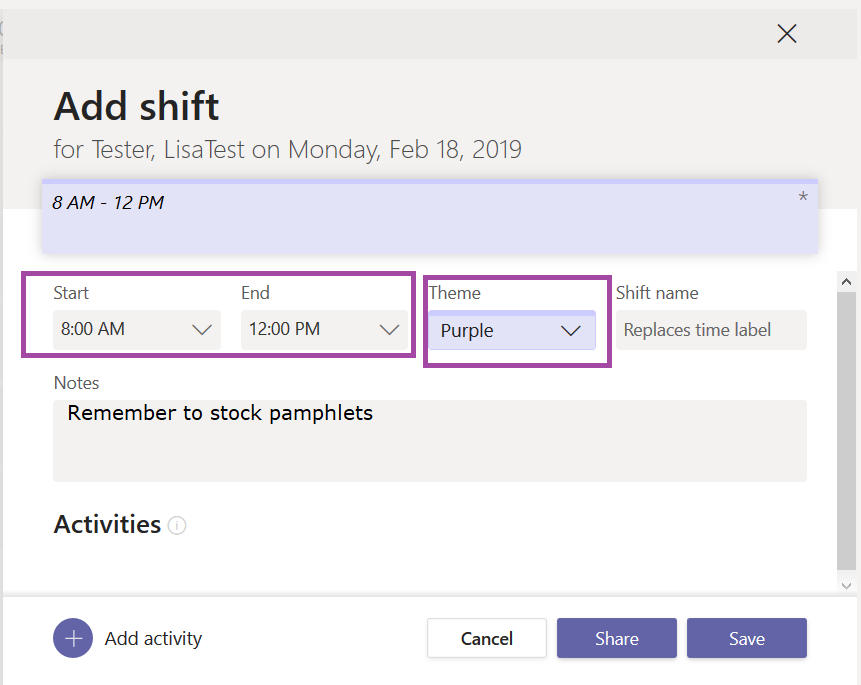
If breaks will occur during the shift, click “Add activity” and add the break period. Click “Save” to save the scheduled shift (Share saves it and shares it with the rest of the Team. I won’t share the schedule until I’ve finished it.)
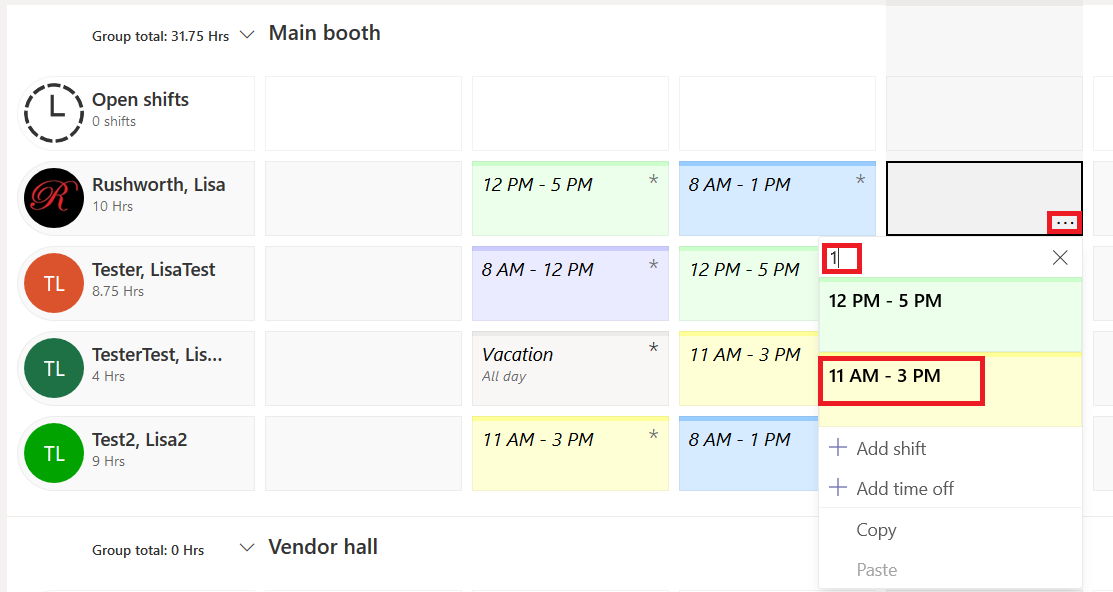
Once a shift has been added, it can be re-used. The most recently added shifts will appear when you click the ellipsis, and you can enter the start time to find other shifts.
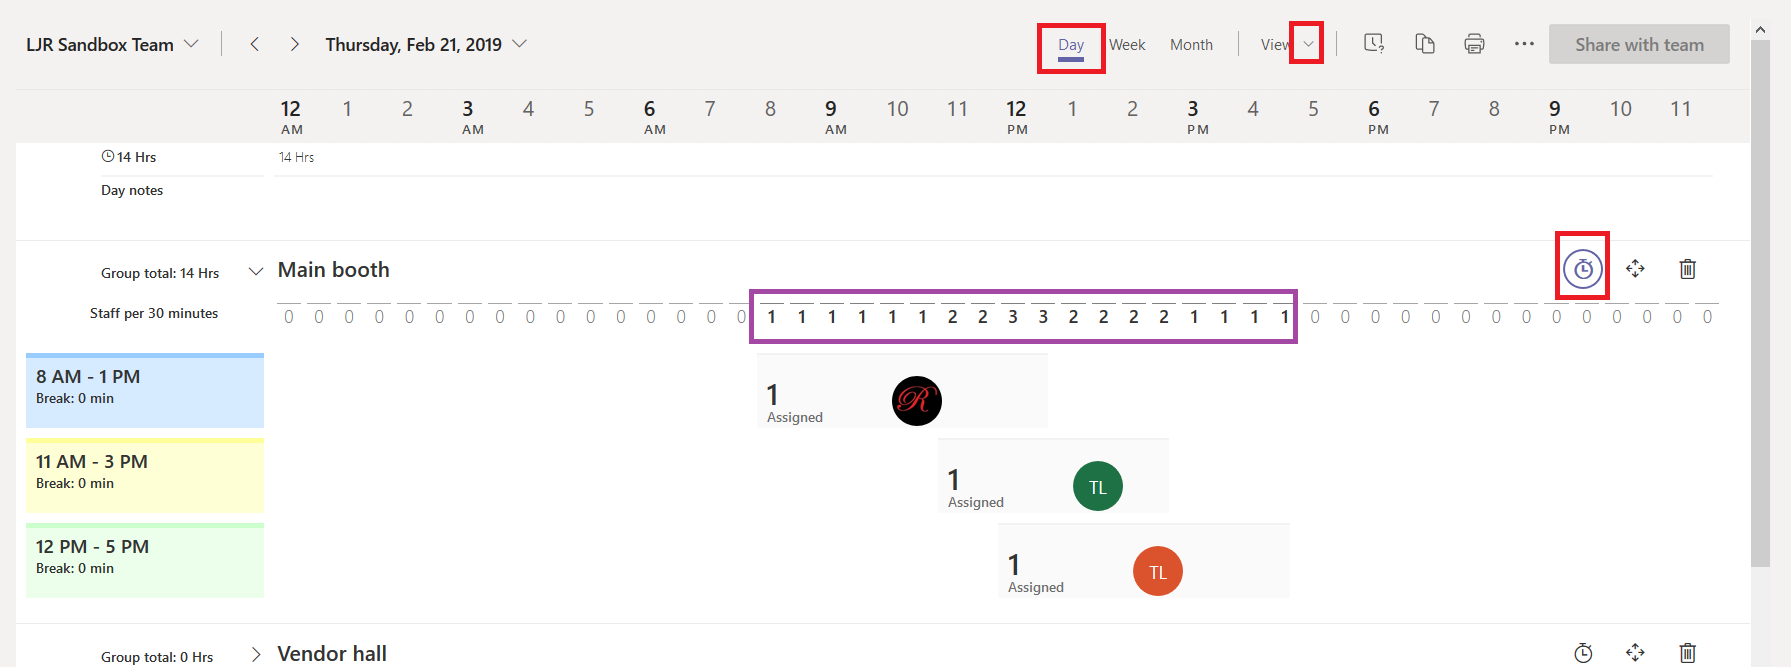
Shifts has several views that ensure adequate coverage is maintained. In “Day” view, you can click the little stopwatch icon to display the number of people scheduled for each 30-minute block. You can switch from ‘People’ view to ‘Shift’ view to see how the shifts line up and how many individuals are assigned to each shift.
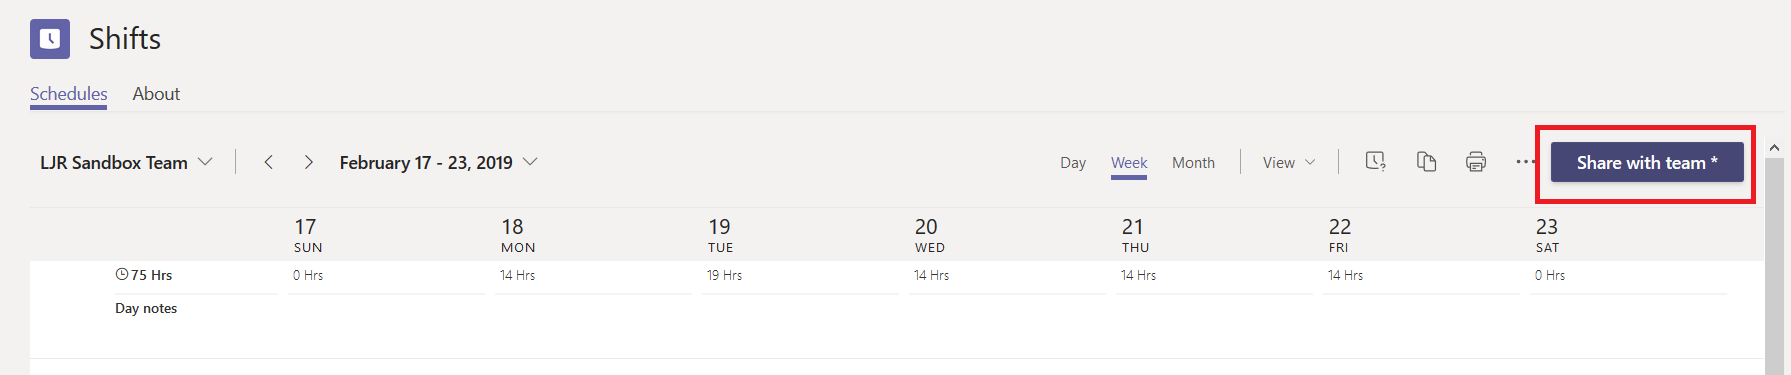
Once you have completed the schedule, share it with your Team by clicking the “Share with team” button.
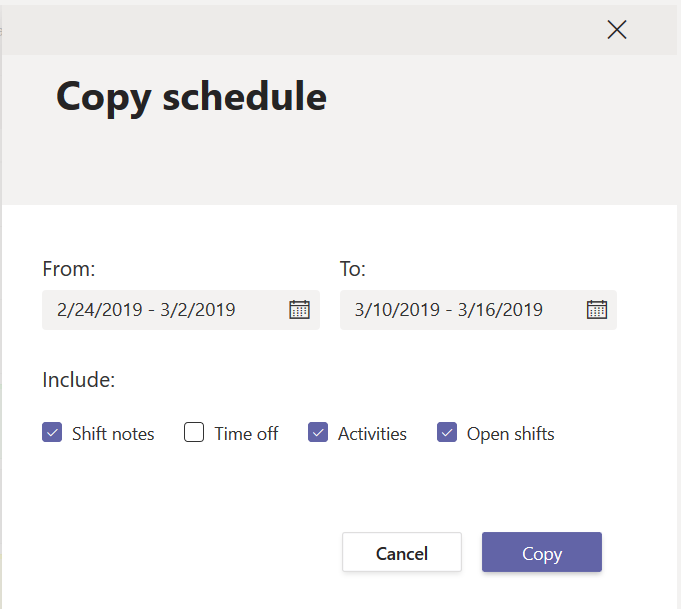
If you generally maintain the same schedule week to week, you can copy a schedule instead of re-entering the same information every week. Click on the “Copy” icon.

Select the schedule to copy and the week to which the schedule will be copied. You can include all of the notes, time off requests, activities, and open shifts. Or you can exclude some of those from being copied by unchecking the corresponding box.
Schedule Adjustment Requests
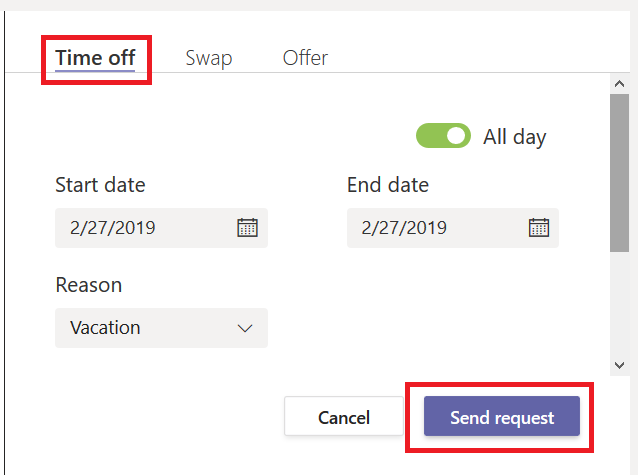
Once the schedule has been shared with the Team, members can see the schedule in Shifts. Team members can request time off or schedule adjustments using the requests menu.

Click on “Add request”

After selecting the date(s) or time for the time off request and selecting a reason, click “Send request”. The request will be queued for Team Owner approval.
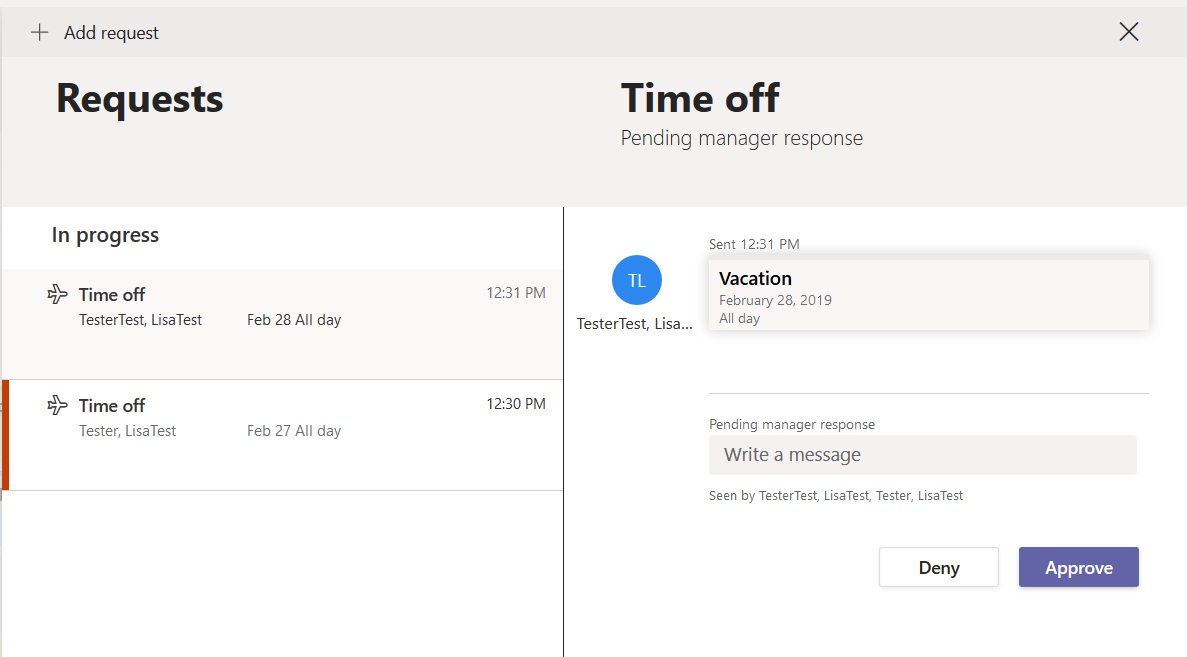
Requestors can view the status of their request

And Team Owners will see the requests in an approval queue.
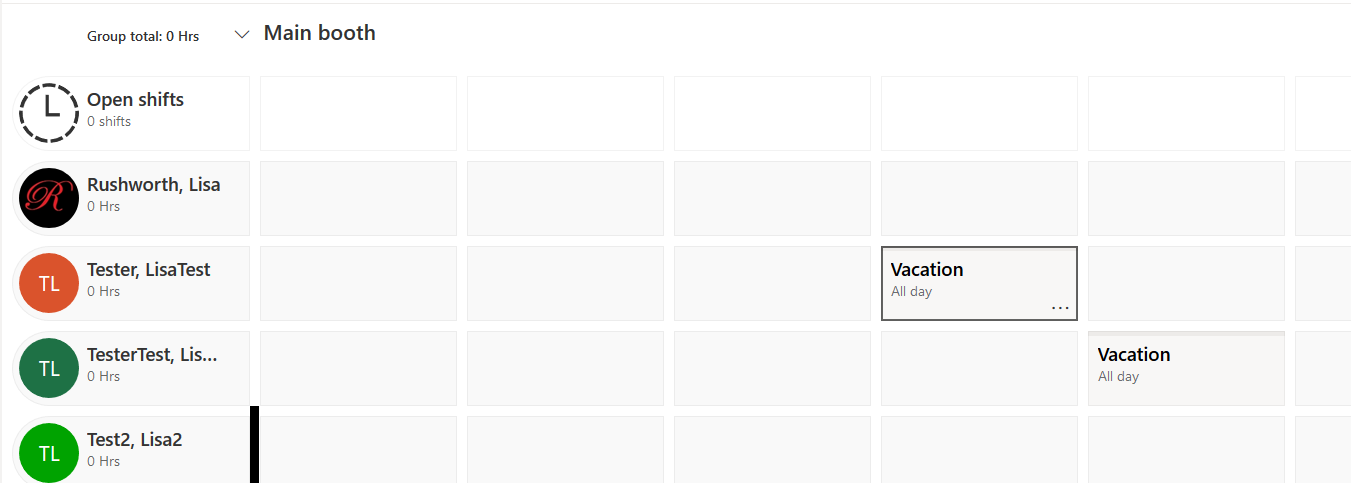
Once a request for time off is approved, the appropriate time will be blocked off so you don’t inadvertently schedule over someone’s vacation.
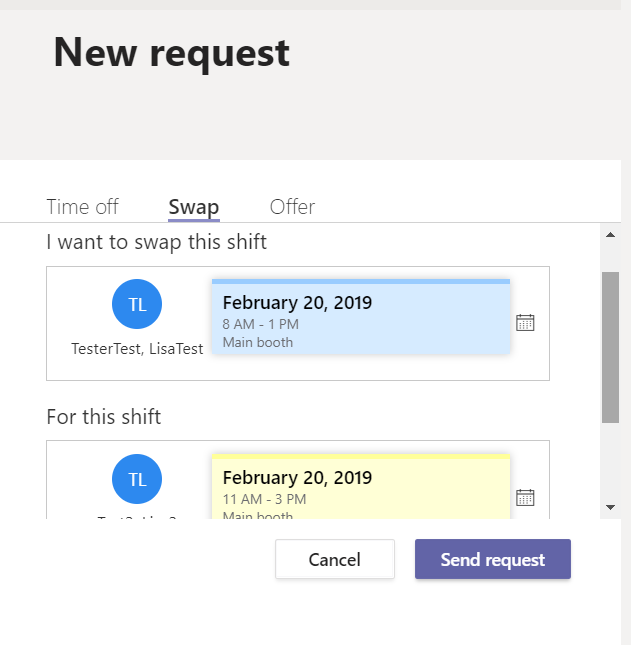
Team members can also trade shifts using the requests feature. These changes are *first* queued the person assigned to the other shift to accept or reject the request. If the requestee approves the swap, the change is queued for Owner approval.
Open Shifts
In addition to individually scheduled shifts, Owners can create “open” shifts – a shift that anyone can request to work.
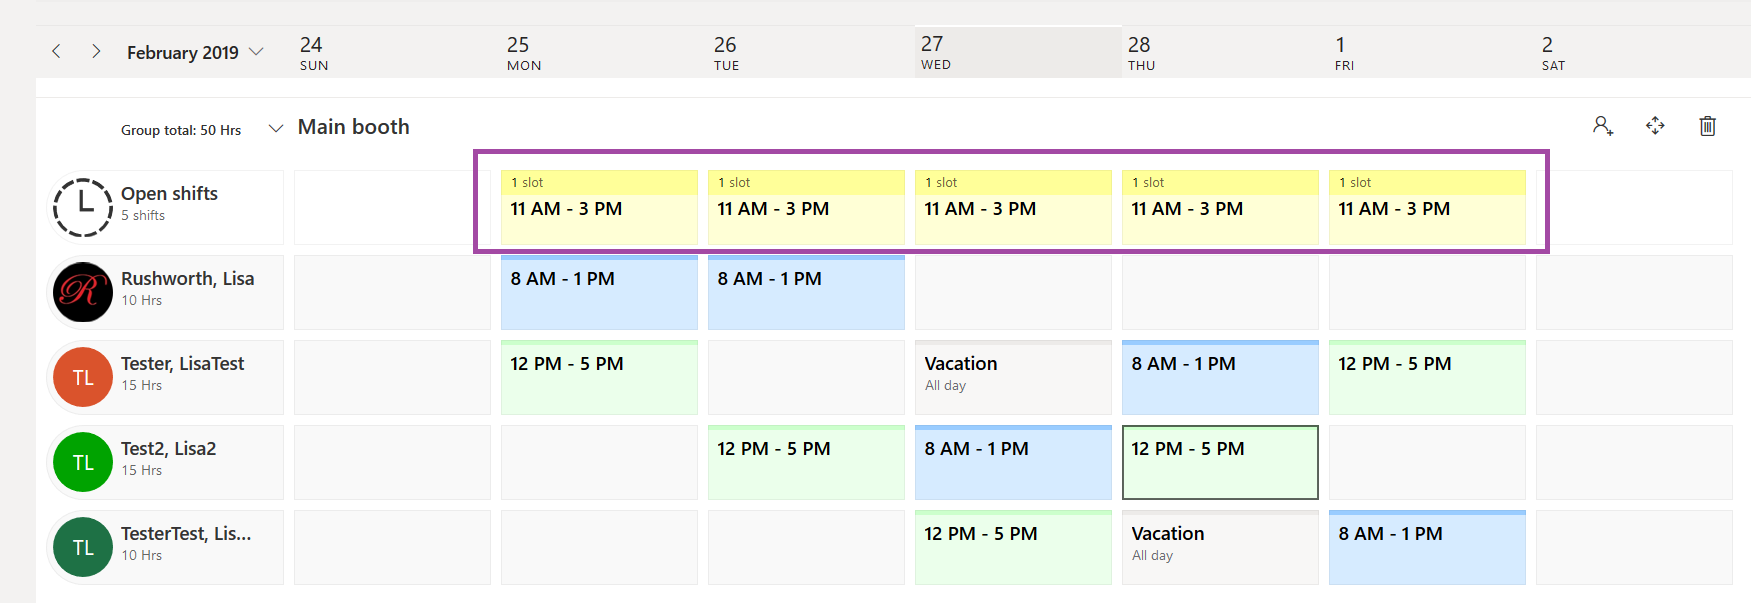
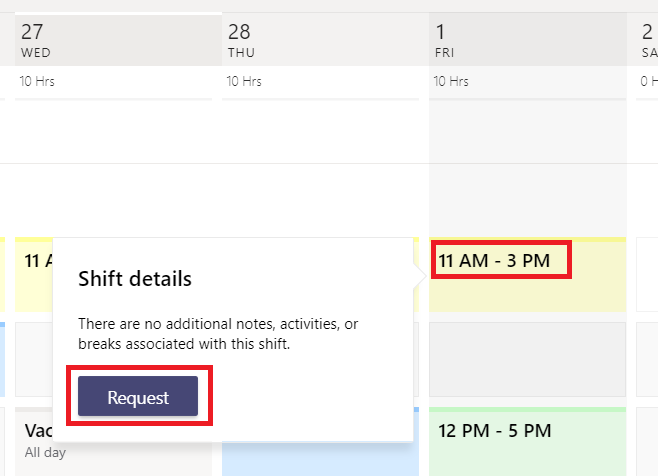
Team members can select the shift, view any notes associated with the shift, and request it.
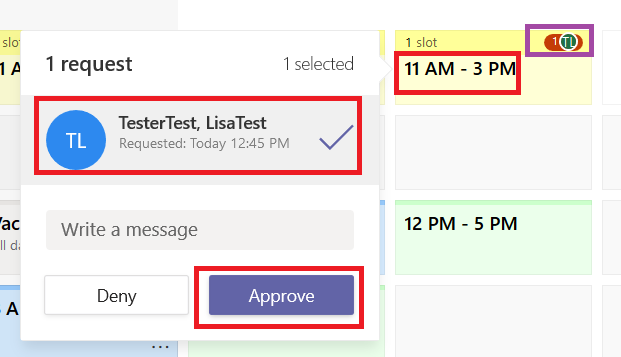
Team owners will see how many people have requested a shift and can schedule an individual for the open shift. Click on the shift, select the individual to whom the shift should be assigned, and click “Approve”.
** If you change the times of an open shift, any pending requests will be declined automatically when the schedule changes are shared with the Team.
Shifts Customization
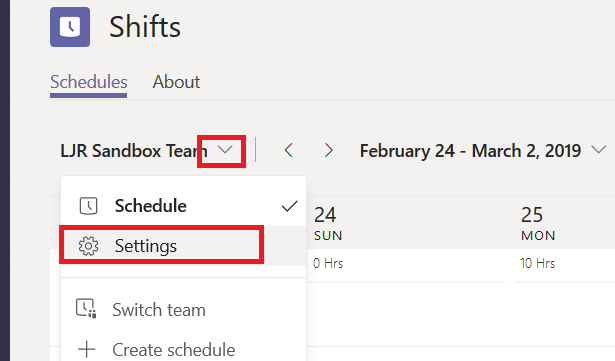
The list of time off request reasons can be customized. Click the inverted caret next to the Team name and select “Settings”.
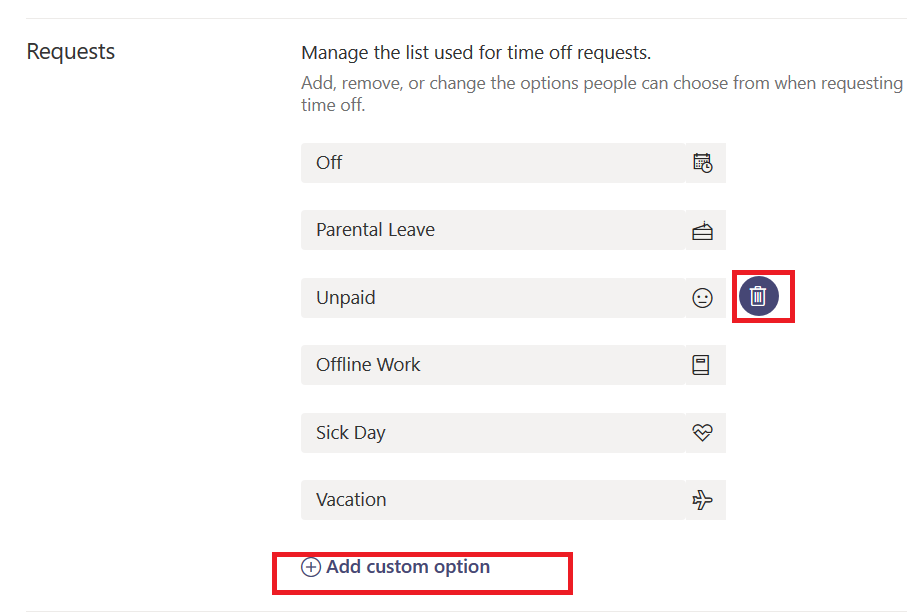
You can remove any categories that are inappropriate for your organization and click “Add custom option” to add a new category.
API Access
A preview of programmatic access to Shifts should be released early in 2019. API access will be available through Microsoft Graph, and documentation will be available at https://docs.microsoft.com/en-us/graph/api/user-getmembergroups?view=graph-rest-beta when the API preview is made public. This will allow existing resource management tools to integrate with Shifts. Look for more information when the API is released.