Category: Technology

Two Approaches to Using PIP Through an Integrated Authenticated Proxy

The proxy at work uses integrated authentication. While BASIC auth prompts happily let you use a proxy of http://uid:pass@proxy:port, ours does not. There are two ways I’ve managed to use pip to install packages.

Proxied Proxy

The easiest approach is to use something that can handle the authenticated proxy, like Fiddler, as an intermediary. I do the same thing with perl’s PPM, docker pull … basically anywhere I’ve got to use a proxy that wants to pass through a proxy username.

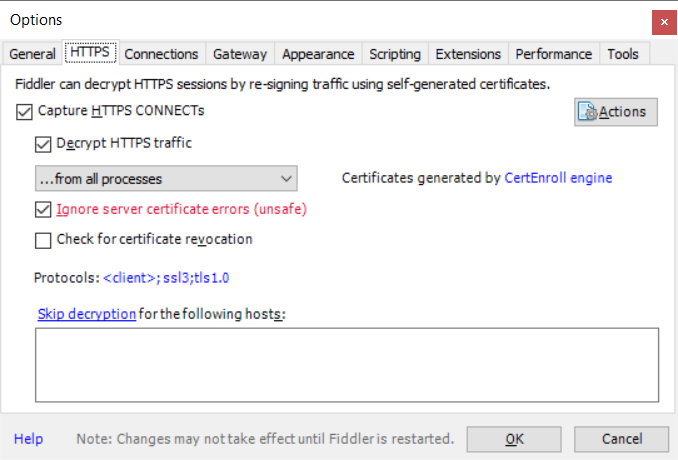
Select Tools => Options to open the configuration dialog. Make sure you are handling SSL traffic — if not, check the box to “Capture HTTPS CONNECTs, “Decrypt HTTPS traffic”, and “Ignore server certificate errors” (it’s only unsafe if you don’t understand what you’re doing … don’t log into your bank account bouncing traffic through this config!)
On the “Connections” tab, check the port on which Fiddler is listening. If you cannot install Fiddler on the same box where you want to use pip, you’ll need to check off “Allow remote computers to connect” (and you won’t use localhost as the proxy hostname). Click OK, start capturing traffic (F12), and we’re ready to go.
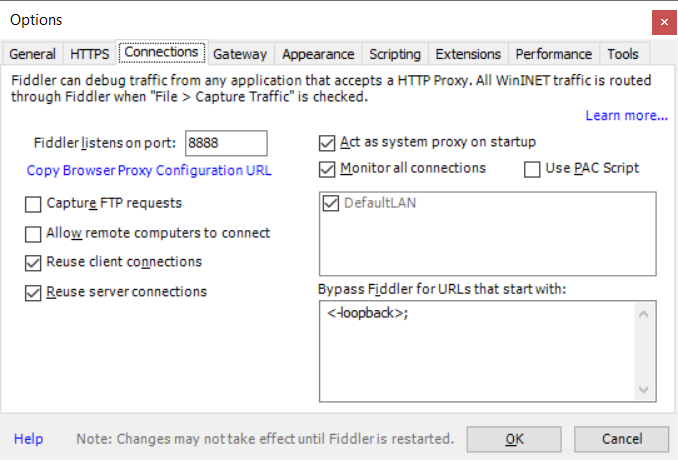
Use the PIP command line to install the package but proxy the request through your Fiddler instance. In this example, Fiddler is installed on the local box and uses port 8888.

pip –trusted-host pypi.org –trusted-host files.pythonhosted.org –proxy http://localhost:8888 install SomePackage

This is nice because pip will automatically resolve dependencies. Not great if you’re not allowed to install your own software and cannot get Fiddler installed.

Dependency Nighmare

Back in the early days of Linux (think waaaay before package managers working against online repositories), we called this “dependency hell” — navigating dependency chains to get all of the required “stuff” on the box so you can install the thing you actually wanted.

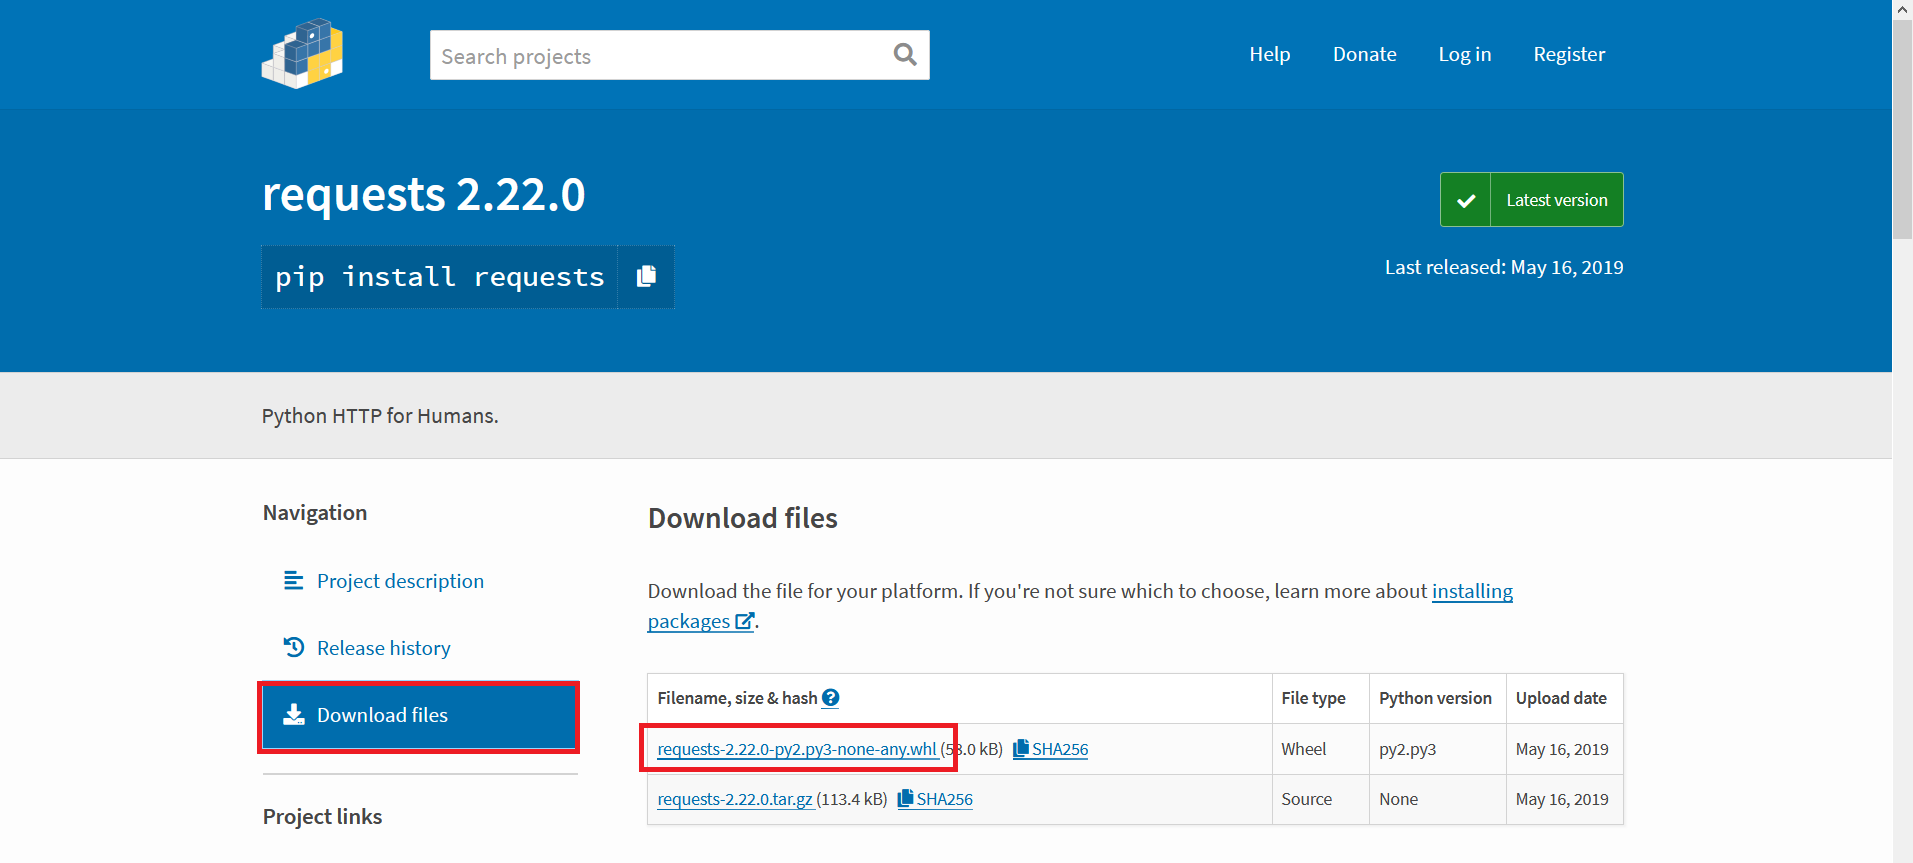
Make a folder for all these wheels we’re going to end up downloading so it’s easy to clean up once we’re done. Search PyPi for the package you want. On the package page, select ‘Download Files’ and then download the whl
Use “pip install something.whl” to attempt installing it. If you’re lucky, you’ve got all the dependencies and the package will install. If you don’t have all of the dependencies, you’ll get an error telling you the first missing one. Go back to the pypi website & get that. Use “pip install somethingelse.whl” to install it and maybe get a dependency error here too. Once you get a dependency installed, try the package you want again. Got another error? Start downloading and installing again. Eventually, though, you’ll get all of the dependencies satisfied and be able to install the package you actually want.
Adding Python to Fedora Alternatives

Gimp installed Python 2.7). Which, of course, took over my system so nothing was using Python 3 anymore. We’ve used ‘alternatives’ to manage the Java installation, and I thought that might be a good solution in case I ever need to use Python 2

Add both Python versions to alternatives:

[lisa@fedora ~]# sudo alternatives –install /usr/bin/python python /usr/bin/python3.7 1
[lisa@fedora ~]# sudo alternatives –install /usr/bin/python python /usr/bin/python2.7 2

Select which one you want to use:

[lisa@fedora ~]# sudo alternatives –config python

There are 2 programs which provide ‘python’.

Selection Command
———————————————–
1 /usr/bin/python3.7
+ 2 /usr/bin/python2.7

Enter to keep the current selection[+], or type selection number: 1

And, of course, repeat the process for PIP:

[lisa@fedora ~]# sudo alternatives –install /usr/bin/pip pip /usr/bin/pip2.7 2
[lisa@fedora ~]# sudo alternatives –install /usr/bin/pip pip /usr/bin/pip3.7 1

[lisa@fedora ~]# sudo alternatives –config pip

Did you know … you can add a “Share to Teams” button to your web content?

If you can add script tags to the page head, you can add a “Share to Teams” button on your web site. This can be used to allow employees to share internal sites to Teams, but it can also be used on public sites to allow visitors to post links to their Teams organization.

How? There are two steps – add “<script async defer src=”https://teams.microsoft.com/share/launcher.js” ></script>” in HEAD. The post that is made to Teams is *prettier* if you have  meta properties for title, description, and image within the linked page.

Then add a div with class “teams-share-button”. The “data-href” value is the URL to be shared. If you don’t want a page preview to render, you can set “data-preview” to false.

Sample page content:

<head>
    <title>Teams Share Test</title>
    <meta property="og:title" content="Lisa Rushworth Home Page">
    <meta property="og:description" content="Lisa Rushworth's Home Page">
    <meta property="og:image" content="https://www.rushworth.us/lisa/RedR.png" />
    <script async defer src="https://teams.microsoft.com/share/launcher.js" ></script>
</head>
<body bgcolor="black" text="white">
    <div class="content">
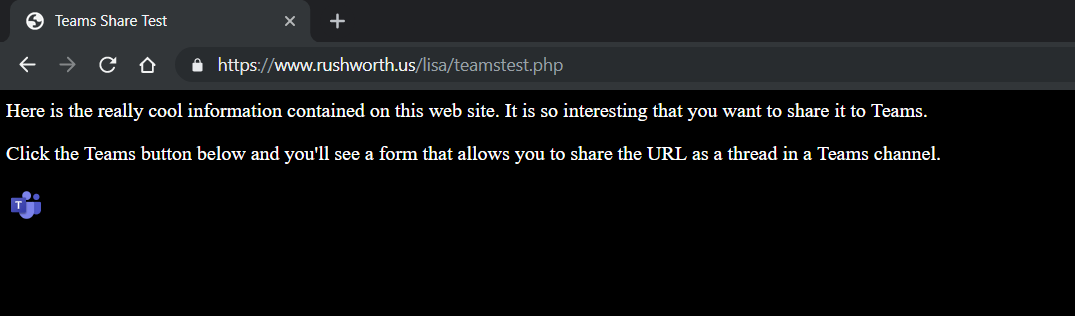
        <P>Here is the really cool information contained on this web site. It is so interesting that you want to share it to Teams.</P>
        <P>Click the Teams button at the bottom and you'll see a form that allows you to share the URL as a thread in a Teams channel.</P>
    </div>
    <div class="teams-share-button" data-href="https://www.rushworth.us/lisa/teamstest.php" data-preview="true">
    </div>
</body>

Visitors will see a small Teams logo in the teams-share-button div. To share the URL in Teams, they just need to click on the Teams logo.

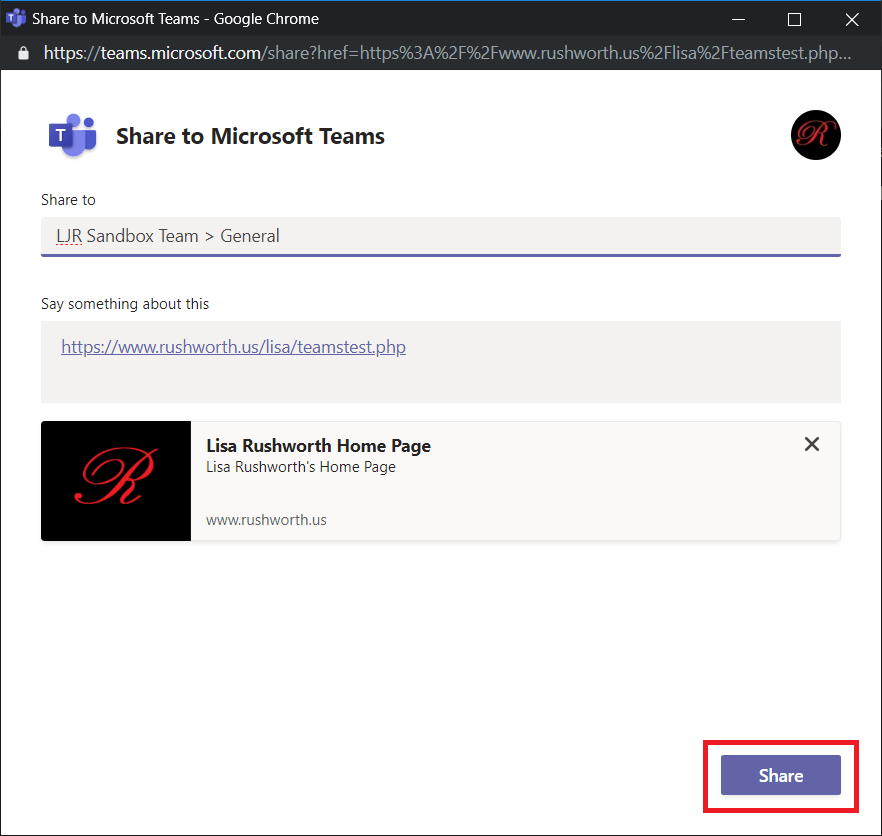
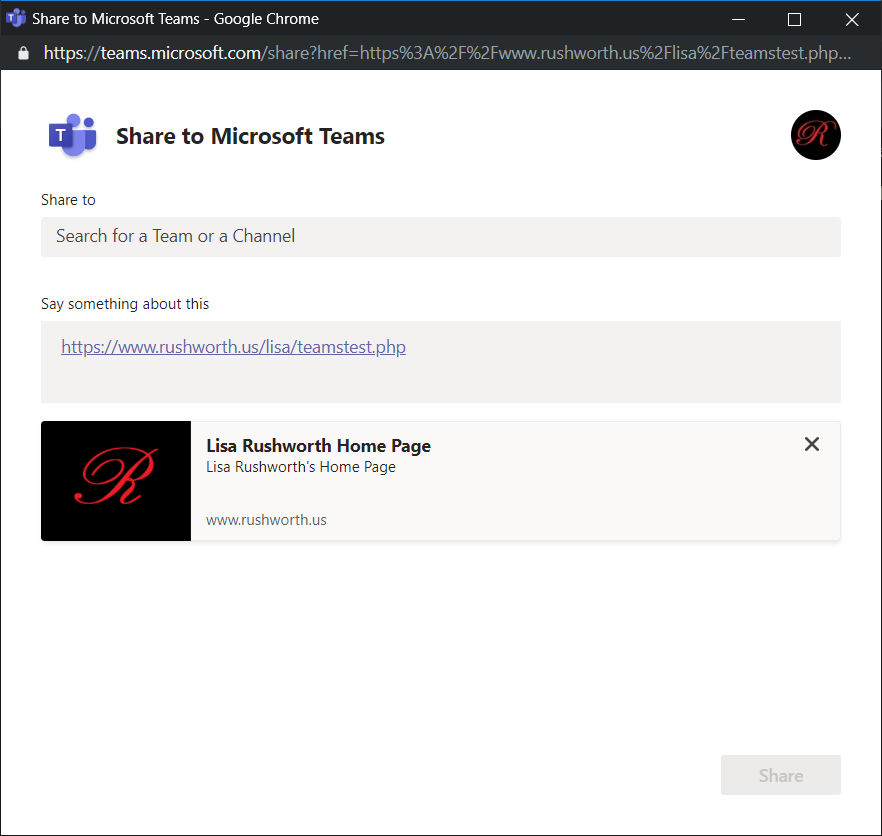
A new window will load. If the user is not logged into the Team web site, they will be prompted to log in. Once logged in, the share dialogue will be displayed. If your site has title, description, and icon meta tags, a preview card will be included at the bottom.

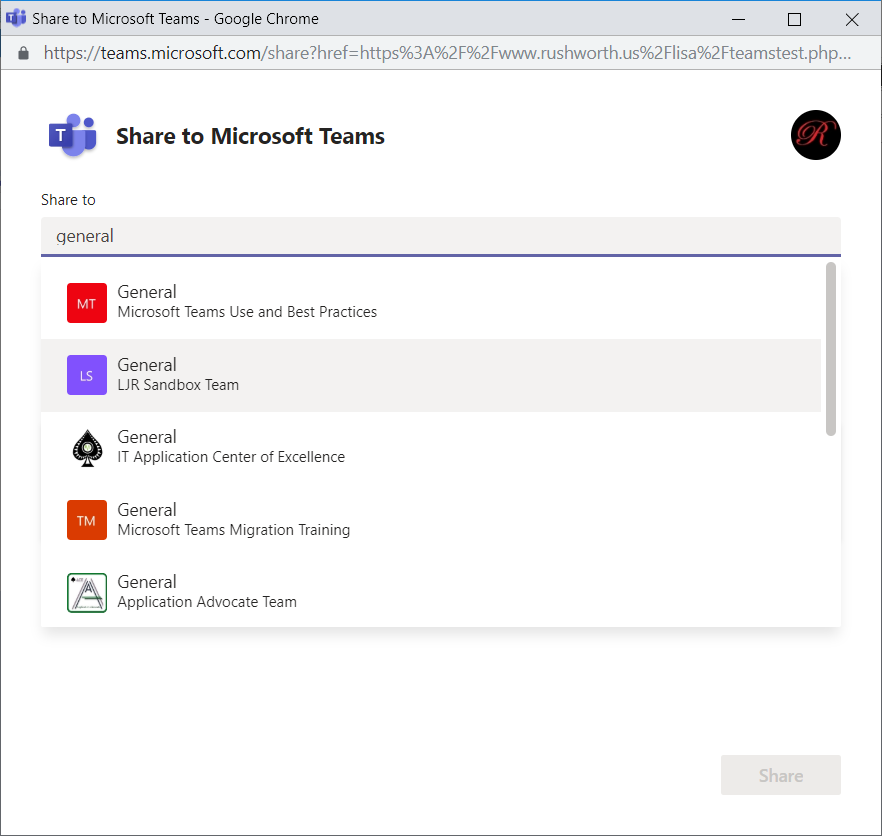
Click in the “Share to” field and type a Team or Channel name – Teams and Channels from the user’s organization will be displayed.

The user can add text to the thread. Click “Share” to share the link to the selected Teams channel.

A confirmation page will be displayed.

In Teams, a new thread will be created. This is the thread for my shared URL.

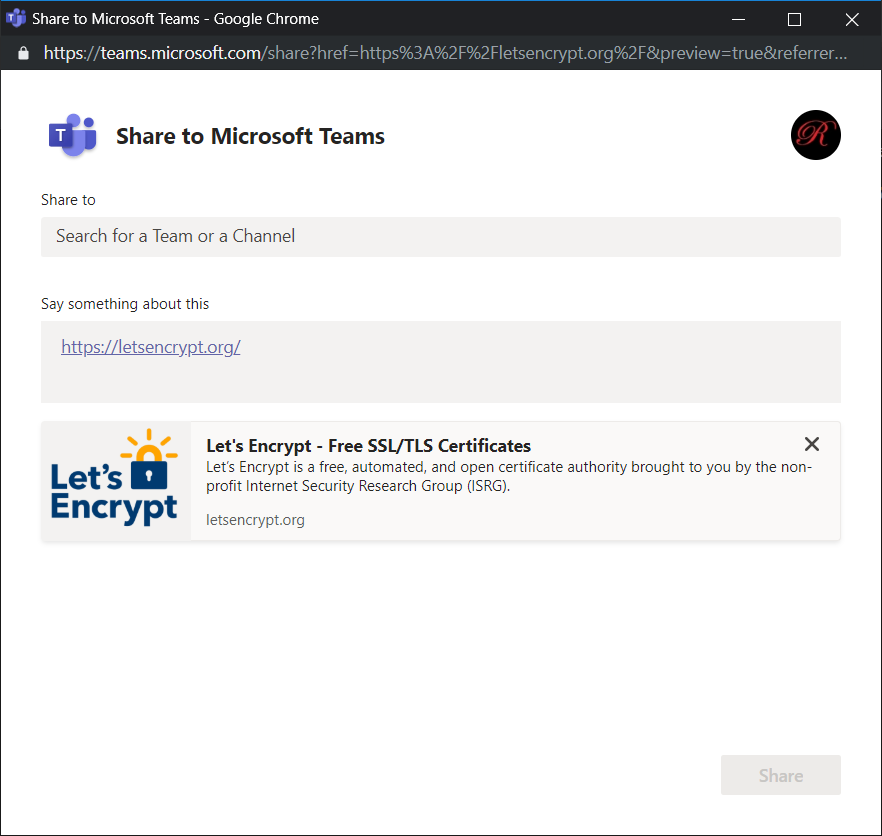
The URL used in the teams-share-button DIV doesn’t have to match the page on which it is used — I can add a ‘share to Teams’ button that posts any URL to Teams.

Did you know … you can customize Teams channel notifications?

Microsoft has created additional notification options in Microsoft Teams – and you can now customize those settings for individual channels to ensure you’re getting notifications when and were you want to see them.

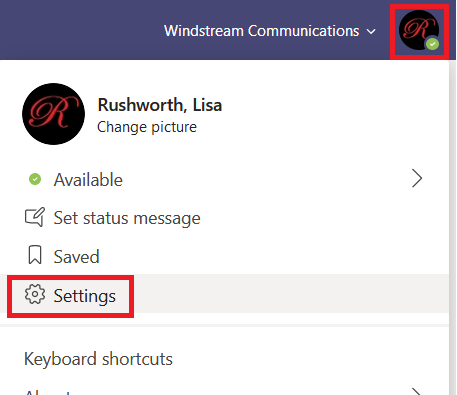
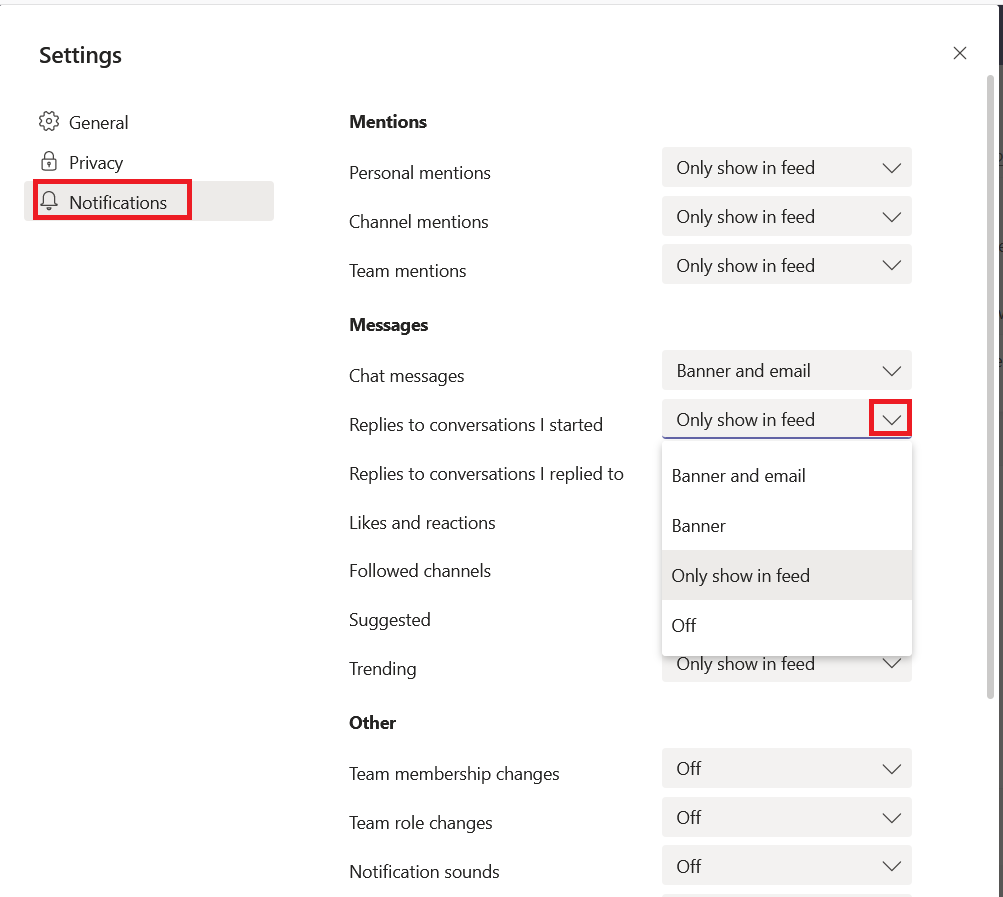
To access your general notification settings, click on your avatar in the upper right-hand corner of the Teams window. Select “Settings”.

Click on “Notifications”. You will be presented with a long list of activities and can select the type of notification you wish to receive for each activity. Notice “Show only in feed” is now an option – this means new activity will appear in the “Activity” section of Teams but not display the big purple notification box (a.k.a. “the banner”) in the lower right-hand corner of your screen.

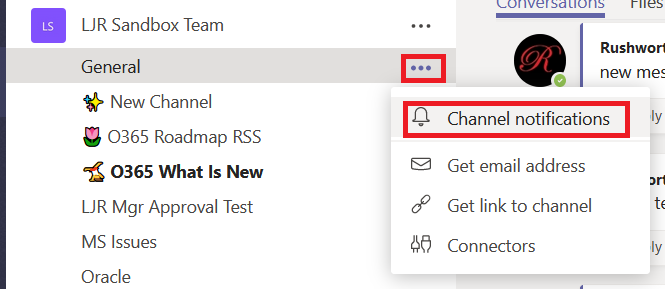
You can also customize notifications for individual channels – maybe you want a banner notification for a really important channel, or you don’t want to be notified about every reply to a message. Click the ellipsis next to the channel name and select “Channel notifications”

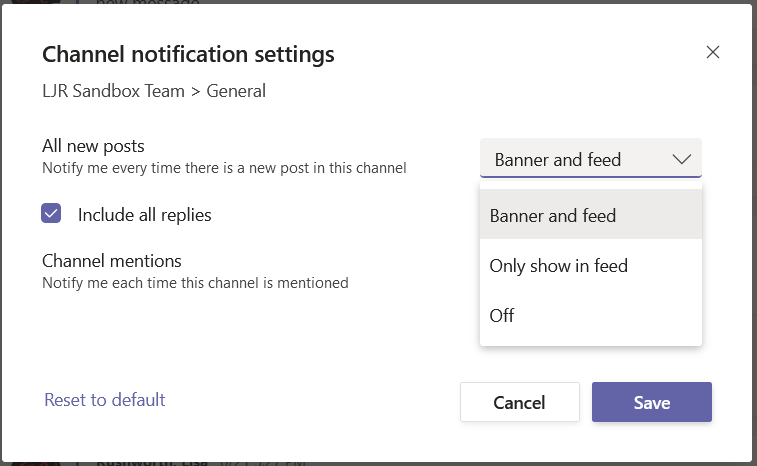
Here you can customize the notification you will receive for channel posts and at-mentions (you’ll still get notified about Team or individual at-mentions). You can also un-check the “Include all replies” box to get notified about new threads.

All of the channels that you followed previously will use your Teams-wide notification settings. Channels that you weren’t following will have notifications off. Newly created channels will have new post notifications turned off and channel mentions set to “Only show in feed”.

** If you still see “Follow” and not “Channel Notifications”, click on your avatar in the upper right-hand corner of the Teams app and select “Check for updates”. Once the updates have been applied, click the tip to “refresh” Teams.


Updating ll alias

Fedora and Red Hat Enterprise Linux have an alias “ll” which uses the long listing format. It’s a quick little tweak that I love, but I generally want to list hidden files too. Seemed easy enough to tweak the alias … but I never had any luck overriding the system setting or finding the source of the alias. Typing “ll -a” gave me what I wanted, although that’s not appreciably easier than typing “ls -al” …

The ll alias is defined in /etc/profile.d/colorls.sh (or colorls.csh if you use the C shell). Add the ‘a’ and “ll” produces a long list format of all files.

lisa@fedora123 ~]# grep “alias ll” /etc/profile.d/colorls.sh
alias ll=’ls -la’ 2>/dev/null
alias ll=’ls -la –color=auto’ 2>/dev/null

Did you know … Microsoft Teams private chats can include 100 people?

In January, Microsoft expanded Teams Chats to 50 people. I’ve heard from a few individuals who wanted to be able to chat with more people — essentially to use Teams to send broadcast messages to a lot of people. Last week, Microsoft upped the limit for private chats to 100. Hopefully they’ll extend the Graph API to allow applications to initiate those chats because adding 100 people to a chat seems like it would take a while!

Ransomware Insurance

Another city paying hackers in hope of decrypting their data. Interesting note that the payoff is being covered by insurance. I wonder if business insurers are going to go down the PCI-DSS route as part of the risk/pricing calculation. Running unpatched XP workstations and W2K servers? Your insurance is going to get expensive. Show proof of quarterly full DR validation restoring everything from last night & magic cloudy mail/file storage with versioning, that’ll bring your insurance cost down.


Quicker Way To Set Up Key-Based Authentication

I’ve always added my public key to a remote host’s authorized_keys file manually, but happened across the “ssh-copy-id” command which does that for you.

[lisa@workstation-fedora .ssh]$ ssh-copy-id -o PreferredAuthentications=password -o PubkeyAuthentication=no lisa@fedora123.example.com
The authenticity of host ‘fedora123.example.com (10.1.2.3)’ can’t be established.
ECDSA key fingerprint is SHA256:5EuKd5LNRnx5sHgQNFb6HO6W/p0hQk4pEmShTgj3zyU.
Are you sure you want to continue connecting (yes/no/[fingerprint])? yes
/usr/bin/ssh-copy-id: INFO: attempting to log in with the new key(s), to filter out any that are already installed
/usr/bin/ssh-copy-id: INFO: 1 key(s) remain to be installed — if you are prompted now it is to install the new keys
lisa@fedora123.example.com’s password:

Number of key(s) added: 1

Now try logging into the machine, with: “ssh -o ‘PreferredAuthentications=password’ -o ‘PubkeyAuthentication=no’ ‘lisa@fedora123.example.com'”
and check to make sure that only the key(s) you wanted were added.

Omit the -o options when attempting to log in over the key-based authentication. This, of course, presupposes that you have a public/private key pair. To create one, use ssh-keygen -t rsa -b 2048

Linux Mounts Windows Volumes As Read Only

Since I’ve got a larger hard drive installed, I have both Fedora and Windows in a dual boot configuration. I have a shared NTFS partition for data, but it’s mounted as read-only under Fedora. Turns out that Fedora sees the file system as not cleanly shut down when Windows Fast Boot is enabled. I disabled fast boot in power management, and the shared data volume is mounted rw as expected.

Iterating through files/folders with spaces in name using find in bash

Ran into a problem using Sphinx to document some Python modules and scripts that Scott put together for OpenHAB. They’re making some changes to the files to get Sphinx to process them, thus making copies of the original code. Problem is, some of the folders just weren’t showing up in the copy. Needed to change IFS in order to tokenize the find results into full paths that don’t break on spaces in file or folder names.

SAVEDIFS=$IFS
IFS=$(echo -en "\n\b")

for DIRNAME in $(find "$COMMUNITY_DIR" -maxdepth 1 -type d 2>/dev/null); do
     echo $DIRNAME
done
IFS=$SAVEDIFS