Category: Crafts

Continuous Bias Tape

For Anya’s new book bag, I need piping — which is basically paracord wrapped in bias tape. My last few projects, making the bias tape has been an all day endeavor. ALL.DAY.LONG. Lining up, sewing, pressing, lining up, making sure I have the seams facing the right way, sewing, pressing …

I had seen people talk about one-cut methods for making loads of bias tape, so I decided to research alternate techniques. This is SO easy, I feel a little silly about the amount of time I put into quilt bindings and piping.

You start with a square of fabric — how much fabric? That depends! How much bias tape do you want? The number of square inches of bias tape is almost the number of square inches of the square with which you start — you’ve got to subtract out the square inches lost to the seam allowance. The seam is sewn along the sides of the square, and there is 2x the seam allowance per seam. Which means we’re subtracting 4x (two seams!) the length of the square’s side times the width of the seam allowance. Subtract that from the square inches of the original square and you’ve got the remaining square inches. To find the length of the tape, divide by the width of the tape. You could reverse the equation so an input desired length of tape produces a measurement for your square. Or make a quick spreadsheet and try different square sizes until you get close. Now the fabric will stretch, and your measurements won’t be perfect … but you should be close to the calculated length.

Now how do you make it? Start with a square, bisect it so you have two right triangles. Place the triangles so the right angles are on opposite sides — the 45 degree angle on one should be nested in the 90 degree angle of the other. Sew along the bottom edge — where the pins are below. Now you’ve got a parallelogram.

Draw lines the width you want your bias tape to be. I drew on both the front and back of the fabric so i was easy to line up. Pull the long corners of the parallelogram past the center — they’ll overlap a bit. You want each set of lines on one side to match up to the next line on the other side. But not meet up at the edge — you want them to meet up at your seam allowance. This is a little tricky, and it took me a time or two pinning and checking before the met at the right spot. Make sure both of your seams are on the same side of the tube. Stitch the two sides together. Cut along the line.

And you’ve got a long strip of bias tape. Fold it! To make piping, I folded it in half around paracord (yes, I’m sure cotton piping is cheaper, but I’ve got lots of paracord already, and it works).

Bigger Book Bag – Fabric Selection

Anya’s little owl bag is, well, small now that she’s in school school. They’ve got a folder that doesn’t quite fit, there’s no room for her lunch, and she’s a lot bigger than she was two and a half years ago. I’m making a bigger bag for her — using essentially the same pattern, but increasing the size a bit horizontally and a lot vertically.

The first decision — what do we want it to look like? She decided on a cat — a cat pocket, maybe cat charm on the zipper, and paw print fabric. I found a cute cat fabric for the lining, but I couldn’t find any paw print fabric that I liked. So I made my own on SpoonFlower. I had my design printed on their eco canvas — it is a stout fabric and black ink showed up well.


Making Laminated Fabric

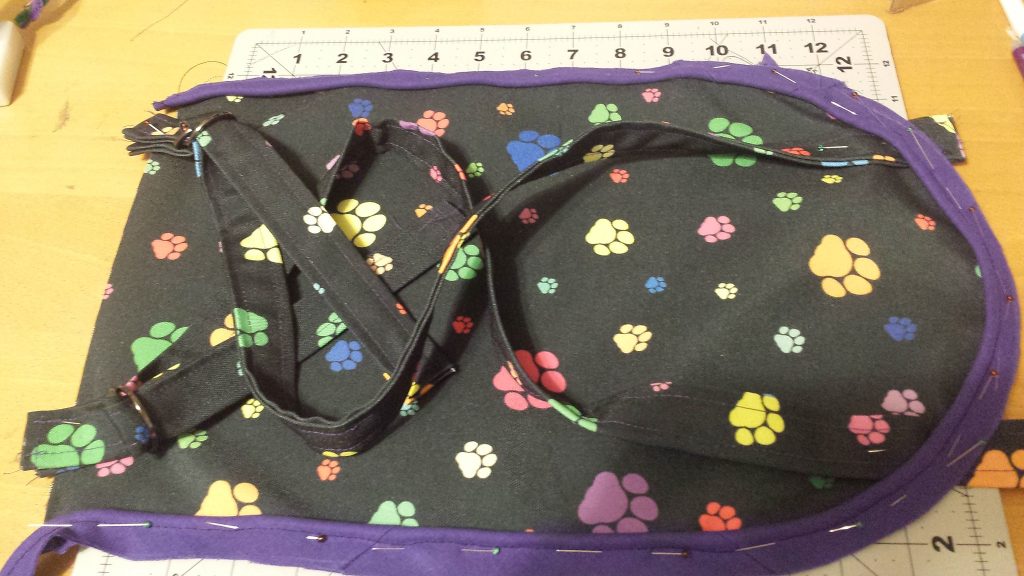
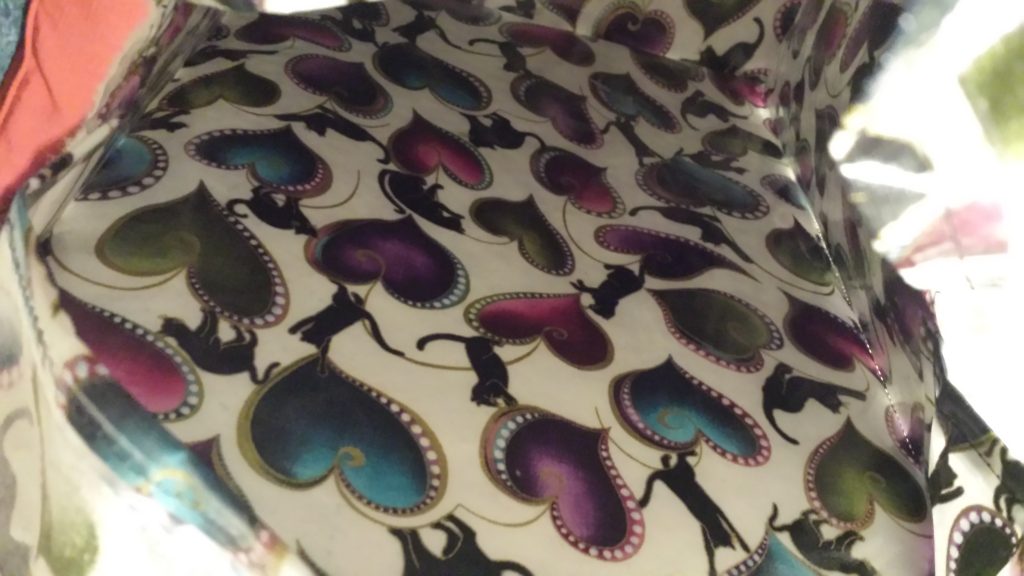
I got lucky when I got the laminated bird fabric for Anya’s book bag — it wasn’t super expensive, it is really cute, and it has a thick lamination. Since then, I’ve not been able to find much in the way of laminated fabric. I don’t want all of her stuff to have the same fabric. So I’ve been experimenting with the laminate-your-fabric iron-on stuff. I’ve used ThermoWeb’s Heat’n Bond and Pellon 100 Vinyl Fuse. Neither are as thick as the lamination on the Robert Kaufman Slicker line, which is a bummer since that’s really what matters. TL;DR: I like the ThermoWeb better, but not enough that I’d pay extra for it or go out of my way to find it.

I bought these as yardage, so the precut and boxed lengths may be different. The Pellon paper has no print on the back, whereas the ThermoWeb has a grid print. Didn’t think I would care either way, but since *most* of my pattern pieces were integer inch rectangles, I was able to cut the ThermoWeb without trying to clip the fabric to the laminate. Since the point of laminating fabric is to make it waterproof, poking holes in it seems like a bad idea. The melting process seems to have eliminated the pin holes, too.

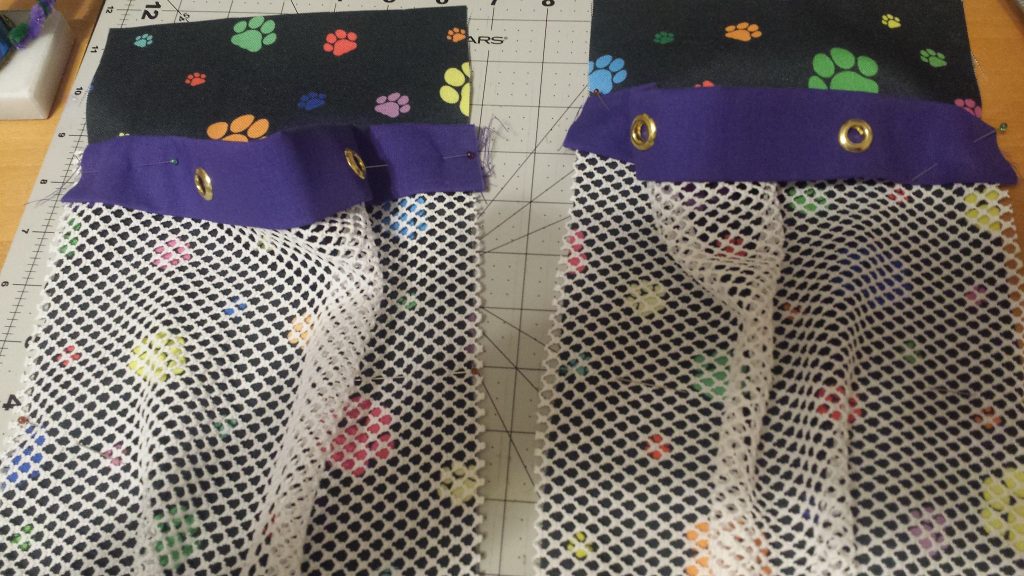
Both products work the same way — it’s paper backed vinyl. They both claim to be sticky to help with placement on the fabric, but beyond being slightly rough and plastic (hence a higher coefficient of friction than polished plastic) they’re not like sticky adhesive sticky. Cut your shape, peel it off the paper, overlay your fabric, place the paper on top of the vinyl, and apply heat with an iron (no steam!). Voilà, laminated fabric. Since my pattern has two of every piece, I placed one paper backing (smooth side up) on the ironing board. Then the fabric, right side up. Then the laminate, again right side up, and smoothed it out with my hand to minimize wrinkles and bubbles. Topped it all with the other paper backing, smooth side down. Doing this, the laminate could be slightly bigger than the fabric piece without fusing to the ironing board 🙂

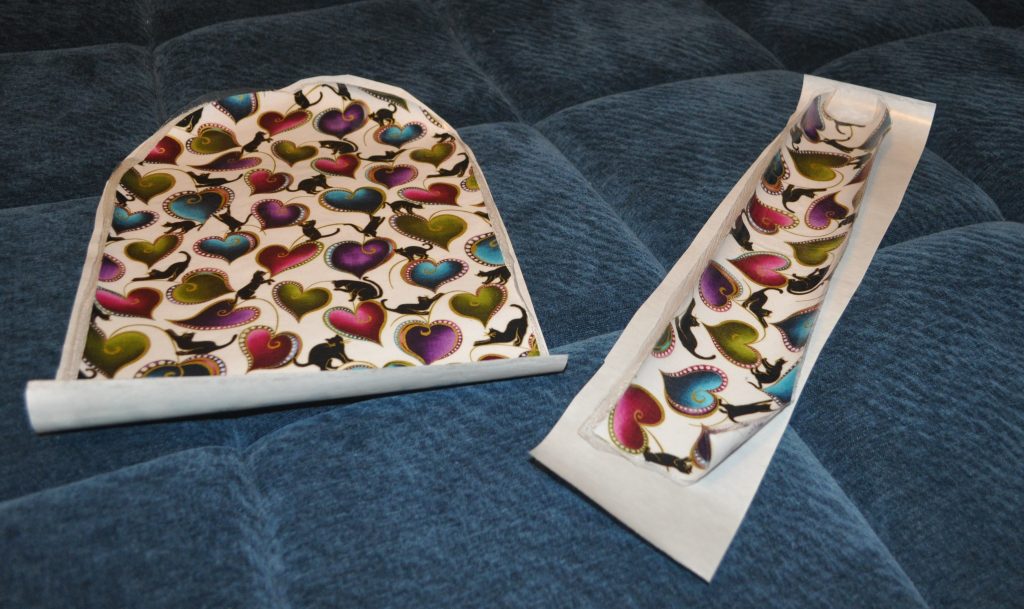
When ironing, the Pellon smelled like melty petro-chemicals. Didn’t smell anything with the ThermoWeb, but my sense of smell is really terrible so it’s possible both smell when heated. One other thing I don’t care for with the Pellon vinyl — the laminated fabric curls. Kind of a lot — I’m putting it all under my cutting mat for the night to see if it straightens out. I’m sure it will be fine once I start sewing it, but it’s certainly not stacking nicely on my desk!

Tomorrow, I’ll see how they sew!

Usage tip: when you’ve finished sewing your project and are ready to turn it, take a hair dryer to it. Warm it up a bit, then turn it the right way about. This gives you nicer corners and makes it easier to turn.

Enlarging A Pattern

There are tricks to sizing clothing patterns — people don’t grow proportionally — but to make non-clothing patterns proportionally bigger, Adobe PDFs can just be turned into posters in the print menu.

In the print menu, select “Poster” and then enter the factor by which you want to scale the original pattern.

What’s that percentage? I use Excel to figure it out. Enter the original dimensions, a formula to multiply the original size by the scale factor … I usually add a cell subtracting the scaled size from the seam allowance to ensure my new object will be the size I wanted. 

I select “Cut marks” on the print menu so I’ve got something to line up when assembling the pages. Print, and you’ve got a bigger pattern. And now to make Anya a bigger backpack (the little owl one I made her a few years ago doesn’t fit the 10×12 notebook or some of the larger library books!).

Ruffling Foot

I got some really nice corduroy fabric a few years ago with the idea of making Anya one of those tiered skirts where each layer is progressively larger than the other and gathered along the previous layer. It’s a simple enough process — decide how thick you want each tier to be and cut the fabric into strips that width + 2x a seam allowance. Once you’ve got a bunch of strips, attach them to create a really really long strip of fabric.

Take a wider strip of fabric and fold the top to form to encase an elastic band. Now comes the tricky part — getting the two pieces of fabric in the ruffler foot. There’s a long metal strip at the front that shoves the fabric to ruffle it — you want the long strip of fabric, right side facing up, under this strip. The bottom of the skirt, you want over this metal strip — it’s not going to be ruffled — and facing down. Both pieces of fabric are slipped under the foot at the back. Now sew — it’s a little jerky as the long strip of fabric gets pulled into the gathering mechanism. Once you make it all the way around the skirt, cut the long strip & attach the two ends of the tier. Then do it all over again — get the long strip into the gathering mechanism, get the bottom of the skirt above the gathering mechanism, both pieces of the fabric under the foot, and sew. Add tiers until the skirt is the desired length. Fold the bottom of the skirt up to form a hem. I went over the seams between each tier with my serger.

And we’ve got a skirt!

Most ruffling feet have settings where you can select how many stitches between a gather (I used 6) and the depth of the gather (I used a small gather because I wanted a subtle effect, not a pleated skirt).

Halloween 2018 – Unicorn Hood

Making a horn turned out to be a LOT harder than it seemed. Taking a heavy piece of paper and folding it into a cone was easy enough. I stuffed it with polyfil to give it some form. But how do you make it sparkly? I wanted to wrap the thing in a gold lamé fabric, but getting it all held together just wasn’t working.

Plan G (or so) was spray-on glue and glitter. I’m going to have to coat this thing in some clear sealant so she’s not a unicorn sprinkling glitter everywhere she goes. But it’s a horn!

Halloween 2018 – Unicorn Mane

I’m making a rainbow mane and tail for Anya’s unicorn custom. To make the mane, I took a piece of cardboard twice as long as I want the mane to be. Folded it in half and laid a piece of white ribbon over the fold (clipped it in place at first). And then wrapped yarn around the thing. A lot of yarn 🙂

Once the yarn was wrapped in the order she wanted, hand-stitched the yarn to the ribbon. After the yarn was attached, I cut the bottom. Stitching the ribbon onto the fur hood, we’ve got a mane.

Halloween 2018 – Unicorn Ears

Anya wants to be a unicorn for Halloween this year — I got some awesome white “fur” and made a shirt and pants from the same patterns I used for her lion costume last year. I just need a different headpiece and tail. I think I’m going to use the hood from a poncho pattern that I’ve got. Attach a mane, some ears, and a horn … voila, a unicorn.

To make the ears, I cut a basic form from comic book board (half-back … what I use to wrap and store my fabric pieces), glued a piece of pink satin to each piece of cardboard, and then wrapped the back with a cut of furry fabric. The fur is glued onto the pink satin. Lots of clips to hold the thing in place while the glue set …

Deodorant Recipe

There are two deodorant recipes I’ve found to be effective — the one without coconut oil is harder and stores better in the summer.

7 T shea butter
5 T arrowroot powder
3 T baking soda

OR

4 T shea butter
3 T coconut oil
5 T arrowroot powder
3 T baking soda

In the bowl of a double-boiler, melt the oil. In another bowl, mix the arrowroot powder and baking soda. Slowly pour powders into melted oil and stir to combine. Remove from heat and stir as it cools. When the mixture starts to thicken, scoop into container and allow to finish cooling.