For Anya’s new book bag, I need piping — which is basically paracord wrapped in bias tape. My last few projects, making the bias tape has been an all day endeavor. ALL.DAY.LONG. Lining up, sewing, pressing, lining up, making sure I have the seams facing the right way, sewing, pressing …
I had seen people talk about one-cut methods for making loads of bias tape, so I decided to research alternate techniques. This is SO easy, I feel a little silly about the amount of time I put into quilt bindings and piping.
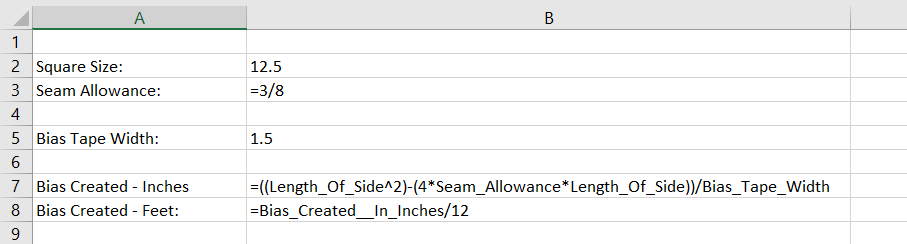
You start with a square of fabric — how much fabric? That depends! How much bias tape do you want? The number of square inches of bias tape is almost the number of square inches of the square with which you start — you’ve got to subtract out the square inches lost to the seam allowance. The seam is sewn along the sides of the square, and there is 2x the seam allowance per seam. Which means we’re subtracting 4x (two seams!) the length of the square’s side times the width of the seam allowance. Subtract that from the square inches of the original square and you’ve got the remaining square inches. To find the length of the tape, divide by the width of the tape. You could reverse the equation so an input desired length of tape produces a measurement for your square. Or make a quick spreadsheet and try different square sizes until you get close. Now the fabric will stretch, and your measurements won’t be perfect … but you should be close to the calculated length.
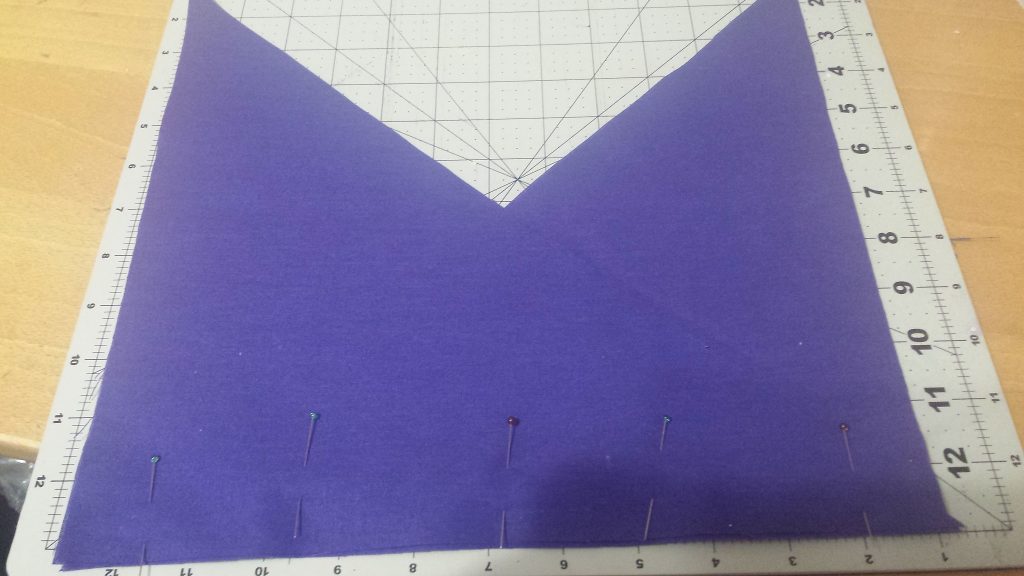
Now how do you make it? Start with a square, bisect it so you have two right triangles. Place the triangles so the right angles are on opposite sides — the 45 degree angle on one should be nested in the 90 degree angle of the other. Sew along the bottom edge — where the pins are below. Now you’ve got a parallelogram.
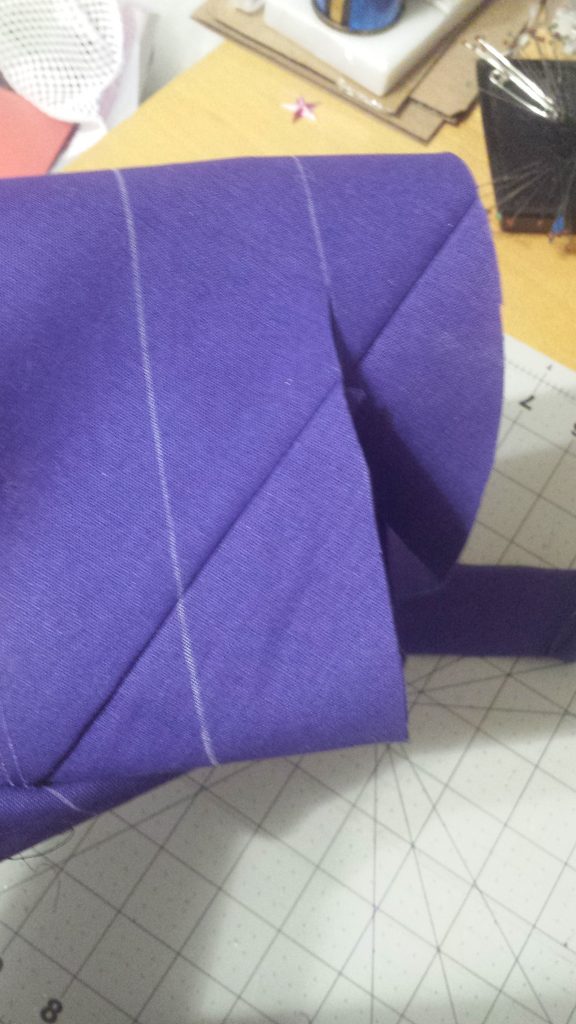
Draw lines the width you want your bias tape to be. I drew on both the front and back of the fabric so i was easy to line up. Pull the long corners of the parallelogram past the center — they’ll overlap a bit. You want each set of lines on one side to match up to the next line on the other side. But not meet up at the edge — you want them to meet up at your seam allowance. This is a little tricky, and it took me a time or two pinning and checking before the met at the right spot. Make sure both of your seams are on the same side of the tube. Stitch the two sides together. Cut along the line.
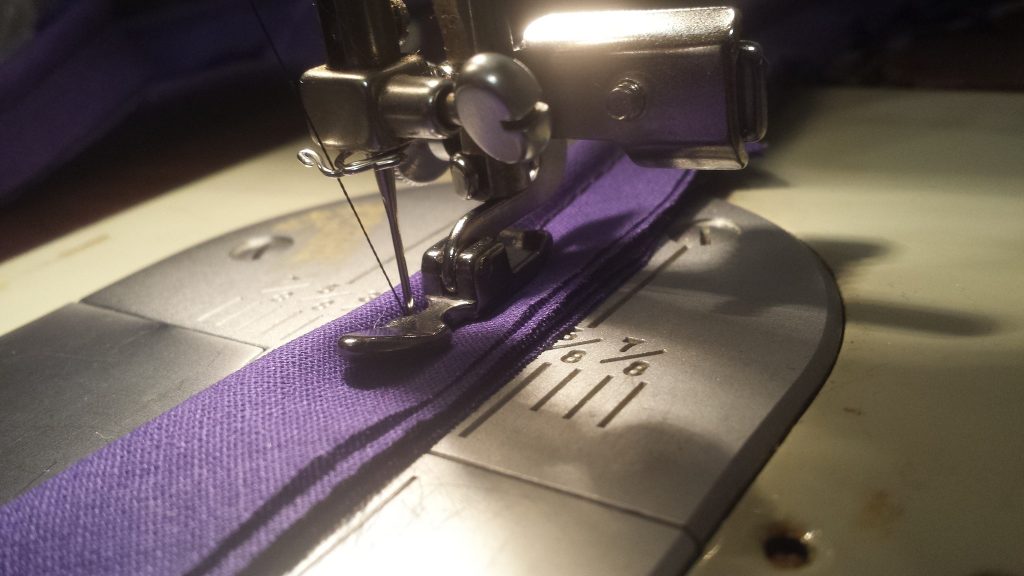
And you’ve got a long strip of bias tape. Fold it! To make piping, I folded it in half around paracord (yes, I’m sure cotton piping is cheaper, but I’ve got lots of paracord already, and it works).