Tag: ADO

Azure DevOps Maven Feed — Deleted Package

Someone deleted one of the packages from the Azure DevOps Maven feed … figured it would be easy enough to just re-publish the package. And they got an error:

409 Conflict – The version 1.2.3 of package.example.com has been deleted. It cannot be restored or pushed. (DevOps Activity ID: E7E4DEB1551D) -> [Help 1]

There’s some not-outlandish logic behind it because they don’t want half of the people to have this version 1.2.3 and the other half to get that version 1.2.3 … if it’s your code, just make it version 1.2.4. Unfortunately, this logic doesn’t hold up well when you’re publishing someone else’s package. Not like I can say “oops, we’ll use 23.13 now”. But you can restore deleted packages — from the feed, go into the recycle bin

Check off the packages that were deleted in error & restore them


Creating an Azure DevOps Work Item From a Teams Message

You can use Power Automate to create an ADO work item (bug, user story, etc) when a user posts into specific Teams channel.

Log into Power Automate and create a new workflow. Find a Teams trigger that suits your need – in my case, I wanted to use a key word (you could even use different key words to create work items in different projects or with different content). Note that automation cycles accrue based on execution — so if you elect to link up to a busy Teams channel and filter for keywords to indicate you want an ADO item created, you may be “wasting” workflow cycles. In our case, I have a “user group” Teams space and set up a special channel where users can submit bug and feature requests. This means workflow cycles are accrued when someone specifically wishes to create an ADO item not when messages are posted into the user group’s general chat channels.

You can source messages from channels or group chats in the “Message type” selection. You cannot use hash-tags as key words! The workflow execution reports a gateway error. Select the Team and channel(s) that you want the workflow to monitor.

Add a new step to “create a work item” from Azure DevOps

Configure the project into which you want to create the work item – the organization and project name, the type of work item, and content of the work item.

If you want to set priority, add an assignment, etc – click on “Show advanced options”. I added a few fields to provide a clue as to where the bug report came from.

Save the workflow and post a message in your channel with the key word. Go into the ADO project work items; your Teams-initiated bug should be there.


Using Git Submodules

Contents

Using Git Submodules

What Are Submodules?

Before You Start

Recursion

Adding Submodules

Performing Operations on All Submodules

Cloning a Repository That Contains Submodules

Making Changes to a Submodule

Pulling Changes Made to Submodules

Including Submodules in ADO Pipelines

Git Submodule Quick Reference Guide

What Are Submodules?

A submodule is a link – it is a pointer at a specific path in the parent repository’s directory structure that references a specific commit in another git repository. The actual git repository is no different than any other repository – what makes it a ‘submodule’ is someone using it inside a parent repository. If I create a really cool PHP function – an Excel parsing utility – I can publish it to a git repository to share it. This repository is not a submodule for me. Someone who wants to use my utility may add my repository as a submodule in their code repo. In their repo, my repository that houses the Excel parsing utility is a submodule. You cannot tell, by looking at a repository, if it is included elsewhere as a submodule.

The example provided above – one individual looking to include someone else’s code in their project – is the typical use case for submodules. But there are other scenarios where isolating different parts of code make sense. In our organization, we cannot deploy code until it passes a security scan. This means problems in one section of the code can hold up development on everything else. Additionally, our code scanning is charged per repository. While we may have a dozen independent tools that happen to reside in a parent folder, it is not cost effective to have dozens of repositories being scanned. Using submodules will allow us to roll up independent tools into a single scanned repository.

The parent repository does not actually track the changes in a submodule. Instead, the parent contains a pointer to a commit identifier in the submodule repository. All changes in the submodule are tracked in its repository.

Before You Start

Before working with submodules, ensure you have an up to date version of git. If, as you interact with remote repositories, you see an error indicating you are using an older version of git:

You are apt to see fatal errors like this:

Recursion

You can have submodules inside of submodules inside of submodules – because of this, most command that interact with submodules have a –recursive flag that will recursively apply the command to any submodules contained within submodules within the parent repository.

Adding Submodules

Begin with a git repository that will serve as the parent – in this example, I am starting with a blank repo that only contains a .gitignore and a readme.md file, but you can start with a repository that’s been under development for years.

We link in submodules using “git submodule add” followed by the repo URL. If you want the folder to have a different name, use “git submodule add URLHERE folderNameForSubmodule”

Once the Tool1 submodule has been added, files from Tool1 are on disk.

Check out a branch in the submodule, or use “git submodule foreach” to check each submodule out to the desired branch (main in this case)

If you use git diff with the –submodule switch, you can see that “Tool1” is being tracked as a submodule.

Add and commit the change – since this is both an entry in the .gitmodules file and the submodule reference to a commit hash, I am using “git add *”

Then push the changes to ADO

Looking in ADO, you will see each submodule folder is represented as a file. The file contents is the hash of the commit to which the submodule points.

Because the “folder” is reflected as a file in the repository, it will not sort with the other folders. You’ll need to look in the file listing to find the submodule file.

Performing Operations on All Submodules

The “git submodule foreach” command allows you to run commands on each submodule in a repository.

You can run any git command in this fromeach loop – as an example, I will checkout a specific branch in all submodules using

git submodule foreach –recursive git checkout main

Cloning a Repository That Contains Submodules

Cloning with –recurse-submodules flag

When cloning a repository with submodules, add –recurse-submodules to your git clone command to pull all of the submodules. To clone my ParentRepo, I use:

git clone –recurse-submodules https://Windstream@dev.azure.com/e0082643/e0082643/_git/ParentRepo

You will see that git checks out the parent project and all included submodules.

Use “git submodule foreach –recursive git checkout main” to check each submodule out to the desired branch (in this case, main).

Cloning without –recurse-submodules

If you forget to include –recurse-submodules in your clone command, or if the submodules have been added to a repository that you have already cloned, you will have empty folders instead of each submodule’s files. A parent repository only has pointers to commits for submodules – until the submodules are initialized, those pointers go nowhere.

Use git submodule update –init –recursive to pull files from the registered submodules.

Making Changes to a Submodule

Working within a submodule’s folder will perform operations in the submodule’s git repository. Working in other folders will perform operations in the parent’s git repository.

To make a change to Tool3, I first need to change into the Tool3 directory.

Make whatever changes are needed. Then add the changes, create a commit, and push the commit to the submodule’s repository. You can create branches, merge branches, and such all within the submodule’s folder to interact with the submodule’s git repository.

If you look at the parent repository, you will see that no changes have been made to it – committing changes to a submodule repository will not kick off the pipeline code scan.

To update the parent repository to point the submodule to your most recent commit, you will need to commit the submodule folder in the parent folder. Change directory into the parent repo – add, commit, and push the changes.

And push the references to the remote using “git submodule update –recursive –remote”

This commit updates the contents of the file representing the repo’s folder – the folder’s file used to reference a commit ending in 6d95 and now it references a commit ending in 6292

Which you can see in the git log of the submodule repository:

Because we have made changes to the parent repository, the pipeline that initiates our code scanning should execute.

Pulling Changes Made to Submodules

To sync changes made by others (or that you’ve made in other locations), you will need to pull the submodules, you need to pull the submodule as well as the parent repo.

To pull (fetch and merge) changes from all upstream submodules, use:

git submodule update –recursive –remote –merge

Using “git submodule status” to view the submodules, you can see the submodule now points to the commit hash from the change we made

Including Submodules in ADO Pipelines

Veracode scanning is initiated through a pipeline. Since our goal is to include files from all of the submodules when scanning the parent repository, we need to ensure those files get bundled into the zip file that is submitted for scanning.

To do so, we need to add a checkout step to the pipeline and set “submodules” to ‘true’

When the submodules are all part of the same ADO project, you do not need to supply additional credentials in the pipeline. Where a different set of credentials are required, you can check out the submodule by passing an extra header with an authorization token.

Git Submodule Quick Reference Guide

Clone repo and all submodules:

git clone –recurse-submodules REPO_URL

cd RepoFolder

git submodule update –init –recursive

git submodule foreach –recursive git checkout main

Add a submodule to a repo:

git submodule add REPO_URL /path/to/folderForSubmodule

git submodule update –init –recursive

git submodule foreach –recursive git checkout main

git add .

git commit -m “Adding submodules”

git push

git submodule update –recursive –remote

Check Out a Branch in All Submodules

git submodule foreach –recursive git checkout main

Committing Change to a Submodule

cd .\submodule_folder

# Make some changes!

git add .

git commit –author=”Lisa Rushworth <Lisa.Rushworth@windstream.com>” -m “Commit Message”

git push

cd ..

git add submodule_folder

git commit -m “Updated submodule”

git push

Pull Updates into All Submodules:

git submodule update –recursive –remote –merge


Example Azure DevOps File Deployment

To automatically update files from your repository on your server, use a release pipeline. For convenience, I use deployment groups to ensure all of the servers are updated.

Creating a deployment group

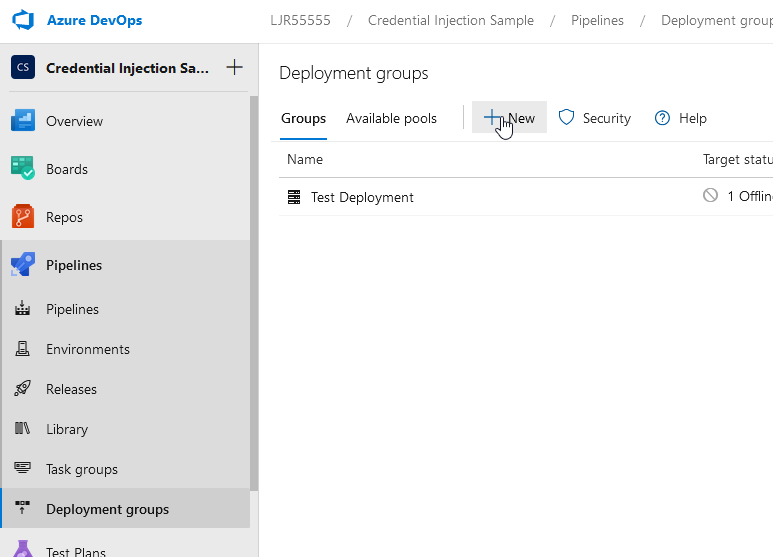
Under the Project, navigate to Pipelines and “deployment groups”. Click “New” and provide a name for the deployment group.

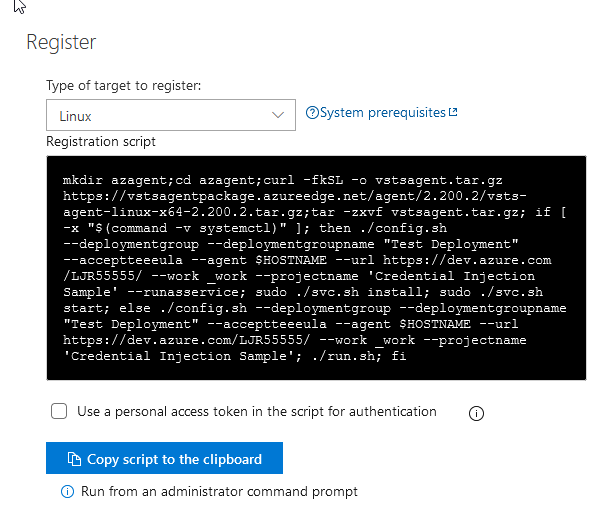
Now click into the deployment group and select “Register”

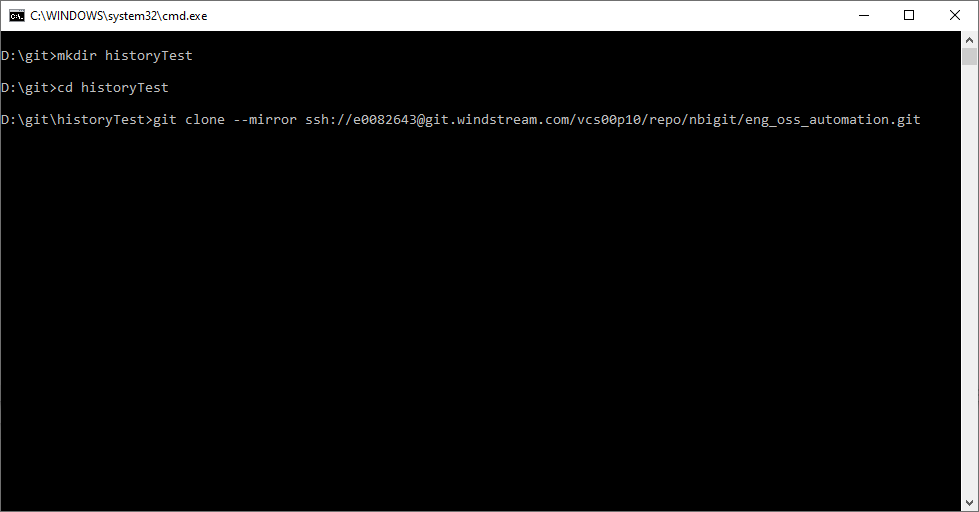
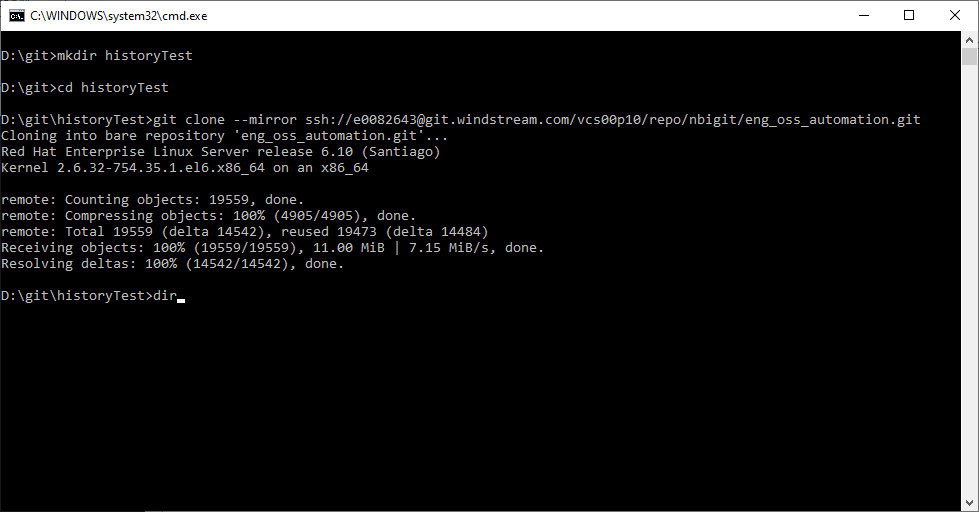
Since I have a Linux server, I changed the “Type of target to register” drop-down to “Linux”. Copy the command and run it on your server (I don’t run literally what MS provides – I break it out into individual commands so I can make a folder named what I want it to be named and just run the part of the command that registers a service with systemctl.

Run the agent – for demonstration purposes, I am using the run.sh script to launch the agent. This outputs details to my console instead of a log file.

If you have multiple servers to which you want to deploy the files, install and run an agent on each one.

Create the release pipeline

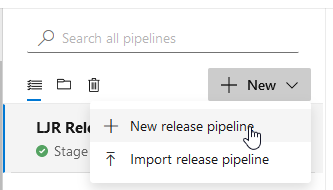
Now we will build the pipeline that actually copies files over to the agent. Under Pipelines, navigate to “Releases”. Select “New” and create a “New release pipeline”. Start with an empty job.

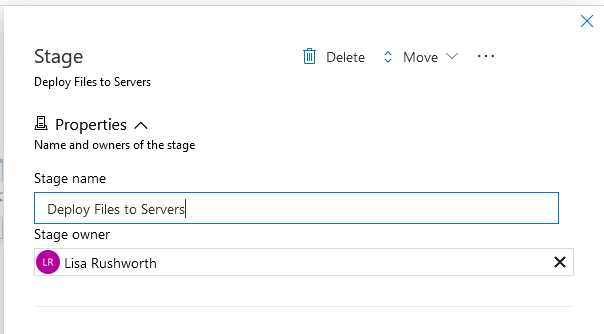
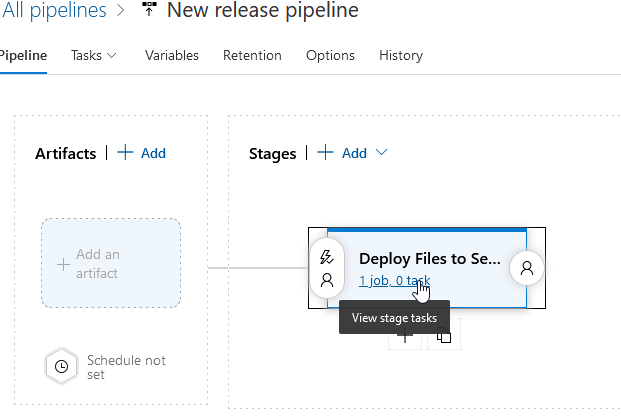
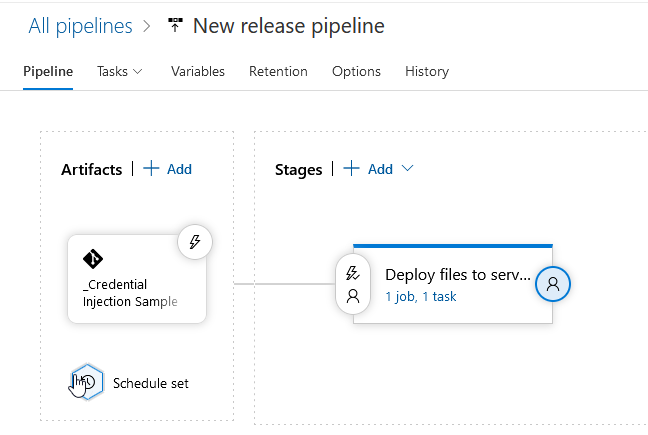
You’ll be asked to name the first stage of the deployment pipeline – here, I’m calling it “Deploy Files to Servers”. Close out of the Stage window to see the pipeline.

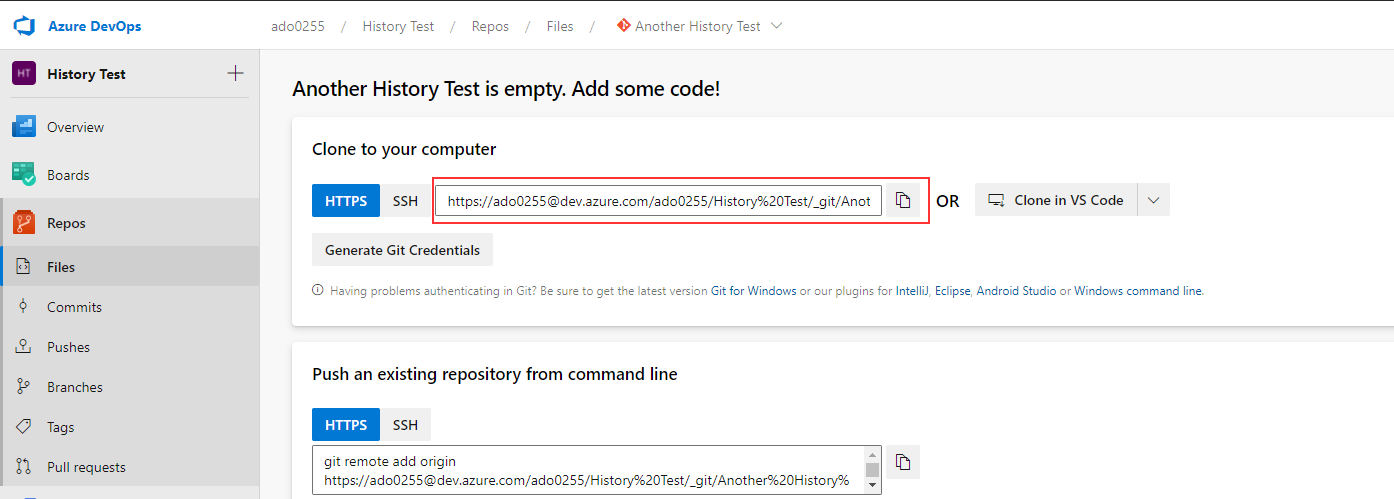
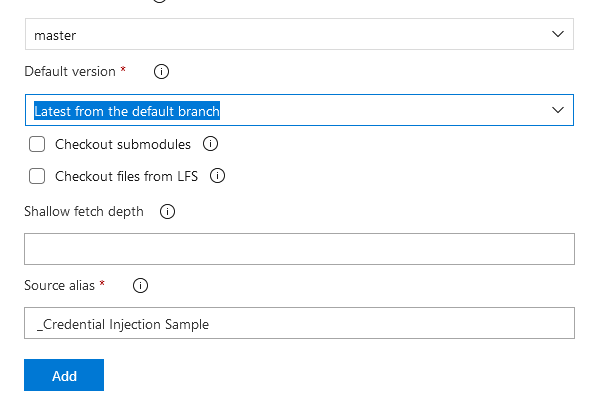
Click the “+ Add” next to Artifacts to link an artifact to the deployment

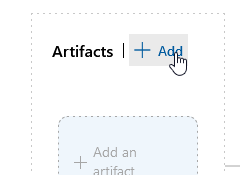
If you have a build pipeline, you can link that as the artifact. Since I am just copying files, I selected the “Azure Repo” and configured the test project that contains the files I wish to deploy to my servers.
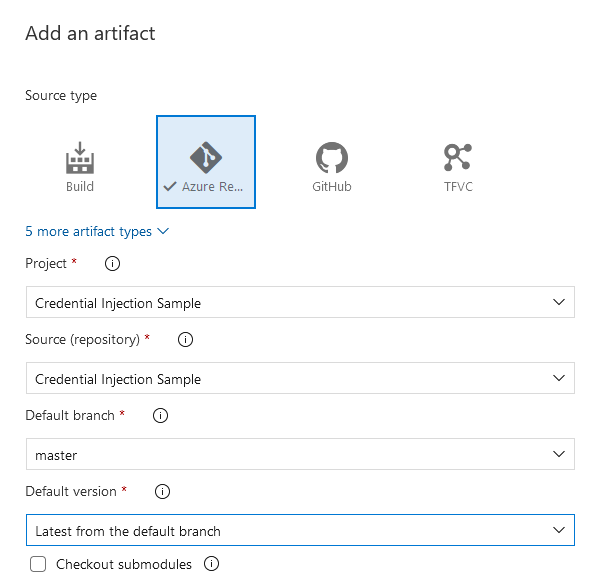
Click “Add”

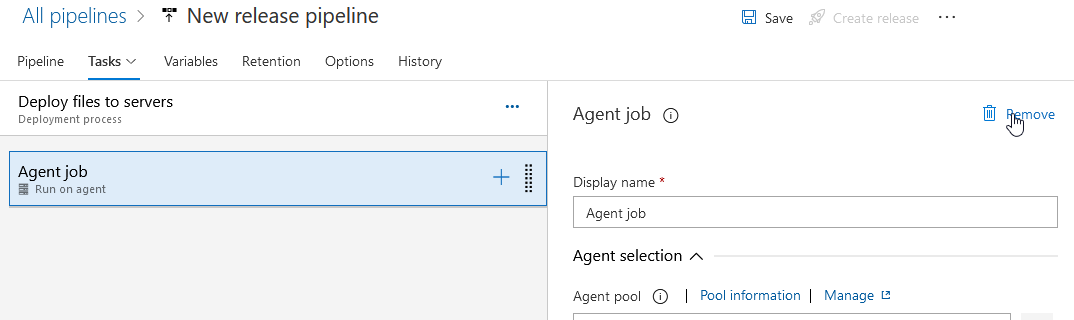
Back in the pipeline, click the “1 job, 0 task” hyperlink to create a file deployment task.

We don’t need the “Agent job”, so click on it and click “Remove”

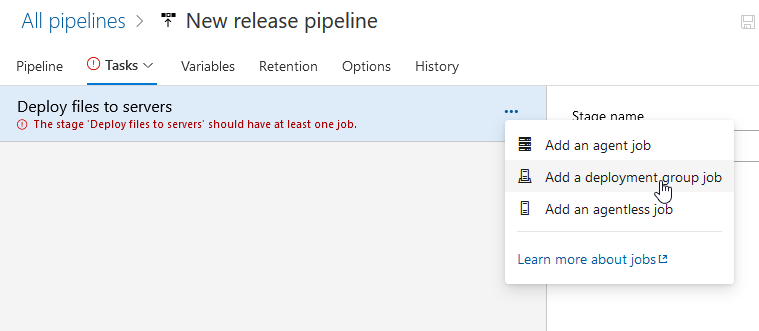
Select the hamburger menu next to “Deploy files to servers” and select “Add a deployment group job”

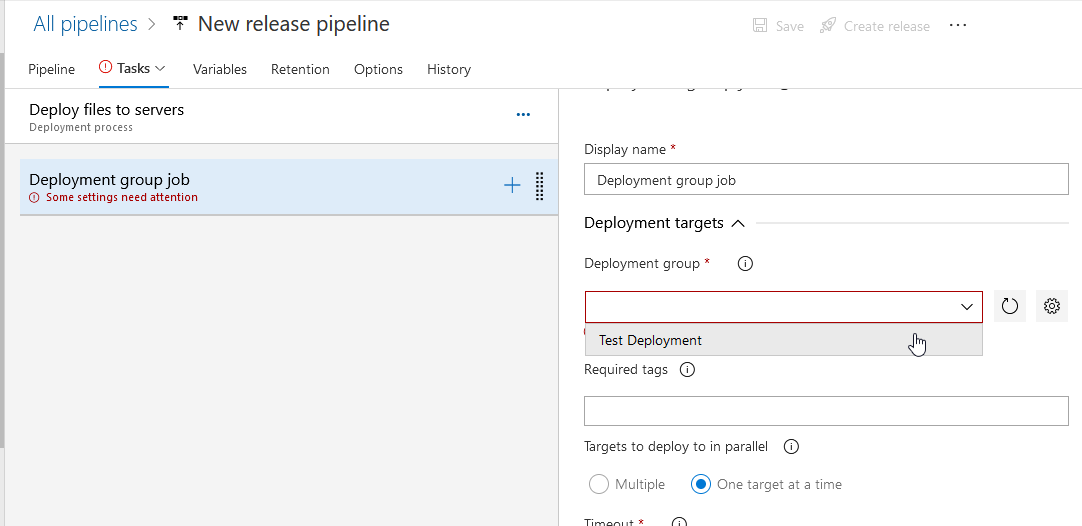
Click the “Deployment group” dropdown and select the deployment group that contains the servers to which you want to deploy files. You can add tags to limit deployment to a subset of the deployment group – I don’t do this, but I have seen instances where “prod” and “dev” tags were used and all servers in both the prod and dev environment were part of the same deployment group.

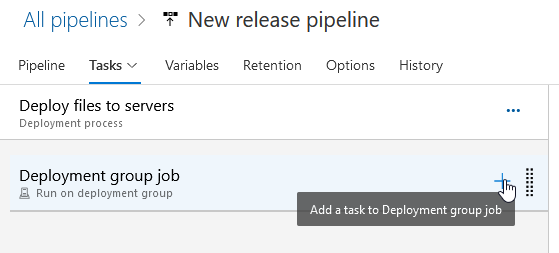
Click the “+” on the “Deployment group job” item to add a task.

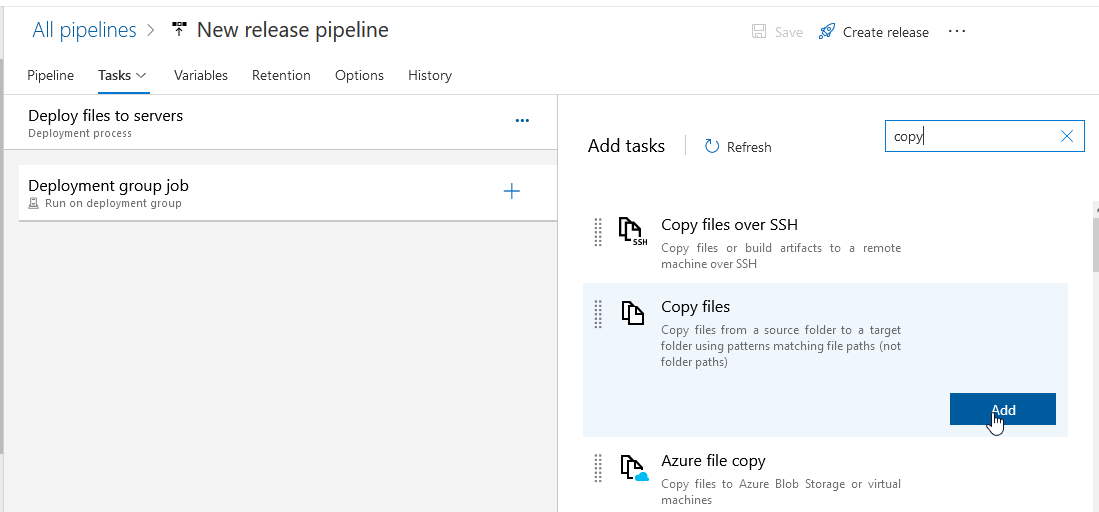
Find the “Copy files” task and click “Add” to create a task to copy files.

Click on the “Copy files to:” item to configure the task. The source folder is the Azure repo, and the target folder is the path on the server.

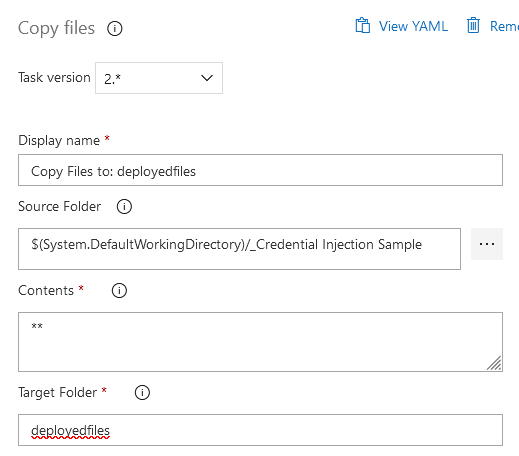
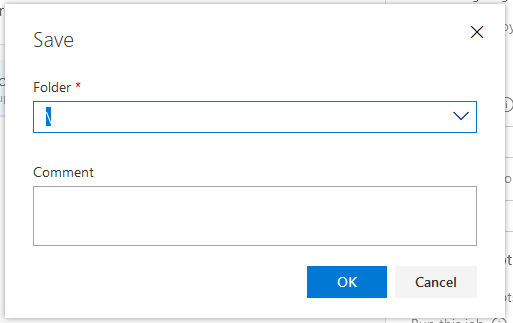
Click “Save” to save the task, then click “OK” to save the task.

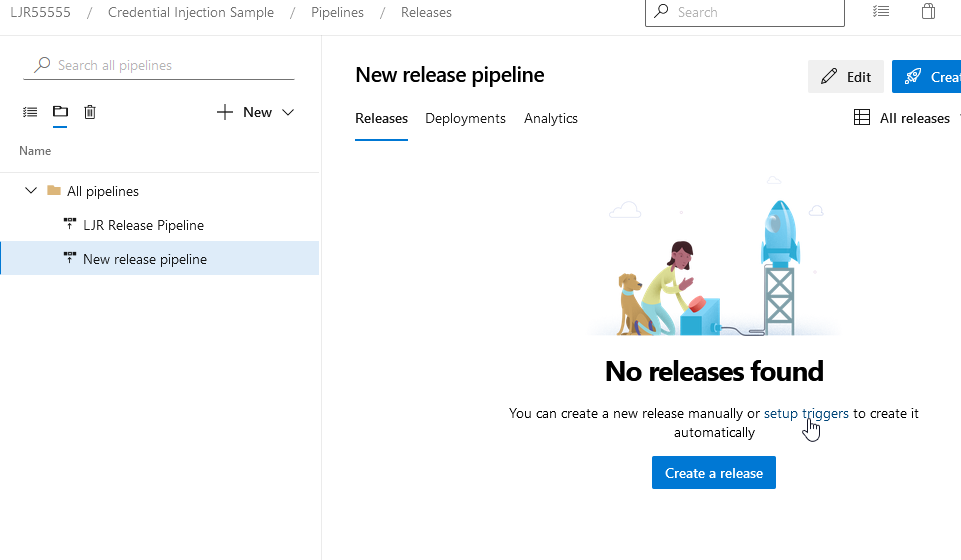
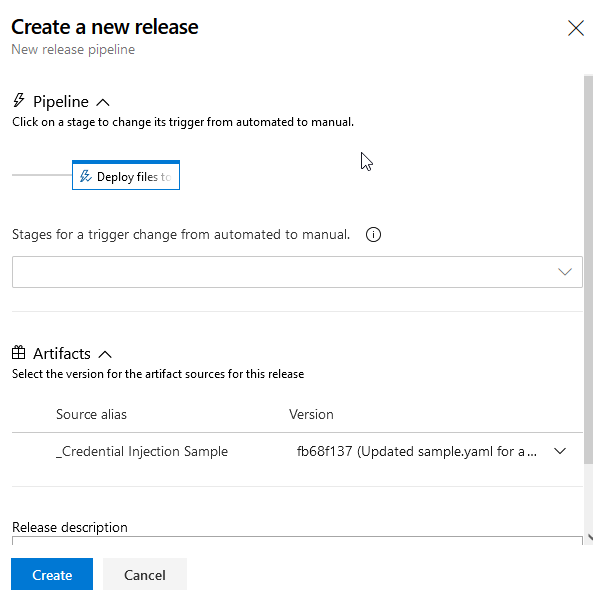
Now create a release – click the “Create a release” button

ok

When the deployment runs, the agent will show the job running.

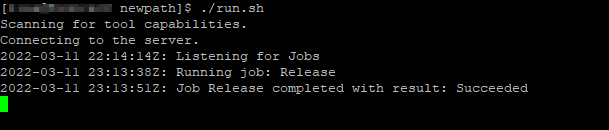
Once the deployment completes, the files are on the server.
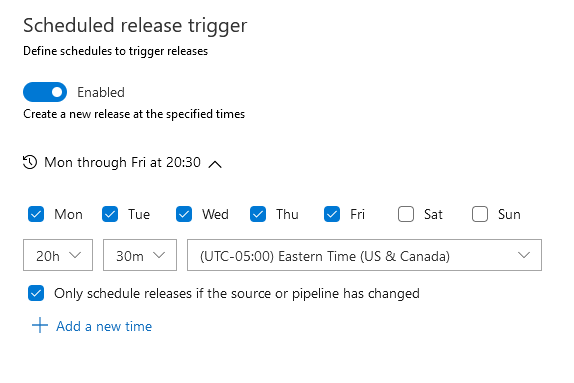
Scheduling Release

In the pipeline, you can click on “Schedule set” to schedule new releases.

Enable the schedule, set a time – I select to only schedule the release if the source or pipeline has changed … if I’ve not updated files in the repo, there’s no need to redeploy the files. Remember to save your pipeline when you add the schedule.

Azure DevOps – Changing Work Item Type

I had to reorganize a lot of my work items in a way that required items not to be what they were. Fortunately, there’s a mechanism to change work item type. Within the work item, click on the ellipsis to access a menu of options. Select “Change type …”

Select the item type you want – I record the reason I needed the new type for posterity – then click “OK”. Save the work item and re-open it.

The one thing I’ve noticed is that fields that don’t exist on an item type (e.g. “effort” on “feature” items) are still present on the new item type even when that field does not normally display (e.g. “effort” on “user story” items).


Azure DevOps – Features, User Stories, and Story Points

I had wanted to classify my ADO work items as “features” (i.e. something someone asked to be added to an application), “bugs” (i.e. some intended functionality that was not working as designed). Bugs have a story point field, but features do not appear to have their own story point field. They, instead, are a roll-up of the story points of their subordinate user stories. Which makes sense except that I’ve now got to have two work items for every feature. Rolling up larger requests into sprint-sized work units is how we use epics. So I’ve instead found myself with user stories tagged with “features” that fall into epics (or don’t in the case of a small feature request).


ADO – Migrating a Repository to Azure Repos (and keeping your commit history)

The most direct way to migrate a repo into Azure Repos is to create a new, blank repository. This may mean making a new project. From the organization’s main page, click “New project”

Or it may mean making a new repo in an existing project. From an existing repo, click the drown-down next to the repo name and select “New repository”

Name the repository but don’t add a README. We want a blank repo

Note the URL to the repository – in this case, it’s https://ado0255@dev.azure.com/ado0255/History%20Test/_git/Another%20History%20Test

Find the URL for your existing Git repo – if you cd into the project’s folder and run “git remote -v”, you will get a list of the repos. Make a new folder somewhere – this is a temporary staging area to move the data from your existing repo over to the new Azure Repo. Change directories into your new folder. Run git clone –mirror URLToOldRepo

You will see data being downloaded from your git server.

Change directories into the folder that just got downloaded. You won’t see your code like you normally do when you clone a git repo. You’re looking at the underlying git stuff that makes up the repo. You’re code is all in there, as are all of the branches and commit history.

Now add the new Azure Repo as a remote – in this case, I’m naming the remote “ado”. Then run “git push ado –all” to push everything up to the new Azure Repo.

Stuff will transfer – you may be prompted to log into your ADO repository first. Eventually, you’ll see new branches being created on the remote and the process will complete.

Refreshing the Azure Repo, you’ll now see the files.

Selecting “Commits” will display the commit history.

Anyone else using the repo will need to add the new remote. Use “git remote rm origin” to remove the existing origin, then use “git remote add origin url” to add the new Azure Repo as origin.

ADO – Cleaning up test repos and projects

I find the process to delete repositories and projects to be nonintuitive. Since I create a lot of projects and repos for testing and documentation, it’s nice to be able to clean them up when I’m done!

To delete an Azure Repo, navigate to a repo and select the drop-down next to the repo name. Select “Manage repositories”

With your mouse over a repository, there’s a hamburger menu at the right-hand side of the listing. Click it and select “Delete”

You’ll need to type the repository’s full name to activate the delete button.

To delete a project, go to the organization’s home page and select “Organization Settings” from the lower left-hand corner of the screen.

Select “Projects” from the left-hand navigation bar

With your mouse over the project listing, you’ll have a hamburger menu. Click it and select “Delete Project”

You’ll need to type the project name to activate the delete button.


ADO Notifications

I’ve been underwhelmed with the notifications I get from Azure DevOps – there are a lot of build-centric notifications, but I don’t use ADO for builds or deployment apart from playing around. And I really don’t care if the silly test project I set up to build and deploy a website worked, failed, or whatever. I was thinking about hooking whatever they’re calling Flow this week up to ADO and building notification workflows.

Fortunately, a coworker mentioned that you can customize notifications in ADO … which, I’d spent a few seconds poking around and didn’t see anything. But I spent more than a few seconds this time and happened across this little ellipsis on the card that pops up when I click the circle with my initials in it. More options!

A new menu flies out; and, look, there’s “Notifications”

Exactly as I’ve observed, there are a lot of build-centric alerts. So I created a new subscription.

Here’s a subscription that I hope will notify me when items assigned to me have updates to activity or comments.