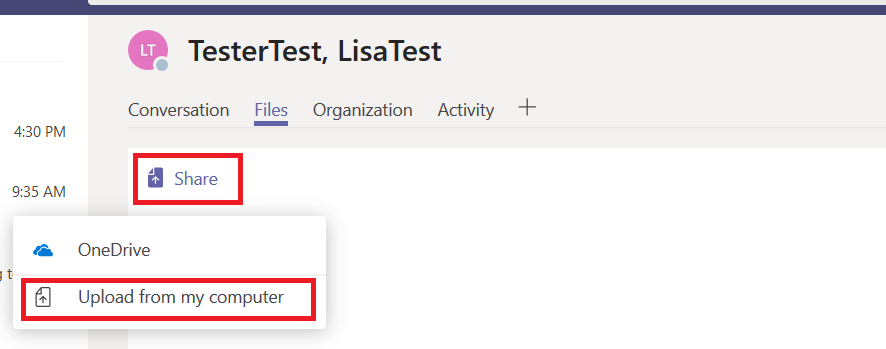
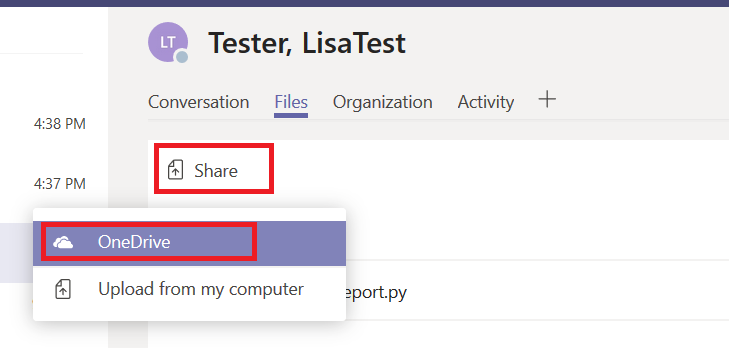
You can share files in both individual and group chats. In the chat, click on “Files”
Then click on “Share” and “Upload from my computer” to share a new file.
While it is uploading, you’ll see a status indicator.
And once the upload completes, you will get a desktop notification.
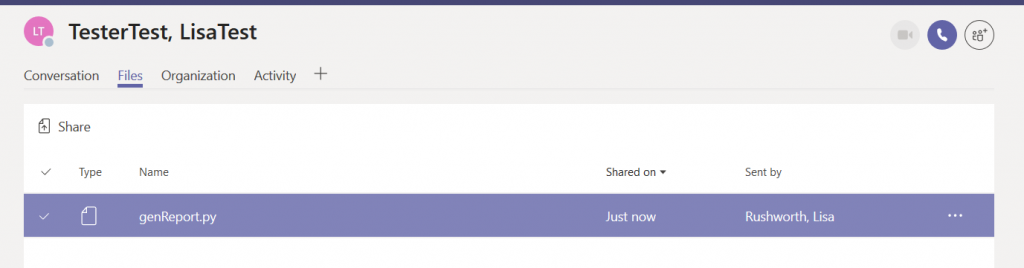
Voila – a shared file.
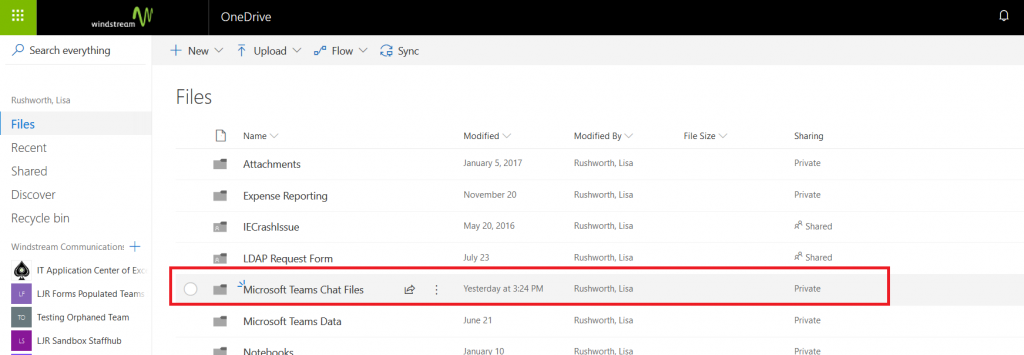
Where is that file? It’s been uploaded to your OneDrive for Business. Open the OneDrive web app and you’ll see a folder titled “Microsoft Teams Chat Files”.
In there, you’ll see all of the files you’ve shared in Teams. Click on “Shared”
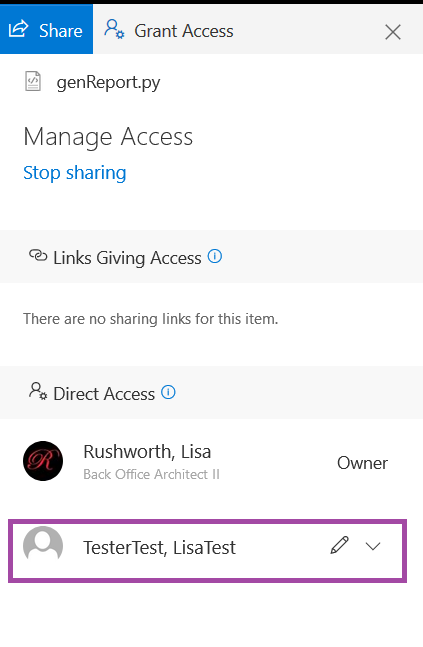
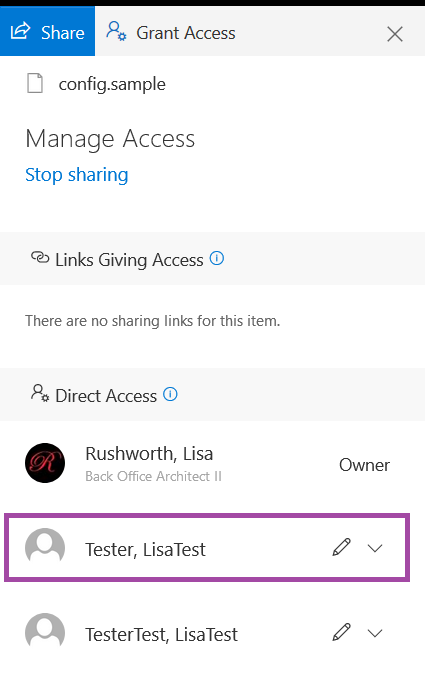
And you can see with whom the file was shared.
If you shared a file in a group chat, everyone in the chat will be added to the file permission. If you shared a file in an individual chat, just that individual will be added.
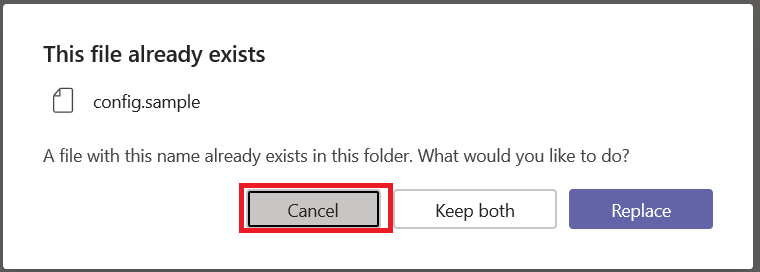
If you want to share the same file with a second person, there’s no need to upload it again … doing so would remove the original permissions. When you see a warning that the file already exists, cancel.
Instead of uploading the file from your computer, select “OneDrive”
from the “Share” menu.
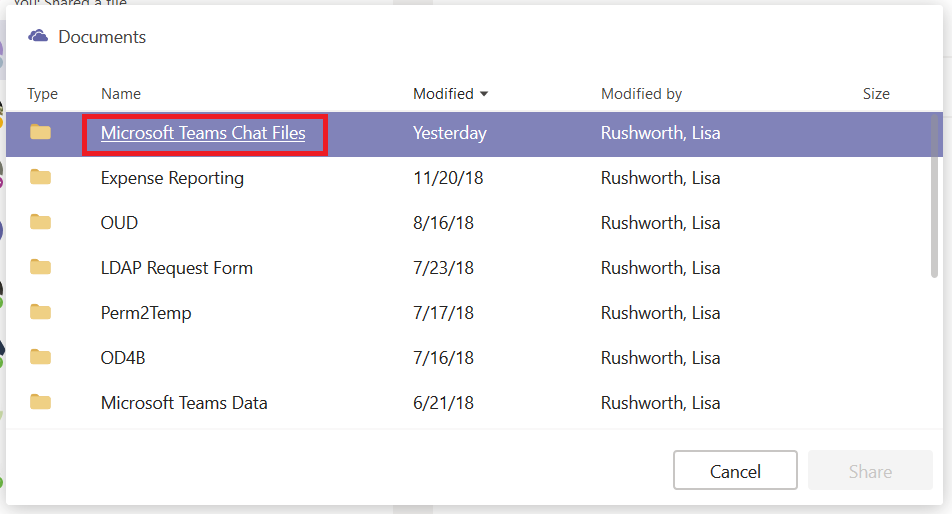
Navigate into the “Microsoft Teams Chat Files” folder.
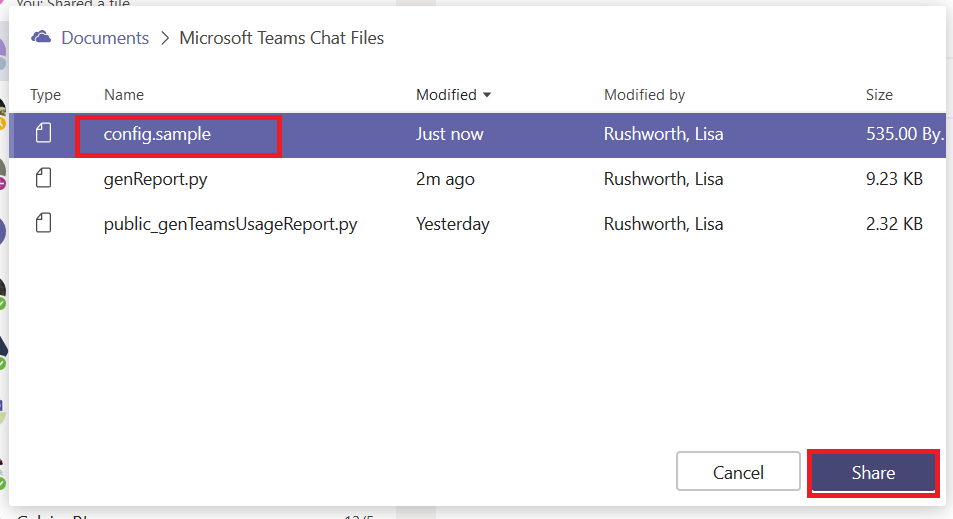
And select the file you wanted to share.
The new person with whom you want to share the file is added to the share list, and both individuals will see the file in the “Files” section of your Teams chat.
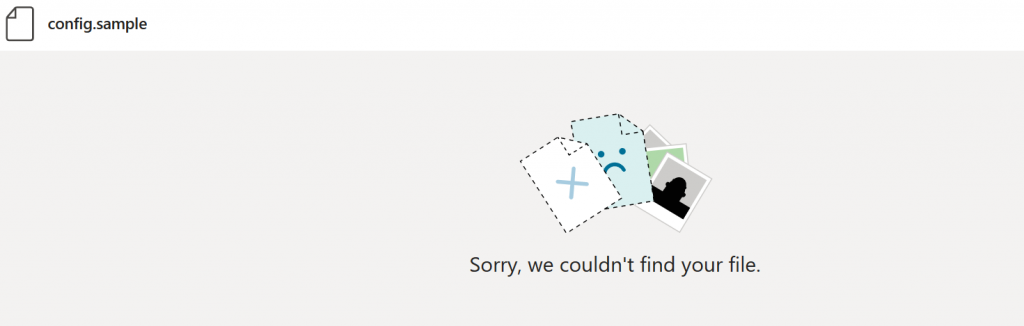
Be careful — deleting the file from your OneDrive space does not remove it from the Teams files list. The chat participants will get an error when they attempt to view the file.
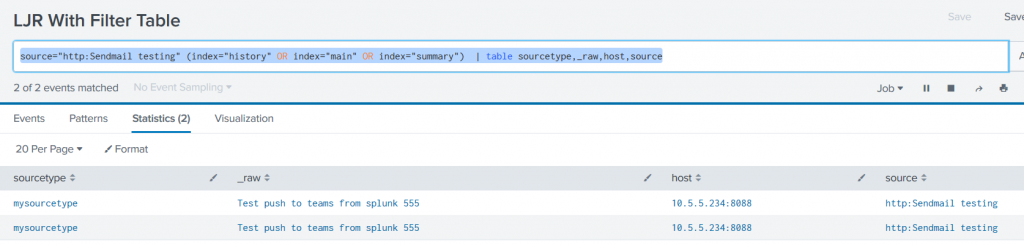
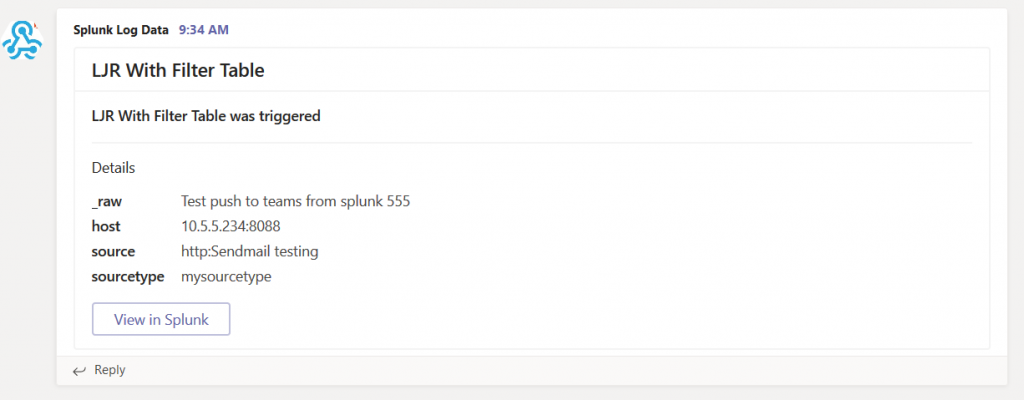
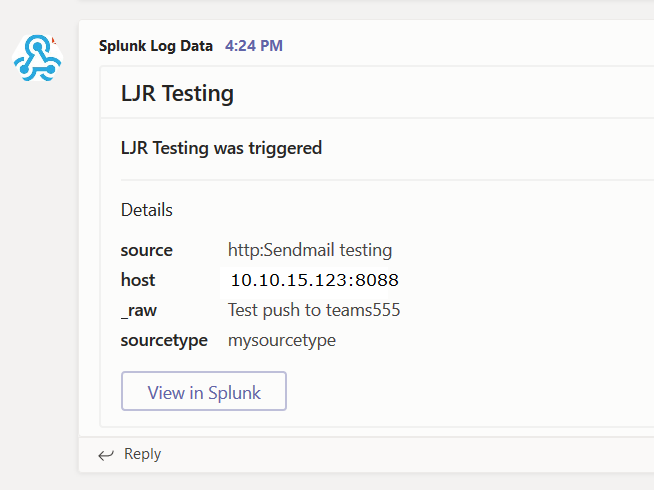
We managed to use the stock Teams webhook app in Splunk — just needed to modify the search being used. Adding “|table” and specific fields to be included in the table avoids having to filter the list data within the Python code
There still is a tweak to the code that I prefer — Python lists aren’t in any particular order. I’d like to be able to look the same place in the Teams post to see a particular field. Adding a sort when the facts array is put into the post body ensures the fields are in the same order each time.
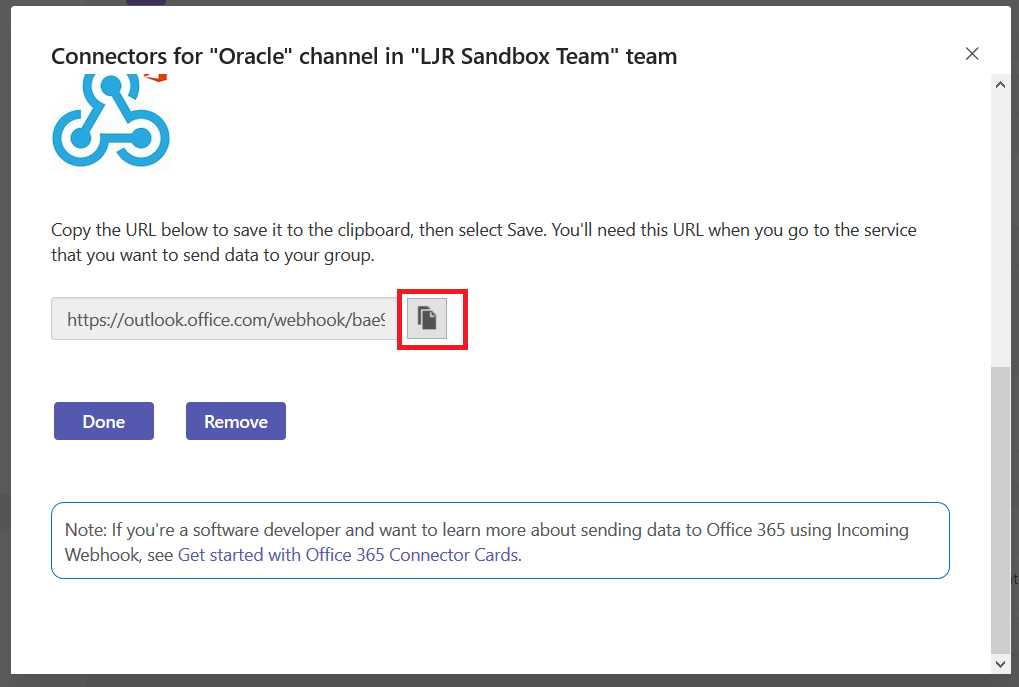
Using either the default webhook action or the Teams-specific webhook, Splunk searches can post data into Microsoft Teams. First, you need to get a webhook URL for your Teams channel. On the hamburger menu next to the channel, select “Connectors”. Select Webhook, provide a name for the webhook, and copy the webhook URL.
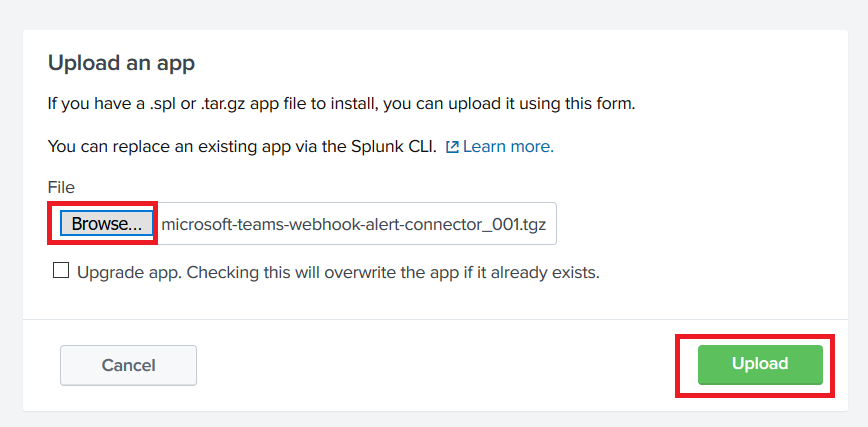
If you intend to use the generic webhook app, there is no need to install the Teams-specific one. The Teams-specific app gives you prettier output & a “view in splunk” button. Download the app tgz. To install the app, go into “Manage Apps” and select “Install app from file”.
Click ‘Browse…’ and find the tgz you downloaded. Click ‘Upload’ to install the app to Splunk.
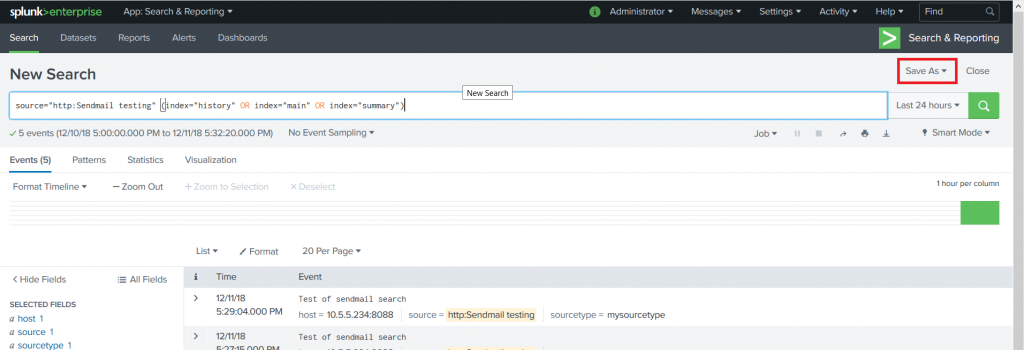
Now create a search for which you want to post data into your Teams channel. Click “Save As” and select “Alert”
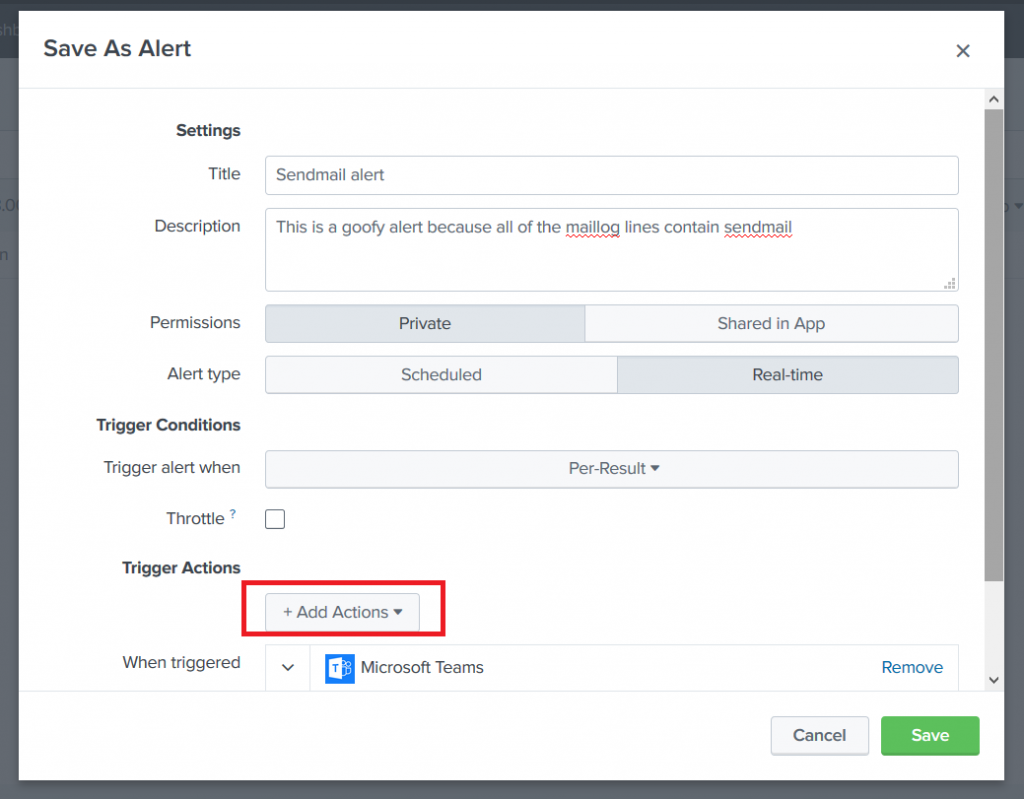
Provide a title for the alert — you can use real-time or scheduled alerts. Once you’ve got the alert sorted, select “Add Actions” and select the Teams webhook action (or the generic webhook action if you intend to use that one). Paste in the URL from your Teams channel webhook and click “Save”.
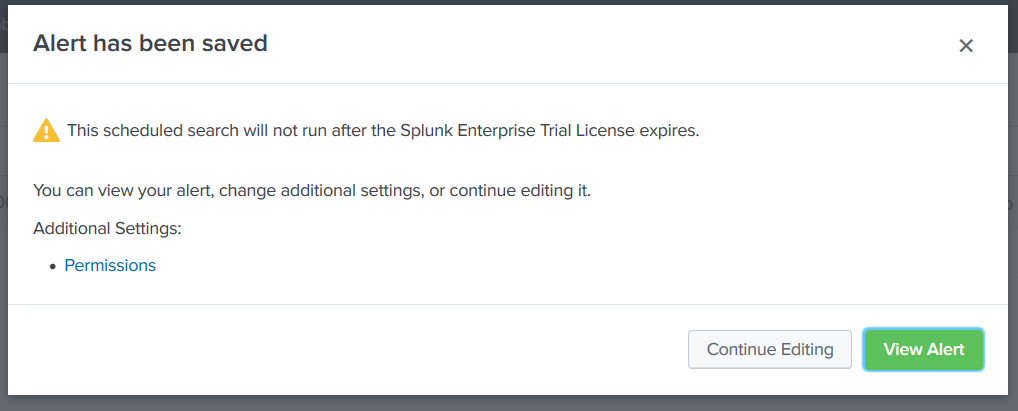
You”ll see a confirmation that the alert has been saved. Close this.
Now you would think you’d be ready to use it … but wait. Neither one works out of the box. In the Splunk log, you see error 400 “Bad data” reported.
For the default webhook app, edit the Python script (/opt/splunk/etc/apps/alert_webhook/bin/webhook.py in my case). Find the section where the JSON body is built. Teams requires a summary or title within the POST data. I just added a static summary, but you could do something fancier.
        body = OrderedDict(
            sid=settings.get('sid'),
            summary='LJRWebhook',
            search_name=settings.get('search_name'),
            app=settings.get('app'),
            owner=settings.get('owner'),
            results_link=settings.get('results_link'),
            result=settings.get('result')
For the Teams-specific webhook, edit the Python script (/opt/splunk/etc/apps/alert_msteams/bin/teams.py in my case) and find the section where the facts list is populated. There’s too much data being sent through. There’s probably a way to filter it out in Splunk, but I don’t know how 🙂
The right way to do it is select the most important items from settings.get(‘result’).items that you want to be displayed within Teams and populate facts with those elements. I used a new list, strWantedKeys, to determine which keys should be added to the facts list. The quick/ugly way is to just take the first n items from the result items (settings.get(‘results’).items()[:7] gets seven … 8 produced a ‘bad payload received by generic incoming webhook’ error from Teams.
try:
    settings = json.loads(sys.stdin.read())
    print >> sys.stderr, "DEBUG Settings: %s" % settings
    url = settings['configuration'].get('url')
    facts = []
    strWantedKeys = ['sourcetype', '_raw', 'host', 'source']
    for key,value in settings.get('result').items():
        if key in strWantedKeys:
            facts.append({"name":key, "value":value})
    body = OrderedDict(
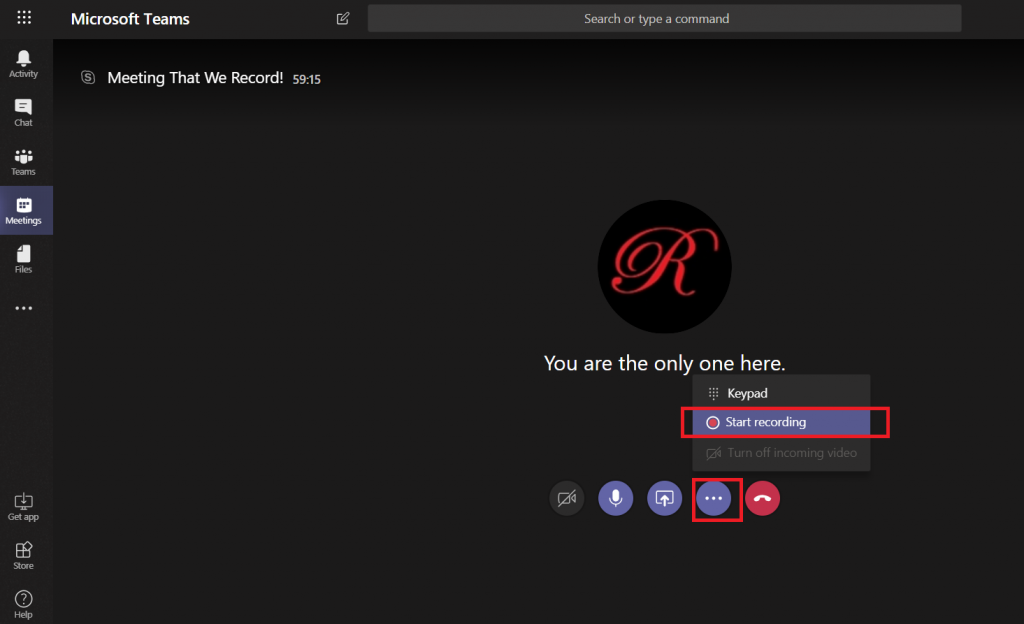
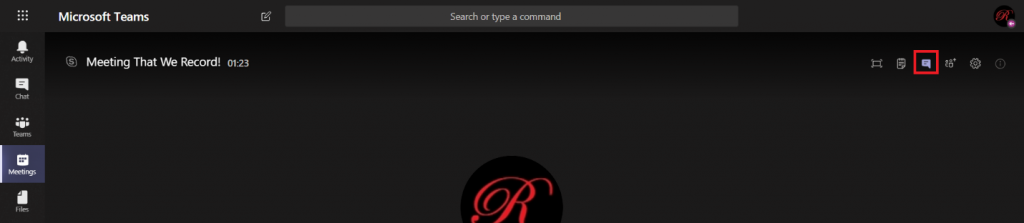
Once you have started a Microsoft Teams meeting, click the not-quite-a-hamburger menu in the meeting control and select “Start recording.
You will see a confirmation that your meeting is recording – and, as the message mentions, make sure everyone knows they are being recorded.
If you are attending the meeting using a web browser, the browser tab will have a little red circle indicating that recording is active.
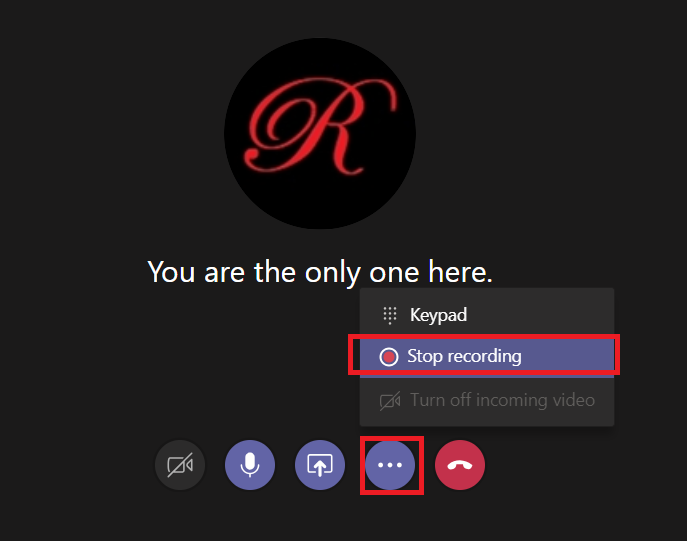
If you no longer wish to record the meeting, click the not-quite-a-hamburger-menu button again and select “Stop recording.
Now where is that recording?? Open the meeting chat
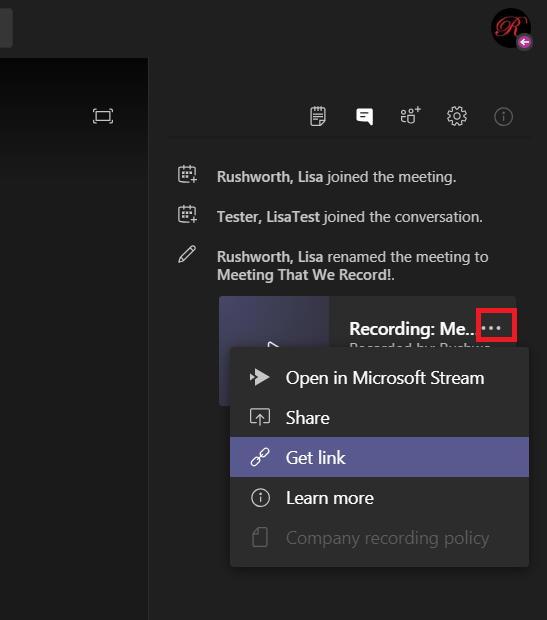
And you’ll see a post indicating that the recording is saving. Once the recording has been saved, a link to the recording will appear in the conversation. You can get a link to share with others.
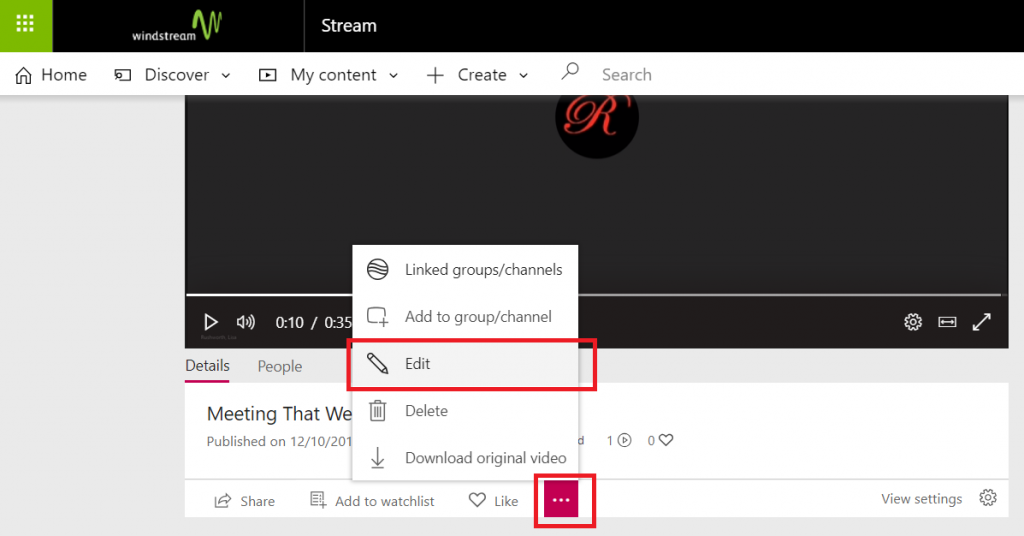
If you would like a transcription to be created for your meeting, select “Open in Microsoft Stream”. This will open the recording in a web browser. Under the meeting information, click the not-quite-a-hamburger menu and select “Edit”
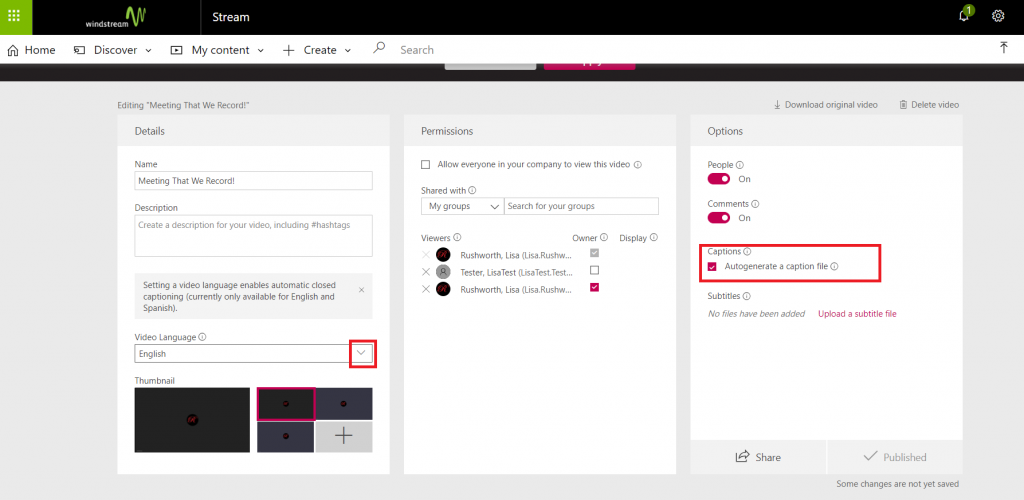
On the edit page, select the video language. Ensure “Captions” is checked.
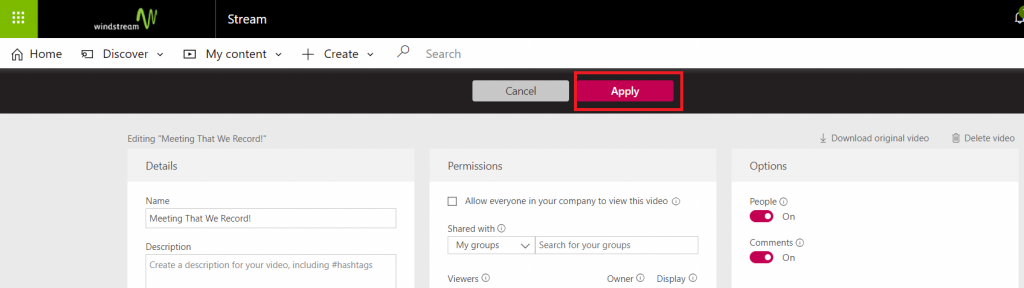
Scroll up to the top of the page and click “Apply”.
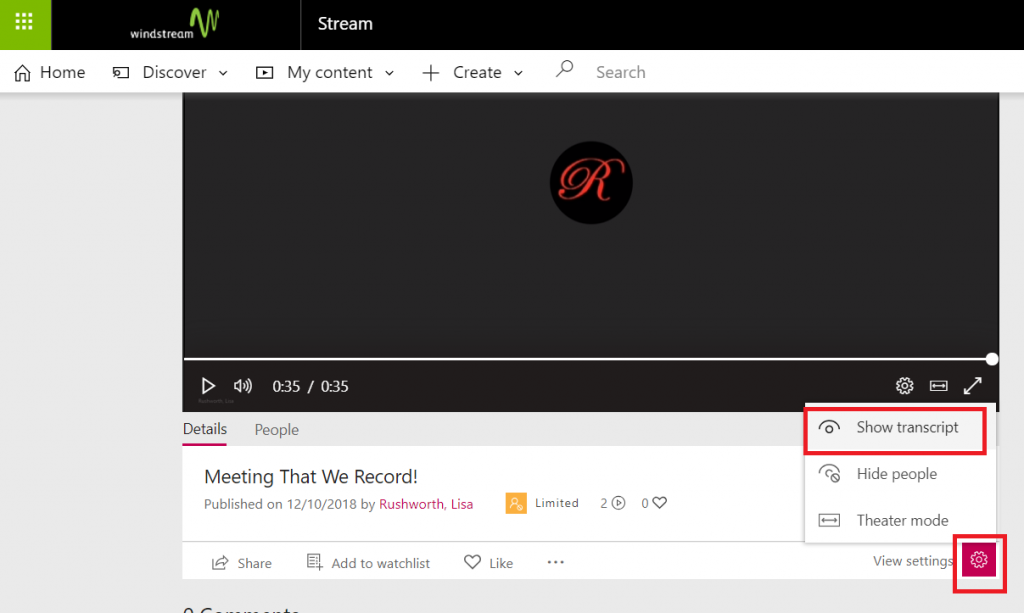
Wait for it – the transcription process can take a loooong time. Once the transcription is done, you can click the gear icon in the video information and select “Show transcript” (if the transcript isn’t done yet, this option is still available. But the transcript pane will just tell you to come back later)
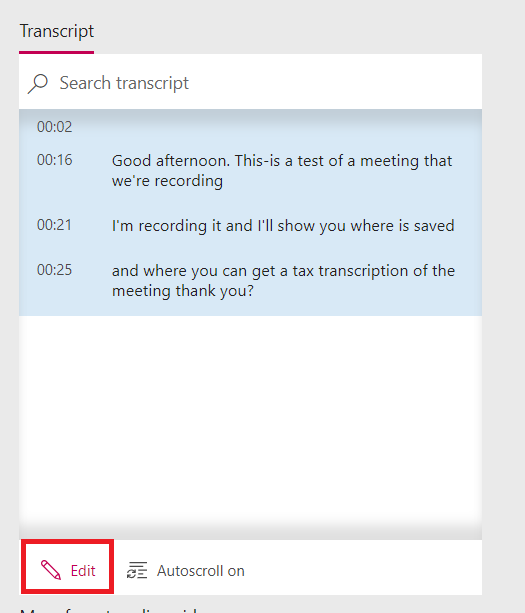
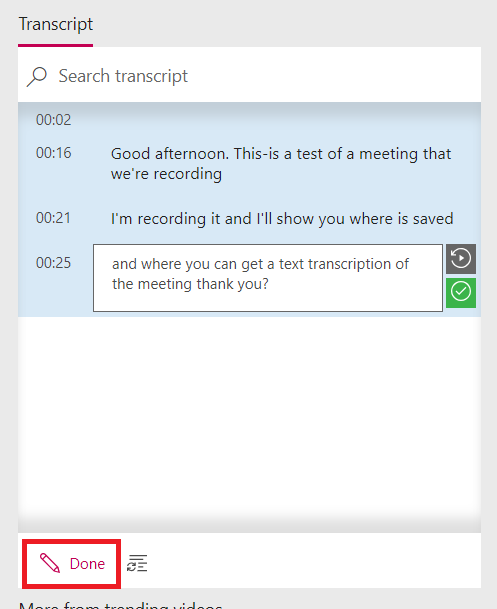
Read through the transcript – an AI engine is used to perform the natural language processing, and the transcription accuracy *should* improve as you use the service. Click on “Edit”, make any corrections
Click “Done” to save your changes.
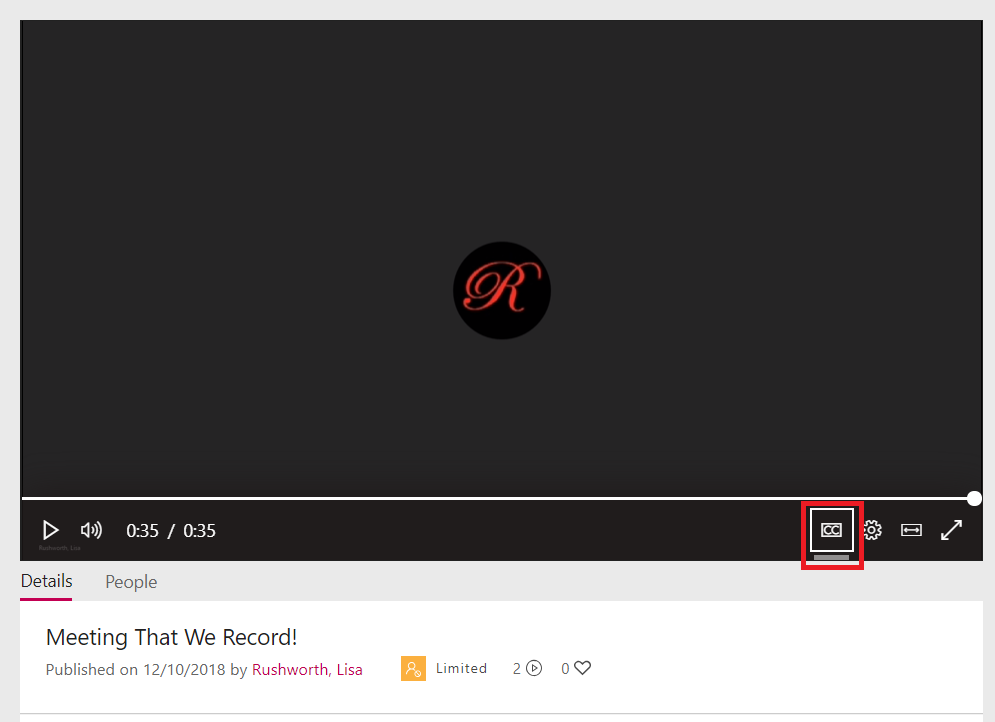
When your video is played, there is now a button to display closed captioning.
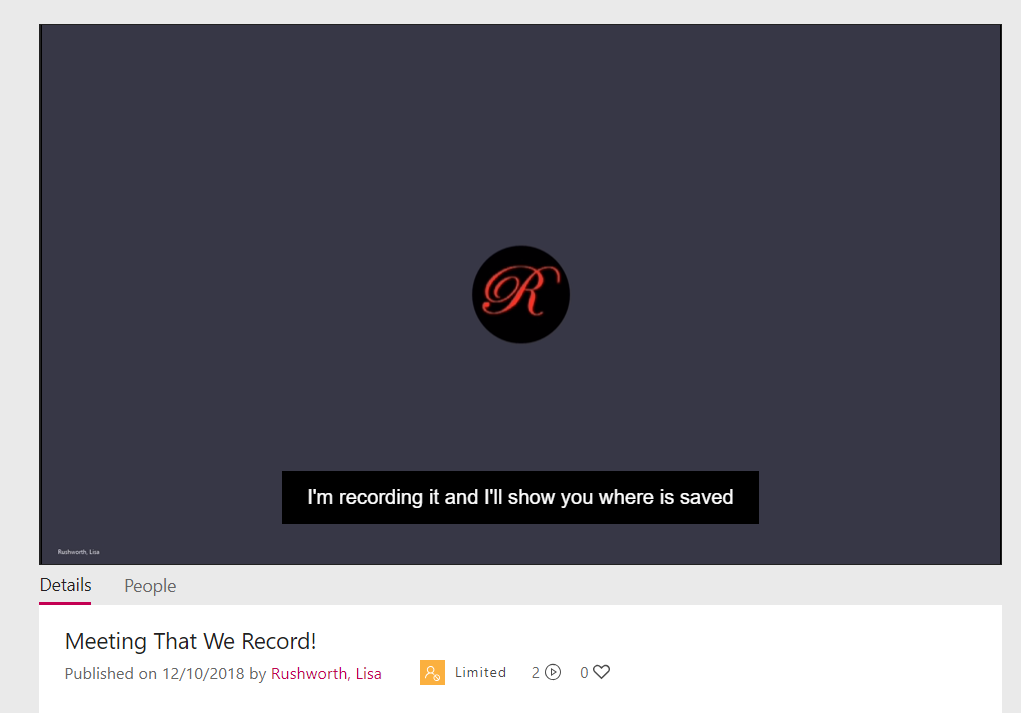
And the transcript will be displayed as the video progresses.
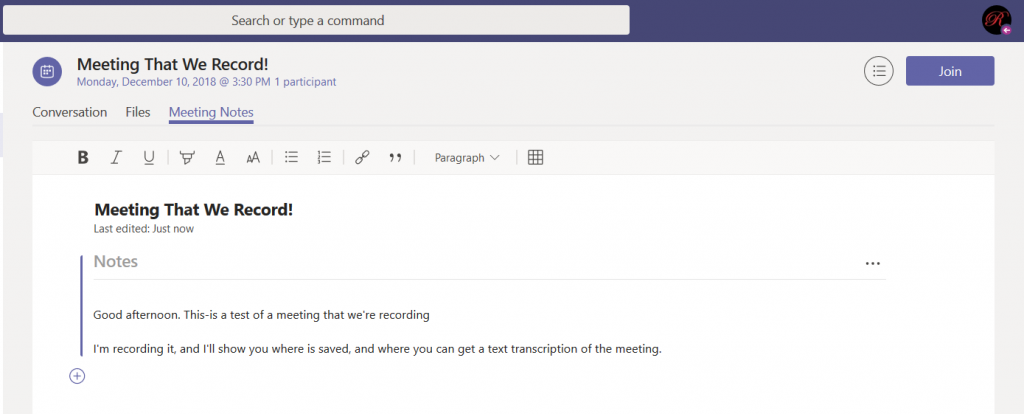
When you view the transcript, you can copy the entire thing & paste the transcript into OneNote or the meeting chat to have computer-generated meeting notes. I usually edit the transcript to remove the timestamps (and remove any tangential discussions).
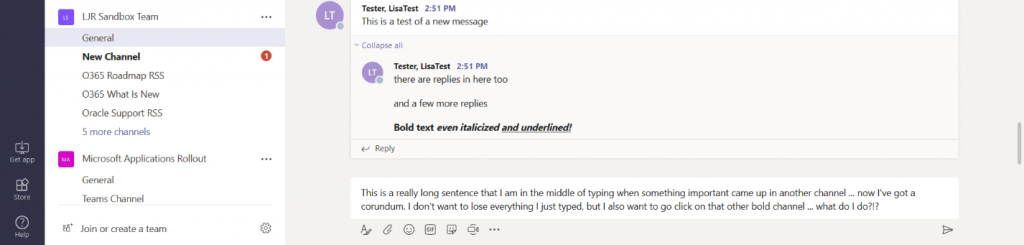
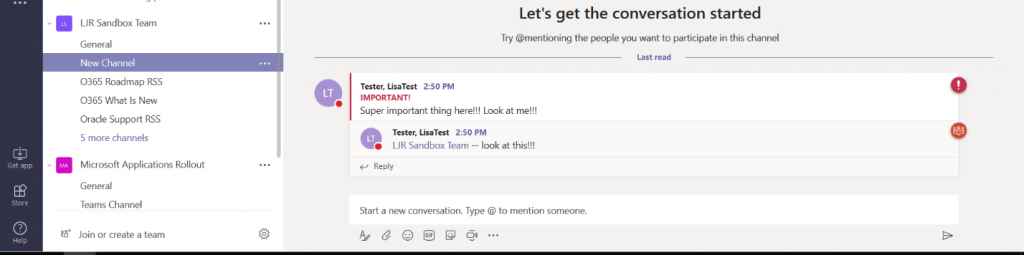
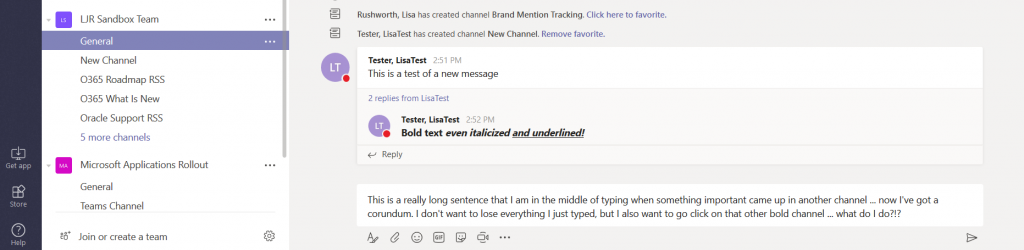
While cognitive research says we focus best if we’re not switching topics every few minutes,sometimes I find myself needing to switch to a new channel in the middle of a thought. Desktop notifications, important content flags … but Teams will save what you’ve already typed even if you leave the channel or chat session.
I’ve switched over to the channel with that important activity – I can even send a new message here.
And when I return to my original channel, everything I’ve typed is still in there. Teams even saves the un-sent post if you close the client (I still copy my post to notepad just in case if I’m doing anything more than re-launching the browser to apply updates, but I haven’t needed the saved post content yet)
As you use Teams to chat with colleagues, you may find your “recent”chats include several entries with almost the same list of people. And now you’re clicking between groups with someone’s name to find the right group chat. Don’t! You can rename group chats to make it easier to find a specific conversation.
Within the group chat, click on the little pencil next to the participant names.
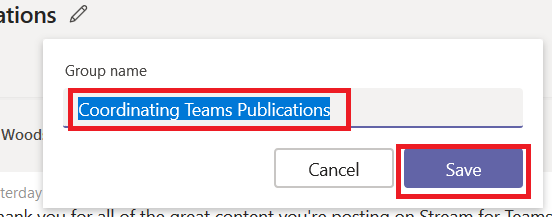
You will have an edit dialogue where you can add a group name – this is displayed to the other participants so select the name accordingly 😊 Click ‘Save’.
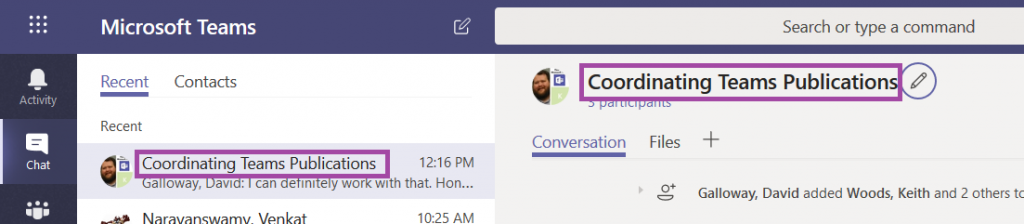
The conversation is now listed with the name you’ve supplied. Should you want to remove the name, simply click the pencil again and delete the name. Save a blank name, and the conversation will be titled with the participants again.
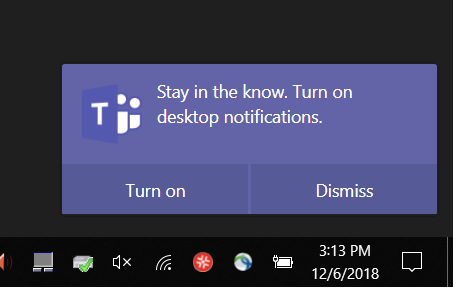
The *one* disadvantage of using Teams in a web browser was not getting notifications for new activity, but the Teams web site now supports desktop notifications. Next time you log into Teams in a web browser, you’ll be asked if you want to turn on desktop notifications – click “Turn on”.
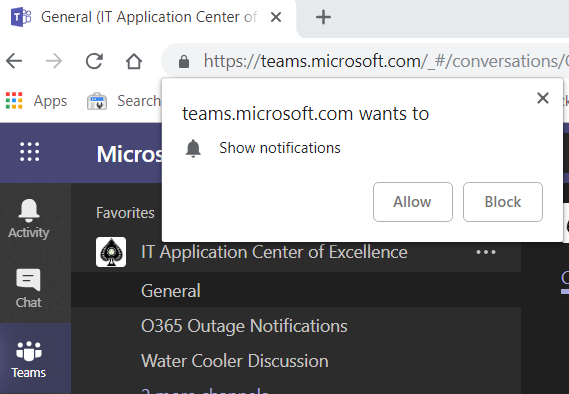
You may see an additional browser prompt asking you to confirm you wish to grant the Teams website the right to show notifications –click Allow.
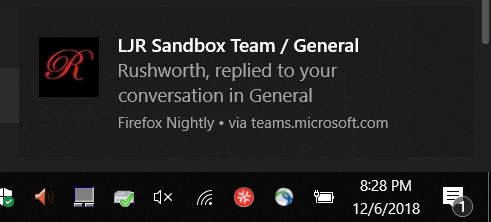
If you have Windows 10 notifications enabled, you will now get notifications in the lower right-hand corner of your screen and the Windows notification panel.
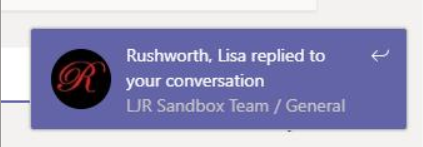
You will get notifications even if you’ve disabled desktop notifications.When you are on the Teams tab, you’ll see notifications in the lower right-hand corner of the browser.
And when you are not on the Teams tab, you’ll see a number indicating the number of new notifications that have been sent.
I frequently collaborate on documents with a small group of people – not that I don’t want everyone’s input, but starting a discussion with thirty people and a blank sheet of paper can become a cat-herding endeavor. I start drafting a document with a small group of people and then present the mostly finished information to a larger team for final review. I do not want to keep track of different versions of the document spread across multiple Teams! Fortunately, you can move documents between Teams.
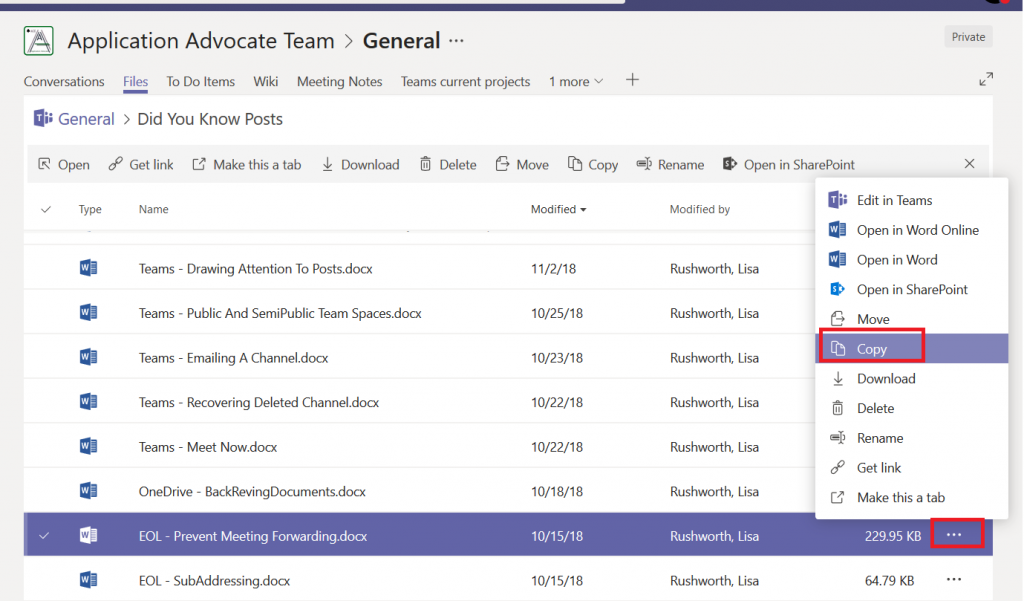
Find the document that you want to move. Click the not-quite-a-hamburger menu to the right of the document listing. Then select either “Move” or “Copy”.
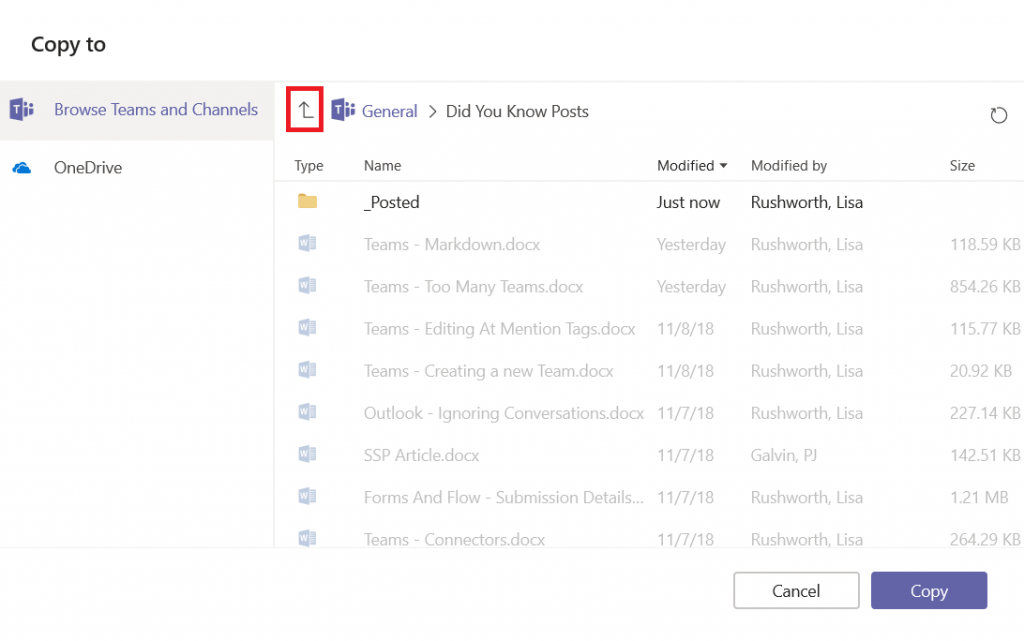
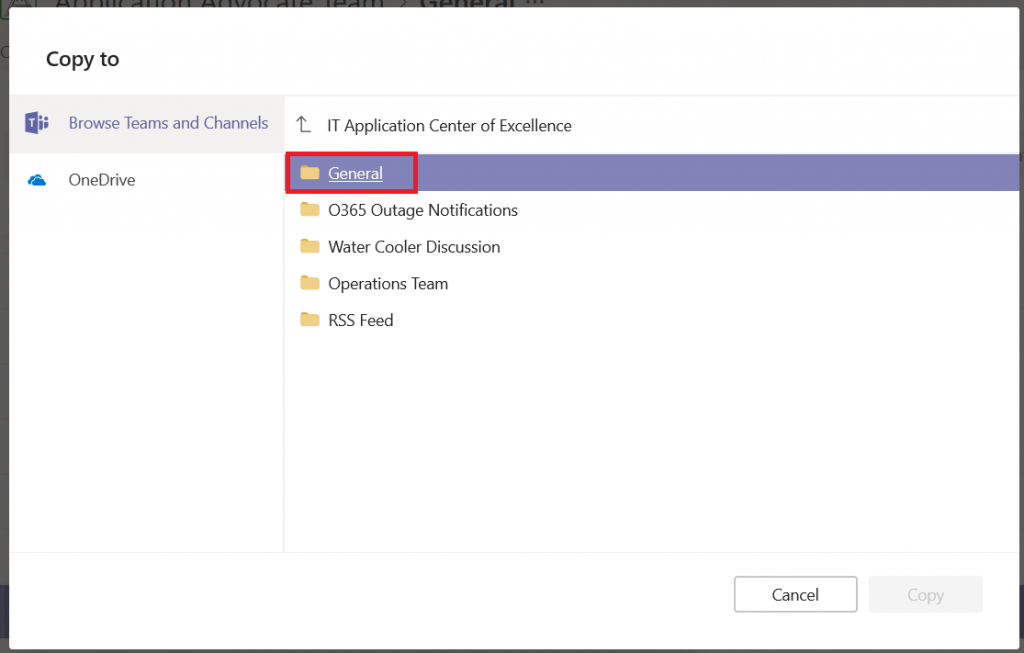
A “Copy/Move To” dialogue will open, allowing you to select where you want to document to appear. You can navigate the folder structure within the channel’s file space or click this arrow to move outside of the channel’s file space.
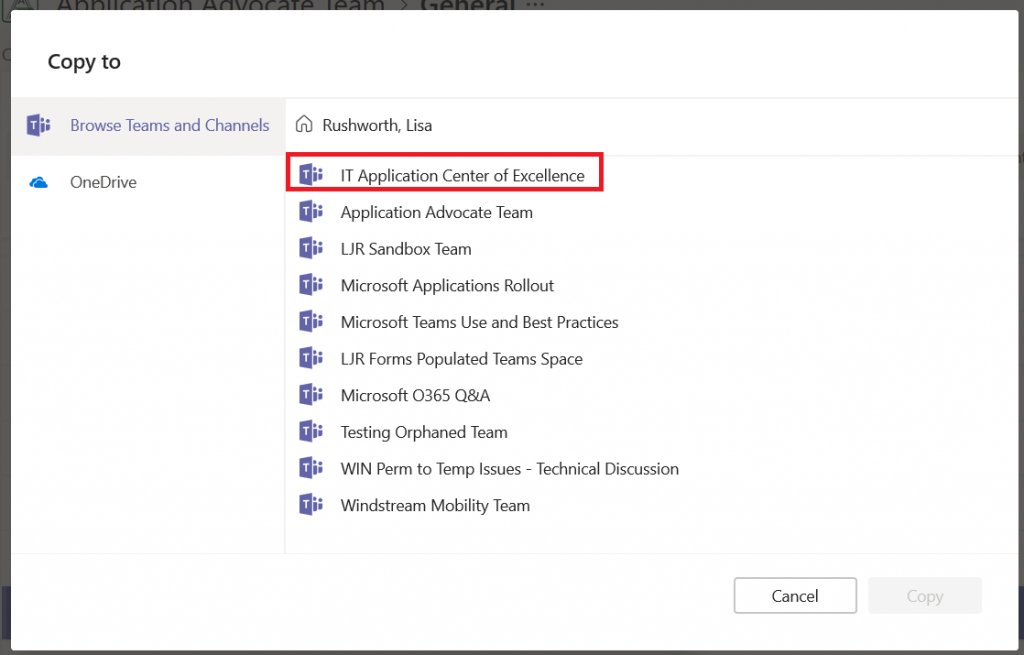
Clicking the arrow once will bring show the channels within the team. Clicking it a second time will display all your Teams. Click on the team into which you want to move the document.
Select the channel in the new team where the document will appear.
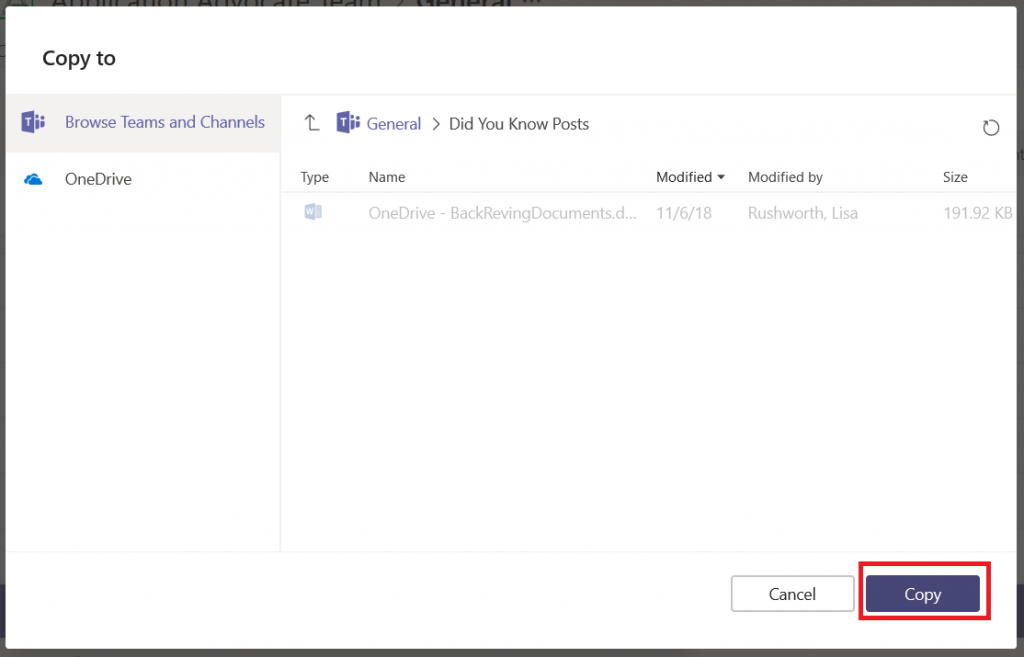
If there is a folder structure within that channel’s file
space, select the folder path you want. When you’re in the right place, click “Copy”
or “Move”.
Do you have a two-foot-high stack of papers on the desk behind you? Does your whiteboard contain information that isn’t quite ready to be broadcast? Or maybe you are working from the aeroport and your camera is facing the main terminal hallway – all of those people running past can be distracting. Video meetings humanize participants, but what’s behind you isn’t always something you want to share with others. When you join a scheduled Teams meeting, you can use a video filter to blur all of that stuff.
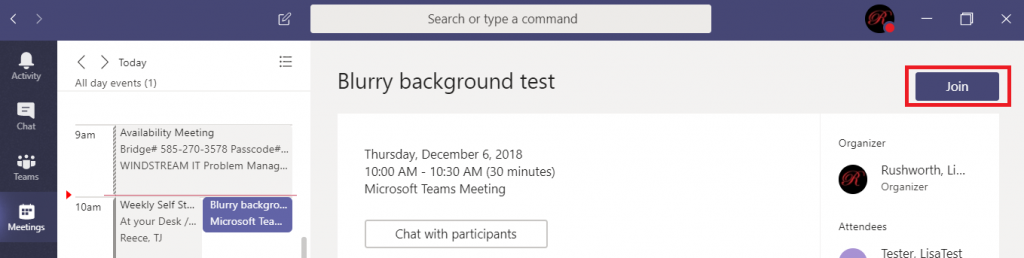
Click to join a meeting.
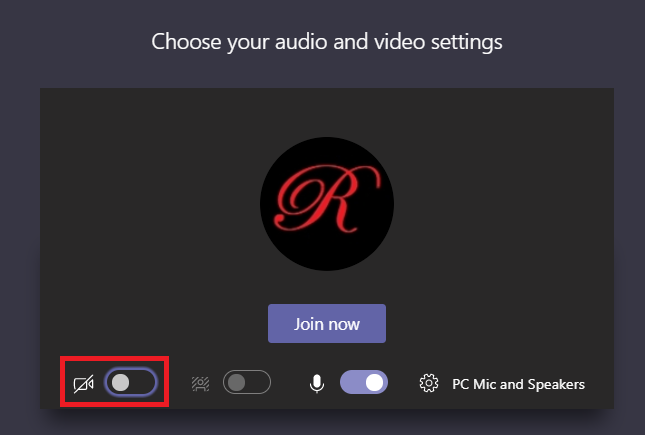
Click the slider next to the video camera to join the
meeting with video.
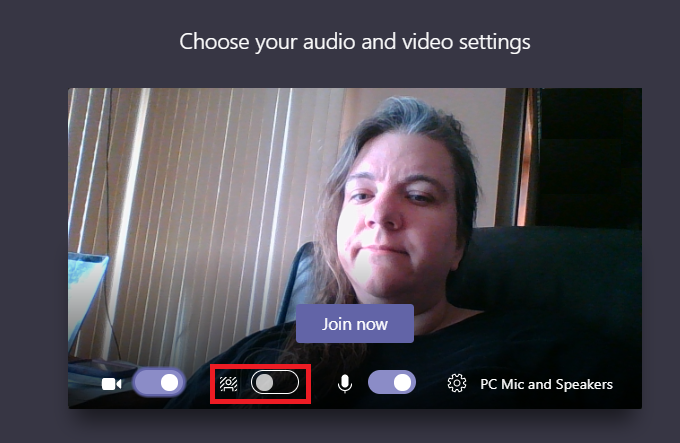
You will see a video preview. Click the middle slider to activate
the background blurring filter.
The video preview shows the changes. If the blur
sufficiently obfuscates whatever you didn’t want to show, click ‘Join now’ and
join the meeting. If your desk still looks a mess … move your stuff 😊
The blur effect is not applied to things the filter considers to be in the “foreground”
… so you might be able to achieve
more blurring by pushing an object farther from the camera.
Adding a Planner board to Teams spaces is a great way to manage tasks within a group or for a project, but it can be a little difficult as an individual to keep track of tasks scattered across various Teams. Microsoft Teams also provides a view of your tasks.
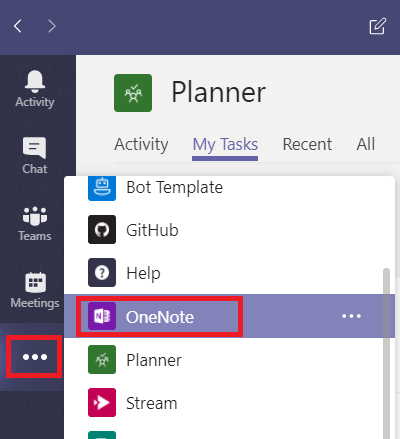
Click on “More apps” on the left-hand toolbar and select “Planner”
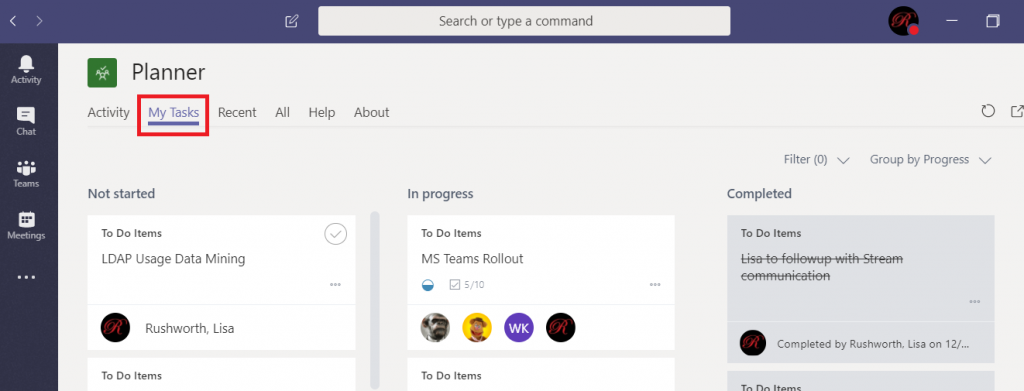
Click on “My Tasks”. You will see tasks in any Planner board that have been assigned to you. You can edit task content, change labels, and change the completion status from within this view.
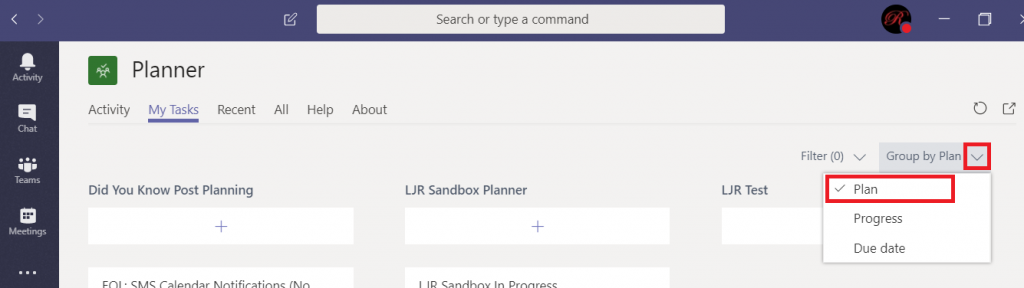
Although you can edit most of the Task details, you cannot drag it between buckets on the Planner board. To do that, you need to open the containing Planner board. Currently, there’s no way to navigate directly to the Planner board from within this view. You can click the inverted caret next to “Group by …” and select “Plan” to see the name of the Planner board that contains your task. You can then find the board on https://tasks.office.com