Selecting The Wrong Target Audience

A few weeks ago, we saw a Shark Tank episode with a chap who developed a personal breathalyzer / smartphone app. The Atlantic posted an article about personal breathalyzers too. In both cases, there appears to be a low adoption rate for these devices. But the marketing seems to be going about this the wrong way. Most people I’ve encountered either restrict themselves to a drink or two (and only when they’re going to be hanging out for a while after drinking and before driving), don’t care enough to spend money on a personal breathalyzer, or really don’t care and have the state government install something in their vehicle as a part of the court proceedings. None of these make for a ready market of customers. Why not market this product to businesses. Restaurants and bars carry liability insurance, and one of the liabilities is that alcohol is served to someone who subsequently damages themselves / others / property. The server and establishment can then be liable for providing too much alcohol to someone who, literally, asked for it.

It seems, then, that the insurer should be able to provide a lower rate for an establishment with a policy of only serving to persons under a certain blood alcohol level. A real win for the manufacturer would be getting insurance agents engaged to market these to commercial establishments — you use these things, your premiums are reduced. Akin to the automobile insurance apps that monitor your driving habits in exchange for reduced auto premiums.
Tofu Bánh Mì Chay Recipe

Ingredients:

One 14-ounce package extra-firm tofu
1.5 cups of shredded carrots
3 tablespoons rice vinegar
2 tablespoons palm sugar
1/4 cup olive oil
Sriracha sauce
1/3 cup soy sauce
1 medium yellow onion, thinly sliced
1.5 teaspoons black pepper
Fresh baguettes (
English cucumber, shredded

Method:

1. At least one day before you plan to make the sandwiches, cut the tofu into slices and pat dry. Freeze the tofu overnight, then thaw it in the refrigerator. Once it has thawed, squeeze it dry again.

2. Combine the carrot, 2 tablespoons of the vinegar, 1 tablespoon of the sugar, and a large pinch of salt in a medium bowl; cover and refrigerate while you prepare the other ingredients.

3. Whisk together the oil and a few drops of Sriracha (personal taste how much) in a small bowl.

4. Put 1 tablespoon of palm sugar and 1 tablespoon water in a large skillet over medium-low heat. Cook, shaking and swirling the pan occasionally (but not stirring), until the sugar is mostly melted and golden brown. Slowly drizzle in the soy sauce, then add the onion. Cook, stirring often, until the onion is tender, 8 to 10 minutes. Add the thawed tofu and the black pepper and cook, turning the tofu occasionally, until it has absorbed most of the sauce, about 15 minutes.

5. Split the baguette horizontally with a bread knife.Spread the Sirachah mixture on the bottom half of the baguette, and top with the tofu mixture, the carrot mixture, and the cucumber.

Baked French Toast Casserole with Maple Syrup

Ingredients

  • 1 loaf French bread (~16 ounces)
  • 8 large eggs
  • 1.5 cups heavy whipping cream
  • 1.5 cups milk
  • 2 tablespoons maple syrup
  • 1 teaspoon vanilla extract
  • 1/4 teaspoon ground cinnamon
  • 1/4 teaspoon ground nutmeg
  • Dash salt

Directions

Slice bread into 20 slices, 1-inch each. Arrange slices in a generously buttered 9 by 13-inch baking dish in 2 rows, overlapping the slices. In a large bowl, combine the eggs, half-and-half, milk, sugar, vanilla, cinnamon, nutmeg and salt and beat with a rotary beater or whisk until blended but not too bubbly. Pour mixture over the bread slices, making sure all are covered evenly with the milk-egg mixture. Spoon some of the mixture in between the slices. Cover with foil and refrigerate overnight.

The next day, preheat oven to 350 degrees F.

Bake for 40 minutes, until puffed and lightly golden. Serve with maple syrup, fresh fruit, and fresh whipped cream.


Star Quilt – Phase Zero

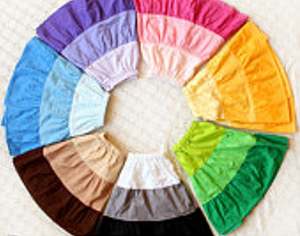
A few weeks ago, my mom sent me a picture of a pieced circle skirt made with rainbow colors:

RainbowCircleSkirt

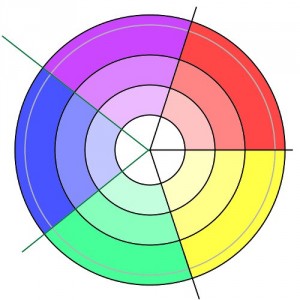
That is fantastic, but with Anya being so small … seven different colors would yield very tiny little slivers along the top. So I thought I’d make something like this, but using Newton’s five color spectrum divisions. Even sharing the fabric with my mom so she can make another skirt, I’m going to have a good bit of fabric left over.

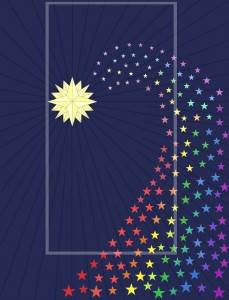
I think I’m going to make a quilt. It is possible to cut a five pointed star from a square of fabric with a bunch of folds and one cut (http://www.ushistory.org/BETSY/more/flagfoldcut.htm). The mariner’s compass will be challenging, and attaching all of the stars to the background fabric will certainly be time consuming even on a machine. But I think it’ll be worth the effort. Quilt design below – the rectangle is where a twin size mattress would be.

StarQuilt Compass Square Small

Below is a blow-up of the star. There are really three different triangles cut from two different colors. Piecing it together, though, is a challenge. I found a good paper piecing tutorial at https://www.youtube.com/watch?v=IlF1J05OV4U … the process actually makes sense now. At least in theory!

Star Quilt Compass Cutting Template

Rainbow Skirt – Fabric Acquisition Completed

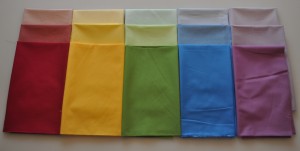
I have finally acquired all fifteen half-yard pieces of fabric to make Anya’s rainbow circle skirt.

DSC_5028

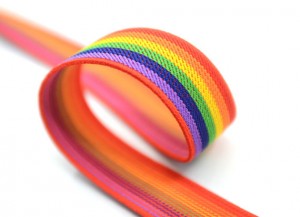
Once the pieces are cut, I can sew the arcs together. Then when all five arcs are completed, I’ll sew the straight lines to join the arcs together into a circle. Once I have one big circle, I can get the waistband attached. Mom bought a few yards of a rainbow elastic for these skirts:

RainbowElastic

Unfortunately the next step is the hardest — I have to find the box that contains my scissors and rotary cutter!

Halloween 2014 – Little Red Riding Hood

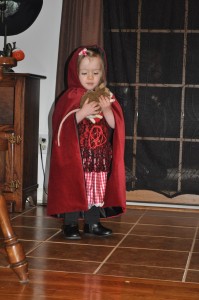
For Halloween this year, I made a cape for Anya’s Little Red Riding Hood costume. The process came from http://www.doityourselfdivas.com/2013/10/diy-little-red-riding-hood-costumecloak.html – but I made a fully lined cloak instead of just lining the hood. As a result, I needed two one yard pieces of fabric. There is a real lead-free pewter cloak clasp too, it is just hiding behind her mouse.

DSC_4803

It turned out beautifully, and we even managed to get her to wear it long enough to take a few photos 🙂

It was not difficult to sew … Mostly a couple of straight line seams. I had a lot of trouble with the top of the hood – too much bulk sewn by machine. Two failed attempts and I just stitched it up by hand. This way, there is not a ridge of fabric on top of her head.

Another gratuitous cute kid picture:

DSC_4822

Rainbow Skirt – Pattern

My mom sent me a picture of a fantastic pieced skirt:

RainbowCircleSkirt

It is similar to a pieced chevron skirt that we had seen on Project Run & Play (http://alittlegray.blogspot.com/2012/04/pr-week-1-piece-by-piece-chevron-skirt.html) — but the sections are parallel to the seam instead of creating the chevron pattern. I saved the original chevron too — it is another skirt I would like to make for Anya.

I’m trying to figure out if it is feasible to make something like this for Anya. How much fabric would be needed?

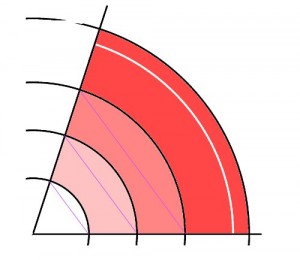
I want to use a 3.5″ radius for the waist (~22″ waist so there’s some gather at the waist and it can grow with her) and five color spectrum divisions. Which means each section is made at 72 degrees.

CircleSkirtMeasurements

Then I need to figure out how large of a rectangle of fabric is going to be needed to cut these arcs.

CircleSkirtCutSheet

So the largest arc requires fabric 8″ high (well, a little more for the seam allowance) and 16″ wide (again plus a little for the seam allowance). So an 40″x18″ half yard is plenty of fabric – even enough for two skirts so I can send fabric along to my mom. We can both have a 20″x18″ rectangle. Now I just need to find a fabric with fifteen shades that I like — a reasonably priced fabric.

You know, when I learnt to use AutoCAD, I never expected that it would be my tool of choice when creating patterns for my kid’s clothes … but the polar array made it so easy to section the circles!