Tag: Did you know

Did you know … Microsoft Teams provides both public and semi-private Team spaces?

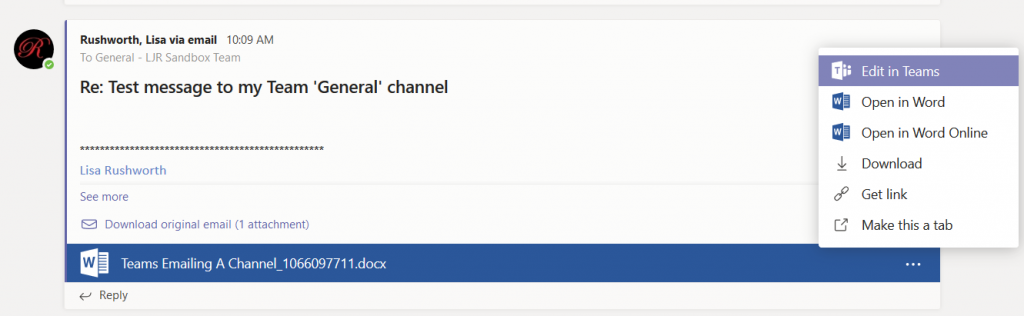
You’ve used Microsoft Teams to collaborate with individuals assigned to a project, and even created Team spaces for ad hoc groups to work on a problem. But what if you want to discuss the office’s community outreach program or plan the next employee engagement activity? Microsoft Teams is a perfect place to host that collaboration too.

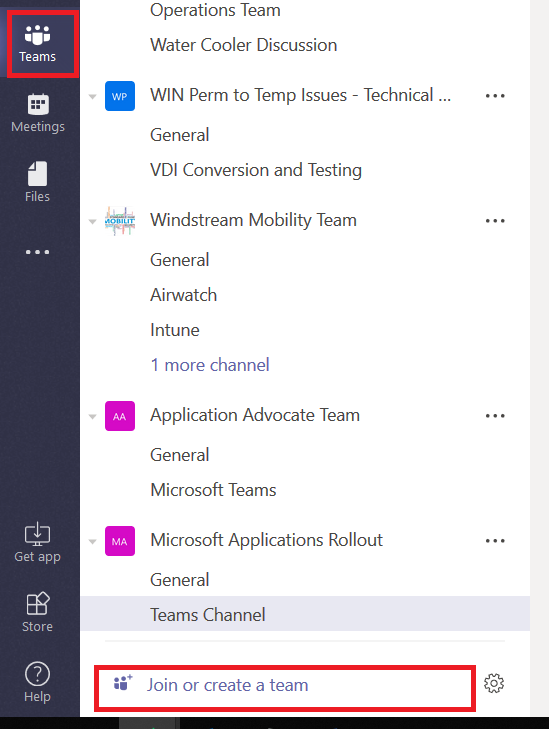
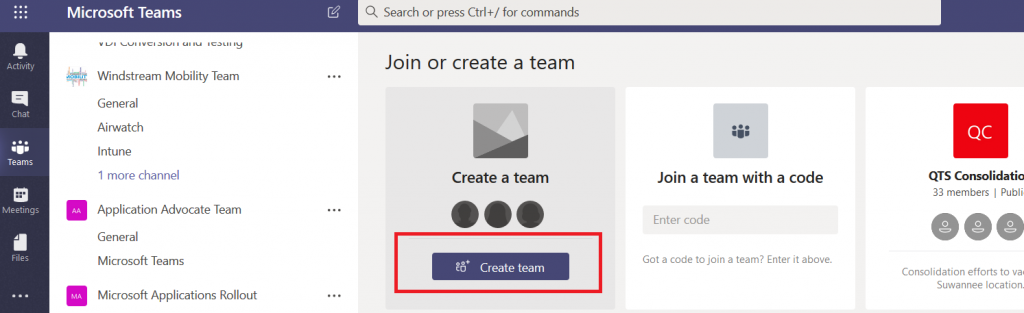
You can create a public Team space – a public Team allows anyone to join without requiring approval. This is great if you do not need to verify qualifications before allowing someone to join a Team. From the “Teams” tile, click on “Join or create a team” at the bottom of your Team list.

Click “Create team”

Provide a team name and description so potential members know it’s something that interests them. Now under “Privacy”, click the down arrow and select “Public – Anyone in your organization can join”.

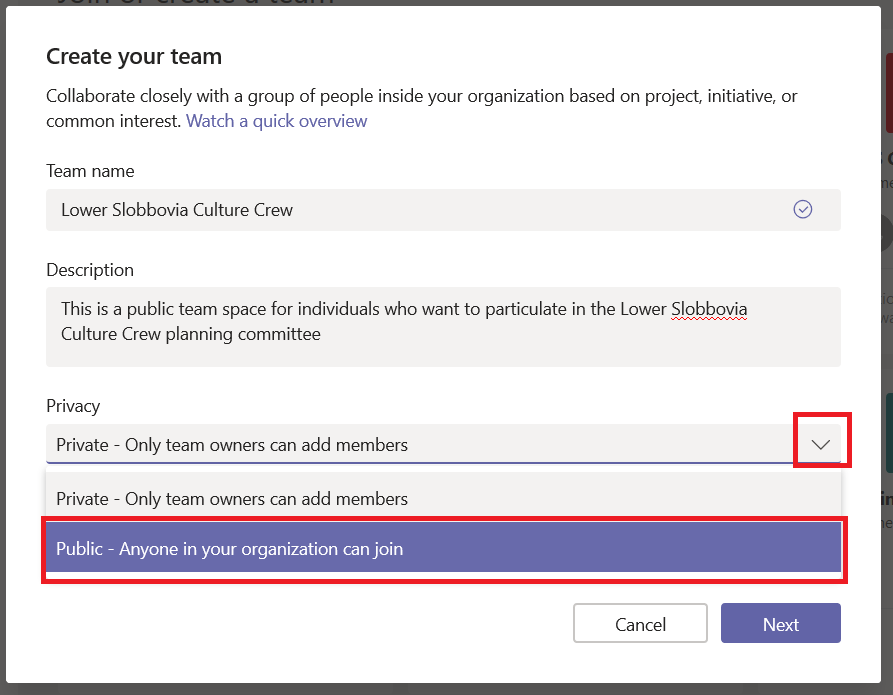
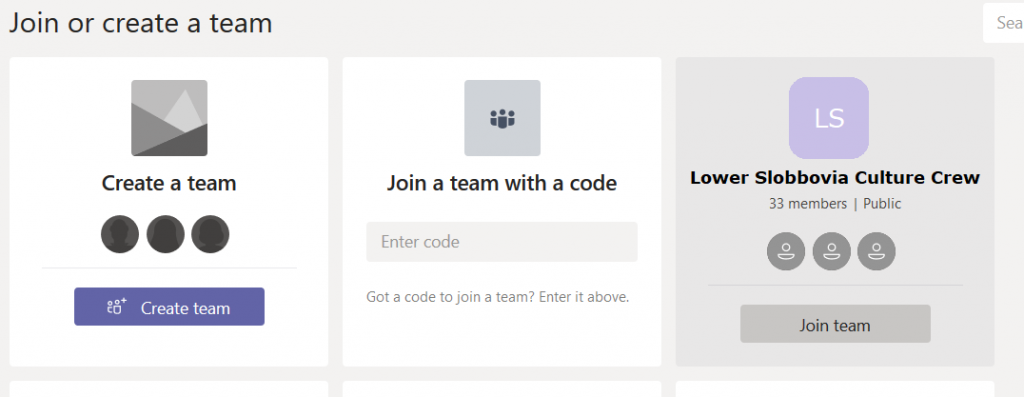
Click Next. You can start your team by adding some members, or you can click “Skip” and let members add themselves. Voila, you’ve got a public team. (Well, give it a few minutes … there’s some background magic that needs to complete). When people click “Join or create a team”, your team will show up in the Team gallery (they may need to search for it – and as of 25 October 2018 it’s a “begins with” search … so Slobbovia will not find my team, but “Lower” or “Lower Slobbovia” will). As soon as they click “Join team”, they will be added as a member of your team.


What if you don’t want your team to be that public? Say we only want people who actually work in East Slobbovia to join up. Then leave the Privacy setting at “Private – Only team owners can add members”. This means your new Team won’t appear on the “Create or join a team” Team list …

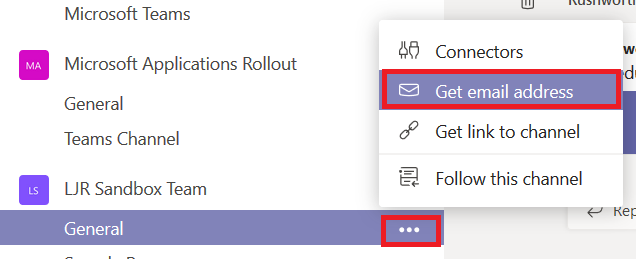
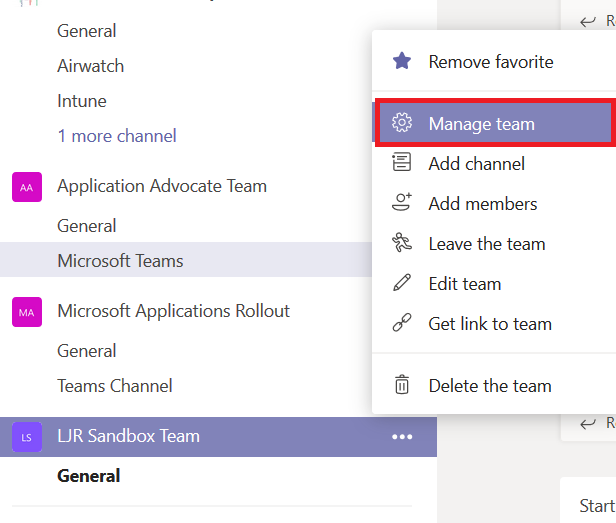
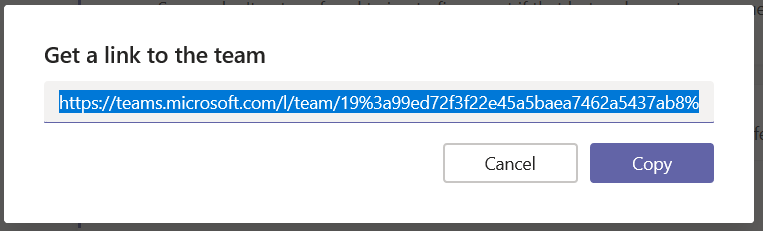
From the hamburger menu next to the team name, select “Get link to team”

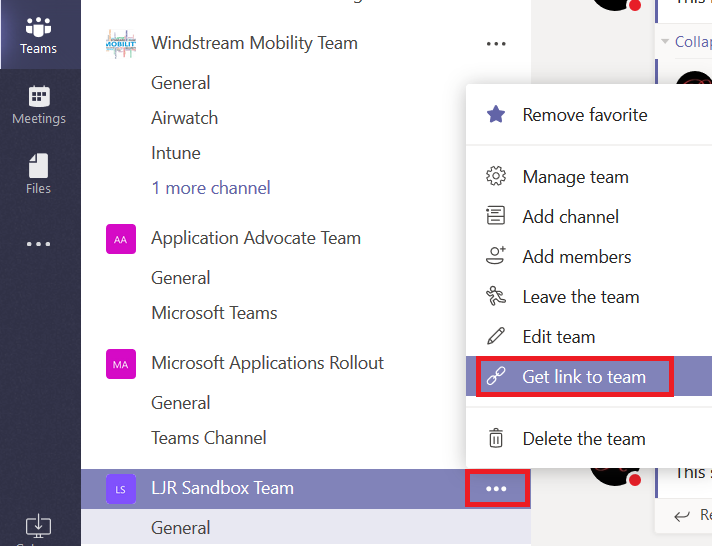
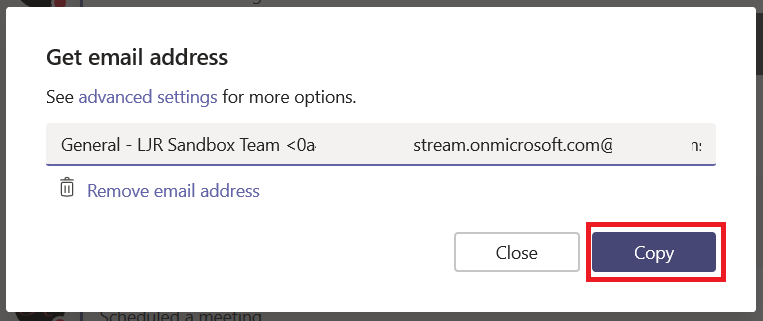
The URL will be displayed in a new pane – click “Copy” and you’ll have the URL in your clipboard.

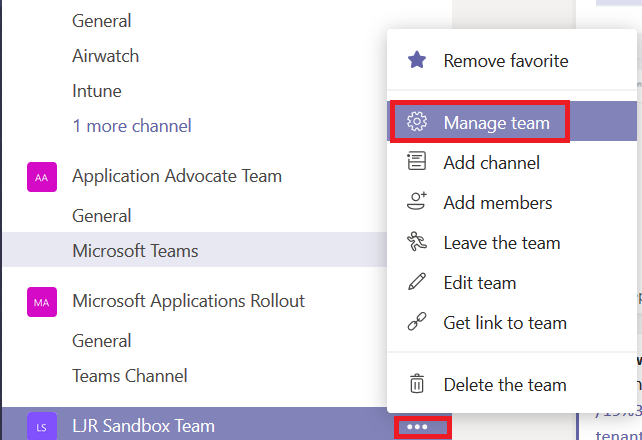
Publicize your URL — you could post it to Stream, have the link included in a local newsletter message, e-mail it to potential Team members … however you let people know about the URL. When someone follows the URL, a membership request will appear on the Team. From the hamburger menu next to the team name, select “Manage team”

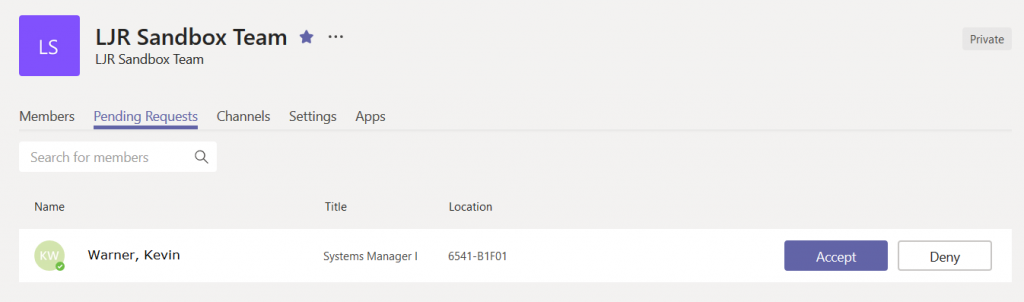
Click on the “Pending Requests” tab

You’ll see, well, the pending requests. Click accept to add the person to your team, or click deny if you prefer.

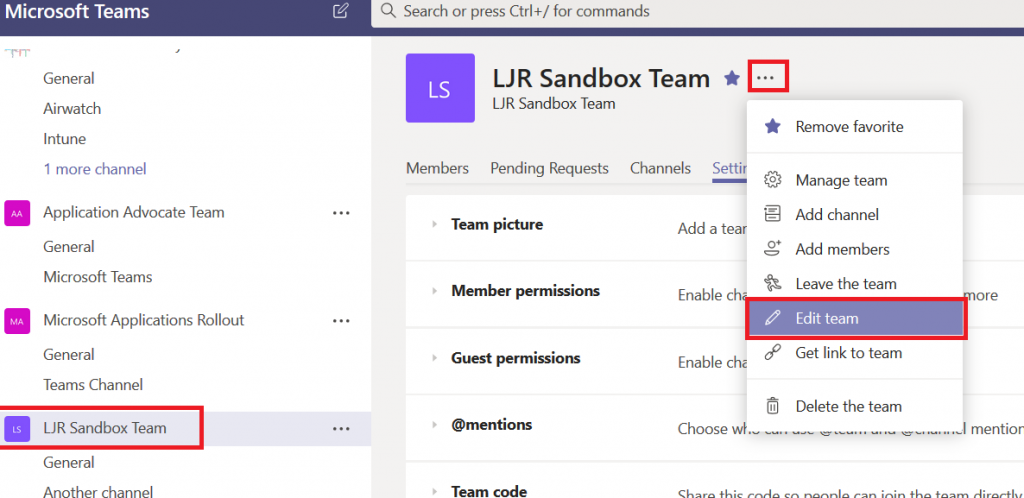
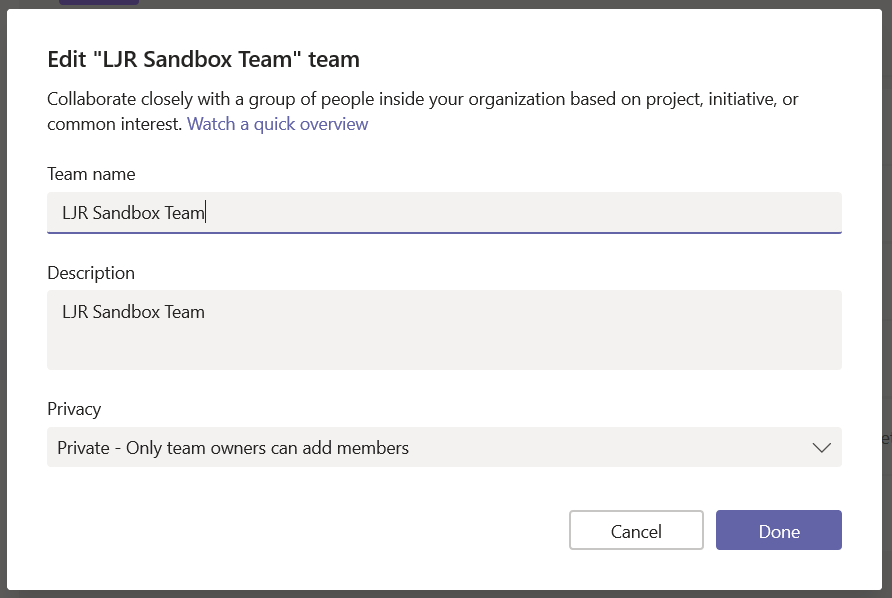
Changing the settings – If you change your mind, that’s OK too. In your Teams list, click on the Team itself (not the hamburger menu next to it, and not one of the channels under it. Then click on the hamburger menu next to the team name in the right-hand pane. Select “Edit team”.

You can change the privacy settings and click “Done”

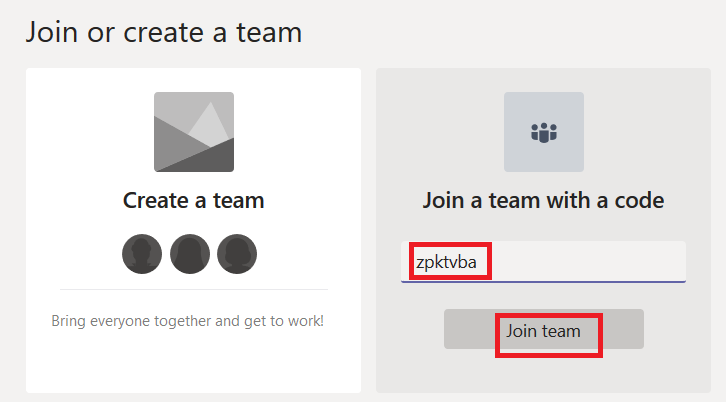
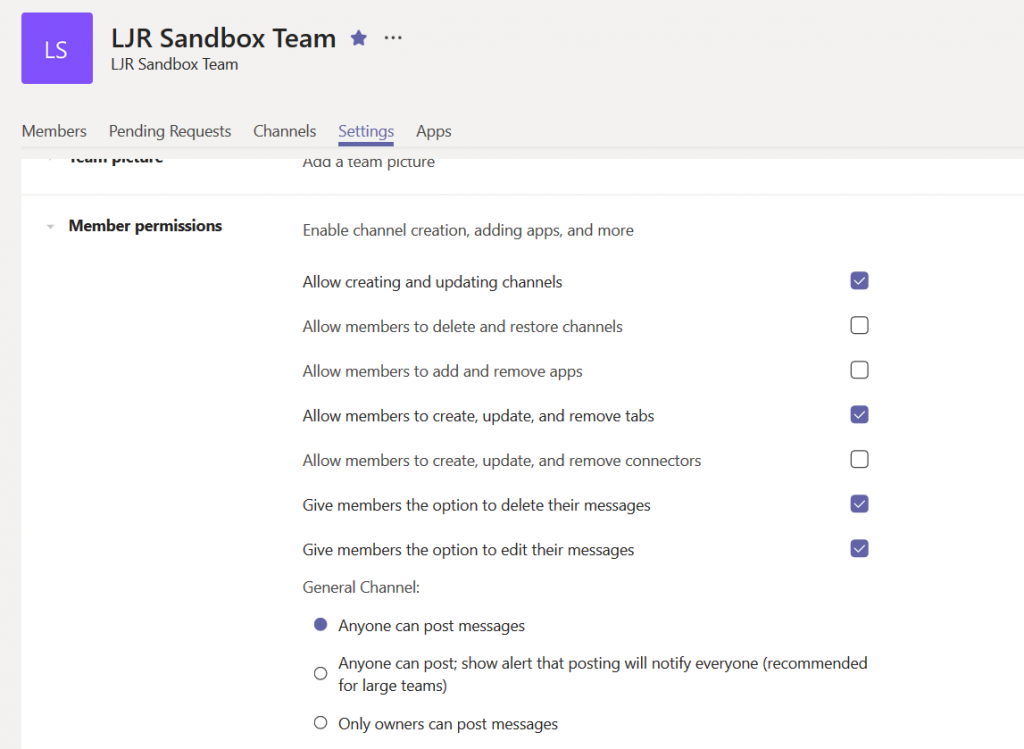
Bonus option … for those of you who have stuck with me this far! You can create a code for your team that allows invited individuals to join the team without waiting for your approval. Click the hamburger menu next to the team name and select “Manage Team”. On the “Settings” tab, expand the “Team code” section. Click “Generate”

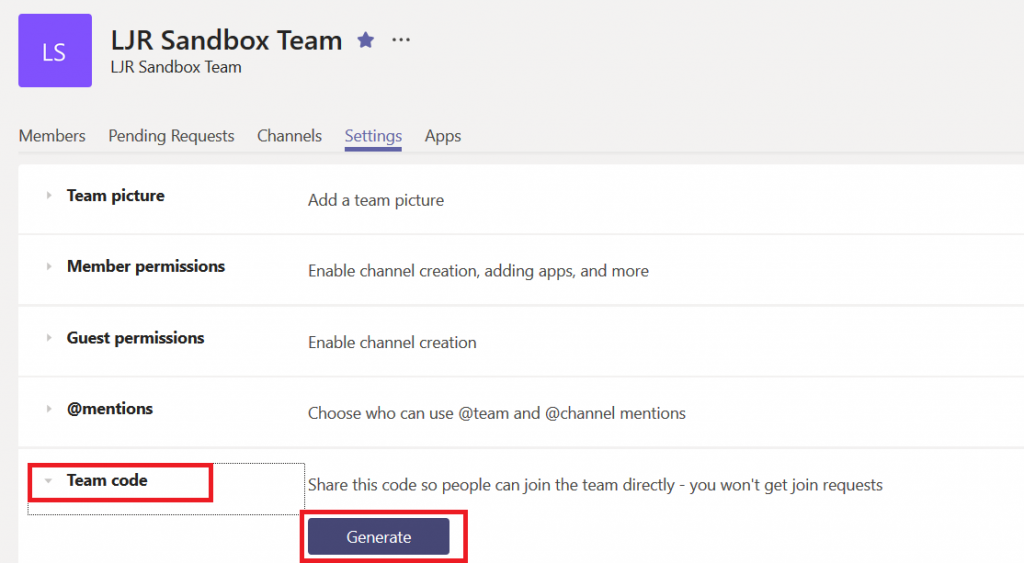
Now there’s a code associated with your team.

Individuals who have the code can go to the Teams gallery and enter the code in the tile that says “Join a team with a code”

Did you know … you can send e-mail to a Microsoft Teams channel?

Why would you send an e-mail to a Microsoft Teams channel? That’s a good question! At first, e-mailing a Team channel sounds like a solution in search of a problem. I think of it as moving an e-mail discussion into Teams. And there are a lot of times when an e-mail thread can be more efficiently handled in Teams.

Attachments that are being updated and resent – you know, the documents where there are five different working copies with various people’s changes and now someone must condense those changes into a single document. Including the document in the Team space allows team members to collaboratively edit it online. One copy! Having the discussion history available in Teams avoids switching between e-mail and Teams as the document is developed.

“I forwarded this to five people, and here’s what they think” – When a message gets forwarded and you’ve got three different sets of recipients discussing the same issue – or if someone keeps going back to an older message and dropping a few recipients who were added late in the discussion – moving the discussion into Teams ensures all of the people who should be involved in the discussion are included and working together – not a person from one of the threads trying to update everyone on a separate thread.

“Hey, Sean, can you forward me that hour-by-hour for this weekend?” – Ever have to ask a coworker to forward some message that you’ve misplaced (probably deleted, but cannot seem to find there either). The Teams threads are persistent (I cannot accidentally delete your message) and searchable.

The new guy – an involved discussion may take months. When a new person joins your group, someone has to remember to include them on the next reply-all (even adding an existing employee to a thread, they get lost when someone else replies to an older message). By moving involved discussions into Teams, you can quickly add a new person to the discussion.

There are also cases where Teams could replace a shared group mailbox – you cannot receive messages from outside of the company, but if your group mailbox only gets messages from other Windstream mailboxes … Teams may be a good replacement for that group mailbox. Team members can post into the thread taking ownership of the request – everyone will see who claimed the request, and if someone is unexpectedly out of office, you can see the issues on which they were working.

Ok, ok … you convinced me! Sending an e-mail into a Teams channel isn’t a completely pointless feature. So how do I do it?

First, you need to know the e-mail address associated with the channel. Click on the hamburger menu next to the channel name and select “Get email address”

There you have it – you can click “Copy” and all of that text will be in your clipboard.

Paste the address into the “to” field of an e-mail message, then send the message.

Wait for it … this may take a minute … and the message will appear as a thread in the channel.

If the message includes an attachment, that attachment will be displayed in the thread. You can even edit the document online – in Teams or in Word Online.

The default setting for Channels is to accept e-mail messages from the windstream.com domain – this may be exactly what you want. You can send the address to individuals outside of your team and allow them to create threads without having to grant them access to your Team space. But you may not want that – go back to that pane where you got the channel e-mail address. Click to “See advanced settings for more options” – you can set the channel to accept messages only from Team members:

Think it’s kind of crazy that every Team member can adjust these settings? Vote for my idea on the Teams UserVoice site 🙂

Did you know … you can quickly start a web meeting from within a Microsoft Teams channel discussion?

Sometimes text conversations become cumbersome – a topic really takes off, and there’s a lot of typing. A LOT of typing! Sometimes it’s easier to just take a few minutes and talk about the subject instead of typing back and forth. In Microsoft Teams, just click the “Meet now” icon at the bottom of the channel.

This will bring up a page that lets you start an unscheduled meeting (or schedule a meeting, if people aren’t available right now to discuss the subject). You can add a subject so attendees know which thread you want to discuss. Click “Meet now” and …

Voila – you’ve started a meeting with audio (and video, if participants choose).

Did you know … that you can recover a deleted Teams channel?

Oh no, I didn’t mean to delete THAT!!! Sure, it asked me five times if I was sure that I was sure … and maybe that’s part of the problem – I see so many “are you sure” messages that I click OK a little too easily. Well, they say to err is human. And I must be exceptionally human ? Sometimes recovering my data requires a sheepish call to the Help Desk. But did you know you can recover deleted Teams channels?

I used the hamburger menu next to a channel to delete it. Oops!

I even read the first few words of the “are you sure” dialogue before clicking the “Delete” button. Except … oops! I didn’t want to delete that channel!

You can recover the channel immediately, all by yourself. Even if you’re not a team owner. From the hamburger menu next to the team, select “Manage team”.

On the Team management page, select “Channels”. You can expand “Deleted” and see the channel you just removed. Click “Restore”

Yet another prompt … click “Restore” again.

Voila, the channel is back. Along with all its content. Whew!

Just because channel recovery is self-service doesn’t mean no one will know that you’ve mis-clicked. The channel deletion event which appears in the “General” channel … well, it’s still there. You can up-vote a request for enhancement on Microsoft’s site … but it’s not like no one will every know about your mistake.  

Did you know … You can control what members of a Microsoft Team group can do within the team?

When you create a new Team, members can create new channels, delete channels, add apps … they can do a lot of things. Did you know much of that is configurable? You can create a Team where individuals receive but cannot respond to posts. You can restrict your Team so only owners can remove channels.

From the hamburger menu next to your Team, select “Manage team”

On the Team management page, select the “Settings” tab.

Expand the “Member permissions” section. Now uncheck any permission you want to restrict to Team owners. There’s even a radio button near the bottom of this section so only Team owners can post to the “General” channel (if that’s the only channel, and members are prohibited from creating their own channels, you’ve got a broadcast-only Team space)

Scroll down and expand “Fun stuff” … you can prevent Gliphy content from being used in the Team (or change the filter used to determine which Gliphy content is appropriate), disable stickers, and disable memes.

Did you know … OneDrive for Business Retains Document History?

Have you ever really messed up a document? Like “man, I wish I could go back to what I had last week, because this is just W.R.O.N.G” messed up? Even if that’s just me, files can become unusable without perfectly human err’ing – ransomware encrypts the file, a colleague removes that paragraph you spent hours getting just right. Did you know that you can restore earlier versions of files stored to OneDrive for Business?

How? From the https://portal.office.com site, select OneDrive

Click the three dots that aren’t quite a hamburger menu – the ones between the file name and the modified date.

On the menu which appears, select “Version History”

A complete version history of the file will be displayed

You can select “Restore” to replace the “current” file with the selected version, or you can select “Open File” to view the file without replacing the “current” file. Voila!

Did you know … you can prevent meetings from being forwarded?

Have you ever had an attendee forward a meeting that was supposed to be confidential? Microsoft Exchange will notify you when a meeting attendee has forwarded your meeting; unless you are really close on that time machine project, what’s done is done. Unless … did you know that you can prevent the meeting from being forwarded? 

* The forwarding restriction is enforced on the mail client, so attendees outside the company may still be able to forward the meeting request. Additionally, there are ways to circumvent this forwarding restriction – e.g. meeting content can still be copied and pasted into a new appointment item. While restricting forwarding is a way to convey the confidentiality of the meeting and deter casual forwarding, this doesn’t guarantee eyes-only security.

How do I do it?

Right now, you can only restrict meeting forwarding when using the Outlook client on Windows or the Web – Mac, iOS, and Android client users will need to use the Web client.  

Outlook for Windows

This feature has not been deployed to all of the Office 365 channels as of this writing. The screen-shots below were created using an Office 365 installation with the monthly update channel. The semi-annual channel is slated to be updated in March 2019, so use Outlook Web until then!

Create a new meeting:

On the ribbon bar, select “Meeting”. You can restrict forwarding under the “Response Options” button.

Outlook Web

Create a new meeting:

Once you have added an attendee, a gear icon will be displayed above the attendee list.

Click the gear icon – by default, meetings can be forwarded. You can click “Allow forwarding” to prevent the meeting from being forwarded to others.

What does the recipient see?

Exchange Online recipients using Outlook Web will see a banner indicating that forwarding is disabled. The forward option will be grayed out.

Exchange online recipients using Outlook with the Monthly update channel will see the banner as well. Those will the semi-annual update channel will not see any indication that they cannot forward the invitation … in fact, their client will seemingly let them forward the meeting. But Exchange Online will refuse the message and they will get a non-delivery report indicating that the meeting could not be forwarded.

Recipients outside of Exchange online not notice any change — Gmail, for example, happily allows me to forward the meeting request.

Did you know? … Sub-Addressing

There are all sorts of reasons you need to provide your e-mail address to random Internet strangers – purchasing products, registering for a conference, signing up for a newsletter. Unfortunately, disseminating your address across the internet can lead to an inundation of unwanted email.

In addition to spam filters to filter out unwanted mail, Exchange Online supports “sub-addressing”. A sub-address is a slightly modified version your e-mail address that can customize your address for every situation – just before the ‘@’ symbol in your e-mail address, put a plus and then some unique text. It will look like Your.N.Ame+SomeIdentifier@company.ccTLD instead of Your.N.Ame@company.ccTLD.

When signing up for a Microsoft newsletter, I can tell them my e-mail address is Lisa.Rushworth+MicrosoftSecuritySlate@company.ccTLD and messages sent to that address will be delivered to my mailbox. When I sign up for the NANPA code administration newsletter, I can tell them my e-mail address is Lisa.Rushworth+NANPACodeAdmin@company.ccTLD.

Should you start receiving unwanted solicitations to the sub-address, you can then create a rule to delete messages sent to that address. You can even exclude messages from the intended sender from the deletion rule – allowing, for example, messages from the NANPA Code Admin newsletter to reach your mailbox whilst blocking anyone else from using the address.

You can also alert the person to whom you provided the address that their contact list may have been compromised.

Did you know … you can use mini-charts to visualize Excel data?

Using charts and images, data visualization, clearly and efficiently communicates data. But when you’re trying to visualize statistics for several items, your chart can be anything but clear and hardly efficient to read. In this example, I’ve created a line chart depicting the monthly score for eight different people. While you can pick out obvious high or low performance, there’s not a whole lot of information being communicated here.

Did you know Excel can create mini-charts, known as “sparklines” to visualize individual statistics and compare statistics across items? Select the data that you want to compare. From the Insert ribbon bar, look for the “Sparklines” section. I am going to use a “line” style sparkline.

The data range will be selected. Enter the range where you want the mini-charts to display – this can be the row under your data or the column next to your data, or it can be some completely different location.

By default, the y-axis range for each mini-chart depends on the values of the data contained in the chart. This makes comparing the charts a little difficult – the scale is different. In the example below, scores in the 30’s don’t look different than scores in the 80’s.

Click on one of the mini-charts, and a “Design” tab will appear on the ribbon bar. Select it. Under “Axis”, change the minimum and maximum values to “Same for All Sparklines”.

Now you can see how individual performance varied as well as compare individuals.

Blank values will show up as broken lines in the mini-charts. If you do not want to display a gap, return to the “Design” ribbon bar and select “Edit data”. Select “Hidden & Empty Cells”

Select what you want instead of gaps – you can treat null values as zero or have a line drawn between the values on either side of the missing value.