A friend of Scott’s got a Eufy doorbell on sale from Amazon, so we started checking out camera/doorbell devices again. Eufy didn’t seem to allow local access to the video stream. We found three companies that did offer direct access to the RTSP stream: Doorbird, Amcrest, and Reolink. The Doorbird ones were like a thousand dollars … and, for way under a grand, I could DIY something. Amcrest looked like a viable solution, but Amazon had the Reolink ones for sixty bucks less — including a $10 “prime member” discount price. We bought two and set them up inside the house.
The physical hardware is an oval shaped plastic box with a camera & IR ring near the top and a glowing button (you can turn the LED light off in the config) for visitors to press. I wish the logo wasn’t printed onto the plastic, though.
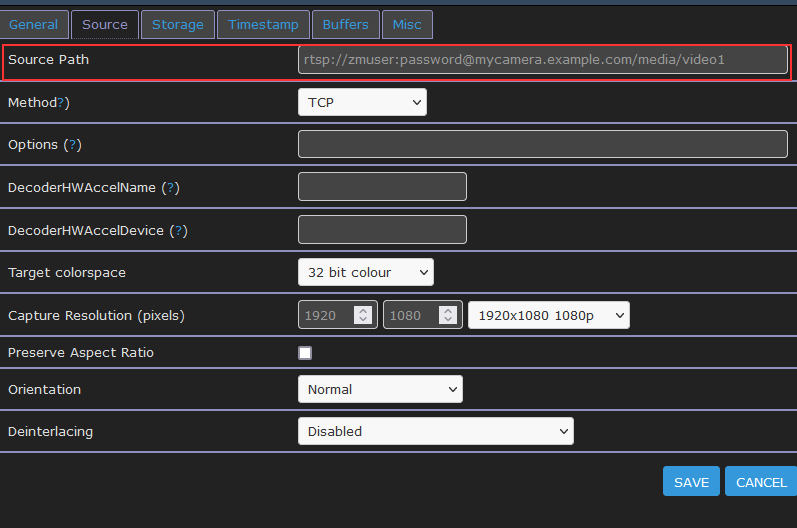
Once you enable RTSP under the advanced network settings, you can access the primary (high resolution) video feed at rtsp://username:password@doorbell.example:554/h264Preview_01_main and the secondary (640×480) video feed at rtsp://username:password@doorbell.example:554/h265Preview_01_sub
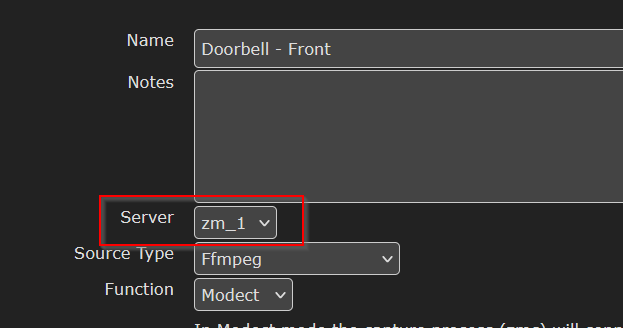
I like that you can set up a “read only” user — our Zoneminder installation doesn’t need to be able to configure the devices. It will also grab a photo to make a time lapse series — while seeing the driveway over time might not be too interesting, having a time lapse of our front yard will be really cool. This requires adding an SD card to the doorbell, but still very cool.
5GHz worked fine in the house, but we had a lot of drop-outs once it was mounted at the door.
You can upload your own key pair for the web server, so visiting the https page doesn’t throw an invalid certificate error. This is a personal thing that really bothers me with a lot of IoT implementations. It’s such a simple thing — there’s already a locally generated key pair, why not let me upload my own with a hostname or SAN that matches what I will be accessing. Even if you don’t have your own CA — you can get a free cert from Let’s Encrypt.
The fisheye camera catches a large field — we can see the entire front entrance — although I now understand why there are dual-camera doorbells with a “package camera”. If the camera is angled so you can see the face of someone pressing the button, you cannot see their feet. Or the ground where a package would be placed.
I don’t like that there doesn’t appear to be any way to ring the house door chime. There also doesn’t seem to be a way to use different tones for different doorbells. While we’ll get motion alerts from Zoneminder and be able to view both doorbell video feeds to see where the ring occurred … it would be nice to assign unique chimes to each doorbell.


Summary: Playlist items are not returned from searches initiated on my uPNP client. The playlist is visible when browsing the Gerbera web UI under Playlists->All Playlists->Playlist Name and Playlists->Directories->Playlists->Playlist Name
Action: In a uPNP client, search using the criteria
upnp:class = "object.container.playlistContainer" and dc:title = "Playlist Name",Expected Results: Playlist matching search criteria is returned
Actual Results: No results are returned
Investigation:
From the Gerbera debug log, the search being executed is:
SELECT DISTINCT "c"."id", "c"."ref_id","c"."parent_id", "c"."object_type", "c"."upnp_class", "c"."dc_title",
"c"."mime_type" , "c"."flags", "c"."part_number", "c"."track_number",
"c"."location", "c"."last_modified", "c"."last_updated"
FROM "mt_cds_object" "c"
INNER JOIN "mt_metadata" "m" ON "c"."id" = "m"."item_id"
INNER JOIN "grb_cds_resource" "re" ON "c"."id" = "re"."item_id"
WHERE (LOWER("c"."upnp_class")=LOWER('object.container.playlistContainer'))
AND (LOWER("c"."dc_title")=LOWER('Playlist Name'))
ORDER BY "c"."dc_title" ASC;
The playlists do not have a row in the grb_cds_resource table, so the “INNER JOIN” means the query returns no records.
I am able to work around this issue by manually inserting playlist items into the grb_cds_resource table
INSERT INTO grb_cds_resource (item_id, res_id, handlerType) VALUES (1235555,0,0);If I have some time, I want to test changing join2 to be a left outer join and see if that breaks anything.