Category: Sewing

Setting Bobbin Case Tension

I’d always been told to just leave the bobbin case tension alone — which seemed odd … why would they have a user-adjustable screw on something you should leave alone? If it is something that needs to be set by a professional … hide it, require an odd tool, whatever. A little flat-head screw right there … but, yeah, randomly turning it certainly didn’t help my stitches.

My husband’s mother used a Kenmore 158.17520 in the 70’s and 80’s, and it was sitting around the house when we needed a sewing machine. His dad let us have it – now I didn’t really know much about sewing machines. I had a compulsory course in practical making-it-in-real-life skills in primary school, and I remember using a sewing machine. But it was all set up and ready to go (maybe we had to thread it … but there were no settings being adjusted). Hadn’t used a sewing machine since. I wasn’t sure how much of my thread snarl was the machine and how much was my ineptitude.

Replacing the bobbin case improved things greatly, but I continued to get inconsistent results from this machine for years. The bobbin thread would be loose, and often snarled. Then I took a class in operating a long-arm quilting machine. There are some quilt projects I can do on the Kenmore (although with the loose bobbin thread & having to rip and re-sew … even that was iffy), but I have designed a computer controlled quilt motif for Anya’s butterfly quilt that creates a sun and rays in the upper right-hand corner of the quilt. And when she’s older, the star quilt is going to have a sunburst that would probably be easily done free-hand, but I know the lines would be straight and spaced properly if I build the design with an algorithm. To use the computer control, I had to know how to use the long-arm. I think I’m going to have an audience when I use my quilting design on their software … seems that there aren’t a lot of computer techies loading up complicated custom designs. But I need to make the quilt first!

Some of the early lessons on the long-arm were basic set-up. How to mount the quilt, how to thread the machine (which, I realized, was a pretty standard sewing machine from a different perspective and attached to a giant computer controlled rail system), and how to set up the bobbin. And the instructor said don’t mess with the bobbin tension. I asked her why — I’d read it online but never heard it from someone I could ask “why?”. We did it already, she said. I know this case is set up for the thread I’m using on this machine. They even drop some nail polish over some of the adjustments to avoid people screwing with the settings. Which begged the question … how did you set the tension?

She showed me that she could hold the bobbin in one hand with the thread between her thumb and index finger, put her other hand 4-5″ under the hand holding the bobbin, and drop the bobbin. It stopped itself just short of her hand. If it plummets and would continue dropping (especially if it will drop all the way to the floor), then your tension is too loose and you need to adjust the screw clock-wise. If it doesn’t budge, your tension is too tight and you need to adjust the screw anti-clockwise.

Now there’s a middle-ground. Generally 4-5″ of drop is good. It could drop 3″ or 8″ and maybe be OK. Depends on the thread being used & the upper tension setting. That’s where you get into trial and error. Sew something — if the bobbin thread is loose, then the tension needs to be tightened. If the bobbin thread pulls up to the other side of the fabric, the tension is too tight. Once you know the right amount of drop for a specific thread, then you have a setting for that thread going forward.

Then she mentioned that this machine needed the bobbin put into the case so the bobbin would spin clockwise as you pull. Wait, the bobbin insertion is directional?? Problem is that I cannot figure out if that’s clockwise as you look at it while it is in the machine or as you look at it out of the machine and are putting in the bobbin. Hopefully the manual indicates which is proper … but I think trial and error will figure it out too. I’ve noticed snarls, taken out the bobbin case to look at it, put it back together a random clockwise/anti-clockwise direction, and had the problem sort itself. Maybe I’m flipping the bobbin in its case?

But even without sorting the spin direction, I am getting consistent stitches with the bobbin tension sorted. WooHoo!!

Sleeping Bag Mathematics

I purchased two yards of the 44″ wide printed star fabric and one yard of the 60″ wide fuzzy green fabric. The fabric arrived, the zipper bits arrived, and then I thought “self, what dimension would make a good toddler sleeping bag?”. Wrong order of operations there.

Now the question is “what dimension sleeping bag can I make with the fabric I already purchased?”. Folding in half along the shorter side yields a 22″ wide sleeping bag. Anya’s waist measurement is 20″, and 22″ seems awfully snug even now. So I’ll use the measurement along the selvage edge as the sleeping bag length. 37″ is a little shorter than she is now, but my sleeping bags (not the camping-in-the-Artic mummy ones) have usually come up to my shoulders … so 37″ will work for years. Then the print’s is folded along its length and the fuzzy folded along its width making a 30″ wide bag. It’ll be 37″x60″ unzipped – which will make a decent “snuggling on the sofa” blanket after she outgrows it as a sleeping bag. Or so I’m telling myself 🙂

Owl Backpack – Done!

Anya’s backpack is done! The embroidered eyes turned out really well, and his wings flap a bit as she walks.

IMG_20160906_223634

I think the piping turned out really well, and the side pockets work well (had a little bag of pretzels in there). I used little push button cord locks — Anya thinks they look like ladybugs. It’d be really cute if they made them in red with black dots to *really* look like ladybugs).

IMG_20160904_014152

I moved the strap mount points – the bag didn’t sit properly when the straps were attached at the seam between the semi-circle and the rectangle. Moving the straps up to the top seam had the bag hanging nicely off her back.

IMG_20160904_014200


Owl Backpack: Halfway Point

The interior is almost complete — I still need to stitch the zipper strips onto the bag, but it actually looks like a bag now:

IMG_20160831_105609

The side pockets are assembled and ready to be attached. I really like the grommets.

IMG_20160831_105614

The back of the backpack has been assembled too — the straps are mounted & the D-rings are in place.

IMG_20160831_105714

IMG_20160831_105722

We went to Joann this evening and picked up a zipper foot, so I can get the piping stitched up tonight.

Owl Backpack: Beginning Assembly

Anya’s owl backpack is starting to come together. I’ve got all of the pieces cut, and the insulation bits are glued to the laminated bits. The glue needs to set for 24 hours.

The owl has been assembled – I want to embroider the face and maybe some zig-zag lines on his body and wings. The face and wings have a thin batting so I’ll get a quilting effect with embroidery. The body (pocket) does not have any batting because it is already a little thick with the laminate layers.

I’ve got the bias strips cut for the piping, and we picked up some 325 paracord to use as the “string” in the piping. Tomorrow, we’ll get the grommets installed on the mesh pocket casing. We should start assembling the bag once that is done!


IMG_20160827_101801


Owl Backpack – Cutting Pieces

I just started cutting the pieces for Anya’s Owl Backpack (a pattern we found on Moda BakeShop). I am making one tweak to the pattern — the front pocket (a.k.a. the owl’s body) is going to be lined in the laminated fabric. Leaky pens, melted crayons … hopefully this will mitigate staining.

We finished cutting the front and back pieces tonight. Tomorrow, we’ll cut out the top/side/bottom rectangles. I didn’t realize the bird fabric is 54″ wide … this may be the lining for several backpacks as Anya grows 🙂

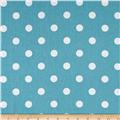
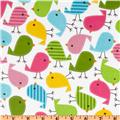
I think the polka-dot fabric looks rather nice with the laminate. There’s a bird the same shade of blue, and there’s a bird the shade of pink I’ll be using for the piping and zipper.

IMG_20160825_232312

The pattern itself I found a little hard to follow. I love that they save paper/ink by not printing a bunch of rectangles, but there are instructions to cut a specific size rectangle from one of the fabrics or another scattered throughout the document. I read through the entire thing three times before I found the rest of the backpack back exterior. To avoid missing any pieces, I searched through the document for the string ‘cut’ and listed out each piece. This list is categorized by fabric. Odd, since they have a “recipe” at the beginning of the article, that they don’t do something similar.

Laminate:
(2)    15 1/2 x 2 1/2    zipper opening interior
(2)    8 3/4 x 4 1/2    side of backpack interior
(1)    10 1/2 x 4 1/4    bottom of backpack interior
(2)    <backpack back pattern>    front and back
(2)    <owl belly pocket>    owl pocket lining

Insul-brite
(2)    8 x 4        side of backpack insulation
(1)    10 x 4        bottom of backpack insulation
(2)    <backpack lining pattern>    front and back

Twill:
(2)    15 1/2 x 2 1/2    zipper opening exterior
(2)    8 1/2 x 4 1/2    side of backpack exterior
(1)    10 1/2 x 4 1/2    bottom of backpack exterior
(1)    10 1/2 x 9    backpack back
(1)    <backpack back half-circle>    backpack back
(1)    <front back pattern>    front
(2)    22 x 4    straps
(2)    2 1/2 x 4    strap attachment mount

Mesh:
(2)    5 1/2 x 7 1/2    mesh pocket

Piping Fabric:
(2)    7 1/2 x 3 1/2    mesh pocket casing

Random fabrics for owl:
(1)    <owl pocket lining>    owl pocket
(2)    <owl face pieces>    owl face
(4)    <owl wing pieces>    owl wings

Projects: Backpack Acquisitions Complete, Sleeping Bag Project

We got presents! While we were mowing the grass yesterday, I noticed a couple of boxes at our garage door. All of the bits and pieces for Anya’s owl backpack got here. Still haven’t unpacked the boxes, but I should be able to get started on her backpack this weekend!

Anya has been asking for a sleeping bag — primarily for camping in the woods, but I’m sure she’d use it as an indoor blanket too. I found a simple looking tutorial at http://crazylittleprojects.com/2013/09/kids-sleeping-bag-pattern-tutorial.html and think that’ll be my Christmas present project.

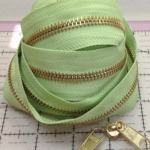
I’m thinking about using a black fabric with metallic gold stars for the bag exterior and a minky green for the interior. I found a zipper with gold teeth and green tape at The Zipper Lady — by the yard zippers! You can add your own bottom and top stops. Maybe case some elastic in the print fabric and use it to hold the bag when it is rolled.

BagExterior ZipperBagInterior

Back to School Project: Backpack

I’ve got a quick-ish back-to-school (is it really back for someone who has never gone to school?). Anya has been wanting a backpack for school – more because Daniel Tiger has one than any actual need for it. We googled toddler backpack and found a really cute owl one from Moda’s BakeShop.

Selecting the project took under an hour – Anya likes owls. Finding the pattern, though … that was an embarrassing number of hours over the next two days. I finally ended up on the designer’s Flicker group and found a comment with someone else who totally loved the design and wanted to make it … but couldn’t find the pattern referenced in the tutorial. Answer: if you scroll down to the bottom & open the ‘printer friendly’ version … it’s not just a printer-friendly version of the tutorial. It’s got the pattern appended to the end.

Finding a piping got rather challenging – the site with the best price on the fabrics I wanted had almost no piping. I didn’t want black or white, and I didn’t want to order it from another site (5$ shipping on 3$ worth of piping, not a deal). Checked out the options at JoAnn’s, but didn’t find any I liked there either. Then I found a great tutorial on making your own piping, and I’m rather excited to try it. I found a good write-up on using piping too – hopefully the piping will be a professional looking touch.

I’ve got a spotted twill fabric for the bag and a pink quilting cotton for the piping.

Small_0430500 Small_EF-293

And some cute birds for the laminated interior.

Small_UN-921

I’m not going to make the interior pocket, but I am thinking about lining the front pocket with the laminated fabric. If any crayons/pens/etc get tossed in there, they won’t seep through and ruin the bag. Maybe I’m being extra-paranoid, but I just ruined a purse by leaving it in the car … and the handful of crayons that I keep in there melted into the fabric. If I make a three layer owl body – twill & laminate on the front, then another laminate attached to the bag – I’ve got some safety. I am also thinking about adding a little batting to the front twill/laminate sandwich & stitching some zigzag’s to suggest feathers.

I am also thinking about embroidering the eyes and beak – saves trying to applique the little pieces onto the face, and I will be able to get a cuter look than if I try to do it in fabric.

Anya Quilt – Part 1

I have been working on an Ohio Star quilt for Anya’s bed (figure anyone who lives in Ohio should have an Ohio Star quilt or two in their house!). Constructing a quilt is a great visual example of exponential progression. Piecing the four tiny triangles into fairly small squares … you’ve still got a whole lot of tiny pieces. Strips of three squares put together were still a lot of small pieces. But, the quilt builds up rather quickly from there – strips turn into 3×3 blocks, then these blocks form three really large strips with a border fabric between them. Then border strips go in between the star strips to form the entire quilt top.

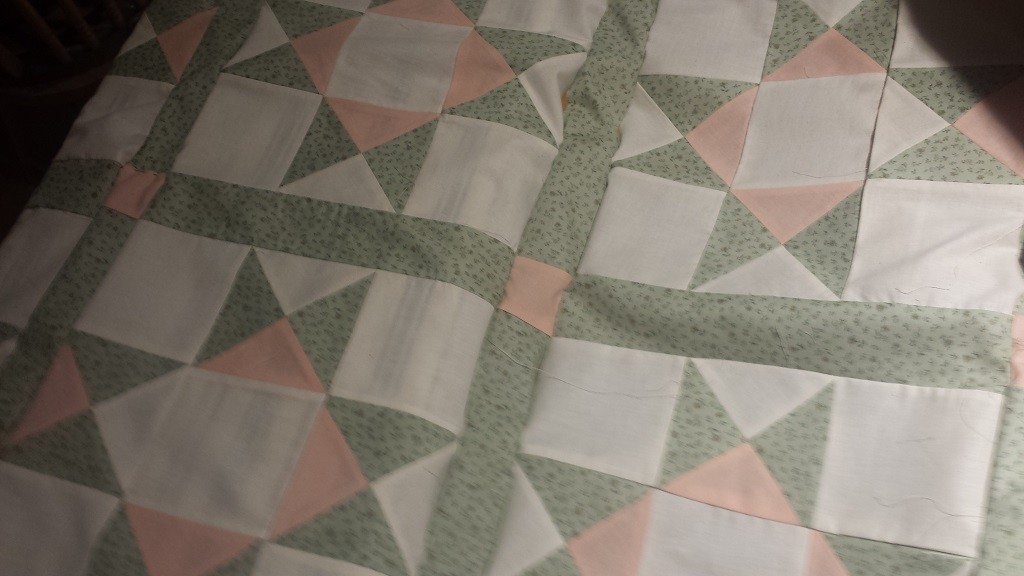
I had the final top pinned together and took a quick picture to share. Something didn’t look right. Took the picture, folded up the project for the night, and went on to other things. Right before bed, I pulled the picture up again to send to my mom:

20160225_223327

Something REALLY didn’t look right … stared at it for a few minutes before I realized that two of my block-triangleblock-block strips were attached upside down! Instead of having a pink triangle along the center block, I have a white triangle. Looking back at the previous step, I do not know how I missed it:

20160225_213145

Evidently there is no historical basis for a humility block (an “intentional” mistake put into a quilt – sort of like small dead end roads used to copyright protect maps) … and, honestly, it always sounded like a defensive “I meant to do that!” kind of thing rather than a real “only God is perfect, so my quilt should have a flaw to avoid angering God” thing 🙂

My task for today is to rip out the two backwards blocks and get them stitched back into the quilt. Ugh! Very important lesson learnt — but all in all, not bad for my first quilt.