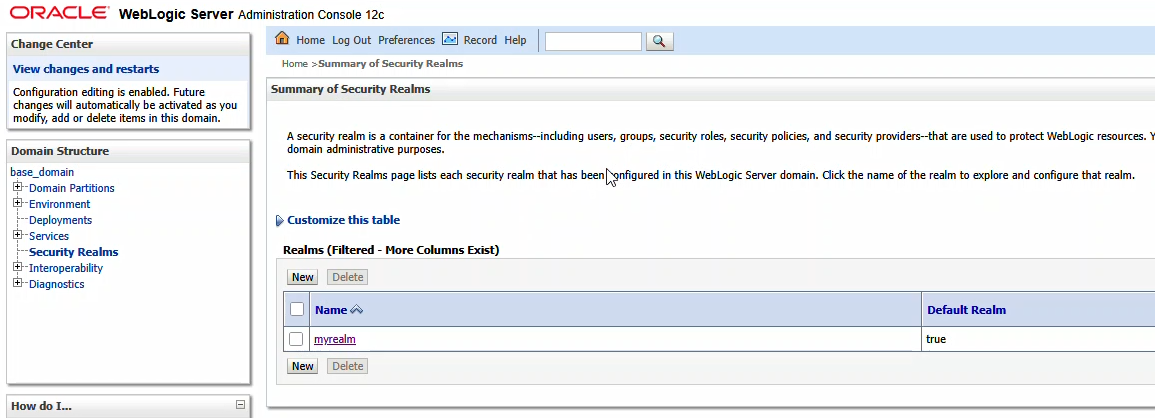
Log into your console. Navigate to “Security Realms” and click on your admin console’s realm – here “myrealm”
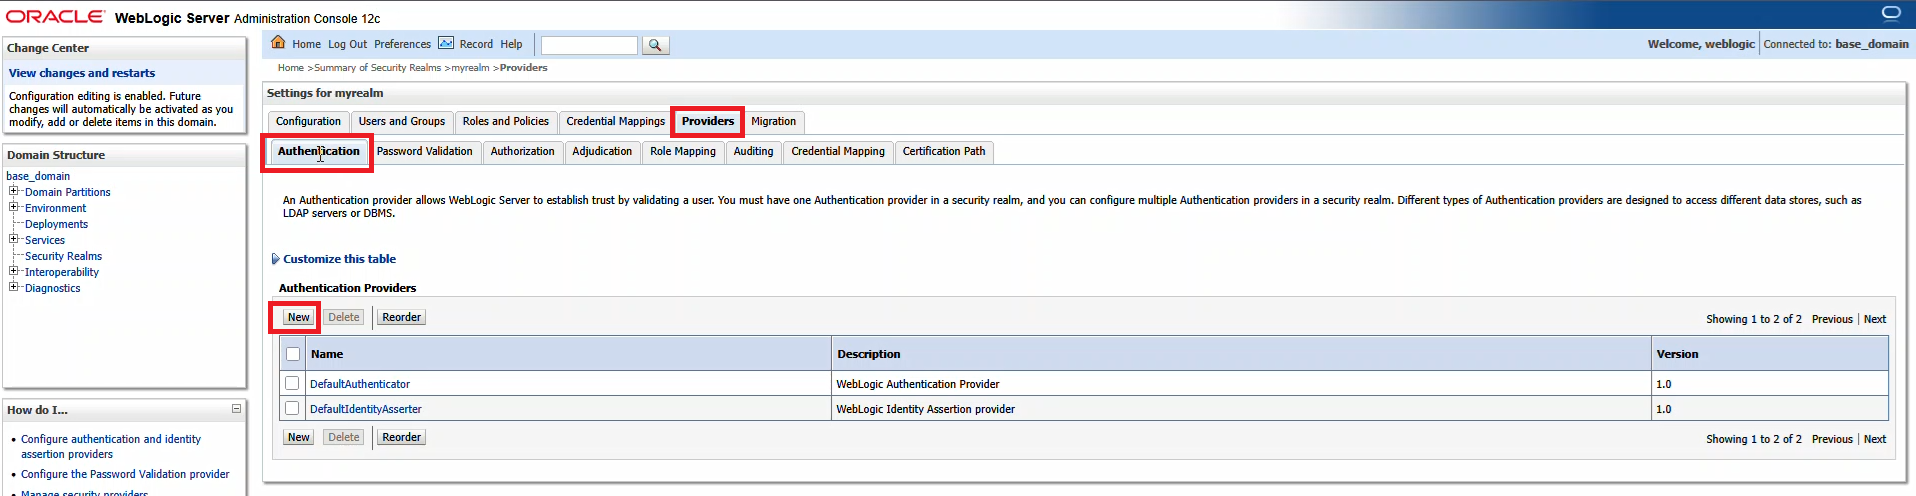
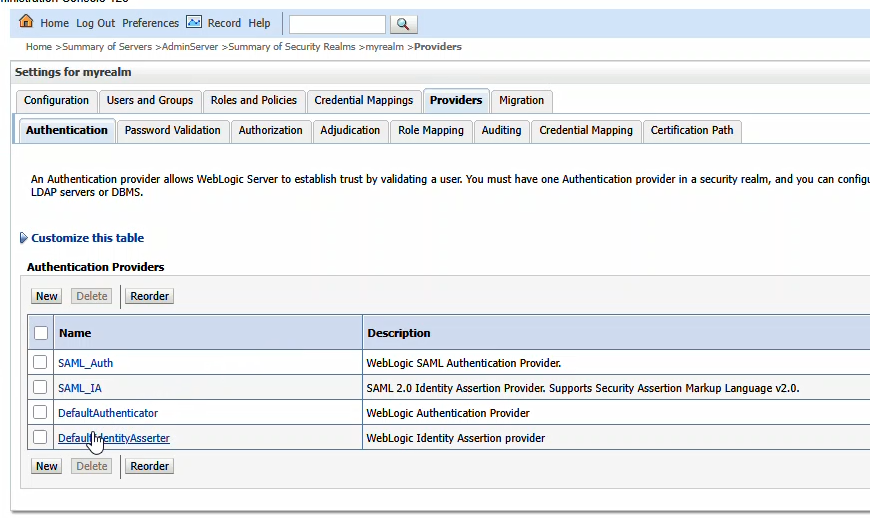
From the first row of tabs, select “Providers”. On the second row of tabs, ensure you are on “Authentication”. Click “New” to create a new identity asserter.
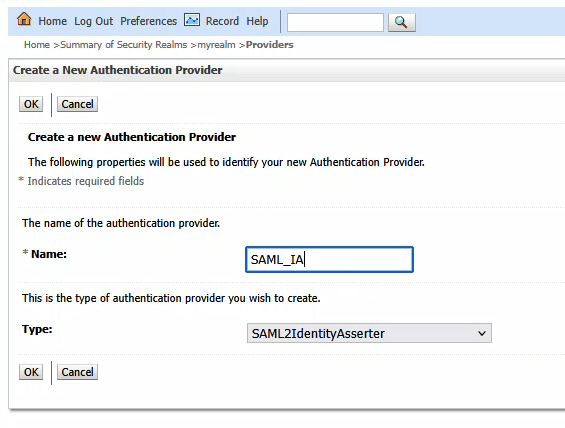
Provide a name – here, it is called SAML_IA – and ensure the type is “SAML2IdentityAsserter”
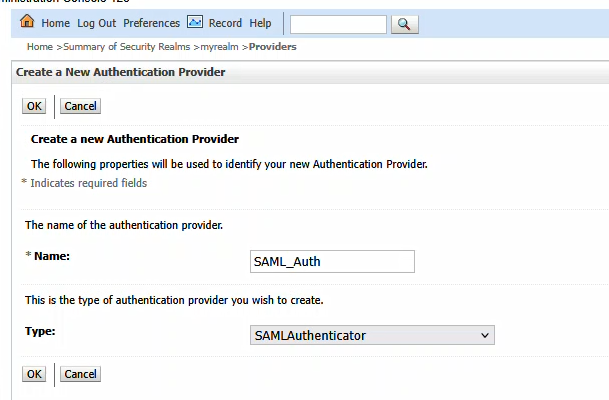
Click OK to create the item. Then click the “New” button again to create a new SAML Authenticator
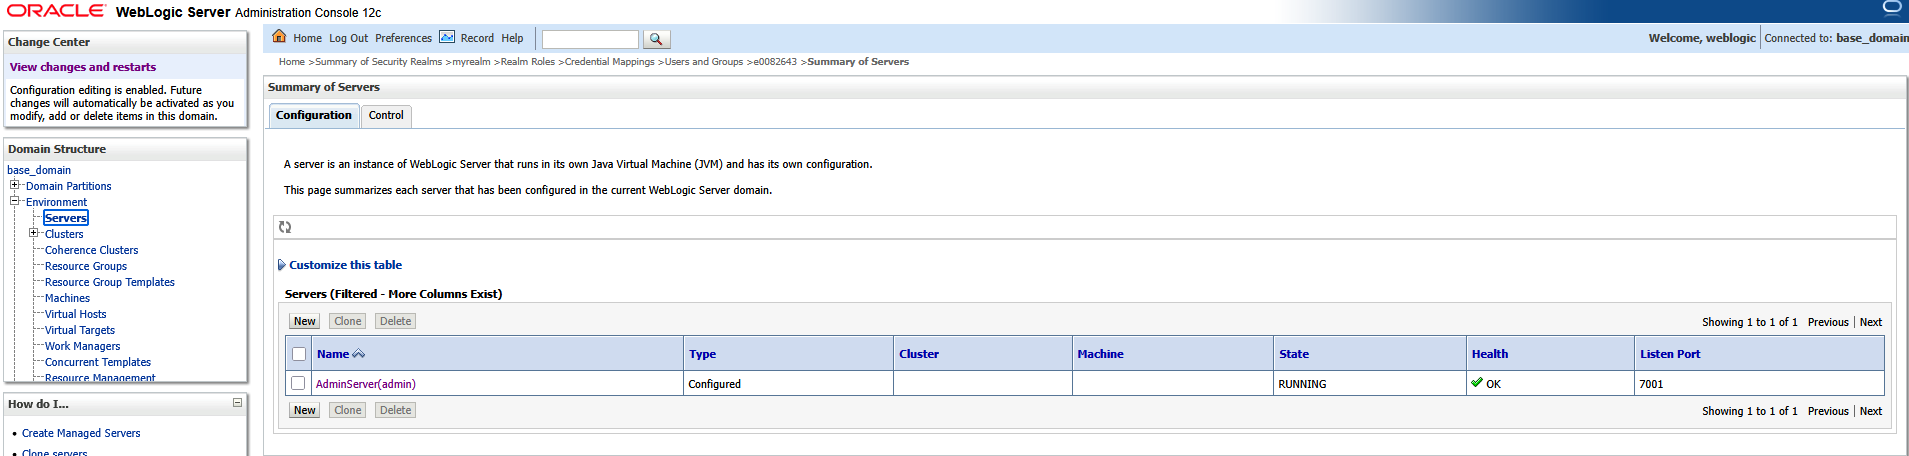
Restart the WebLogic server, then navigate to “Environment” => “Servers” and select the AdminServer
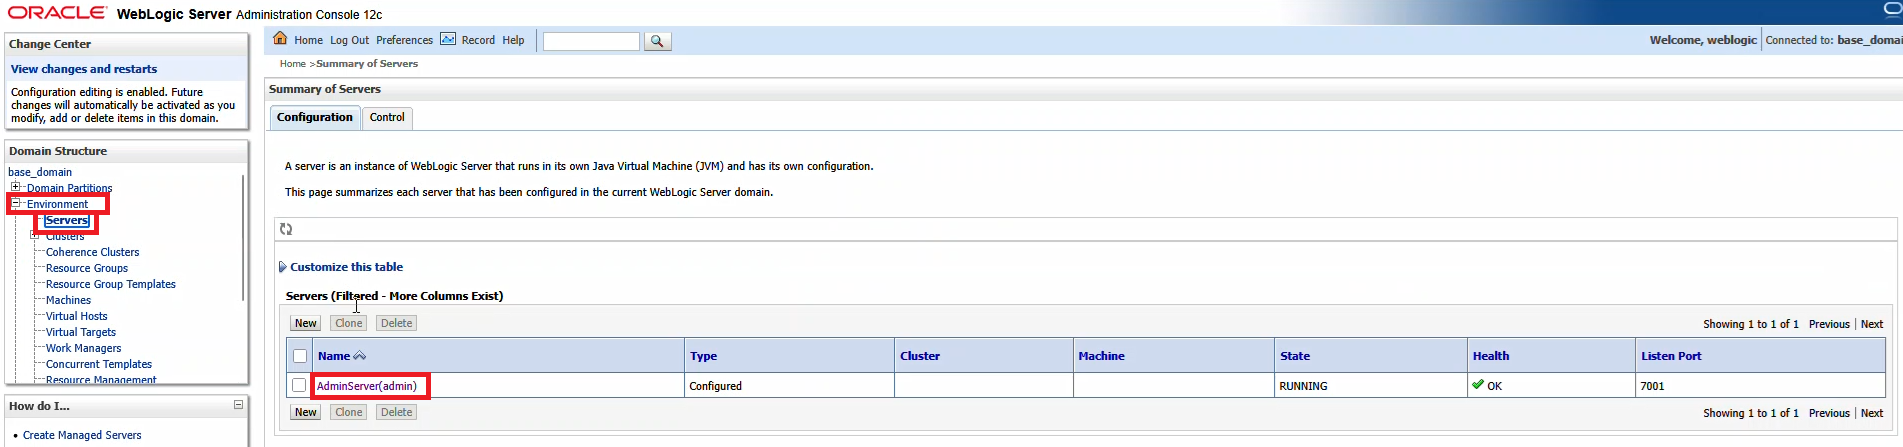
On the first row of tabs, select “Configuration”, on the second row of tabs, select “Federation Servies”, and on the third row of tabs select “SAML 2.0 General”

The published site URL will be your WebLogic host base followed by /saml2
Provide a unique entity ID that needs to match up with what we configure in PingID. Here, I used “LJRWebLogic”
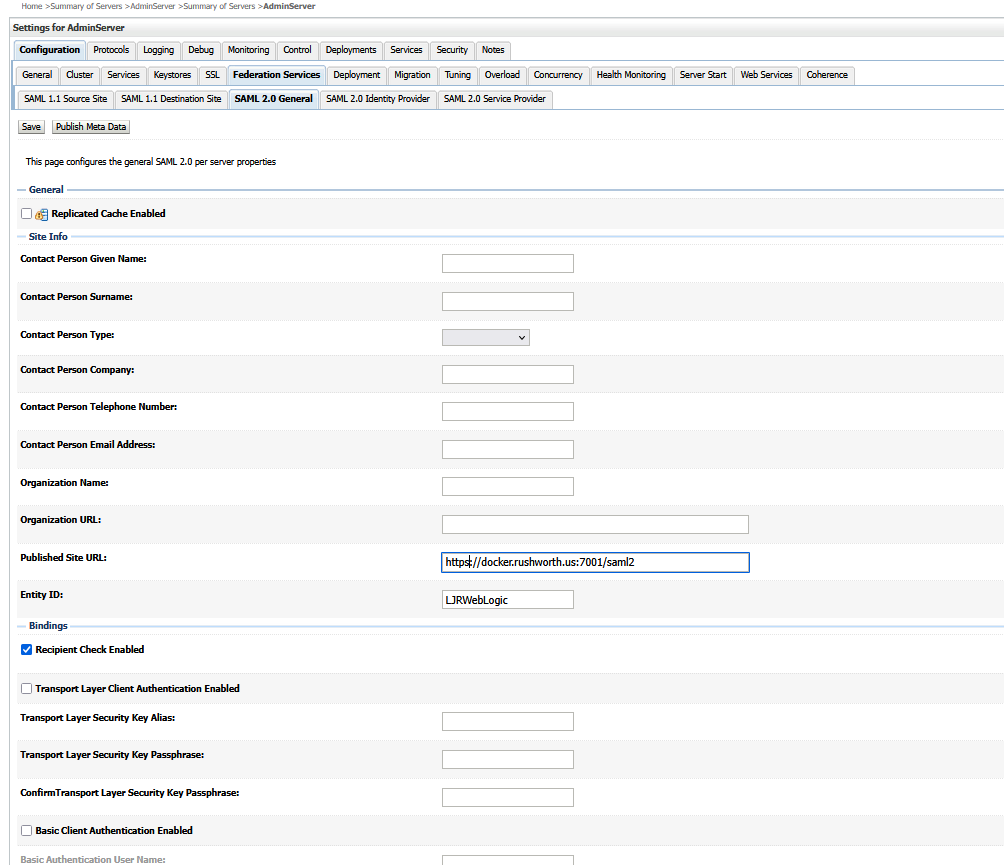
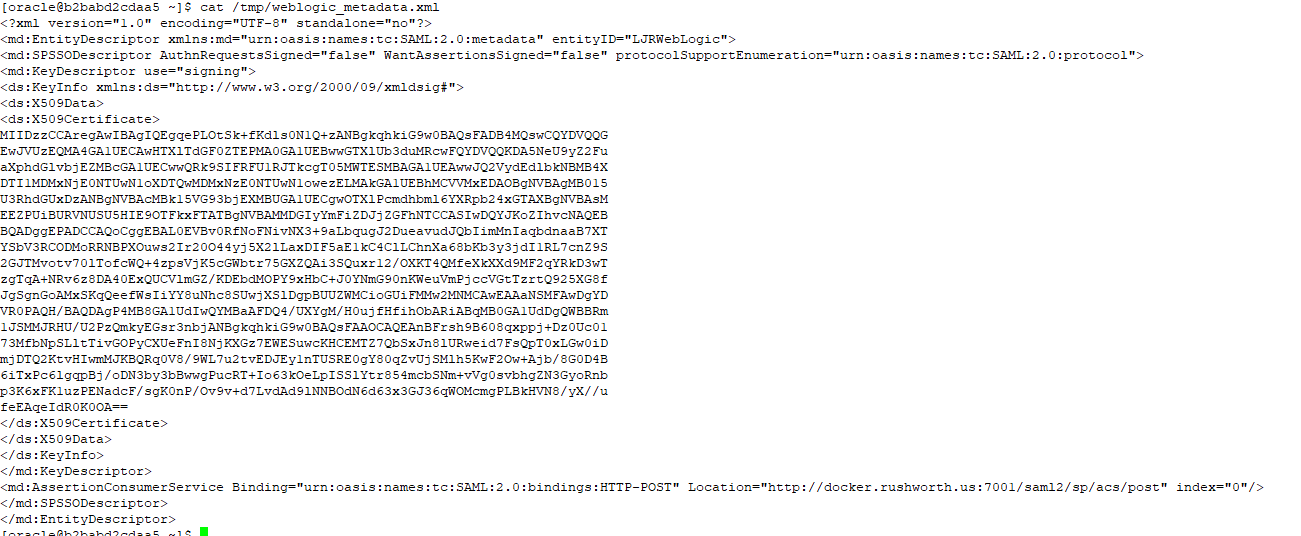
Save the changes and then use the “Publish Metadata” button to save a metadata file that I will use with PingID. You will be saving an XML file
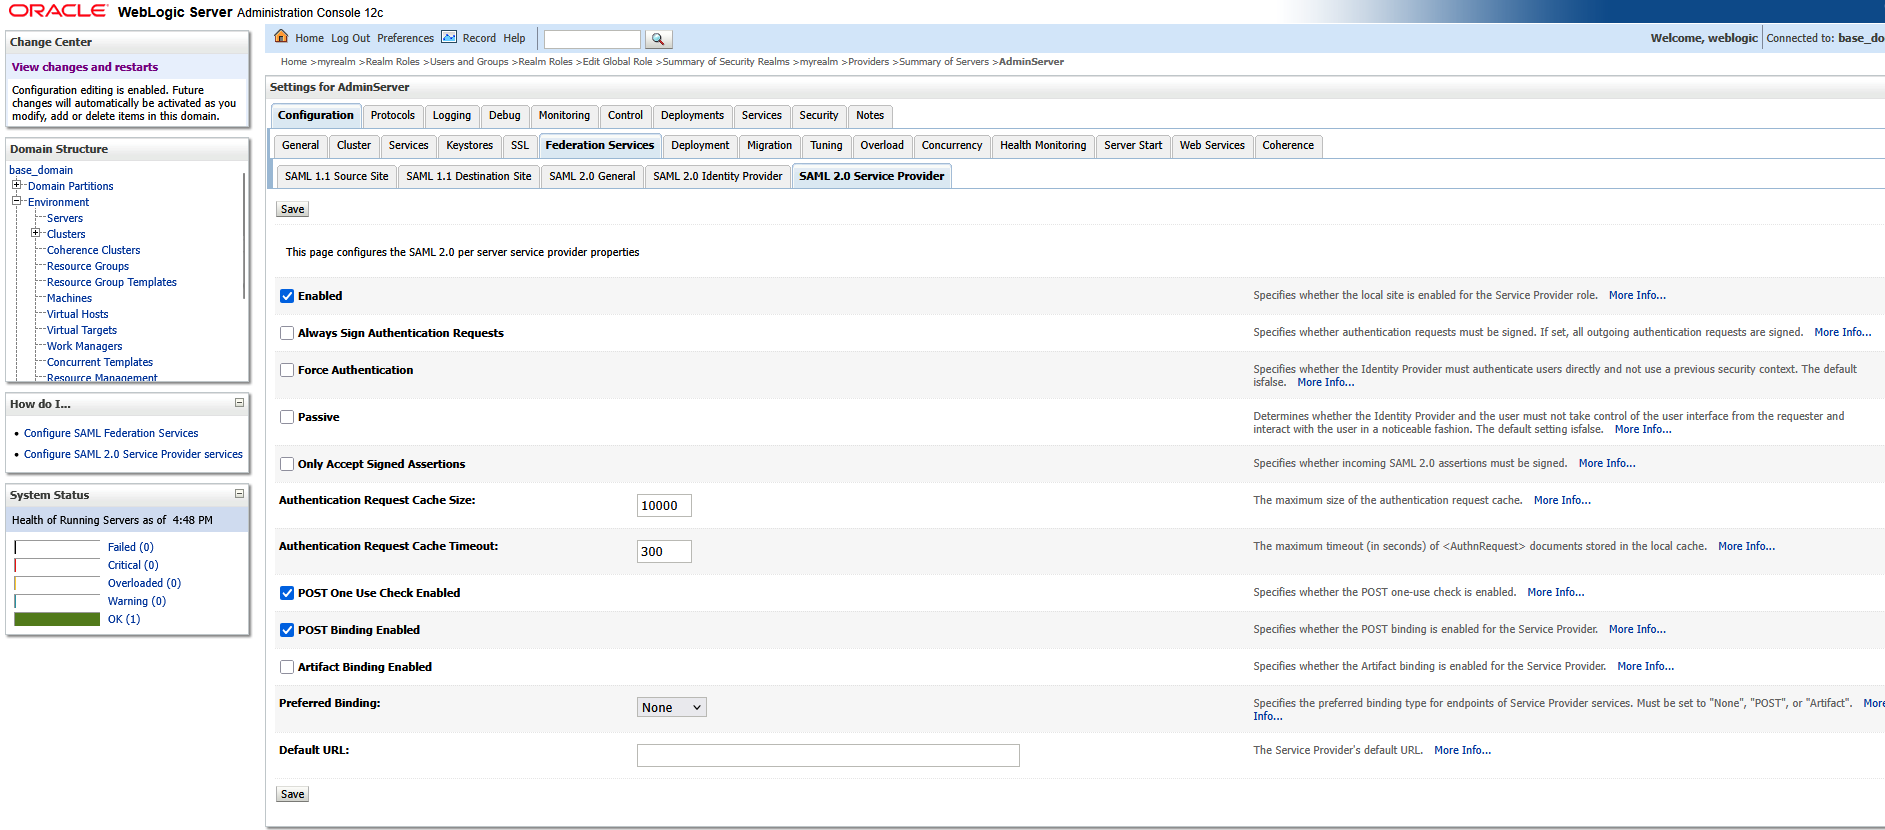
Now select the “SAML 2.0 Service Provider” tab on the third row of tabs. Click “Enabled” to enable the service provider. POST binding should be enabled, but we do not need Artifact binding enabled. Click “Save” to save the changes.
Navigate back to “Security Realms” and select your realm. On the first row of tabs, select “Providers”; on the second row of tabs, select “Authentication”. Click the hyperlink for “SAML_IA”
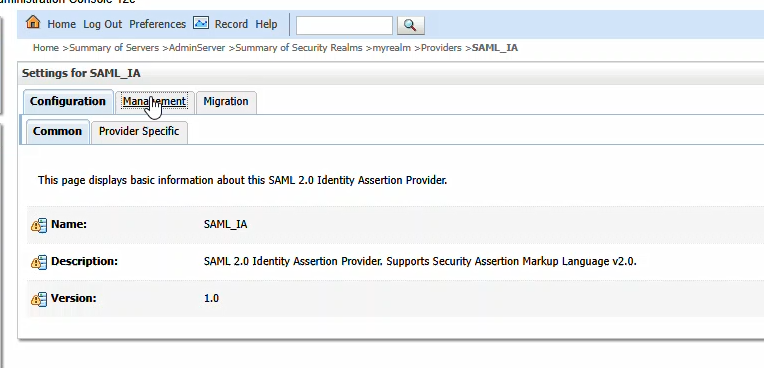
Click the “Management” tab
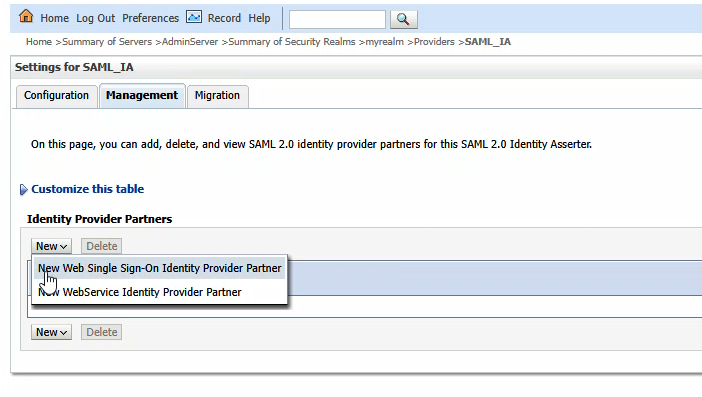
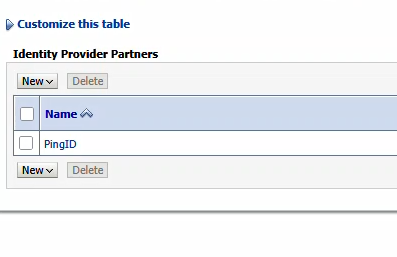
You will be provided a metadata file from PingID. Place that somewhere on your server (I used /tmp). Click “New” and then select “New Web Single Sign-On Identity Provider Partner”
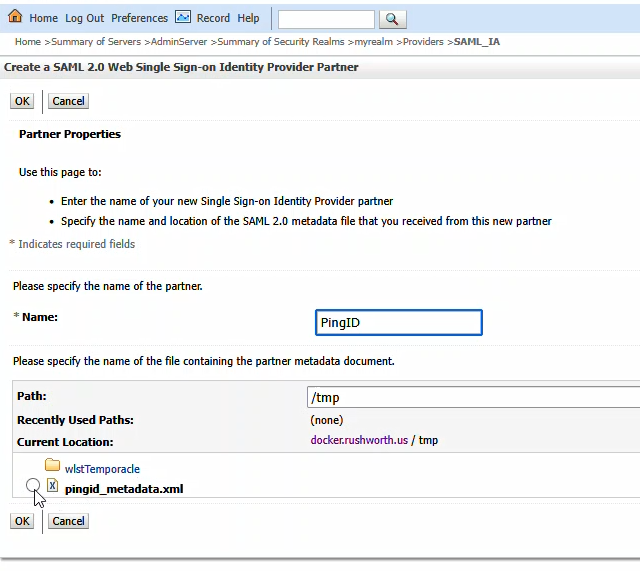
Navigate to the metadata file and select it. Provide a name for the identity provider – here, I used PingID. Cilck “OK” to import the PingID details.
Click on the new entry to configure it
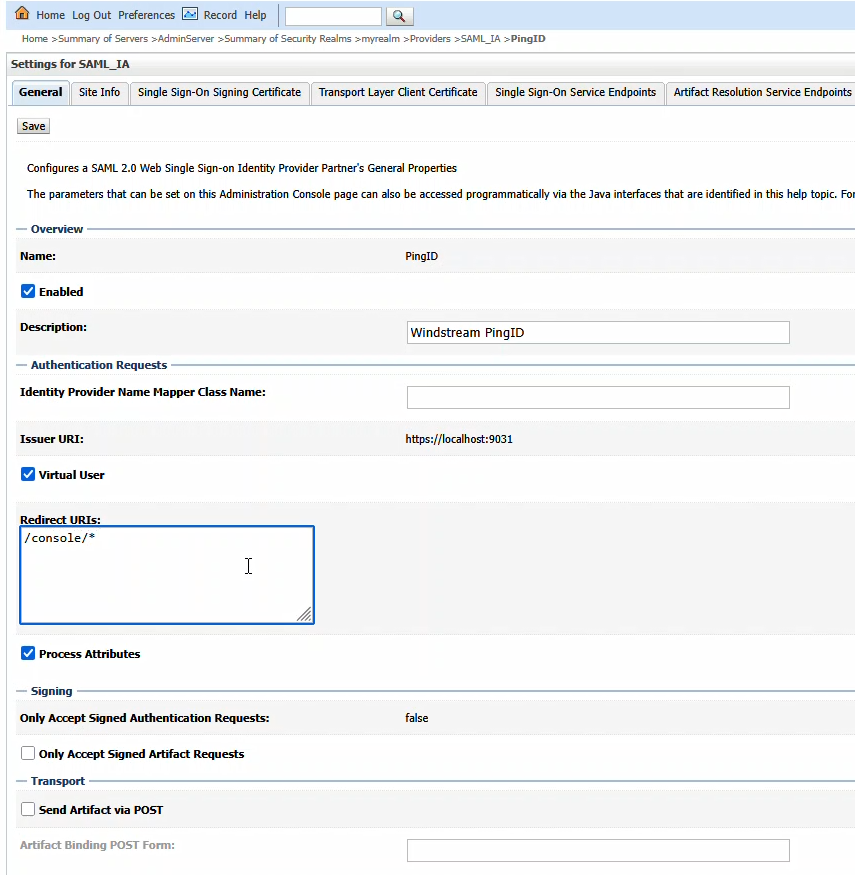
Click “Enabled” to enable the Identity Provider. The redirect URIs should be /console/*
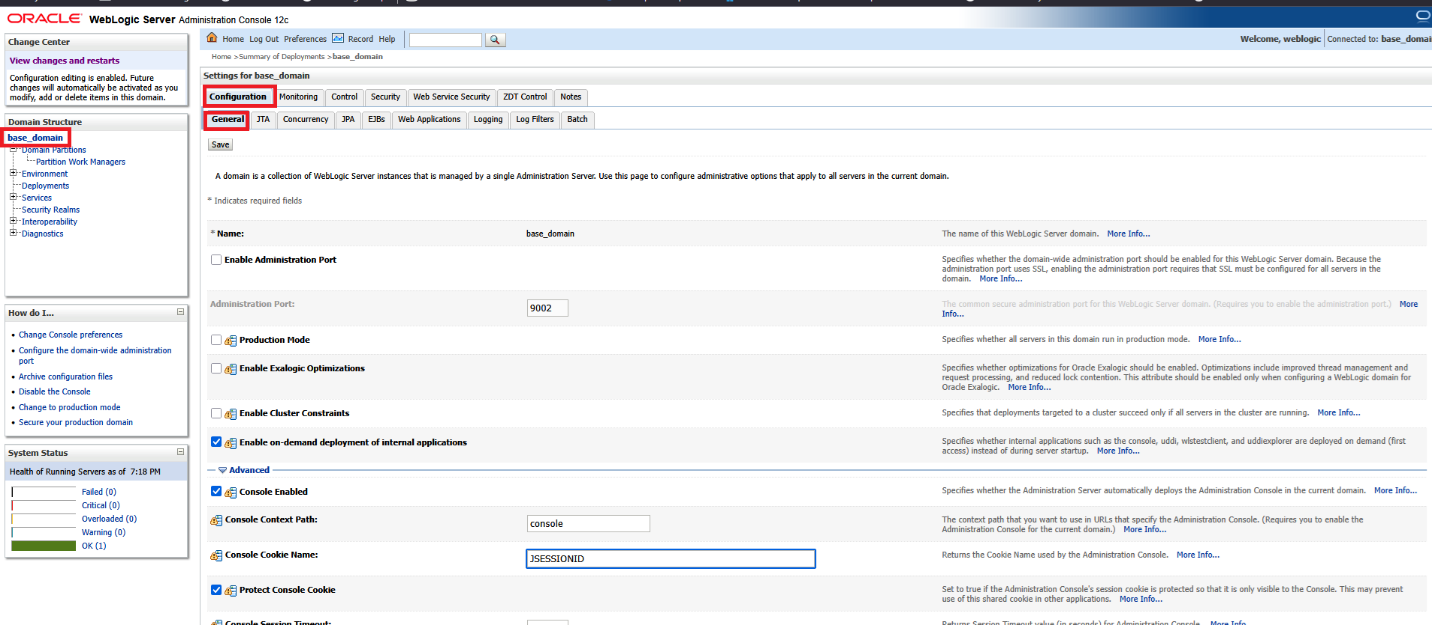
Finally, on the WebLogic Server Admin Console, navigate to the domain name -> [Configuration] -> [General] and expand the [Advanced] link
Update cookie name in WLS admin console to be JSESSIONID.
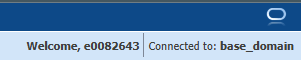
Save the changes and restart the WebLogic server. Navigating to the console, here https://docker.rushworth.us:7001/console, will direct the user to PingID for authentication and then redirect the user’s browser back to the WebLogic server. Looking in the upper right corner of the screen, they will see they are logged in with their directory ID.
Note: You can still access the local authentication dialog by navigating directly to console/login/LoginForm.jsp – e.g. http://docker.rushworth.us:7001/console/login/LoginForm.jsp — but the “normal” URL will redirect users to PingID
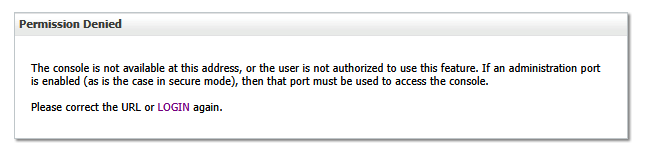
Note Also: There needs to be some step here to map PingID users to a role in WebLogic
Failing to do so, you will complete the PingID authentication but be denied access to the WebLogic Admin Console: