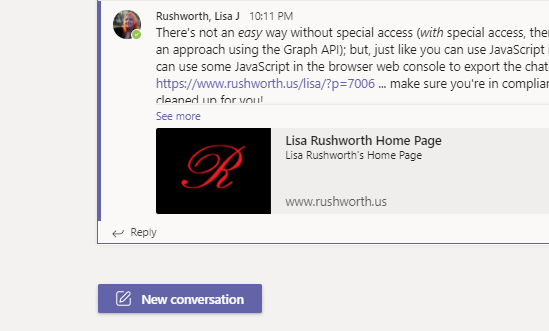
There’s no export functionality in MS Teams chats and conversations. From Microsoft’s standpoint, this makes sense — customer retention. From the customer standpoint, however? There are times I really want to transfer a conversation elsewhere for some reason. You can copy/paste individual text bubbles. If you only need to get one or two bubbles, manually copying the text is going to be quicker. And, for those with special access, there’s the Security & Compliance discovery export stuff as well as an approach using the Graph API. But for the rest of us general users, there’s no easy way to export the bunch of little chat bubbles that comprise a MS Teams chat. There is, however, a not-too-hard way to do it in the Teams web client.
I’ll prefix these instructions with a disclaimer – your company may have document retention in Teams. When you export your chat content, you’ll need to maintain appropriate retention policies yourself. In IT, we had a few information categories where retention was “useful life” – we could retain system documentation as long as the system was used. If you’re exporting a chat to keep something you are allowed to keep and then keep it outside of Teams … that’s awesome. If you are trying to keep something the company’s retention policy says should be removed … that’s probably not awesome.
Once you’ve determined that the info you are exporting is OK to export and maintain elsewhere, here’s how to export a Teams chat from within the Teams web client. Step 1, of course, is to lot into Teams at https://teams.microsoft.com and go to the chat you want to export. Scroll up to the top of the chat. If you have a really long chat, it may not be possible to export the entire thing using this approach. I might play around with it in the future, by most of my conversations are in Teams channels so I don’t have a chat that’s more than 30 or so messages.
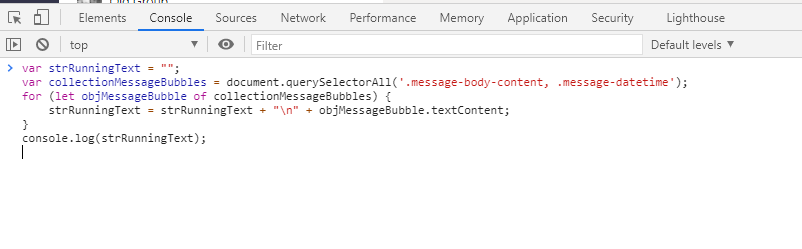
Once you are at the top of the chat, open the developer tools (ctrl-shift-i in Chrome). Clear the errors — they clutter up the screen.

Paste the following script into the console and hit enter:
var strRunningText = "";
var collectionMessageBubbles = document.querySelectorAll('.message-body-content, .message-datetime');

for (let objMessageBubble of collectionMessageBubbles) {
     strRunningText = strRunningText + "\n" + objMessageBubble.textContent;
}

console.log(strRunningText);
If you have a long series of chat messages, you’ll get some of the chat displayed and a button to copy the entire chat content to your clipboard.

If you have a shorter series of chat messages, you’ll have the text of the chat in the console window. You can highlight it and copy/paste the text elsewhere.
There’s a little cleanup that can be done – the content of the message-datetime elements have a beginning and trailing newline character along with a bunch of whitespace. You can get a cleaner timestamp (but, if you embed code within your messages … which I do … the code sections have a lot of extraneous newlines):
var strRunningText = "";
var collectionMessageBubbles = document.querySelectorAll('.message-body-content, .message-datetime');

for (let objMessageBubble of collectionMessageBubbles) {
     strRunningText = strRunningText + "\n" + objMessageBubble.innerText;
}

console.log(strRunningText);
The same JavaScript works in the Teams channel conversations except the channel conversations tend to be longer … so you’re going to export some subset of the channel conversation around where you are in the web browser.
* I realized, during a multi-person chat last week, that I don’t grab the name of the individual who posted the message to the chat. Grabbing the person’s name should just entail adding the identifier for the name element into the querySelectorAll list … but that’s not something I’ve had an opportunity to check yet.