The proxy at work uses integrated authentication. While BASIC auth prompts happily let you use a proxy of http://uid:pass@proxy:port, ours does not. There are two ways I’ve managed to use pip to install packages.
Proxied Proxy
The easiest approach is to use something that can handle the authenticated proxy, like Fiddler, as an intermediary. I do the same thing with perl’s PPM, docker pull … basically anywhere I’ve got to use a proxy that wants to pass through a proxy username.
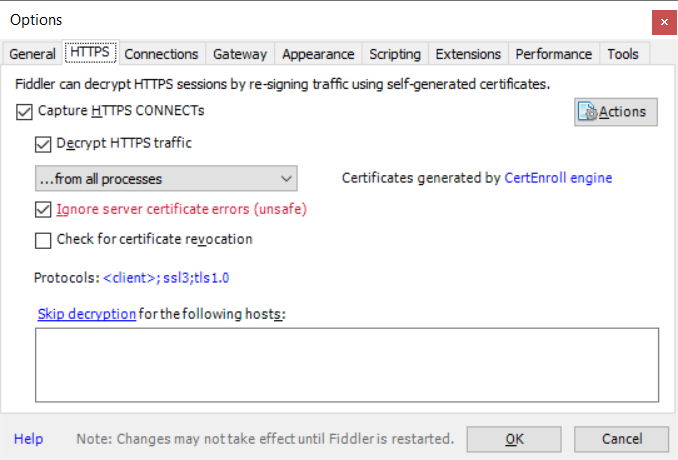
Select Tools => Options to open the configuration dialog. Make sure you are handling SSL traffic — if not, check the box to “Capture HTTPS CONNECTs, “Decrypt HTTPS traffic”, and “Ignore server certificate errors” (it’s only unsafe if you don’t understand what you’re doing … don’t log into your bank account bouncing traffic through this config!)
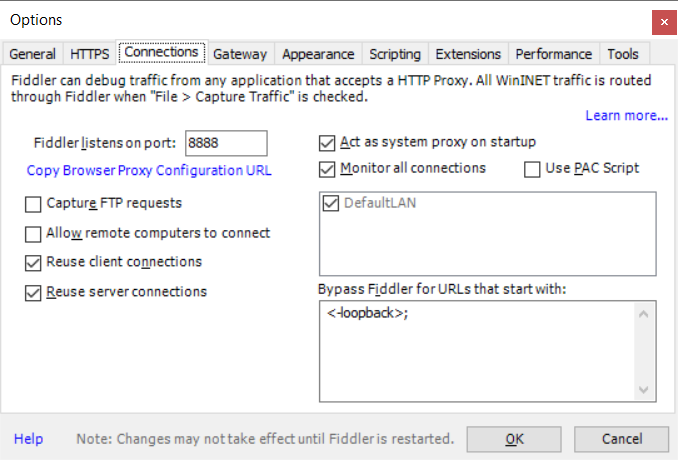
On the “Connections” tab, check the port on which Fiddler is listening. If you cannot install Fiddler on the same box where you want to use pip, you’ll need to check off “Allow remote computers to connect” (and you won’t use localhost as the proxy hostname). Click OK, start capturing traffic (F12), and we’re ready to go.
Use the PIP command line to install the package but proxy the request through your Fiddler instance. In this example, Fiddler is installed on the local box and uses port 8888.
pip –trusted-host pypi.org –trusted-host files.pythonhosted.org –proxy http://localhost:8888 install SomePackage
This is nice because pip will automatically resolve dependencies. Not great if you’re not allowed to install your own software and cannot get Fiddler installed.
Dependency Nighmare
Back in the early days of Linux (think waaaay before package managers working against online repositories), we called this “dependency hell” — navigating dependency chains to get all of the required “stuff” on the box so you can install the thing you actually wanted.
Make a folder for all these wheels we’re going to end up downloading so it’s easy to clean up once we’re done. Search PyPi for the package you want. On the package page, select ‘Download Files’ and then download the whl
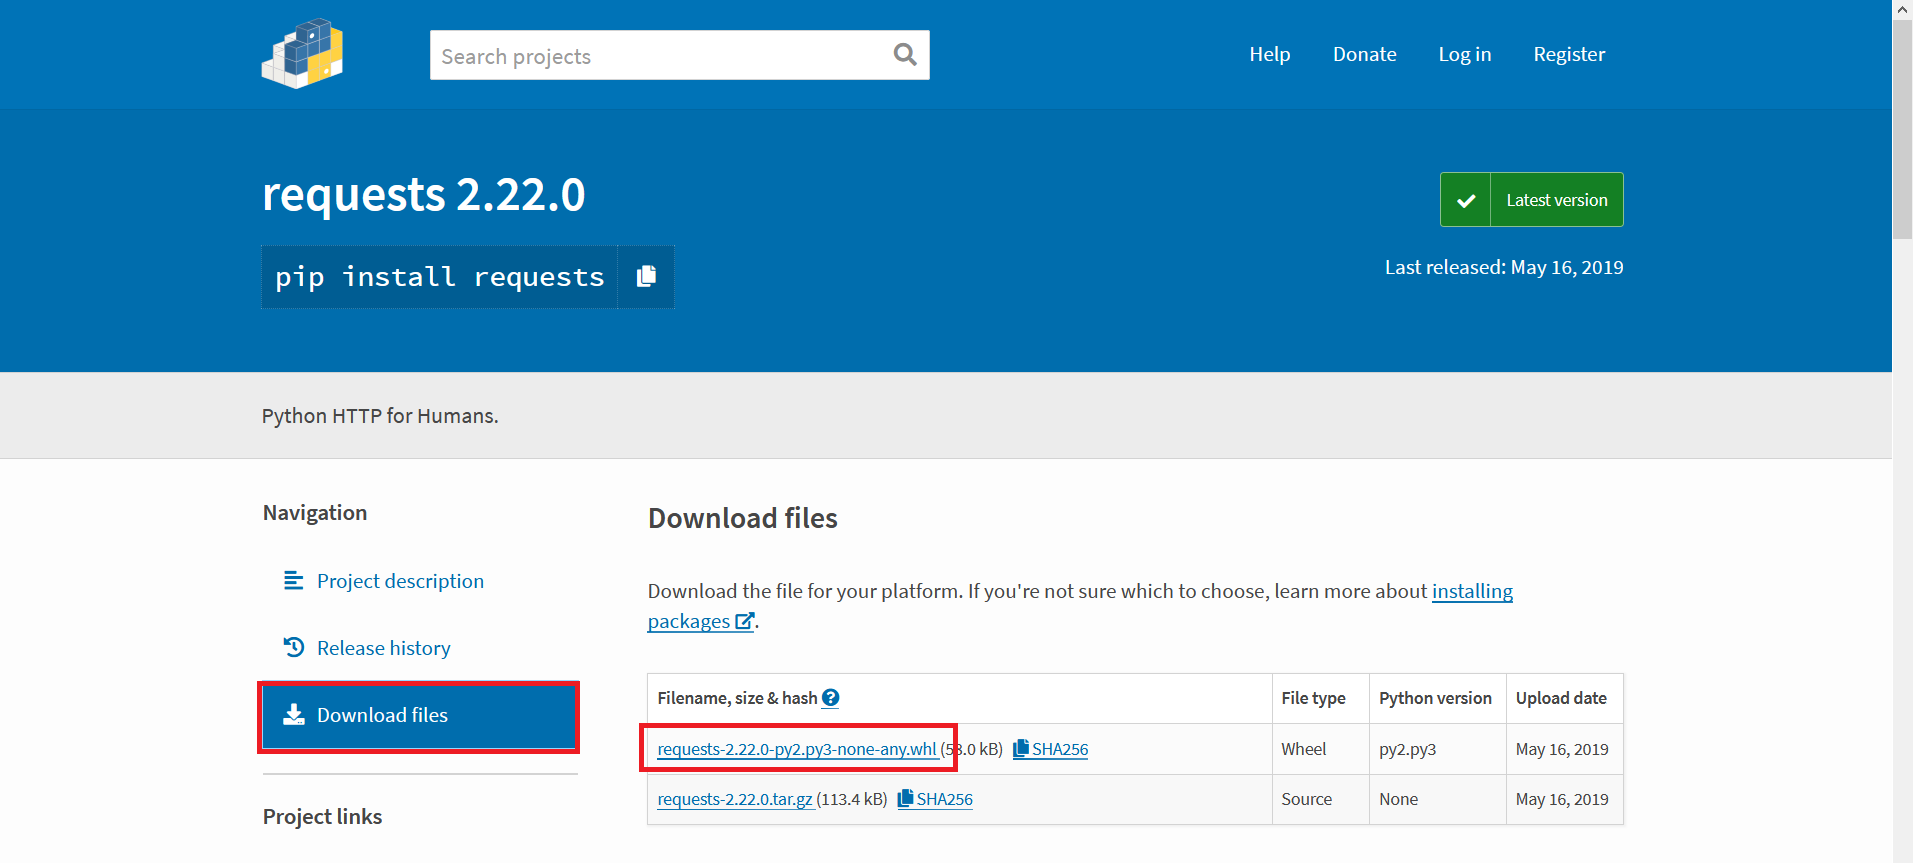
Use “pip install something.whl” to attempt installing it. If you’re lucky, you’ve got all the dependencies and the package will install. If you don’t have all of the dependencies, you’ll get an error telling you the first missing one. Go back to the pypi website & get that. Use “pip install somethingelse.whl” to install it and maybe get a dependency error here too. Once you get a dependency installed, try the package you want again. Got another error? Start downloading and installing again. Eventually, though, you’ll get all of the dependencies satisfied and be able to install the package you actually want.