Pipping!
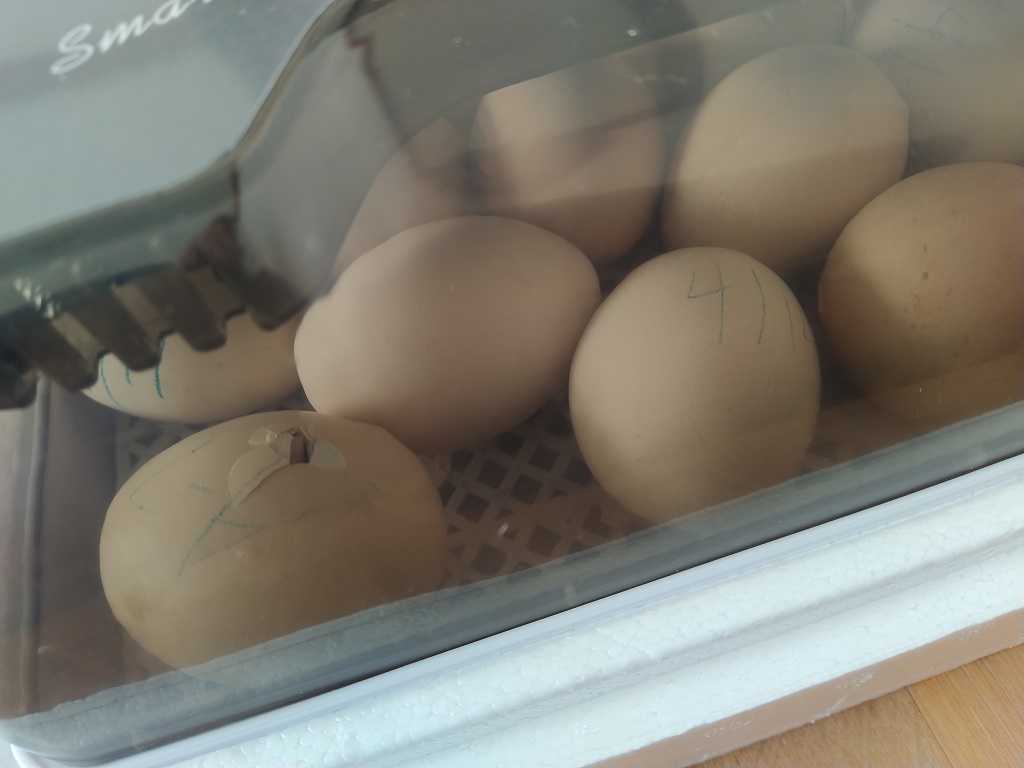
Pipping!
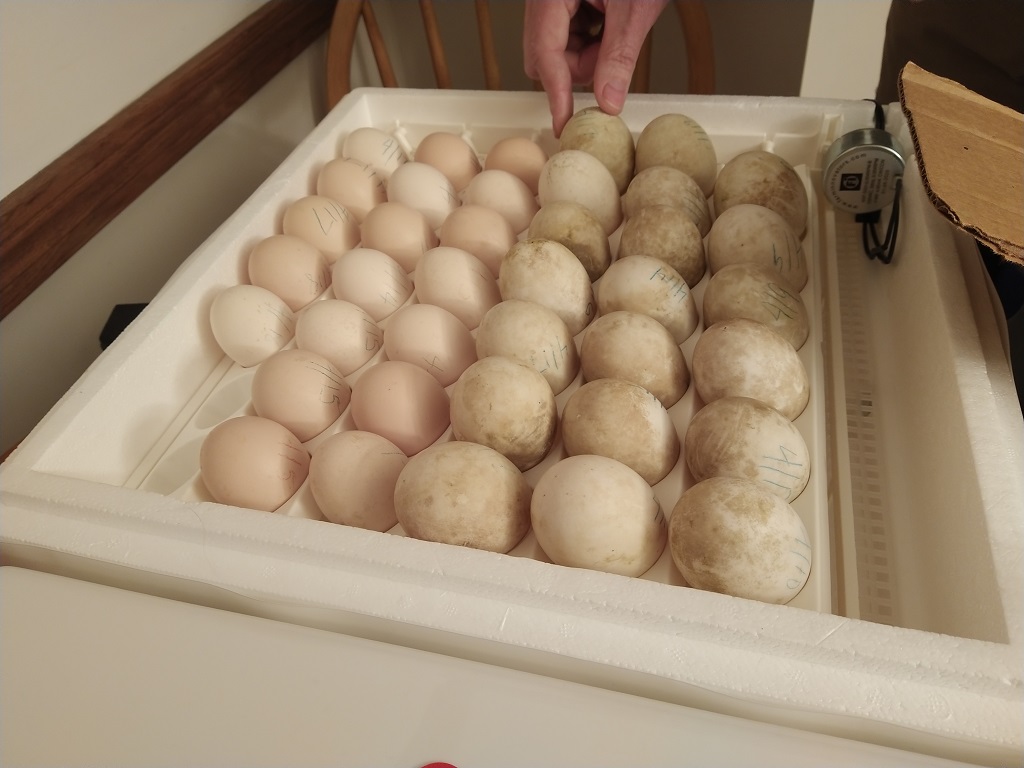
Scott and Anya candled all of the eggs tonight — of the 41 eggs, there are three that might not be developing. But all of the eggs are still in the incubator because there weren’t any obviously undeveloped eggs. If all of these eggs hatch, we’re going to have an absolute swarm of baby birds!
Trying again with the bigger, better incubator — 22 duck eggs and 19 chicken eggs.
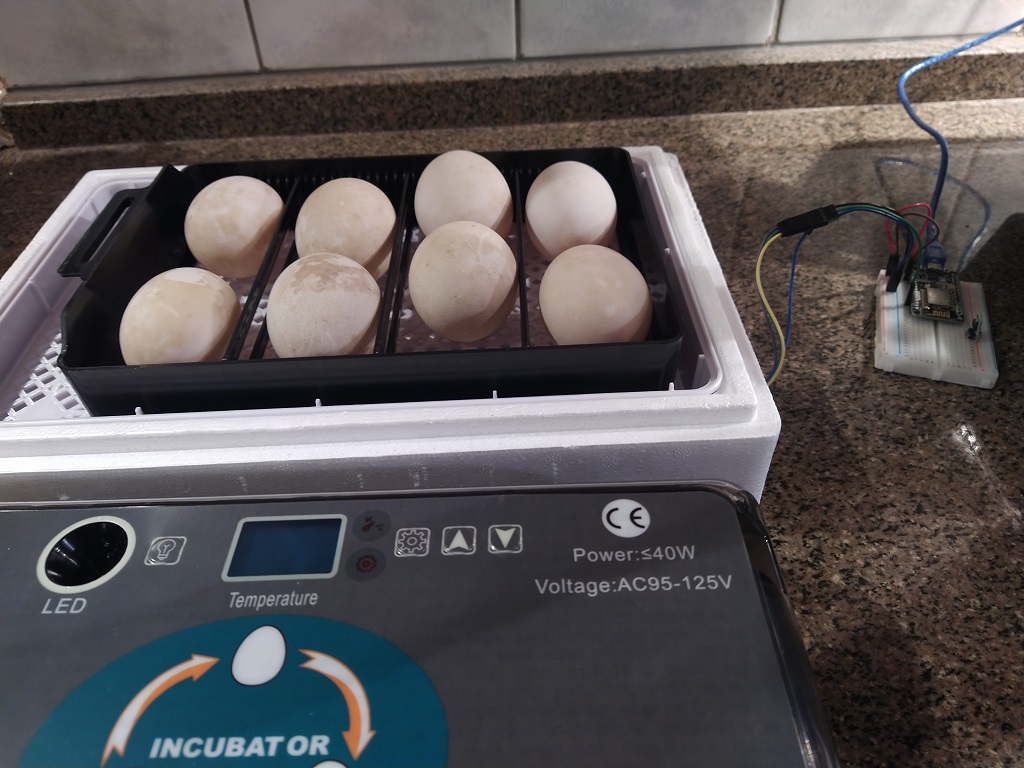
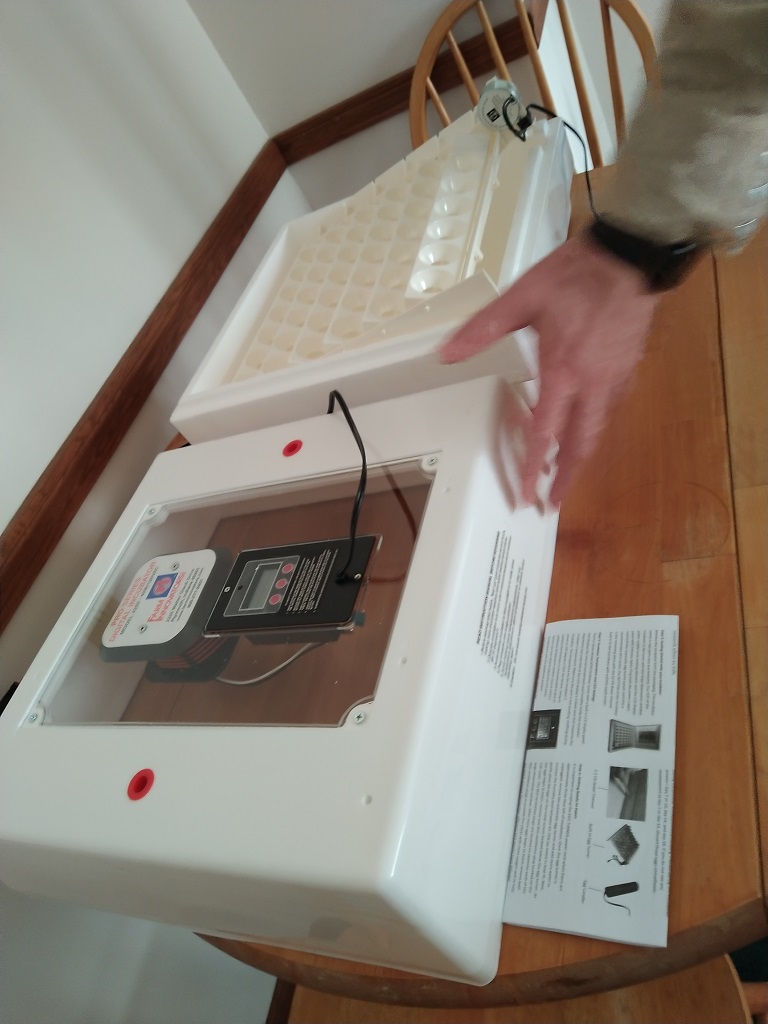
Scott set up one of the ESP32’s that we use as environmental sensors to monitor the incubator. There’s an audible alarm if it gets too warm or cold, but that’s only useful if you’re pretty close to the unit. We had gotten a cheap rectangular incubator from Amazon — it’s got some quirks. The display says C, but if we’ve got eggs in a box that’s 100C? They’d be cooked. The number is F, but the letter “C” follows it … there’s supposed to be a calibration menu option, but there isn’t. Worse, though — the temperature sensor is off by a few degrees. If calibration was an option, that wouldn’t be a big deal … but the only way we’re able to get the device over 97F is by taping the temperature probe up to the top of the unit.
So we’ve got an DHT11 sensor inside of the incubator and the ESP32 sends temperature and humidity readings over MQTT to OpenHAB. There are text and audio alerts if the temperature or humidity aren’t in the “good” window. This means you can be out in the yard or away from home and still know if there’s a problem (since data is stored in a database table, we can even chart out the temperature or humidity across the entire incubation period).
We also bought a larger incubator for the chicken eggs — and there’s a new ESP32 and sensor in the larger incubator.
We tried a cheap forced-air incubator from Amazon.
All of these little rectangular boxes seem to have the same design flaw: the fan and heater are in one corner of the incubator, and the hot air blows out of one side of the box. So there are really hot spots in the incubator and relatively cold spots.
Since we had a bad hatch rate (1 of 8) with the thing, we decided to get a bigger, better incubator. After researching a lot of options, we got the Farm Innovators 4250 — lots of space for eggs, a centrally located heater and fan that blow air all around, and a humidity sensor (looks to be the same DHT-11 that we use in our sensor). We’ll collect eggs and get a large batch going in a few weeks.
We’re about to start incubating eight duck eggs, so I wanted to record the temperature and humidity settings that I’ve found for the chicken, duck, and turkey eggs (well, future turkey eggs! We managed to get five male turkeys last year)
| DUCKS | |||
| Start | End | Temp | Humidity |
| 1 | 25 | 99.5 | 55-58% |
| 26 | 28 | 98.5 | 65% |
| 28 | hatching | 97 | 70-80% |
| CHICKENS | |||
| Start | End | Temp | Humidity |
| 1 | 18 | 99.5-100.5 | 45-55% |
| 19 | Hatching | 99.5 | 65-70% |
| TURKEYS | |||
| Start | End | Temp | Humidity |
| 1 | 24 | 99-100 | 50-60% |
| 25 | Hatching | 99 | 65-70% |
We were finally able to get the starplates to build a 1V geodesic dome for the new chicken coop. Super excited — and we’re going to have a lot of construction going on this year. A greenhouse tunnel for extending the growing season, a chicken coop, a duck coop, a pig shelter, and hopefully a sheep shelter too.
We butchered our broilers and ducks for the year. In a larger household, a whole bird is probably a perfectly reasonable amount of food. But, for us? It’s too much food. Half a bird is a lot more reasonable.
In looking at techniques for grilling and smoking poultry, we came across spatchcocking — basically splitting the whole bird along the spine so it lays flat. It looked like a much quicker way to butcher — and, if we didn’t want to have a whole bird in the end anyway it isn’t like the approach would be counterproductive.
So we’ve been butchering by detaching the crop, airway, and throat. Placing the bird so the backbone is up and the neck facing you, cut along the spine. It’s a little tricky to cut at the hip joint — you’ve got to find the right spot to snip, but the oyster is always included with the leg using this method — and be careful not to pierce intestines. You can leave the spine with one half or cut down the other side of the spine. Cut around the vent, then clear out all of the innards — one entire mass is removed. Either finish spatchcocking to store a whole bird or use shears to cut along the breastbone and have two halves. I’ve found this approach to be a lot quicker than the normal technique — and, since the carcass is open, removing the innards is very easy.
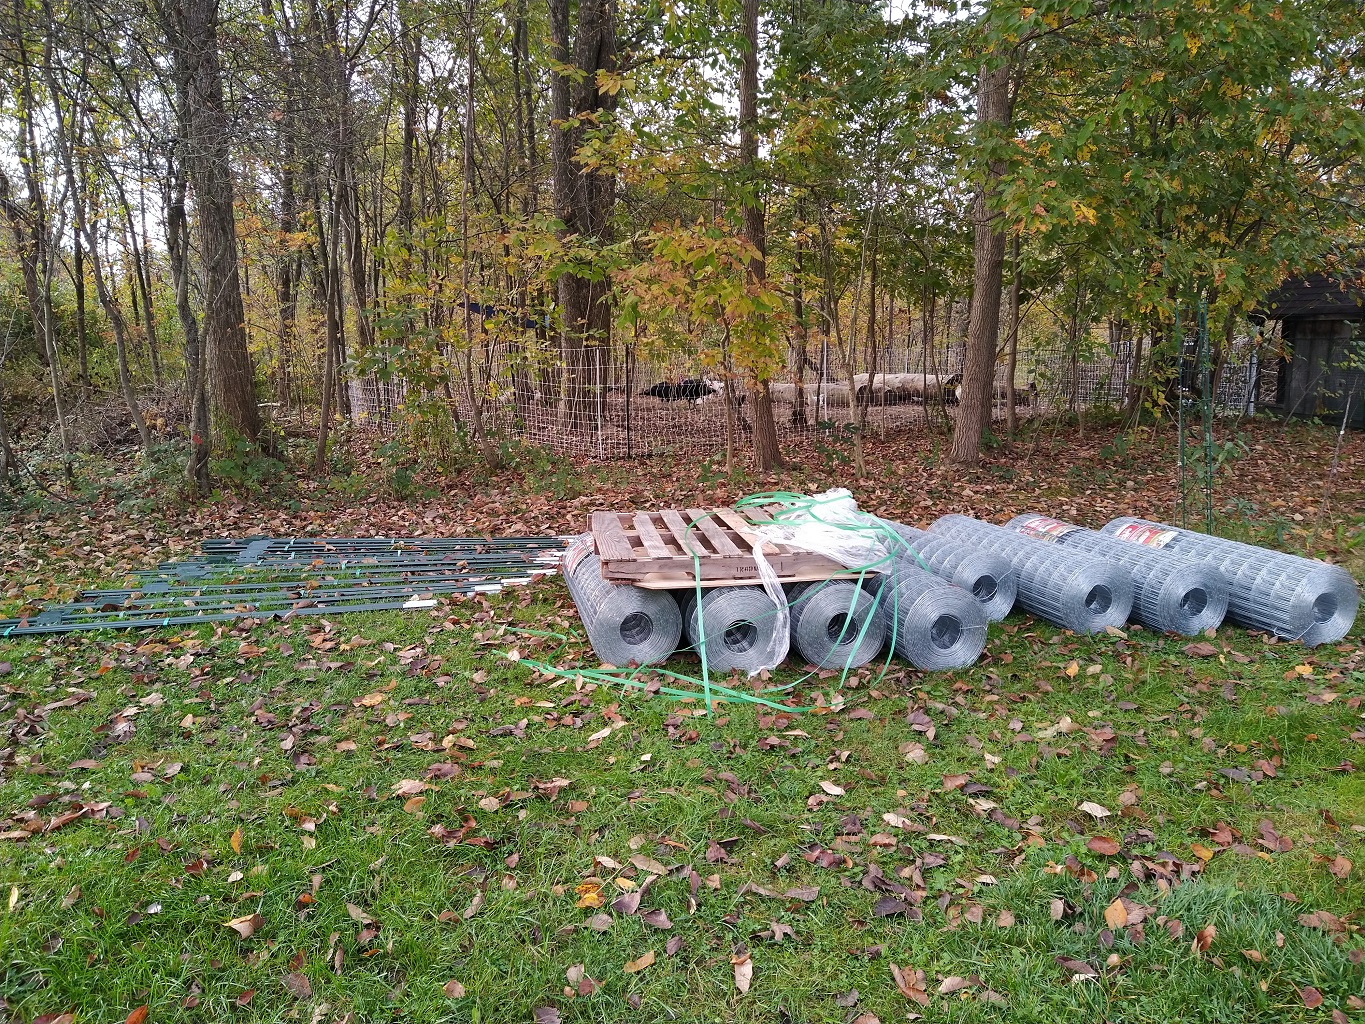
We got our fence stuff! Eight rolls of 4′ welded wire fence and 50 t-posts.
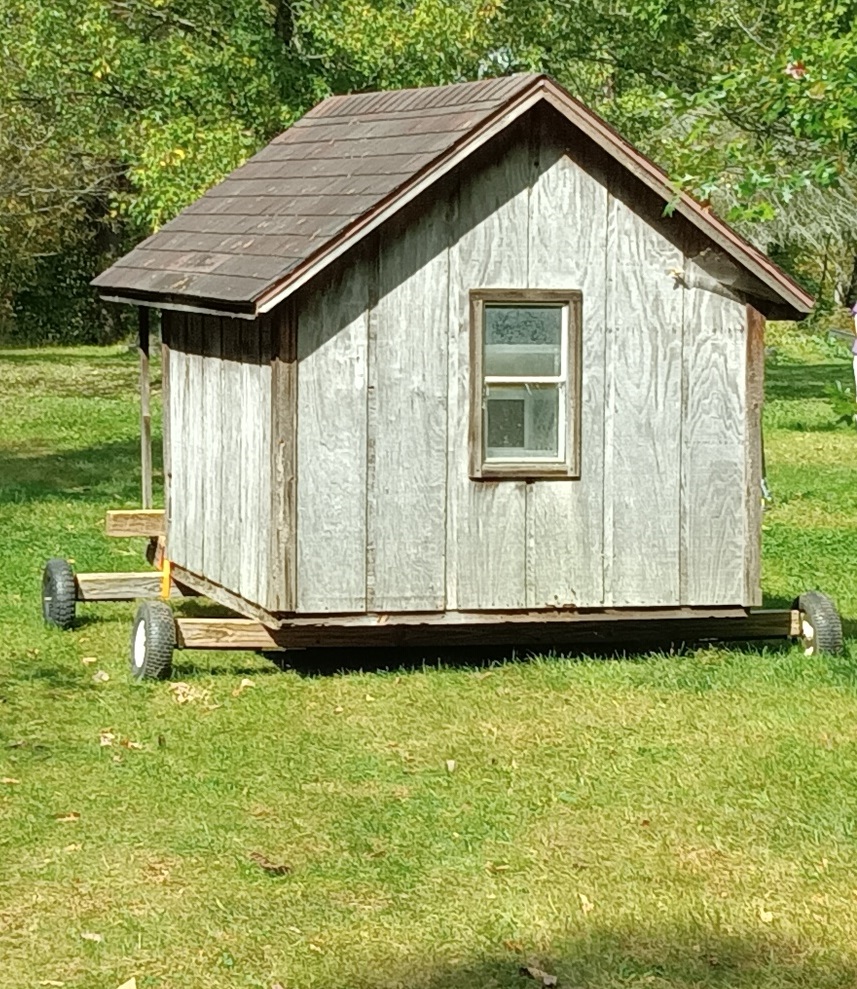
We set up the coop mobile again — I got one of the PoultryNet fences from PremierOne — I spent a lot of time debating the “Plus” version of the fence before realizing that you could buy a whole lot of the FiberTuff posts for less than the additional price for the plus fence. And the FiberTuff posts work a lot better. Since the fence was working well, we decided to move the coop over to the pasture (and not herd the poultry across the yard twice a day!!!).
The “wheels” were made using two 4×4’s with sections of 5/8″ threaded rod that were inserted into old propane tube. This was attached to the 4×4 & wheels from one of our yard carts were attached. We were then able to push the coop across the yard.