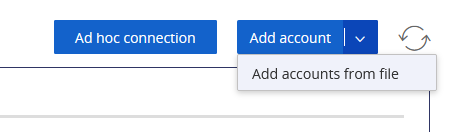
Adding one account to CyberArk takes about a dozen clicks. Adding fourteen was going to take me half the day!
Luckily, I discovered that the “Add account” button is actually a drop-down menu that also offers the ability to Add accounts from file
Create a CSV file with the following columns:
| userName | address | safeName | platformID | secret | automaticManagementEnabled | manualManagementReason | groupName | logonDomain |
| user1 | server1 | OURSAFE | Generic Unmanaged | abc123 | FALSE | Platform does not support automatic password management | ||
| user2 | server2 | OURSAFE | Generic Unmanaged | bcd234 | FALSE | Platform does not support automatic password management | ||
| user3 | server3 | OURSAFE | Generic Unmanaged | cde345 | FALSE | Platform does not support automatic password management | ||
| user4 | server4 | OURSAFE | Generic Unmanaged | def456 | FALSE | Platform does not support automatic password management | ||
| user5 | server5 | OURSAFE | Generic Unmanaged | efg567 | FALSE | Platform does not support automatic password management |
Then browse to select the CSV file. It will show you how many accounts are included in the file – 6 here
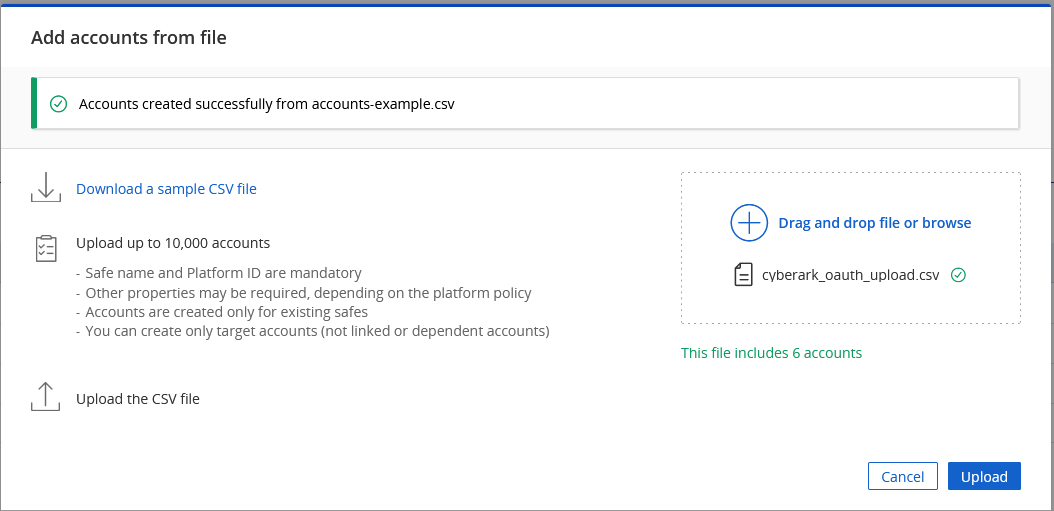
Click “Upload”. The accounts will be created, and you will see a banner at the top of the site