Microsoft Windows Cloud Files Mini Filter Driver Elevation of Privilege Vulnerability (alternately referred to as MiniPlasma) is one of those findings that is a little confusing. The vulnerability appears tied to an issue Microsoft originally addressed in 2020, which raises the obvious question: if it was already patched, why is it relevant again now?
The original fix may have closed a specific exploitation path without fully eliminating the underlying bug class. The remediation may have been incomplete. Or a later code change may have reintroduced a previously fixed condition. Without updated vendor detail, it is hard to say exactly which of those happened; but the operational conclusion is the same: a system can still be exposed today even if the original 2020 patch was installed.
For environments looking for a practical mitigation, the good news is that many servers do not need Windows Cloud Files functionality at all. The vulnerable component is the Cloud Files Mini Filter Driver (CldFlt), which supports placeholder and hydration behavior used by features such as OneDrive Files On-Demand and other CfAPI-based integrations.
That makes CldFlt a viable mitigation target. If the filter is loaded but not attached to any volumes, there is a good chance it can be safely unloaded and disabled. This does not remove the driver from disk, but it does remove the active kernel attack surface associated with the running minifilter. Since this is an elevation-of-privilege issue, that distinction matters: the goal is not to claim the file no longer exists, but to prevent the vulnerable driver from being active in the system.
The following process checks whether any volumes are associated with CldFlt, temporarily unloads the filter, verifies that the system continues functioning normally, and then disables the driver persistently.
REM Check instances on CldFlt — if 0, proceed with testing disablement fltmc filters
REM Example output:
REM Filter Name Num Instances Altitude Frame
REM —————————— ————- ———— —–
REM bindflt 0 409800 0
REM MsSecFlt 9 385600 0
REM CSAgent 9 321410.78870 0
REM storqosflt 0 244000 0
REM wcifs 0 189900 0
REM CldFlt 0 180451 0
REM FileCrypt 0 141100 0
REM UnionFS 0 130850 0
REM npsvctrig 1 46000 0
REM Wof 1 40700 0
REM Unload cldflt fltmc unload cldflt
REM Verify stopped sc query cldflt
REM Verify no longer in filters list fltmc filters
REM Verify applications and expected file operations still work normally
REM If everything looks good, disable persistent startup sc config cldflt start= disabled
After completing an in-place upgrade from Fedora 43 to Fedora 44, dnf5 failed to run with this error:
[lisa@fedora05 ~]# dnf5 update
Cannot load dnf5 plugin: /usr/lib64/dnf5/plugins/automatic_cmd_plugin.so
Cannot load shared library “/usr/lib64/dnf5/plugins/automatic_cmd_plugin.so”: libdnf5-cli.so.2: cannot open shared object file: No such file or directory
What happened
The Fedora 44 upgrade completed, and the installed dnf5 packages were all current Fedora 44 versions. However, there was a leftover plugin file still sitting in /usr/lib64/dnf5/plugins/automatic_cmd_plugin.so.
That file was not owned by any RPM package and had been built against an older library, libdnf5-cli.so.2.
But Fedora 44 had /usr/lib64/libdnf5-cli.so.3.
dnf5 was trying to load a stale plugin from before the upgrade.
How I verified it
These commands showed the problem:
ls -l /usr/lib64/libdnf5-cli.so* rpm -qf /usr/lib64/dnf5/plugins/automatic_cmd_plugin.so ldd /usr/lib64/dnf5/plugins/automatic_cmd_plugin.so
Results:
libdnf5-cli.so.3 existed
automatic_cmd_plugin.so was not owned by any package
After deleting the stale plugin, dnf5 worked normally again.
Root cause
This appears to be a leftover orphaned dnf5 plugin from before the major version upgrade. Even though the main dnf5 and libdnf5 packages were updated correctly, dnf5 still tried to load the old .so file it found in the plugins directory.
I encountered a challenge with a Kafka management tool — it supports SSO, and I was able to get an OAUTH connection set up to control what users could see when logging in through the UI, but the API component didn’t extract information from the bearer token and there was nothing in the rbac mapping to allow the bearer-token client ID to access anything.
Updates to allow the /api components to be authenticated by simple bearer tokens and a client ID mapped into a role are at https://github.com/ljr55555/kafka-ui
AuthorizationController.java was updated to properly support non-browser, machine-principal auth.
Added/fixed:
avoids null failure when authentication.getName() is missing
resolves principal name from alternate attributes such as:
client_id
sub
username
updated displayed permissions logic so /api/authorization uses the same effective RBAC matching idea as the backend
Result
/api/authorization now works for bearer-token API callers and shows:
username = client ID
populated permissions list
AccessControlService.java
Added support for API bearer-token principals
Previously, getUser() only worked when the authenticated principal was a RbacUser, which covered the browser/user flow.
Now it can also derive an AuthenticatedUser from opaque-token authenticated principals by extracting:
principal name
group-like values from attributes/authorities if present
Updated role matching logic
Previously, role matching was only role name matches one of user.groups(). Now it also supports role name matches user.principal(). That enables RBAC binding directly to the API client ID.
Result
RBAC now works for:
normal browser users via groups
API bearer-token callers via client principal name
DynamicConfigMapper.java
Fixed a mapper bug.
Before
The method mapping resource server config created a populated OAuth2ResourceServerProperties result object but always returned null.
After
It now returns result.
Result
Dynamic/config mapping for resource-server settings no longer silently discards the mapped object.
Build/package note
To preserve the browser UI, the jar needs to be built with frontend included — which you know if you read the doc … or you take my route, start it all up, test the API successfully, and then get baffled that the user UI throws
Instead of flipping back and forth between java versions for various builds, you can just use a docker container for the proper Java version to run the build.
[lisa@docker kafka-ui]# docker run --rm -it   --user $(id -u):$(id -g)   -v "$PWD":/workspace   -w /workspace   eclipse-temurin:25   bash -lc './gradlew clean build'
Downloading https://services.gradle.org/distributions/gradle-9.2.0-bin.zip
............10%.............20%.............30%.............40%.............50%.............60%.............70%.............80%.............90%.............100%

Welcome to Gradle 9.2.0!

Here are the highlights of this release:
 - Windows ARM support
 - Improved publishing APIs
 - Better guidance for dependency verification failures

For more details see https://docs.gradle.org/9.2.0/release-notes.html

Starting a Gradle Daemon (subsequent builds will be faster)
<=============> 100% CONFIGURING [1m 46s]
> Resolve dependencies of :api:detachedConfiguration273
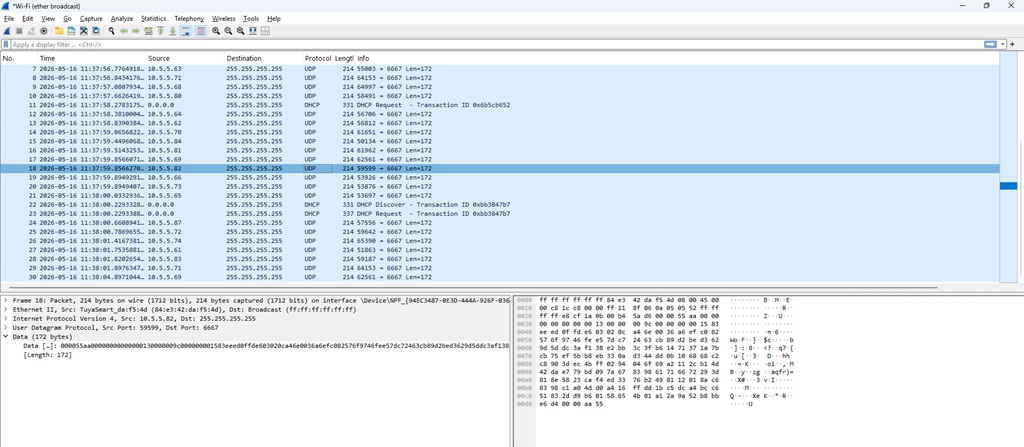
Looking at network slowness, I noticed a lot of overrun errors and an inexplicable amount of broadcast traffic. Running a sniffer trace … these tuya bulbs announce themselves in a constant loop. We’ll add a network filter for now, but some other firmware on these bulbs would be great!
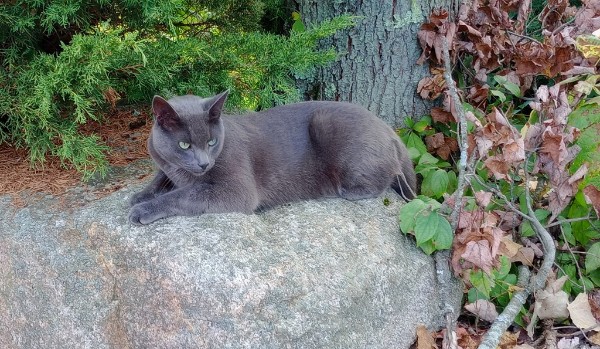
Another memory – sometimes Ash would lay just outside our family room door. Stretched out on the rubber mat, relaxed and content. I wouldn’t even know he was there … and then a little shark fin would appear in the window. Then another – I called that the kitten shark.
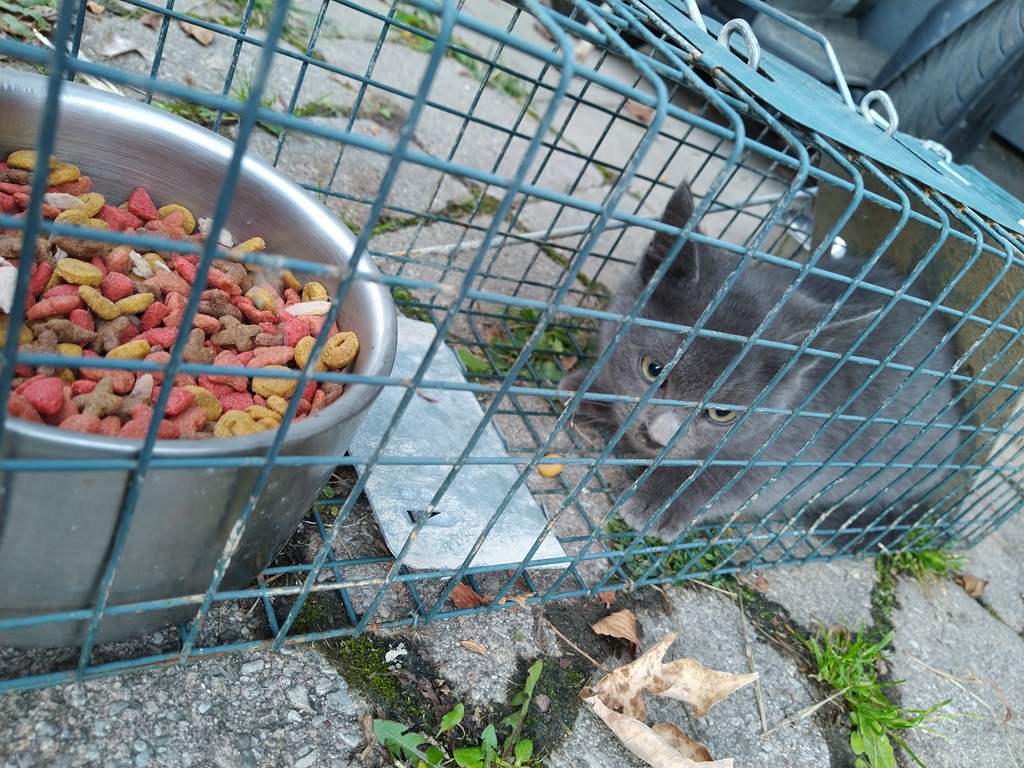
When Patches and the four kittens would come to eat and play on our back patio, we noticed that they never really meowed. And then, on October 28, 2022 — we heard a little kitten meow. The little gray kitten had been left behind – the cat Scott had decided was the coolest one. We got a little trap and baited it with cat food and tuna bits. And caught our little Ash.
We petted him and fed him, and he would curl up on one of us to be extra warm to take a nap. He had the loudest purr I’ve ever heard. You could hear from across the room whenever he was happy. And he was so happy. He loved to be scratched at – ruffling up his fur, then smoothing it back down so he was a sleek, tiny panther again.
He was a spooky cat, very skittish until he got to know and love you. I’d hang out with Anya in her room and play with her while Ash was in her room. One day, we were laying on the bed and he climbed up on my leg. Froze when I looked at him, so I looked away. He walked up my leg and onto my back. Then there was a little kitten head poking over my shoulder. He learned to trust me. Inside! I could pick him up, pet him, and play with him. It took a while before he would come up to me outside. I was cleaning a spot to plant some comfrey and asparagus over by the orchard. Crawling around on the ground, picking out all the weeds. He slowly made his way over to me, creeping closer and closer, and eventually wanted to be petted. I took a long break to talk to him, pet him, and snuggle him. Since then, when I’d go outside, he would usually stop whatever he was doing to run over and greet me.
He had a great smile and always looked thrilled when one of his “people” came outside to hang out. He’d run up with a happy murr-ur. Follow me and ‘help’. He’d even brave the giant growly lawnmower monster to follow me around the yard when I’d use the push-mower. We’d walk over to the chicken coop to let the chickens and turkeys out, he’d come back to the house with me, and then he’d go do cat things for the day. In the winter, he’d carefully follow behind me in the trail I broke through the snow, while his brother would bound across the foot-deep snow into the woods. He’d come with Anya and I as we gathered maple syrup – going from the back woods to the farm, and back to the house. He ducked into the covered cub cadet with us when it started raining, walked along the river as Anya looked for rocks, and was always on the look for chipmunks to pounce on. He’d follow me a lot inside, too. Walking up to the laundry room to get more cat food, bring laundry from the drier into my bedroom and fold it, then back downstairs. Or back and forth into the pantry while I gathered ingredients for dinner.
He was the snuggliest cat I’ve ever met. He would weave between my legs while I was walking outside; I frequently picked him up, held him, and petted him as I walked somewhere. He’d nuzzle his forehead under my chin or scan the yard for prey. If he saw a bird, he’d leap from my arms to try and get it. He loved getting his belly petted. His belly had the softest, silkiest fur. And he was growing two white patches – one on his chest and one farther down on his abdomen. They were getting bigger as he got older, and I thought he might turn into Ash the White like Gandolf.
He was such a smart cat. He learned how to open the garage door to follow me inside when I needed to grab some tools. As I was going through the drawers, trying to find something, I heard a creaky noise behind me. Turning around, the garage door was open and he came trotting over purring and asking to be petted. He would open the laundry room door, so we had to lock it at bedtime.
We used to have trouble rounding the cats up at night, but I got canned cat food. We started bringing them inside at night and giving them canned food for “dinner”. He loved kitten dinner time. Rarely had trouble getting Ash to come in at night. He’d come with us to round up the birds and happily run into the house for dinner.
He loved butchering day – the best farm cat day of the year. He would get excited if I picked up the big, white cutting boards and carry them toward the family room door. It’s hard to walk when you’ve got two 18×30 pieces of plastic in your hands and a big, strong cat weaving between your legs and purring at you. The first butchering day, Ash and Dumplin were so hyper after eating the trim meat I’d throw for them. Zooming around the yard and running up trees. Ash climbed so high on one of the big trees that Anya was worried he wouldn’t get down safely.
He’d climb the ornamental pine at the corner of the garage and hop onto the roof. Looking from the driveway, there’d be a cat walking around on the roof.
As he got a little older, he liked to come into the family room for a nap during the day. He’d sleep on the sofa, either in Anya’s spot while she was at school or snuggled up next to me. When the weather was nice, he would have cat adventures then come back to nap on one of the benches on the back patio or some giant slice of a tree. If he wanted to come inside and no one noticed him, he’d crawl up the screen door (which irritated Scott endlessly) – was very noticeable!
He started having seizures three weeks ago. Trips to the emergency vet, medicine and more medicine. I thought the medicine was working since he had three seizure free days. He was snoozy from the drugs, and spent a lot of time being held while he slept. Petted, brushed, and loved. Comforted after each seizure. He knew how much we loved him, and he was with his people until the end.
May Starclan light your path. May you find swift running, good hunting, and shelter where you sleep.
As I work through automating certificate installation, most applications have a “service account” user that has write access to the SSL certificate files. However, that user does not generally have permission to restart the application service.
We could get the ID added to sudoers with specific rights to manage the service … but it seemed more straightforward to use Polkit for very granular control permitting the service account to run specific verbs with systemctl.
The following rule allows the “tomcatadmin” user to run systemctl start, stop, or restart with the apache-tomcat.service unit.
cat > /etc/polkit-1/rules.d/60-apache-tomcat-tomcatadmin.rules <<'EOF'
polkit.addRule(function(action, subject) {
    if (action.id == "org.freedesktop.systemd1.manage-units") {
        var unit = action.lookup("unit");
        var verb = action.lookup("verb");

        if (subject.user == "tomcatadmin" &&
            unit == "apache-tomcat.service" &&
            (verb == "start" || verb == "stop" || verb == "restart")) {
            return polkit.Result.YES;
        }
    }
});
EOF