Preliminary stuff – before setting up SSH deployment in your pipeline, you’ll need a user on the target box with permission to write to the files being published. You will need a public/private key pair.
On the target server, the project needs to be cloned into the deployment directory. The public key will need to be added to authorized_keys (or authorized_keys2 on older versions of Linux) file so the private key can be used for authentication.
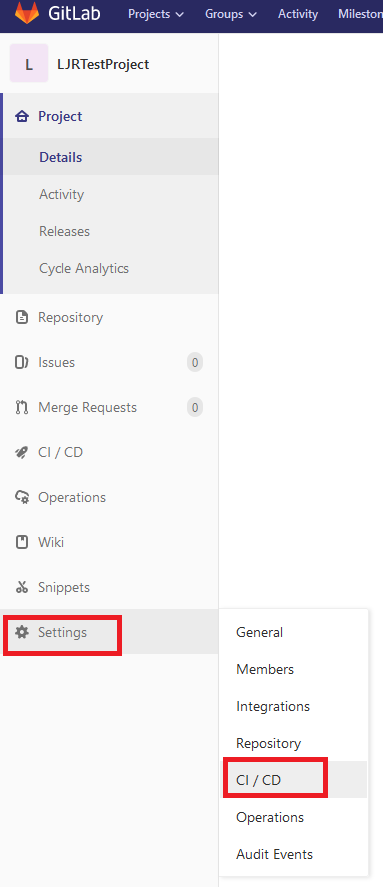
To set up your GitLab project for SSH-based deployment, you need to add some variables to the project. In the project, navigate to Settings ==> CI/CD
Expand the “Variables” section. You will need to add the following key/value variable pairs:
| Key |
Value |
| SSH_KNOWN_HOSTS |
Output of ssh-keyscan targetserver.example.com |
| SSH_PRIVATE_KEY |
Content of your private key |
| DEPLOYMENT_HOST |
Target hostname, e.g. targetserver.example.com |
| DEPLOYMENT_USER |
Username on target server |
| DEPLOYMENT_PATH |
Path to which project will be deployed on target server |
|
|
Save the variables
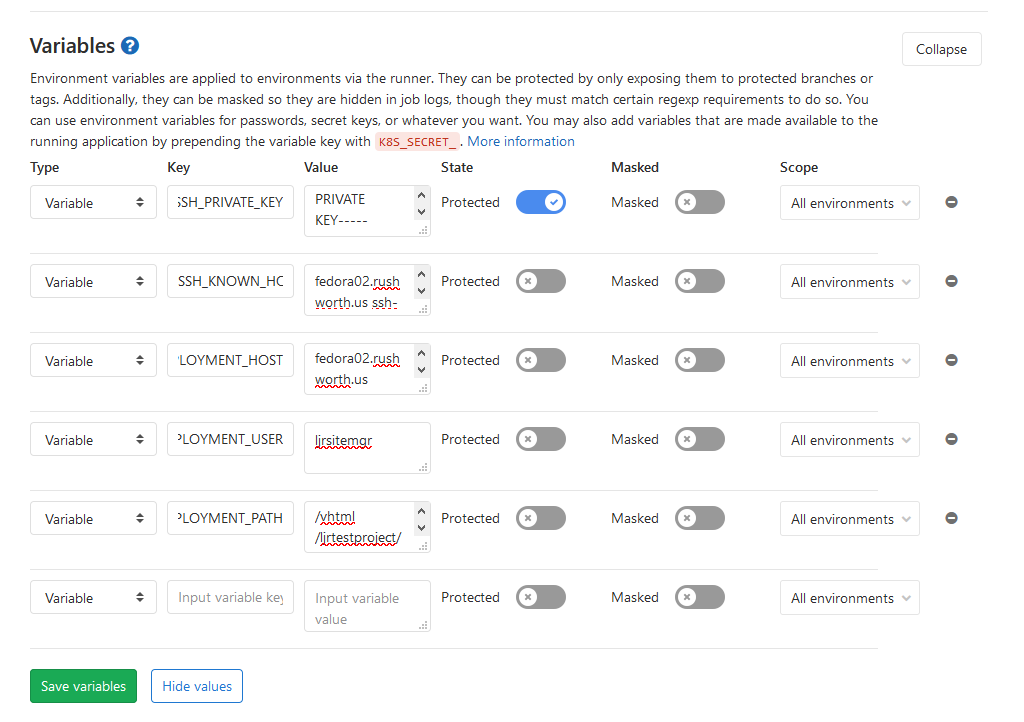
I am managing both a production and development deployment within the pipeline, so I’ve got prod and dev specific variables. We use the same username for prod and dev; but the hostname, path, and target server public key are different.
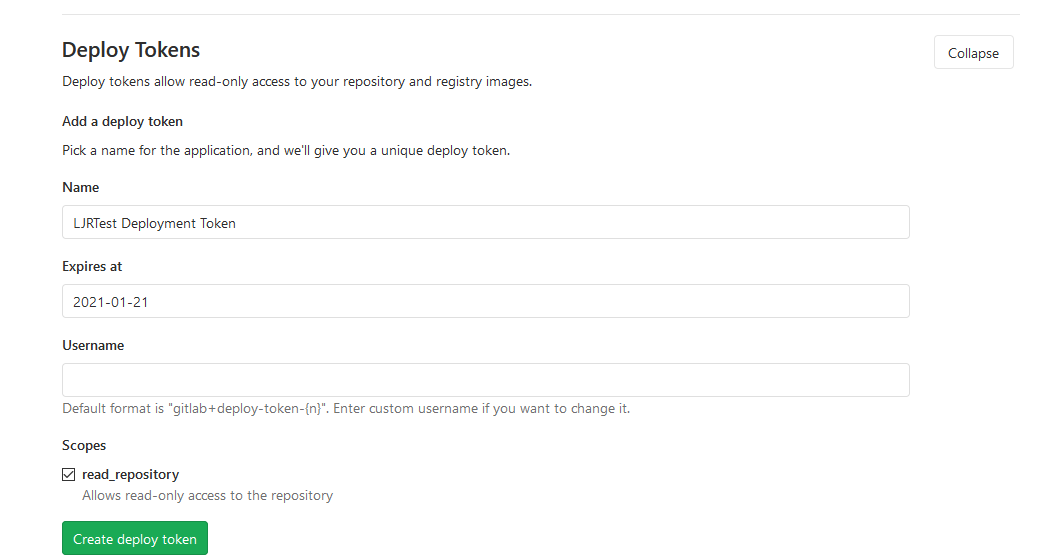
If your repository is publicly readable, this is sufficient. If you have a private repository, you’ll need a way to authenticate and fetch the data. In this example, I am using a deployment token. Under Settings Repository, expand the “Deployment Tokens” section and create a deployment token. On my target servers, the remote is added as https://TokenUser:TokenSecret@gitlab.example.com/path/to/project.git instead of just https://gitlab.example.com/path/to/project.git
Once you have defined these variables within the project, use the variables in your CI/CD YAML. In this example, I am deploying PHP code to a web server. Changes to the development branch are deployed to the dev server, and changes to the master branch are deployed to the production server.
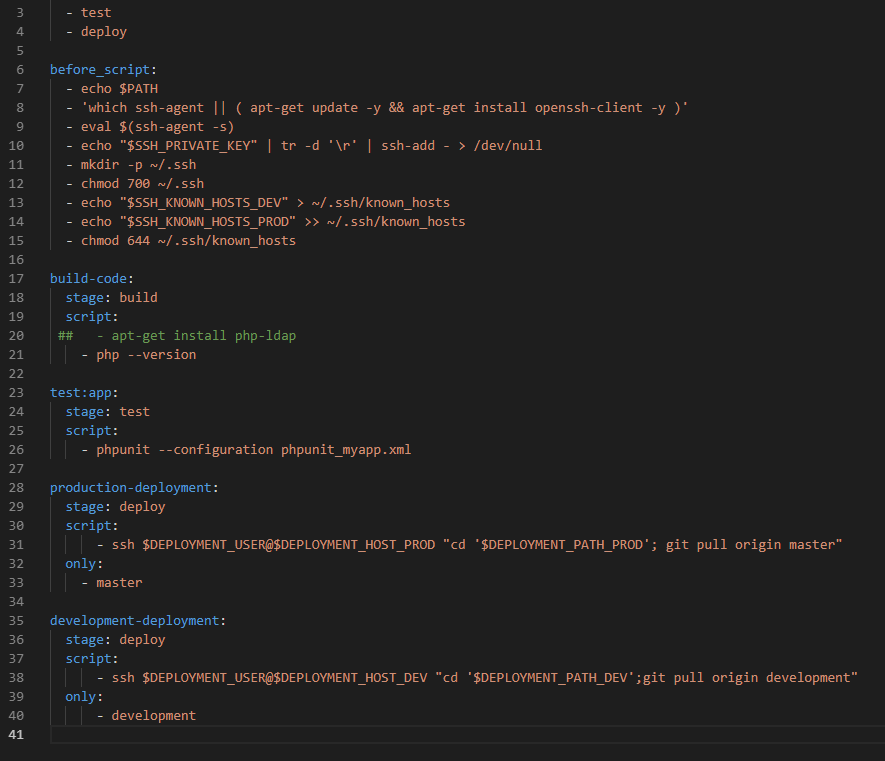
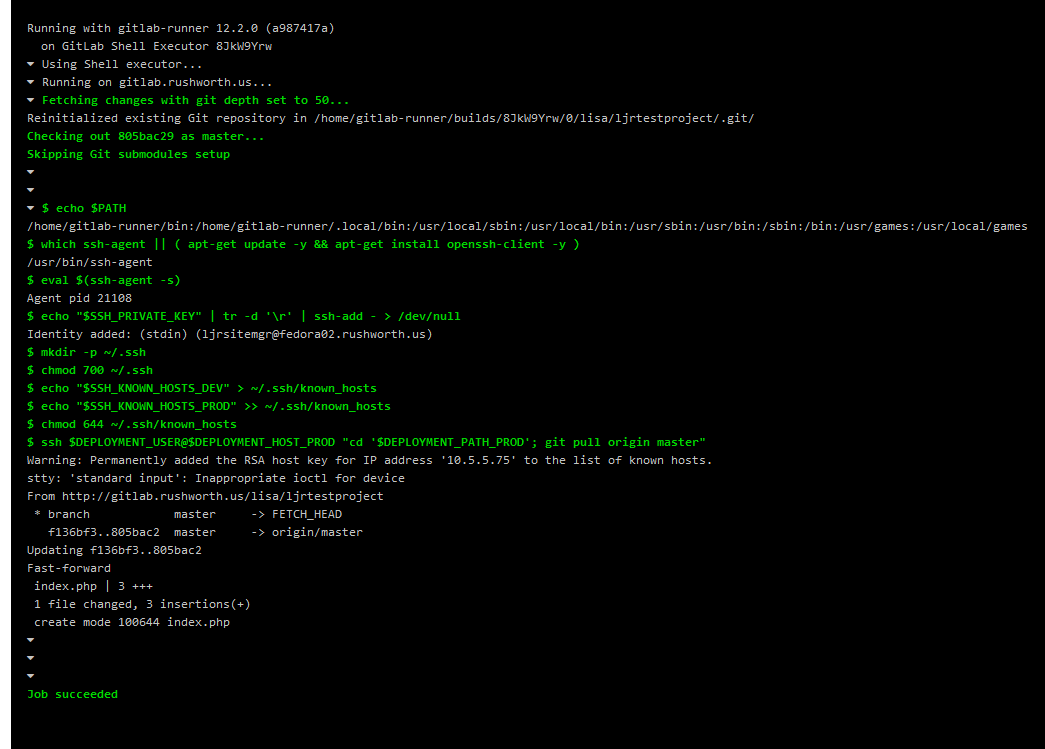
In the before_script, I set up the key-based authentication by adding the private key to my runner environment and adding the prod and dev target server’s public key to the runner environment.
- 'which ssh-agent || ( apt-get update -y && apt-get install openssh-client -y )'
- eval $(ssh-agent -s)
- echo "$SSH_PRIVATE_KEY" | tr -d '\r' | ssh-add - > /dev/null
- mkdir -p ~/.ssh
- chmod 700 ~/.ssh
- echo "$SSH_KNOWN_HOSTS_DEV" > ~/.ssh/known_hosts
- echo "$SSH_KNOWN_HOSTS_PROD" >> ~/.ssh/known_hosts
- chmod 644 ~/.ssh/known_hosts
In the deployment component, username and host variables are used to connect to the target server via SSH. The commands run over that SSH session change directory into the deployment target path and use “git pull” to fetch and merge the updated code. This ensures the proper branch is pulled to the production and down-level environments.
production-deployment:
 stage: deploy
  script:
    - ssh $DEPLOYMENT_USER@$DEPLOYMENT_HOST_PROD "cd '$DEPLOYMENT_PATH_PROD'; git pull origin master"
  only:
    - master

development-deployment:
 stage: deploy
 script:
   - ssh $DEPLOYMENT_USER@$DEPLOYMENT_HOST_DEV "cd '$DEPLOYMENT_PATH_DEV'; git pull origin development"
 only:
   - development
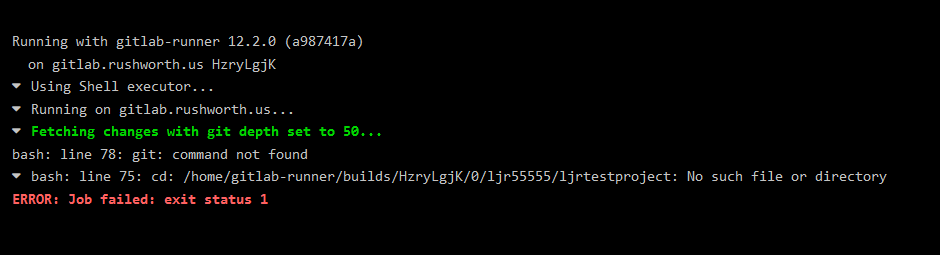
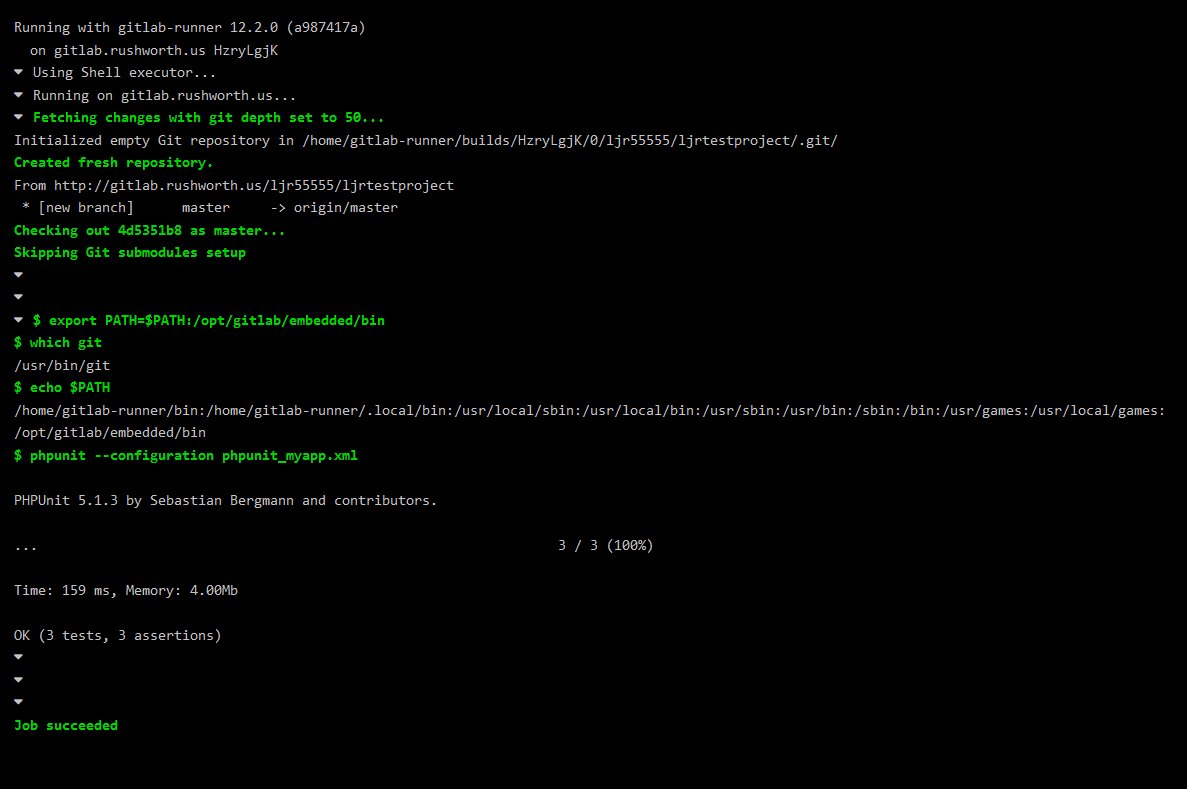
Now when I make changes to the project code,
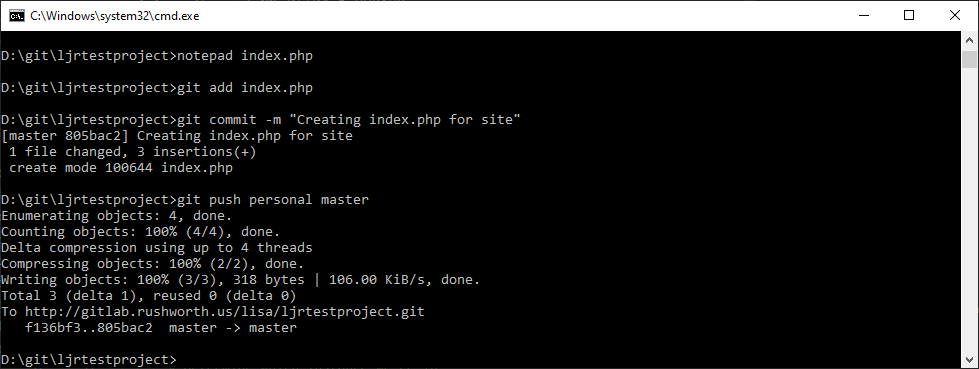
Assuming the tests still pass, the deployment will run

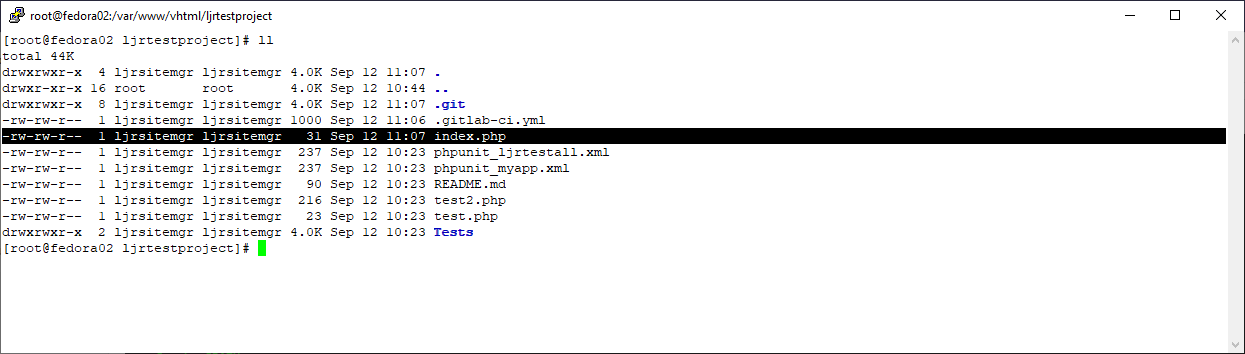
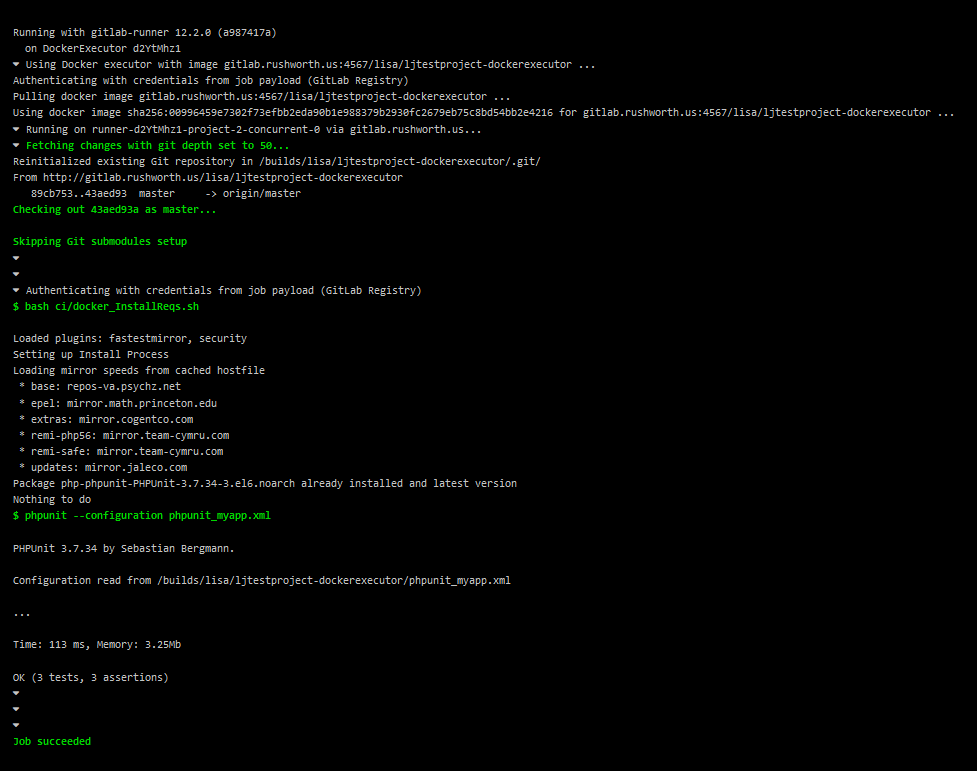
If you click on the deployment component, you can see what changes were pulled to the target server
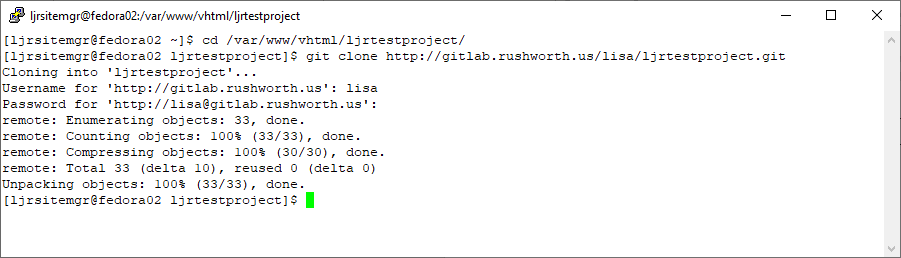
And, yes, the updated files are on my target server.