The trick to understanding this is knowing that “Meeting Notes” are, for some reason, Wiki pages and not OneNote documents. There are two types of meetings — those held in a Teams channel and those held outside of a channel — and the ability to get a useful link to the Meeting Notes depends on which type of meeting you have.
Meetings in a Teams Channel:
When your meeting is in a Teams channel, you can use the ellipsis to grab a link to the Meeting Notes location in Microsoft Teams.
This link points to the “Meeting Notes” tab created in the channel. That tab is available without a link, too — so I can access the meeting notes just by going to the channel where the meeting was held.
Meetings Outside of a Teams Channel:
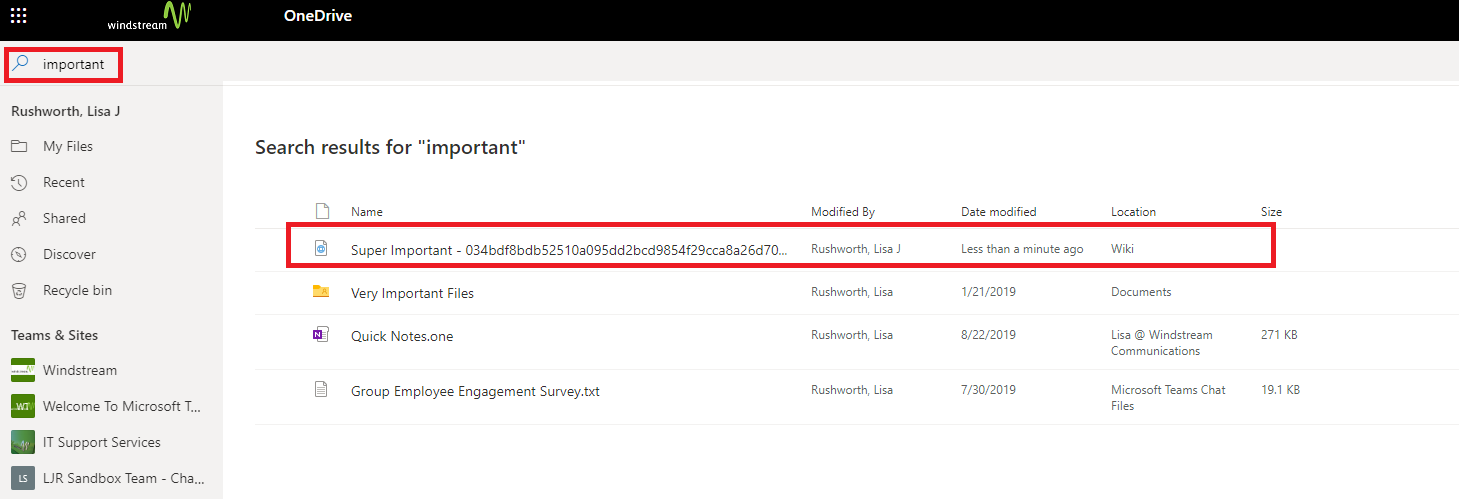
The meeting notes wiki file is stored in your OneDrive. You can find that file by searching your OneDrive for the name of the meeting. In this example, I have a meeting titled “Super Important”. You can right-click on this and select “copy link” to grab a link to the file.
The problem is that it’s an MHT (basically a self contained web page) file. I can give you a link to the file, but it’s not a convenient link to a OneNote page like you’d expect. For some reason, Chrome wants to save it as an EML (email) so the file opens in Outlook (or change the extension to MHT manually). Firefox keeps the MHT extension, and the file opens up in a browser so you can view the notes.
Did you know you can control who can present during a Teams Meeting? As of Dec 2019, you can!
There were a few cool Teams features that, when used inappropriately, disrupt the meeting. Anyone can mute other attendees — great when I notice someone is taking another call and can mute them; not great if I accidentally mute the presenter. Anyone can share their screen — great when we’re taking turns showing something and don’t need to transfer control; not great when you accidentally share your screen in the middle of someone’s presentation. And this occurs during meetings among respectful, professional business associates. The amount of control individual meeting participants get invite goofing off (while you can tell who just took over presenting, you cannot tell who just muted you for the seventh time).
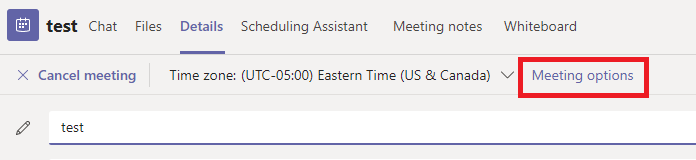
Microsoft has introduced “roles” for meetings. As the meeting organizer, you can establish who has what role. By default (i.e. when you don’t define any roles), everyone can do everything. But, after you create the meeting, you can edit it and select “Meeting Options”
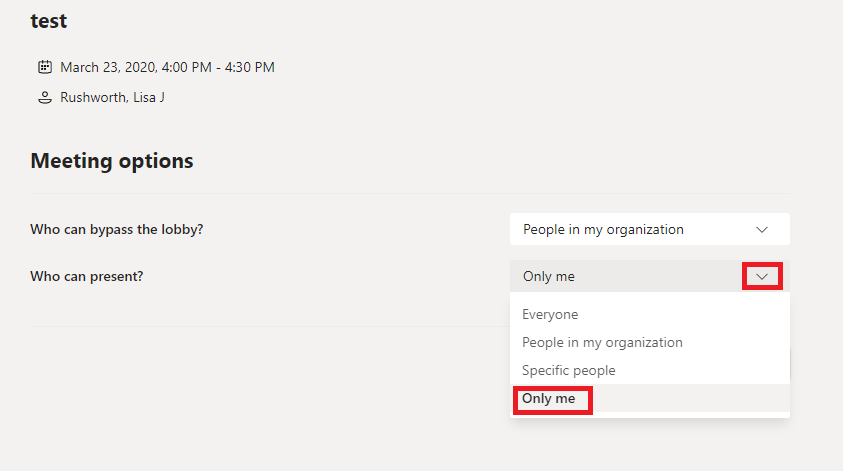
Two options will be presented — you can control who can bypass the lobby (avoid having external parties waiting if you anticipate their attendance) and define who can present. The terminology is a bit odd here, but this is the selection that defines who has what roles within a meeting.
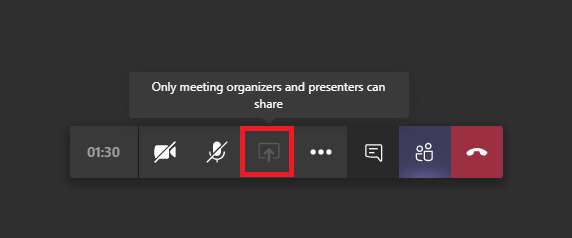
As the person who scheduled the meeting, you are the organizer — you can elect to only allow yourself to present. If you select to allow “Specific people” or “People in my organization” to present, they are assigned the “presenter” role. Everyone else is an “attendee”. What can a presenter or attendee do? Consult the MS documentation for a complete list. The big ones, though … an attendee cannot share their screen. The option is grayed out, and they’ll be advised that only organizers and presenters can share.
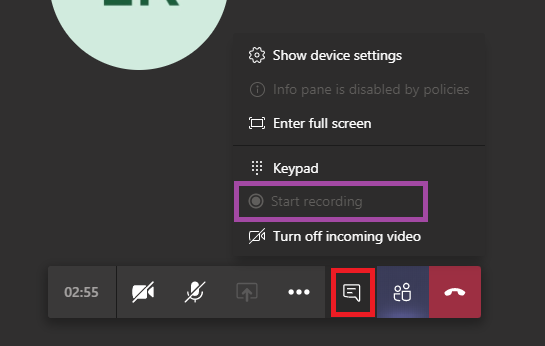
Attendees cannot start or stop recording — the option, again, is grayed out.
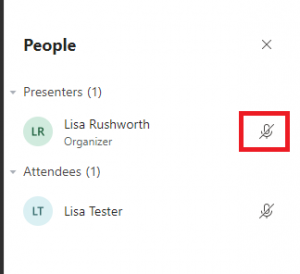
And attendees cannot mute or unmute anyone through the participant listing. This means they cannot mute someone else — the microphone icon will disappear when they put their mouse over it. But it also means they cannot mute or unmute themselves here. They will need to use the meeting control bar to mute or unmute.
What if you’ve restricted someone as an attendee and need them to share their screen? You can modify their role in the participant listing — mouse over their listing and use the ellipsis to select “More options” and select “Make presenter” (or, if you wish to demote a presenter to attendee status, select “Make attendee”).
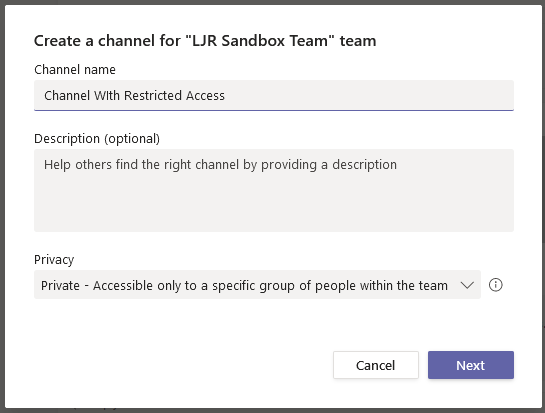
WooHoo! When creating a channel, I have a privacy setting!!
Individuals who do not have access to the channel do not see it in their Teams listing, and posts made to a private channel cannot at-mention the Team or individuals who do not have access. I’m glad Microsoft landed on the side of privacy in their implementation here.
It would be awesome if MS would have added the ability to move channels into other Teams with this rollout so we could consolidate Teams that were set up to restrict access to content. But at least we’ll be able to consolidate general-access and restricted-access content in a single Teams space going forward.
Private channels should be coming this week … not my tenant yet, but soon
Multi-window functionality where chats, calls, and such can pop out into another window
Live captioning should land later this year — this is an obvious great feature for people with reduced hearing or frequency loss, live “closed captioning” is awesome if you’re working from a noisy location too
Microsoft Whiteboard moved into general availability — it’s been a preview for quite some time now
“Attendee” roll will prevent people from inadvertently sharing their screen in the middle of a meeting
My Staff portal that allows managers to perform password resets (and maybe unlocks) for their employees. This is something I’ve done as custom code in IDM platforms, but it’s nice to see Microsoft incorporating ideas that reduce down-time due to password challenges.
I’ll be curious to see if the healthcare-specific features move into other verticals — MS rolled out a feature that allows you to designate a contact when you’re in surgery (basically redirect all of my messages to Bob because I’m busy right now) that seemed like it would be quite useful in enterprise or education uses. The “patient coordination” feature they talk about might work as a contact management tool out of the medical realm too.
URLs in Teams will be protected like the links in other Office 365 programs — if you click on a link and see something about “Advanced Threat Protection” … that’d be why 🙂
While hosting a bot on the Azure network allows you to use pre-built solutions or develop a bot without purchasing dedicated hardware, the bots we’ve deployed thus far do not have access to internally-housed data. And program execution can be slow (expensive, or a combination of the two) depending on the chosen pricing plan. But you can build an Azure bot that is essentially a proxy to a self-hosted bot.
This means you can host the bot on your private network (it needs to be accessible from the Azure subnets) and access internal resources from your bot code. Obviously, there are security implications to making private data available via an Azure bot – you might want to implement user authentication to verify the bot user’s identity, and I wouldn’t send someone their current credit card information over a bot even with authentication.
How to Communicate with a Self-hosted Bot from Azure:
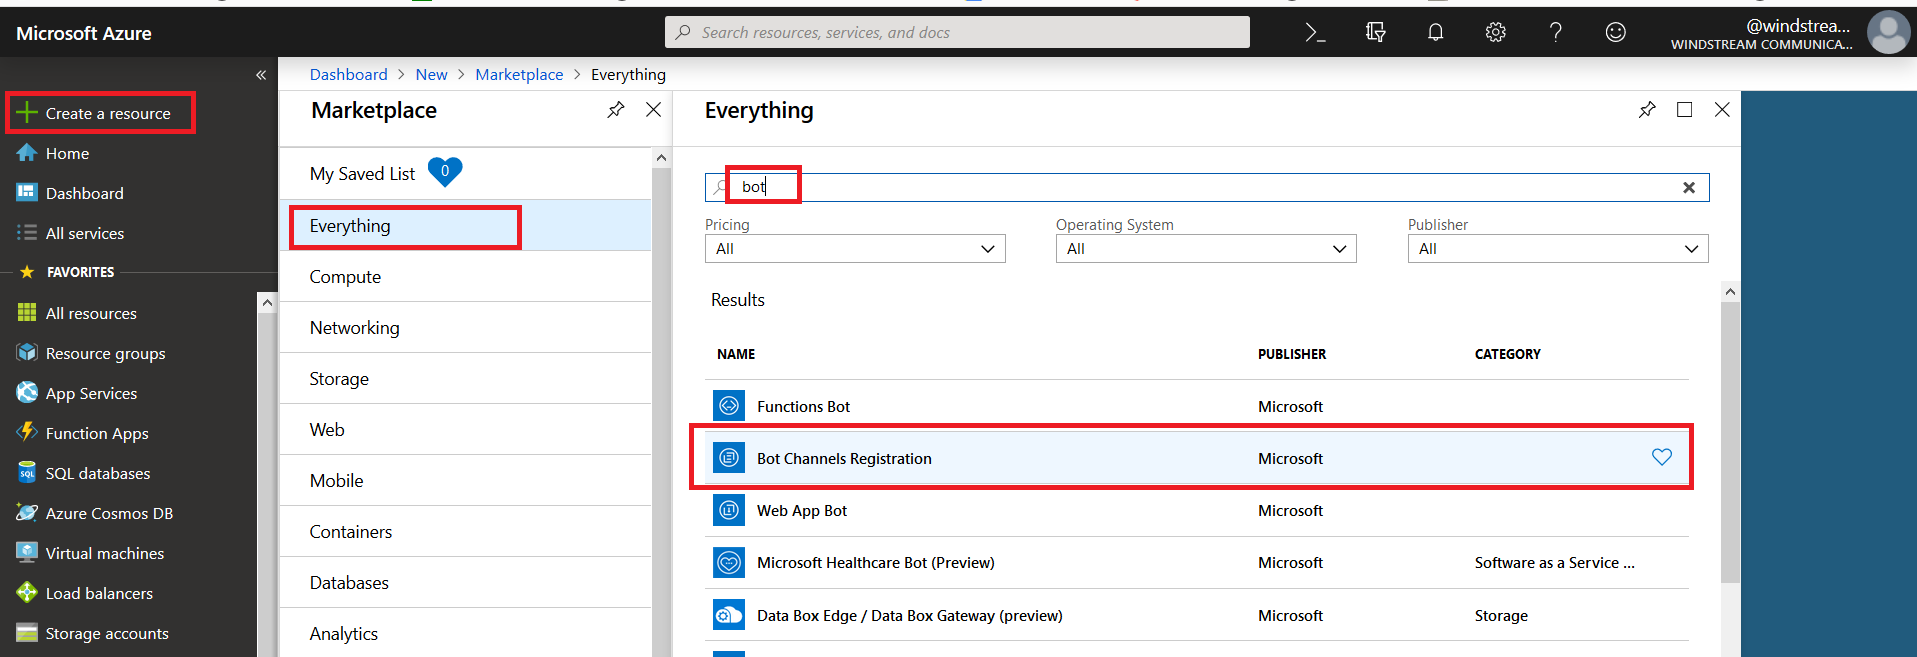
Register an Azure bot. From https://portal.azure.com, select “Create a resource”. Search for “bot” and select “Bot Channels Registration”.
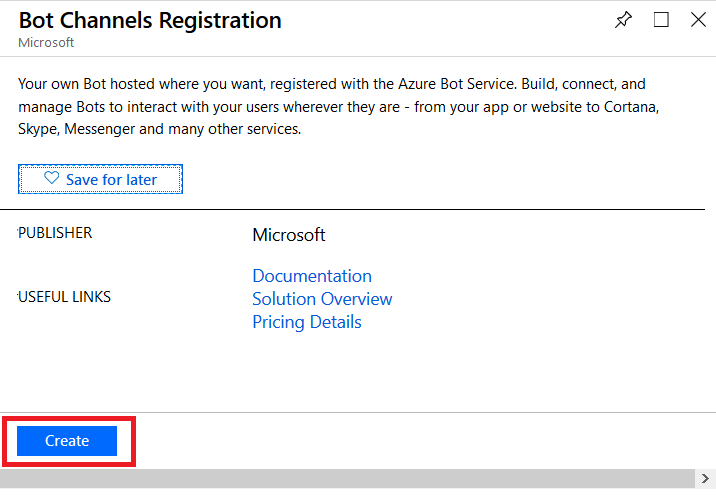
On the pane which flies out to the right, click “Create” (if you will be deploying multiple self-hosted bots to Azure, click the little heart so you can find this item on “My Saved List” when creating a new resource).
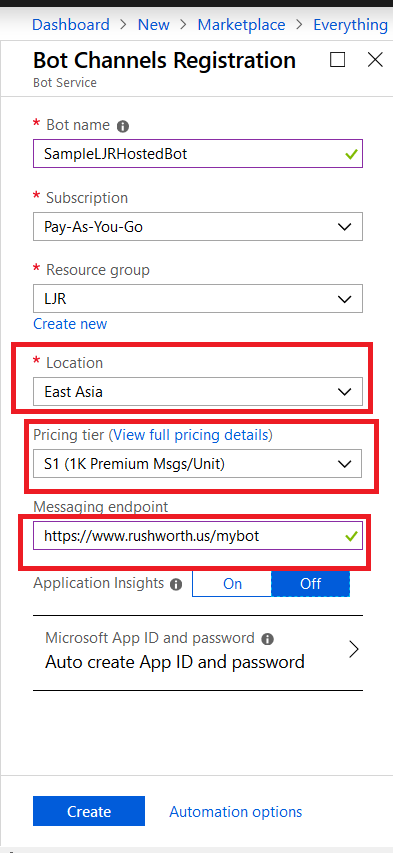
Provide a unique name for your Azure bot. If you have not yet created a resource group, you will need to create one. Make sure the hosting location is reasonable for your user base – East Asia doesn’t make sense for something used on the East coast of the US!
Select the pricing tier you want – I use F0 (free) which allows unlimited messages in standard channels (Teams, Skype, Cortana) and 10,000 messages sent/received in premium channels (direct user interaction … which I specifically don’t want in this case). Then provide the endpoint URL to interact with your locally hosted bot.
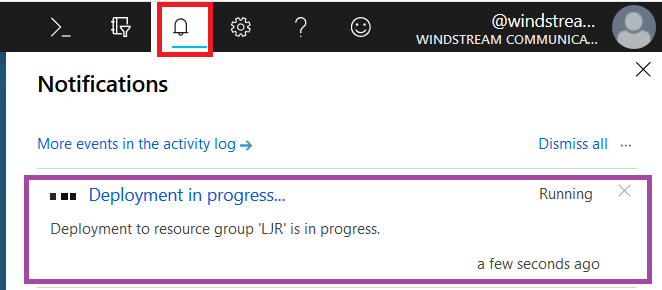
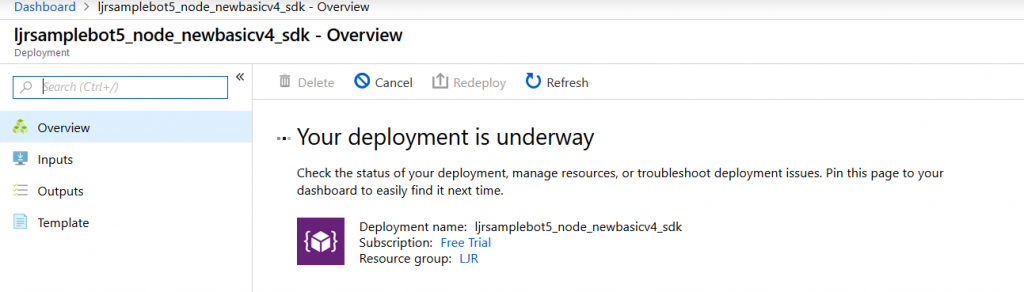
Click “Create” and Azure will begin deploying your new resource. You can click the “Notifications” bell icon in the upper right-hand portion of the page to view deployment progress.
When deployment completes, click “Go to resource” to finish configuring your Azure bot.
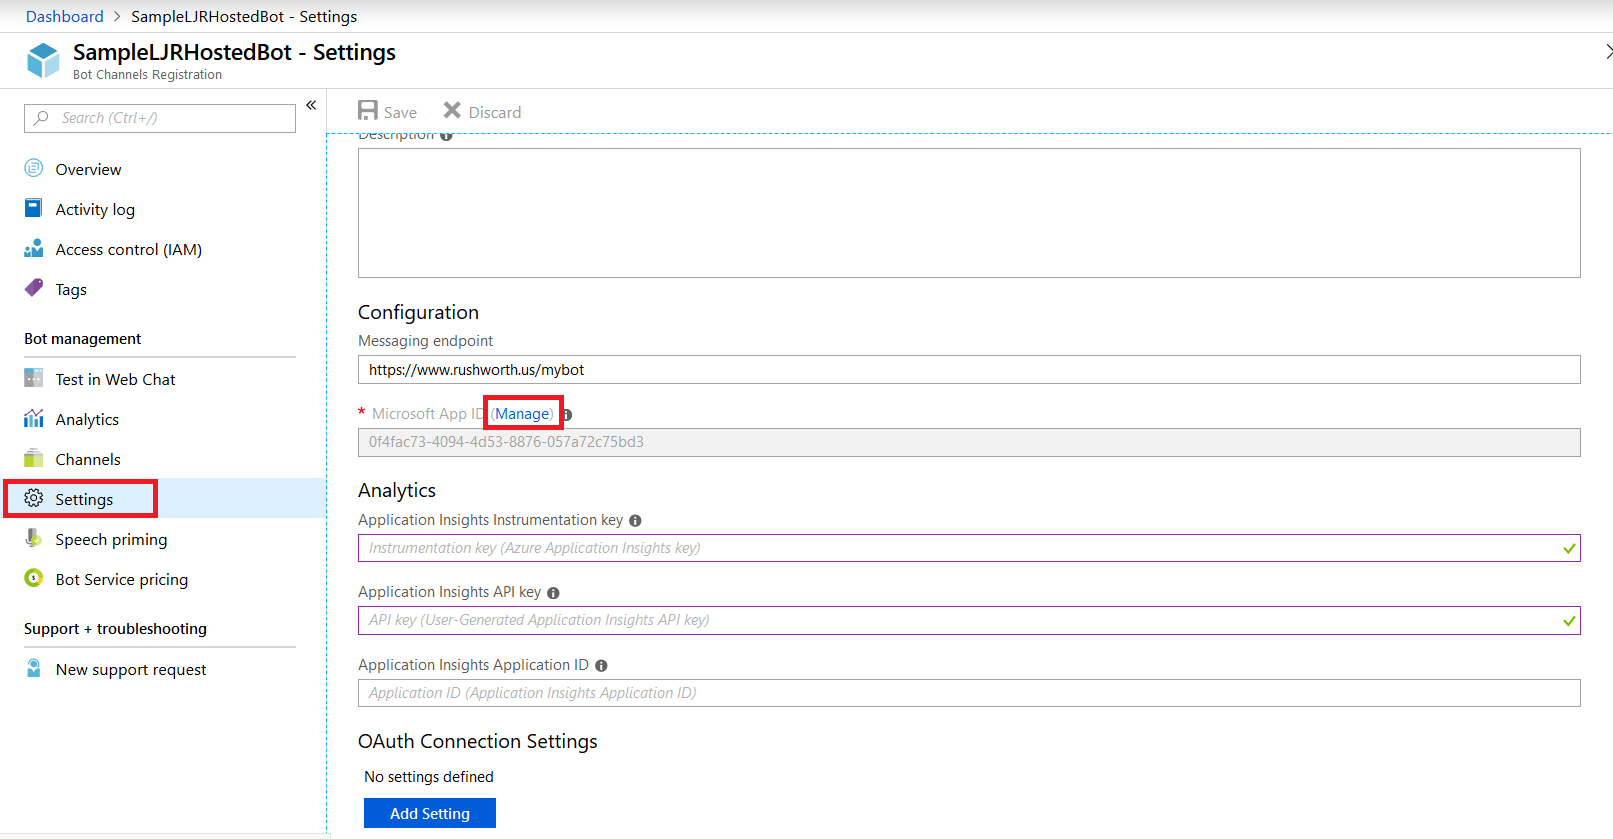
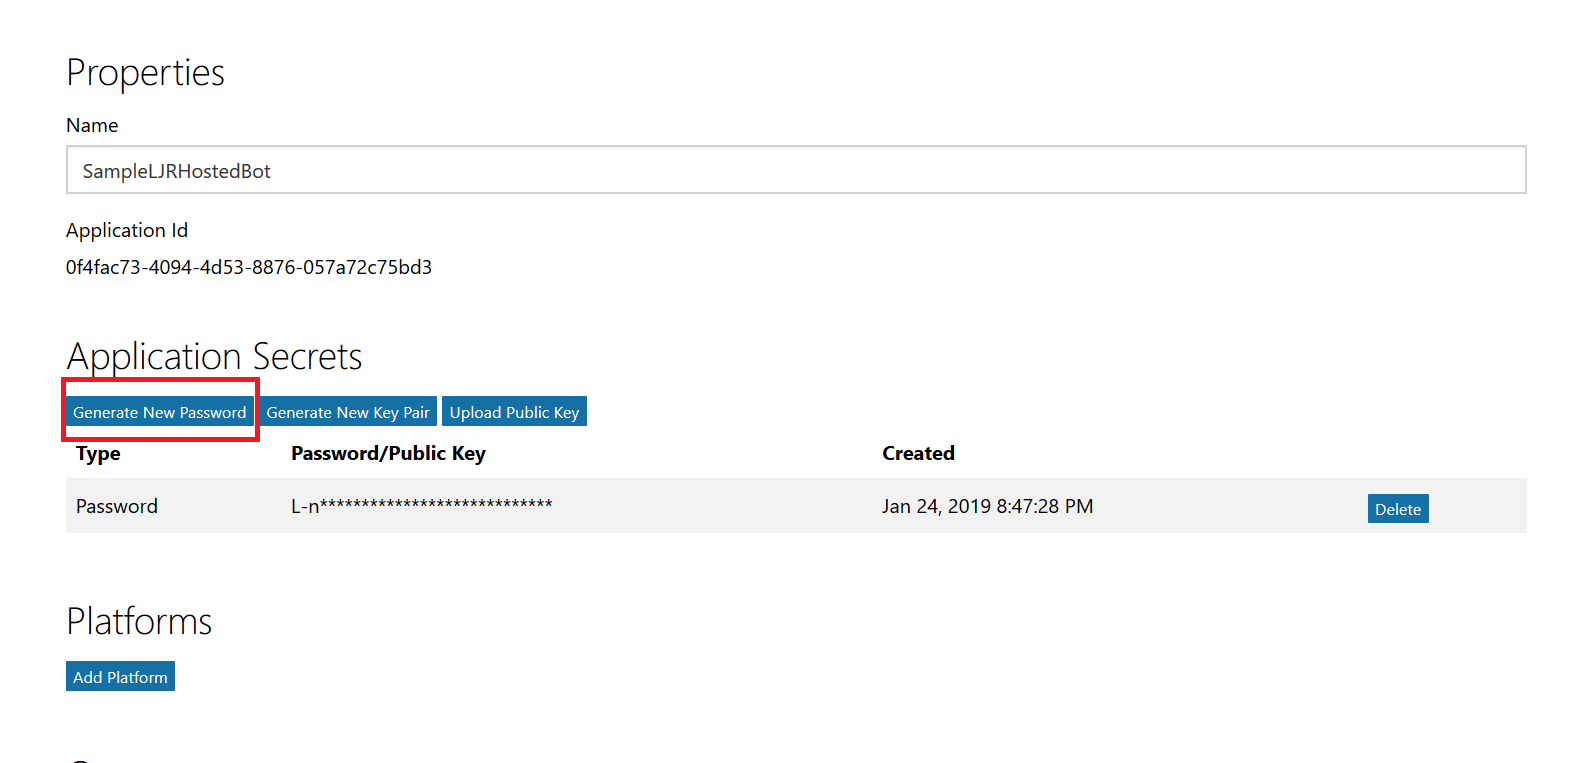
Select “Settings” from the left-hand navigation menu, then find the application ID. Click “Manage”.
This will open a new portal – you may be asked to sign in again. You are now looking at the application registration in Microsoft’s developer application registration portal. There’s already an application secret created but beyond the first few letters … what is it? No idea! I’m a cautious person, and I don’t know if MS has embedded this secret somewhere within the bot resource. Since an application can have two secrets simultaneously, I do not delete the automatically-created secret and click “Generate New Password”.
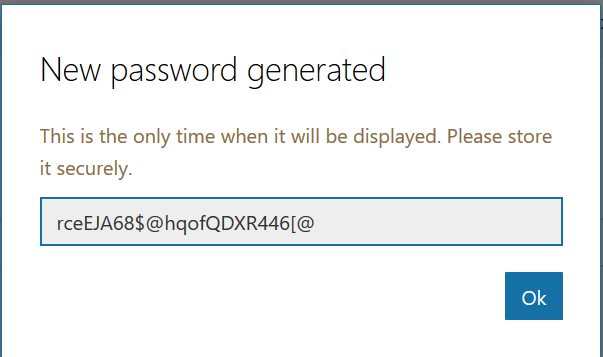
A new pane will appear with your new secret – no, the one in the picture isn’t real. Copy that and store it somewhere – you’ll need to add it to your bot code later.
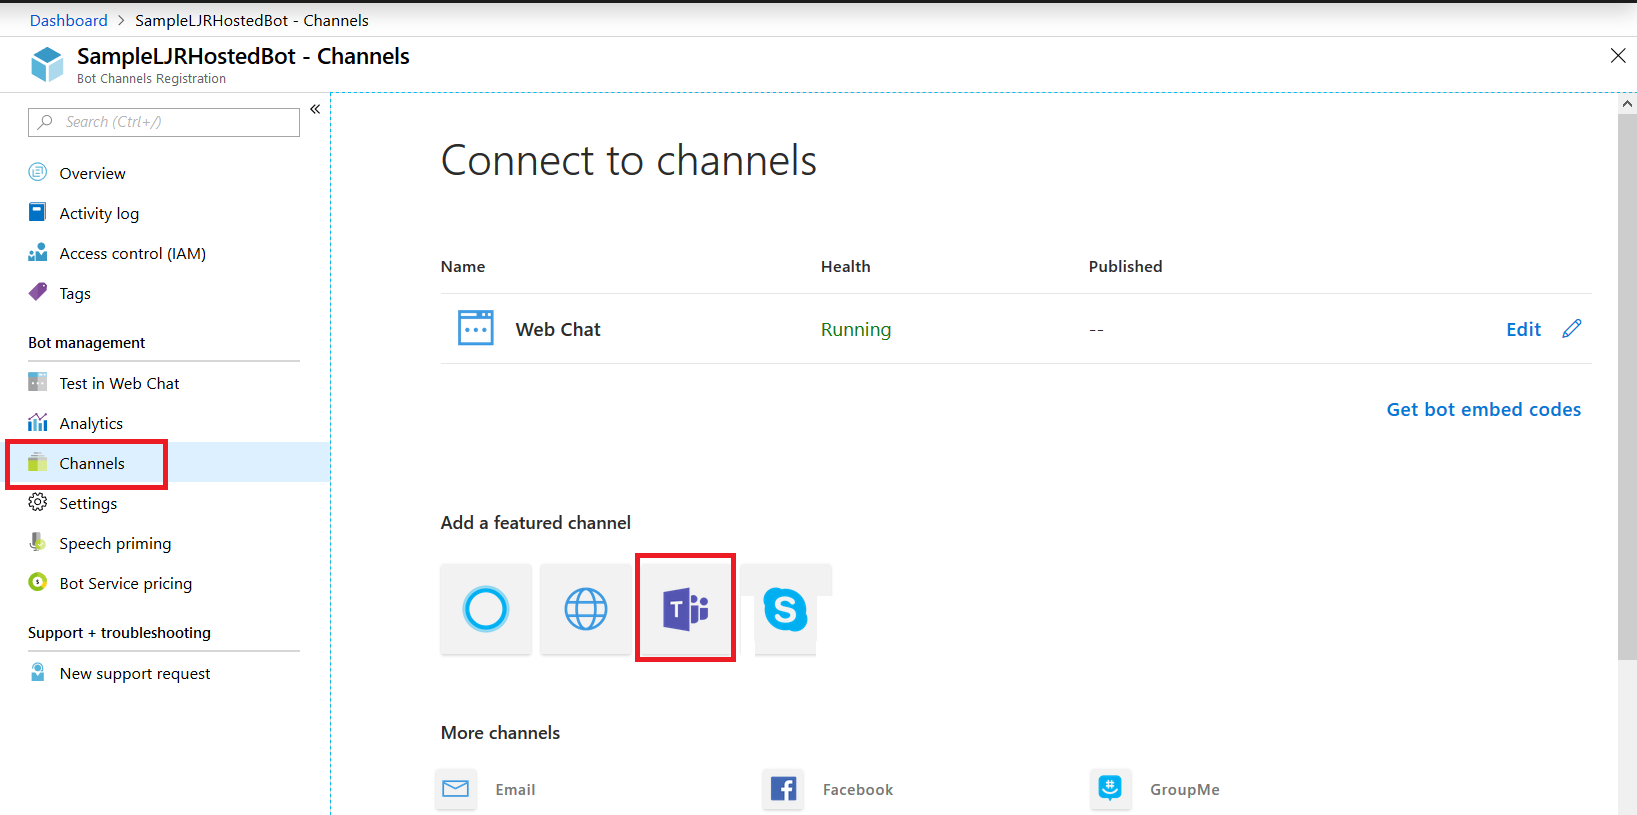
Close the application registration tab and return to the Azure portal tab. Click on “Channels” in your bot and add channels for any interactions you want to support. In this case, I want to publish my bot to Teams. There aren’t really settings* for teams – just click to create the channel.
* You can publish a bot to the Microsoft App Source … but is your bot something that should be available to the Internet at large? It depends! If you’re writing a bot to provide enterprise customers another support avenue, having the bot available through App Source makes sense. If you’re creating a bot to answer employee-specific questions, then you probably want to keep the bot out of App Source
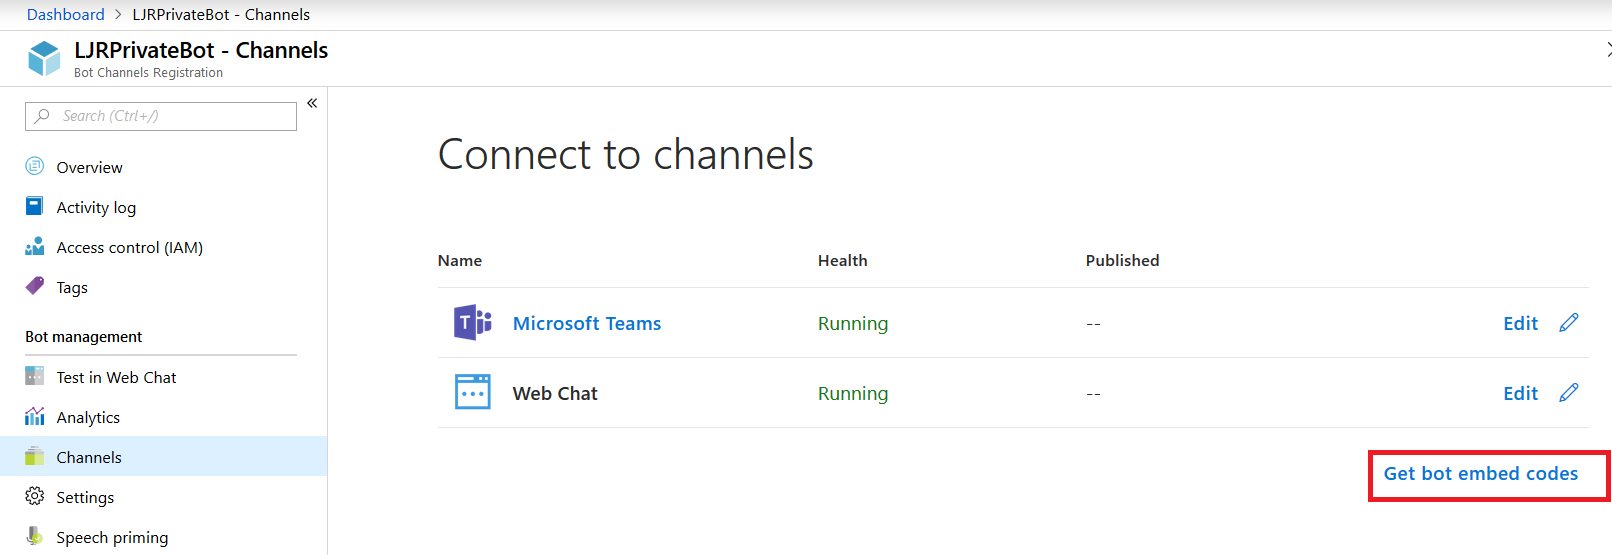
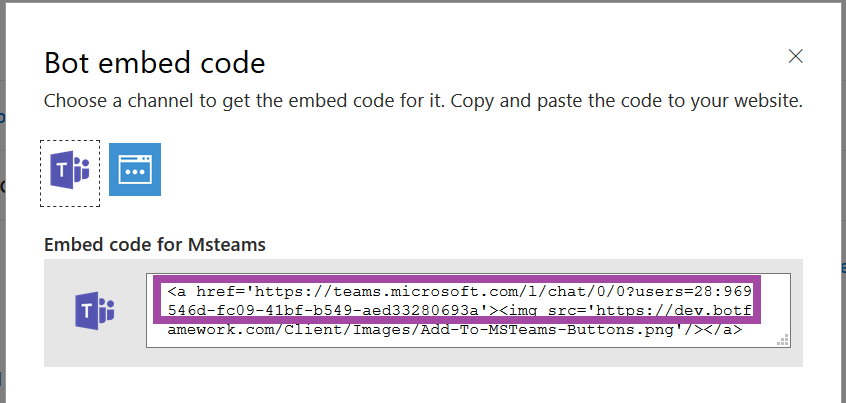
Once the channel has been created, click on the “Get bot embed codes” hyperlink to obtain the bot URL.
Individuals can use the hyperlink provided to add your bot to their Teams chat.
In this example, I am using a sample Python bot. For convenience, I am handling SSL on my reverse proxy instead of using an ssl wrapper in my Python service. Grab the BotBuilder package from git (https://github.com/Microsoft/botbuilder-python.git)
In the ./samples/ folder, you’ll find a few beginner bots. Rich-Cards-Bot requires msrest that has some async functionality and the branch in requirements.txt doesn’t exist. Tried a few others and never got anything that worked properly. Same problem with EchoBot-with-State. I am using Echo-Connector-Bot because it doesn’t have this msrest problem, and I can add my own state support later.
Edit main.py and add your Azure bot application id & secret to APP_ID and APP_PASSWORD
I stash my personal information in a config.py file and added an import to main.py:
from config import strDBHostname, strDBUserName, strDBPassword, strDBDatabaseName, strDBTableName, APP_ID, APP_PASSWORD
Tweak the code however you want – add natural language processing, make database connections to internal resources to determine responses, make calls to internal web APIs. I also added console output so I could debug bot operations.
When you’ve completed your changes, launch your bot by running “python main.py”
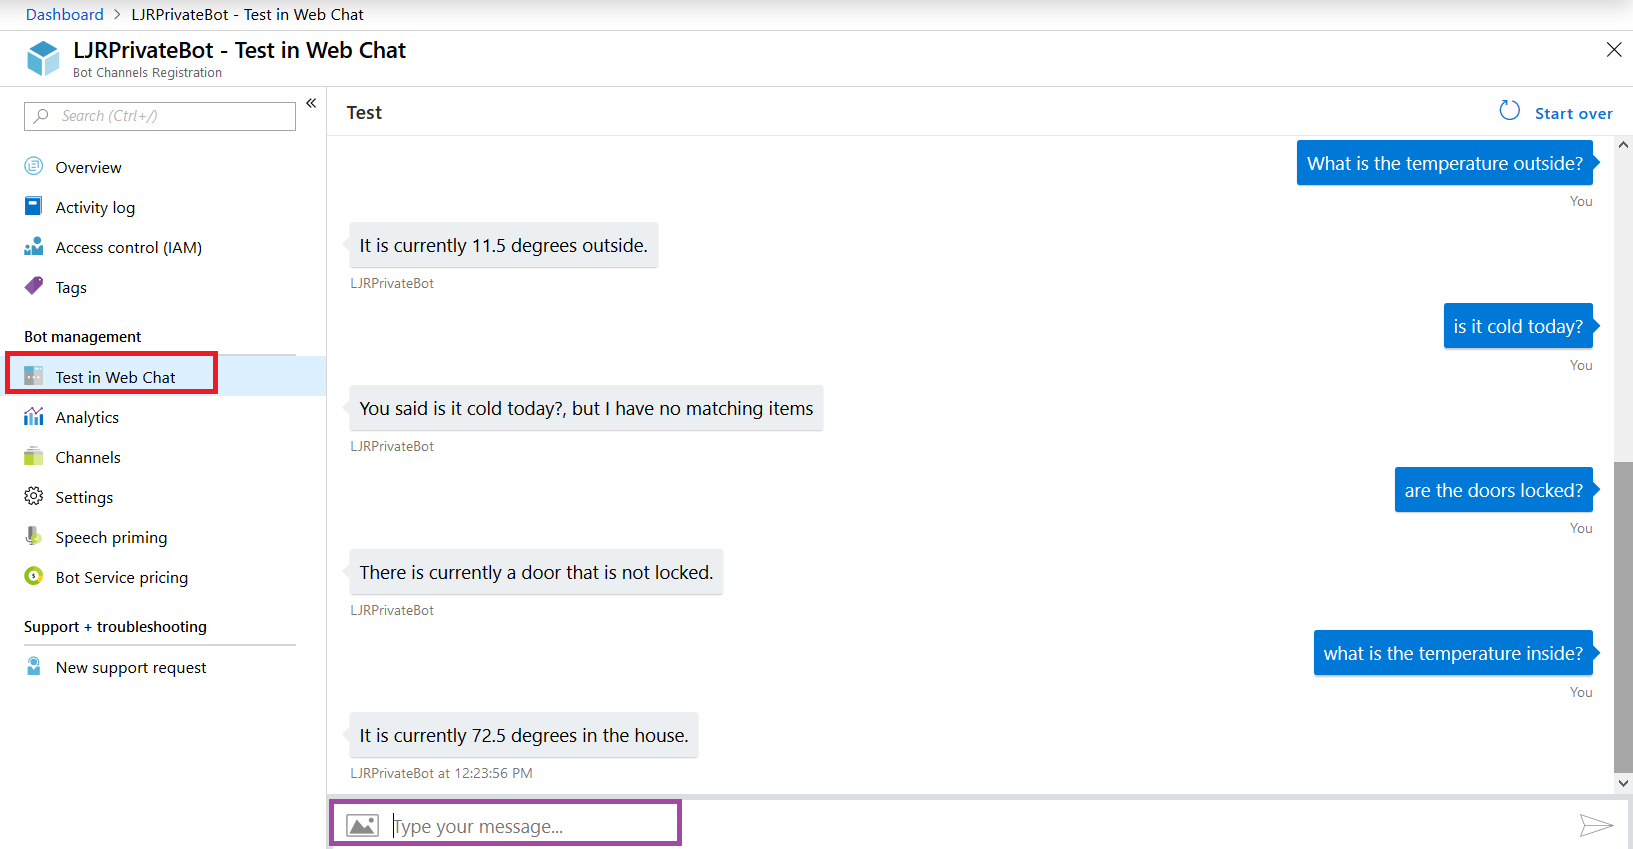
Now return to the Azure portal and select “Test in Web Chat” – this will allow you to test interactions with your bot. Ask questions – you should see your answers returned.
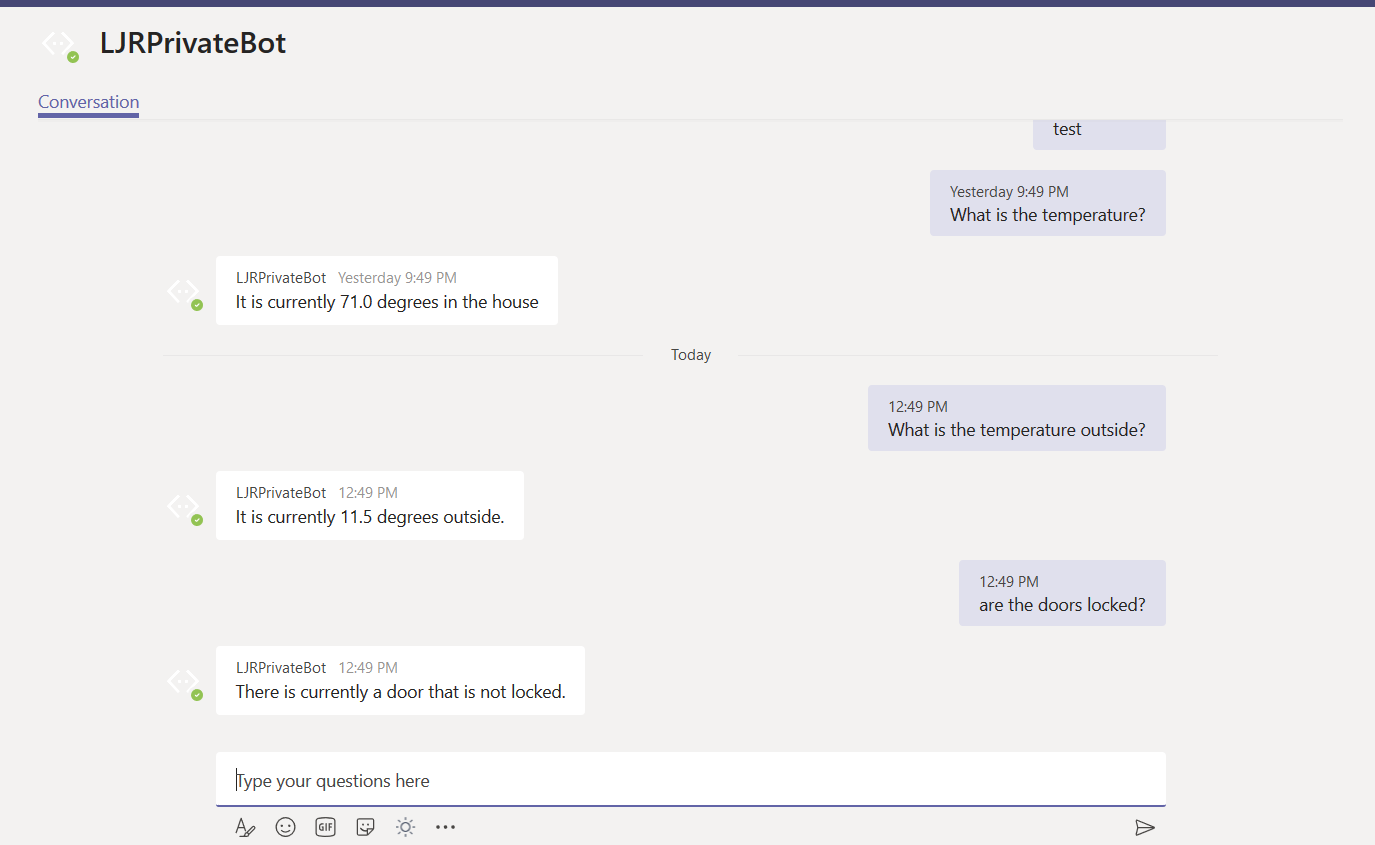
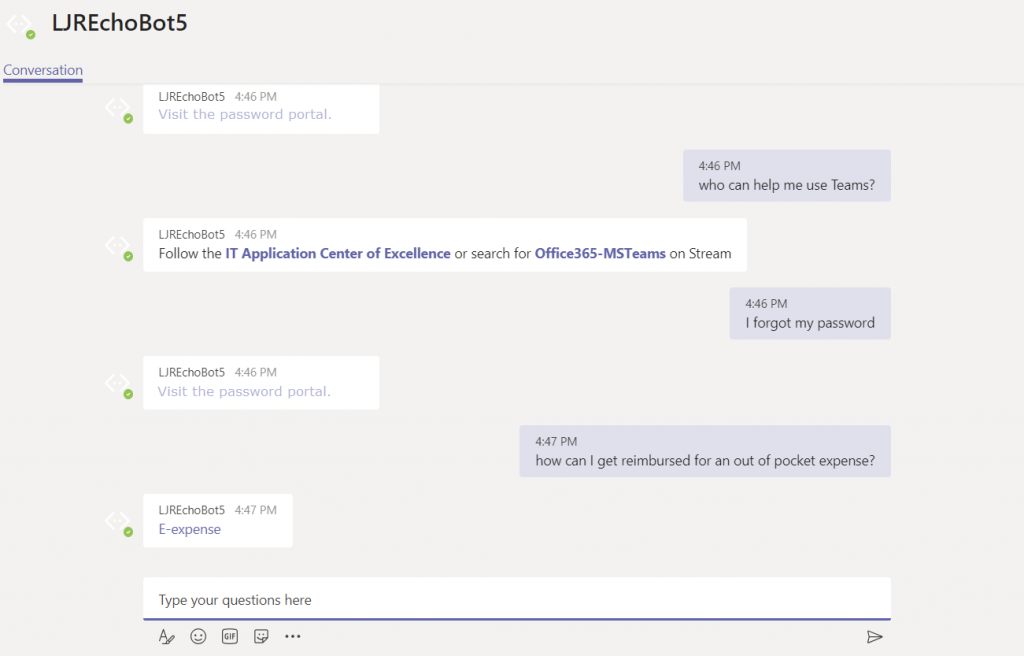
Once you confirm the bot is functioning properly, use the URL from the Teams channel to interact with your bot within Teams —
The answer is served out of our home automation database – data that is only accessible on our private network.
Security – as I said earlier, you’ll probably want to take some measures to ensure access to your locally hosted bot is coming from legit sources. The app ID and secret provide one level of protection. If a connection does not supply the proper app ID & secret (or if you’ve mis-entered those values in your code!), you’ll get a 401 error.
But I don’t want the entire Internet DDoS’ing by bot either, and there is no reason for anyone outside of Microsoft Azure subnets should be accessing my locally hosted bot. My bot is hosted in a private container. The reverse proxy allows Internet-sourced traffic in to the private bot resource. Since communication from Azure will be sourced from a known set of networks, you can add a source IP restriction that prevents the general public from accessing your bot directly. See https://azurerange.azurewebsites.net/ for a convenient-to-use list of addresses.
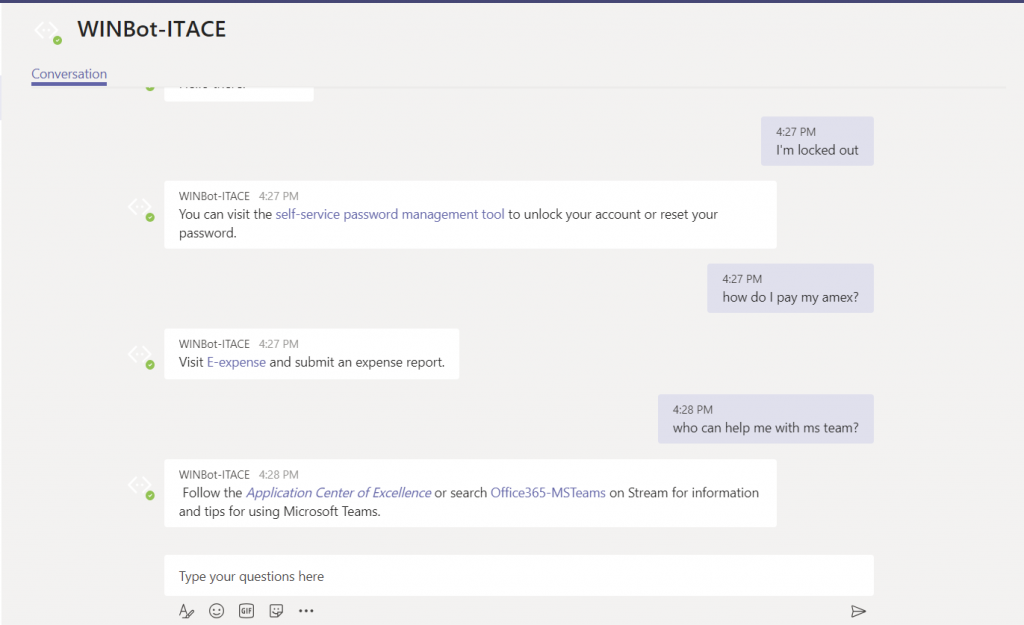
If you want to create a simple bot that uses natural language processing training to allow users to ask questions that aren’t exactly what has been attached to the answer (i.e. I could say “I forgot my password”, “I don’t remember my password”, or “what’s my password” and be directed to the password portal URL without anyone having to come up with every possible iteration of the query),you can create one without actually programming a bot. You’ll need to enter some questions and answers – and it’s best to have a few questions associated with each answer so the bot can ‘learn’ what a real user might ask.
Before we start, understand how the billing works for Microsoft’s cloud services. There are generally free tiers for selections, but they are resource limited. When you first start with the Azure magic cloudy stuff, you get a 200$ credit. A message indicating your remaining credit is shown when you log into the Azure portal. Pay attention to that message – if you think you are using free tiers for everything but see your credit decreasing … you’ll need to investigate. Some features, like usage analytics,cost extra too.
Instead of programming a bot, you can use a pre-built bot and a question/answer knowledgebase maintained at https://www.qnamaker.ai/ Sign in to your company account
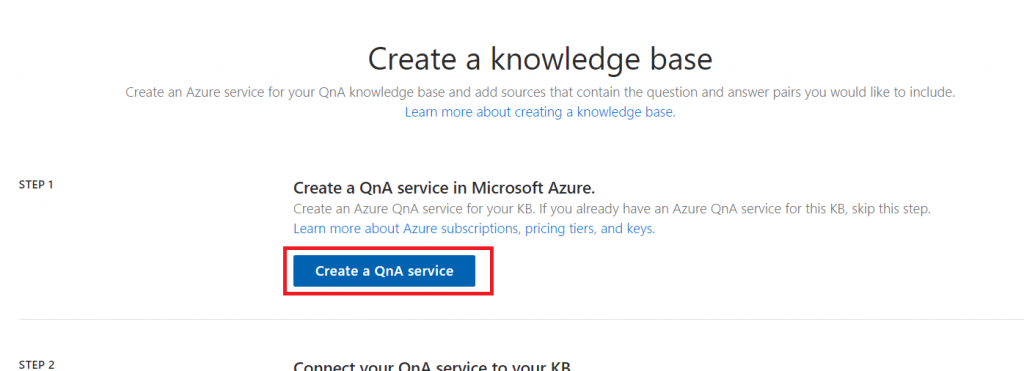
Select “Create a knowledge base” to start.
Click the button to “Create a QnA service”
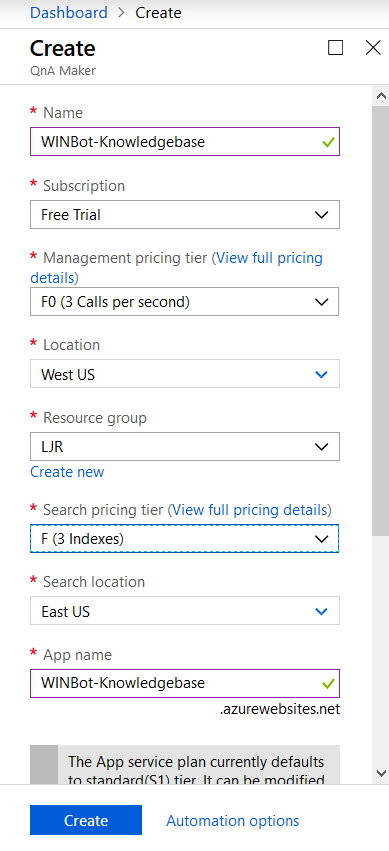
A tab will open to the Azure portal, and you’ll see a wizard to create a QnA Maker resource. Provide a name and select your subscription – you may be walked through creating a new trial subscription. For the management pricing tier and search pricing tier, select the free plans unless you expect high usage or need to store a lot of documents. The selections below are the free tiers.
Disable app insights unless you want to study usage of the q&a – app insights is a paid add-on. Click create to create.
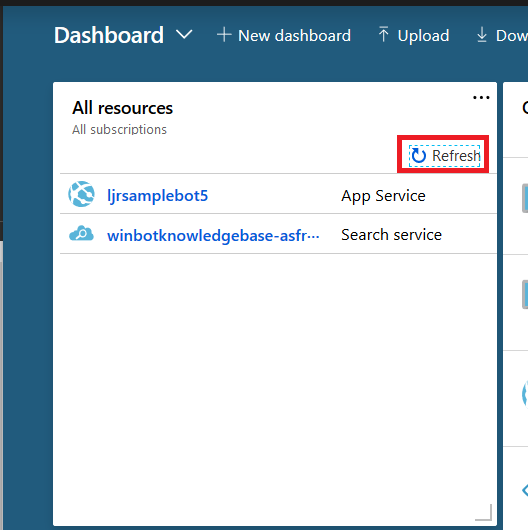
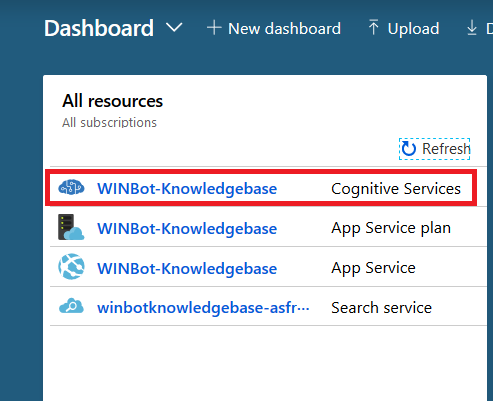
Return to the Azure Portal dashboard and click “Refresh” in the “All resources” section. Eventually, you will see your knowledge base appear.
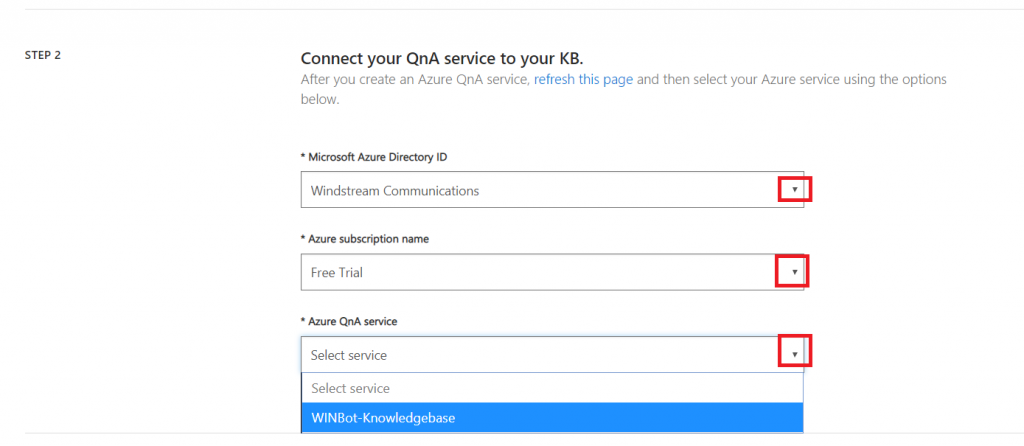
Return to the QnA Maker tab. In “Step 2”, click the drop-down arrows to select the Azure Directory (you should just see our company), the subscription (again, probably just the one), and the knowledge base we just created.
In “Step 3”, provide a name for your knowledge base. If you have an existing Q&A file, or a URL with Q&A pairs, you can import them here. I will enter question/answer pairs manually later.
Optionally, add ‘chit chat’ – this allows your bot to respond to common things users type like “do you know Siri” or “how are you”. It isn’t needed, but it saves adding answers to “are you there” manually. This imports question sets to your KB, so you can remove any you don’t feel are appropriate for your implementation.
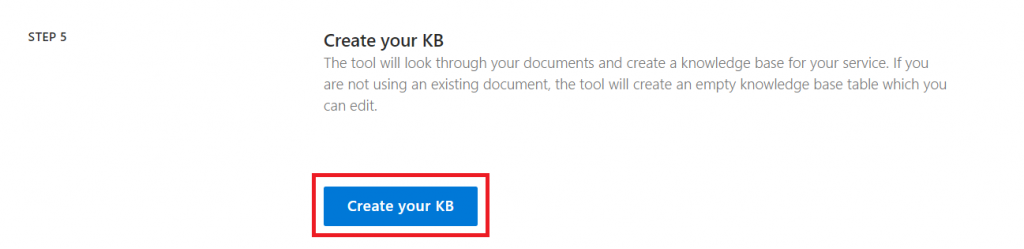
Click “Create your KB”.
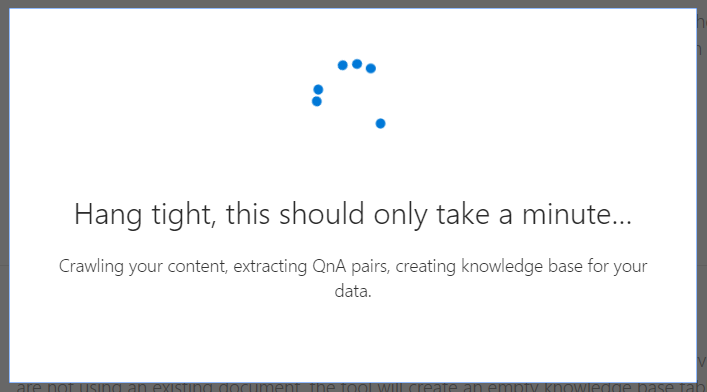
And wait a few minutes.
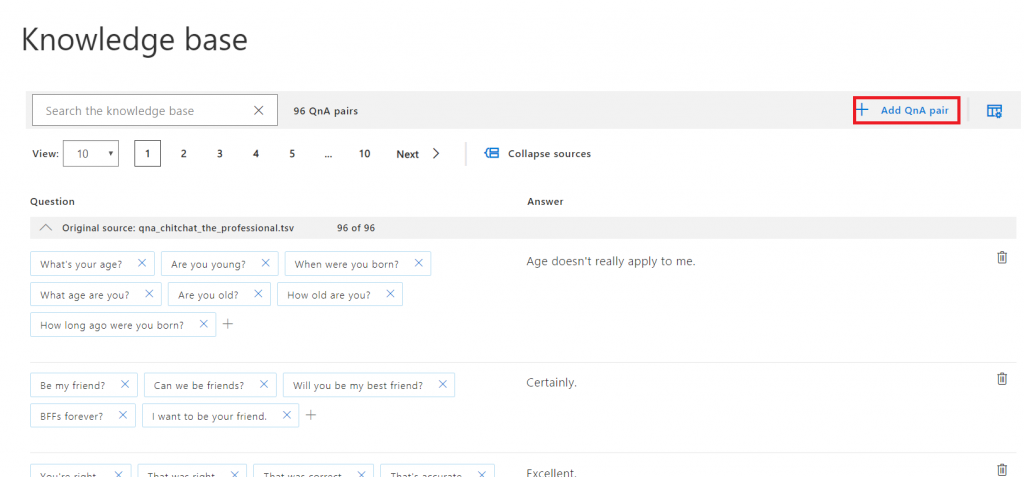
Once the KB has been created, click “Add QnA pair” to begin adding questions. You can also scroll through the imported “chit chat”questions and modify/remove any you don’t like.
Answers use markdown formatting, so you can add hyperlinks, italics, bold, numbered lists.
Once you have added your question/answer pairs, click “Save and train” – training allows the bot to respond with an appropriate answer when the question isn’t exactly one of the questions provided.
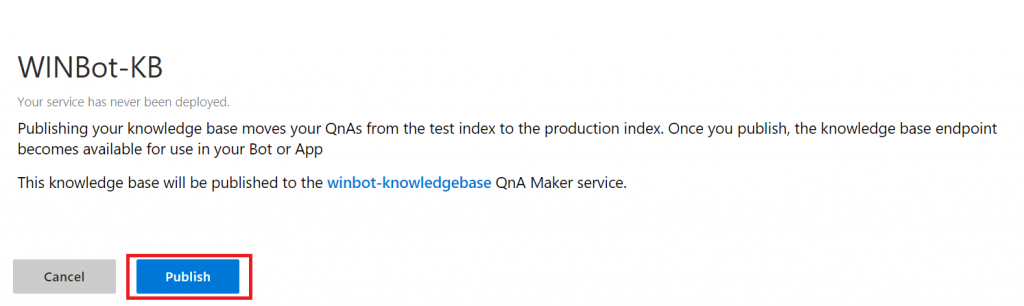
Wait again … when you are returned to the q&a pair screen, click “Publish” – this implements your changes in production. You can stage changes, allowing others to review them, by waiting to click Publish.
Read the warning – assuming you actually want your changes to be in production, click “Publish”.
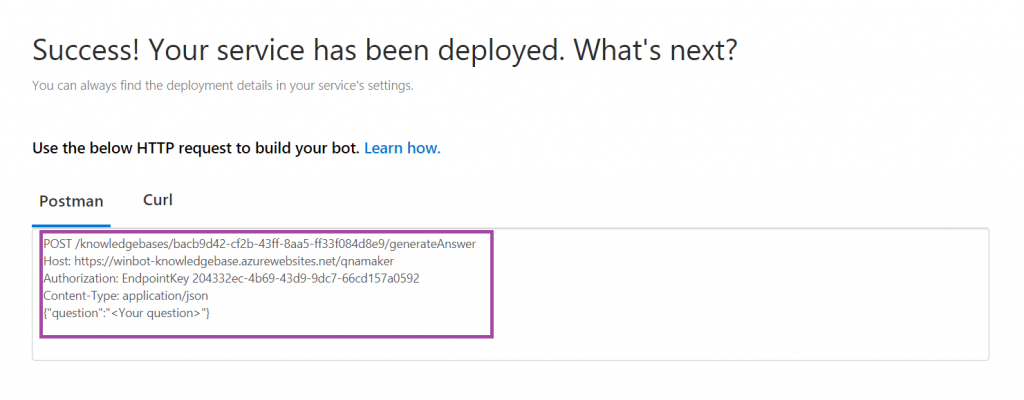
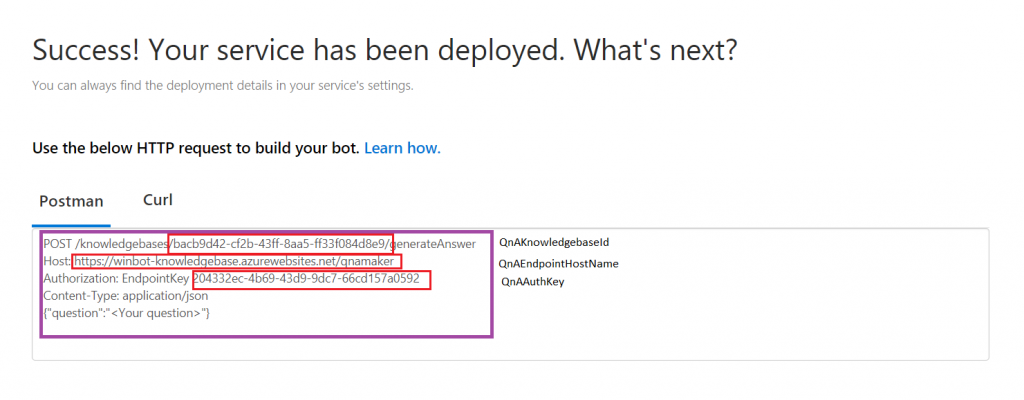
Wait some more, and you have an endpoint!
Copy the ‘stuff’ from the box into a text file somewhere. Find your QnAEndpointHostName, QnAKnowledgebaseId, and QnAAuthKey
Unless you are going to be the *ONLY* person editing your KB (and never go on holiday, never ring up sick), you’ll want to share access with others. Log into https://portal.azure.com and locate your “cognitive service”. Click on its name to edit it.
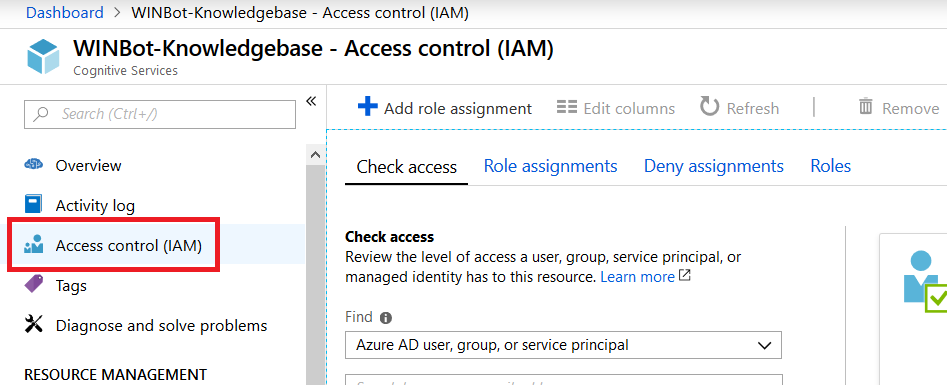
Click on “Access control (IAM)”
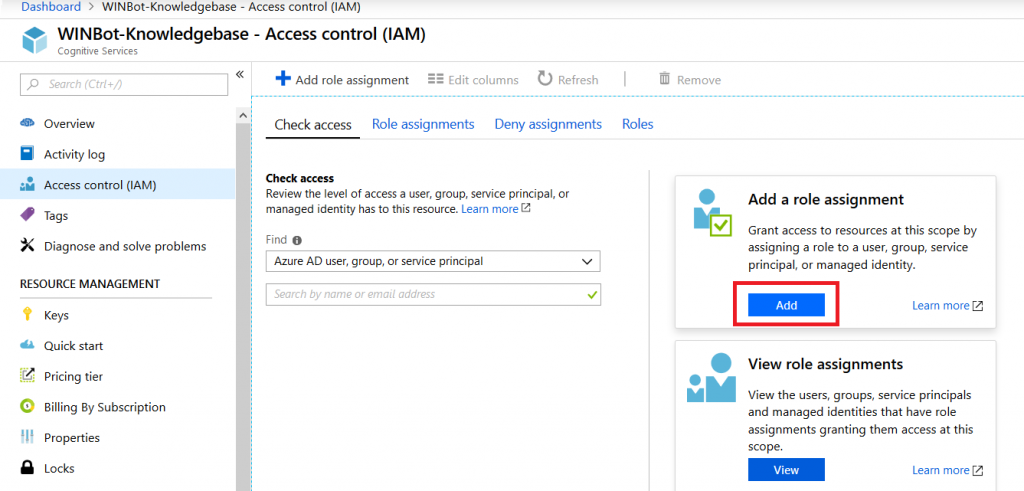
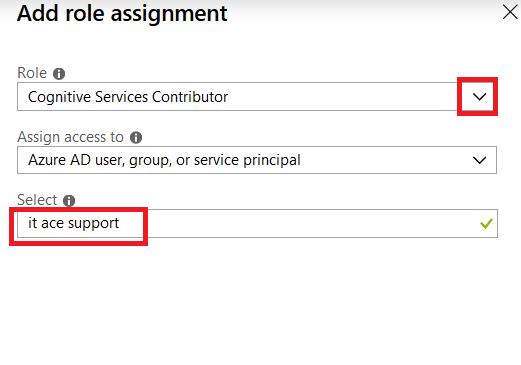
In the “Add a role assignment” section, click “Add”.
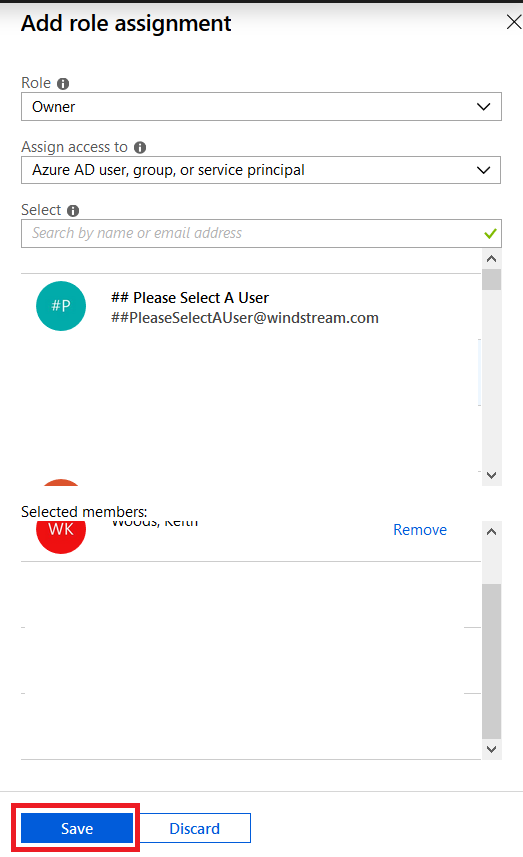
Select either “Cognitive Services Contributor” or “Owner” as the role (owners are allowed to manage all settings, including permissions whereas service contributors can only manage data within the knowledge base). Enter an Active Directory group name – you can enter individual people, but then someone will need to manually edit the permissions as people join and leave your group.
If you didn’t select owner, make sure you add some other owners (either a group or a few people)
Now we’re ready to set up a bot …
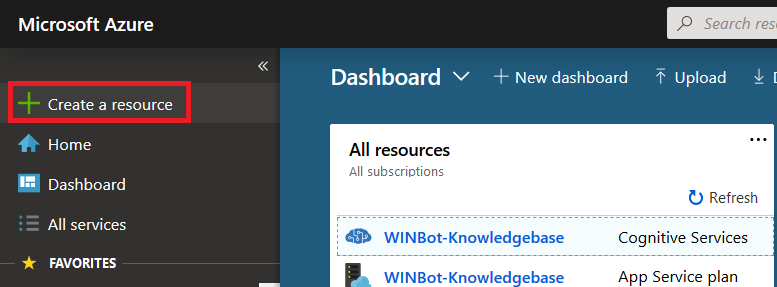
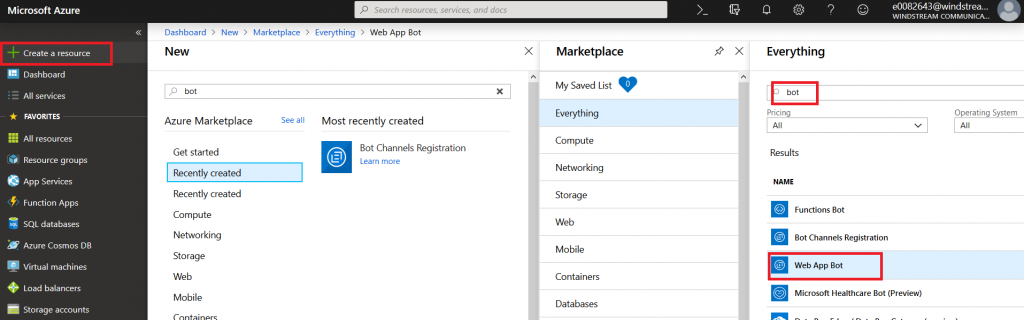
Microsoft Teams uses Azure bots – so you’ll need to create an Azure bot. From https://portal.azure.com, click on ‘Create a resource’.
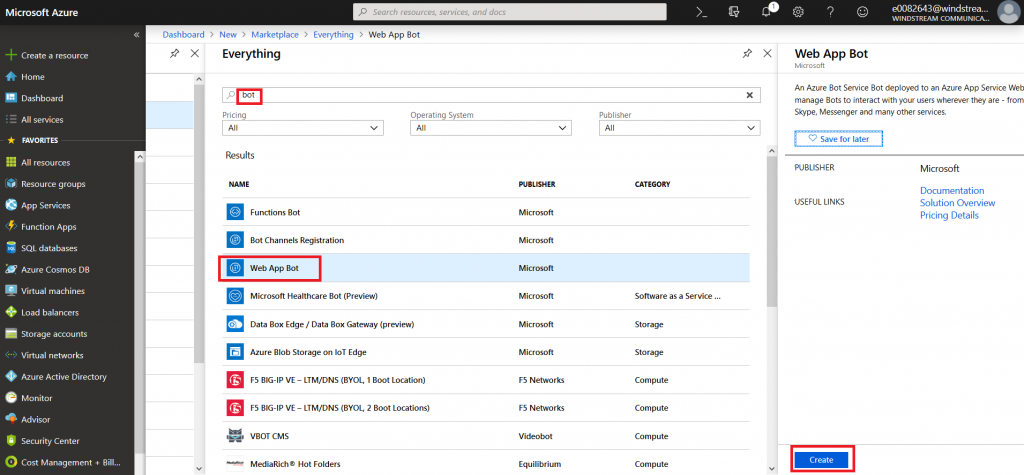
Search for “bot” and find the bots you are looking for. Either “Functions Bot’ and “Web App Bot” can be selected – I am using a WebApp bot because that’s what I’ve used for other bots I’ve coded. Functions bots use Azure functions, which are C# scripts, for logic processing; WebApp bots use WebAPIApp Service for logic processing (C# or NodeJS). If you’re not planning on tweaking anything … doesn’t much matter. Click “Create” to create the bot.
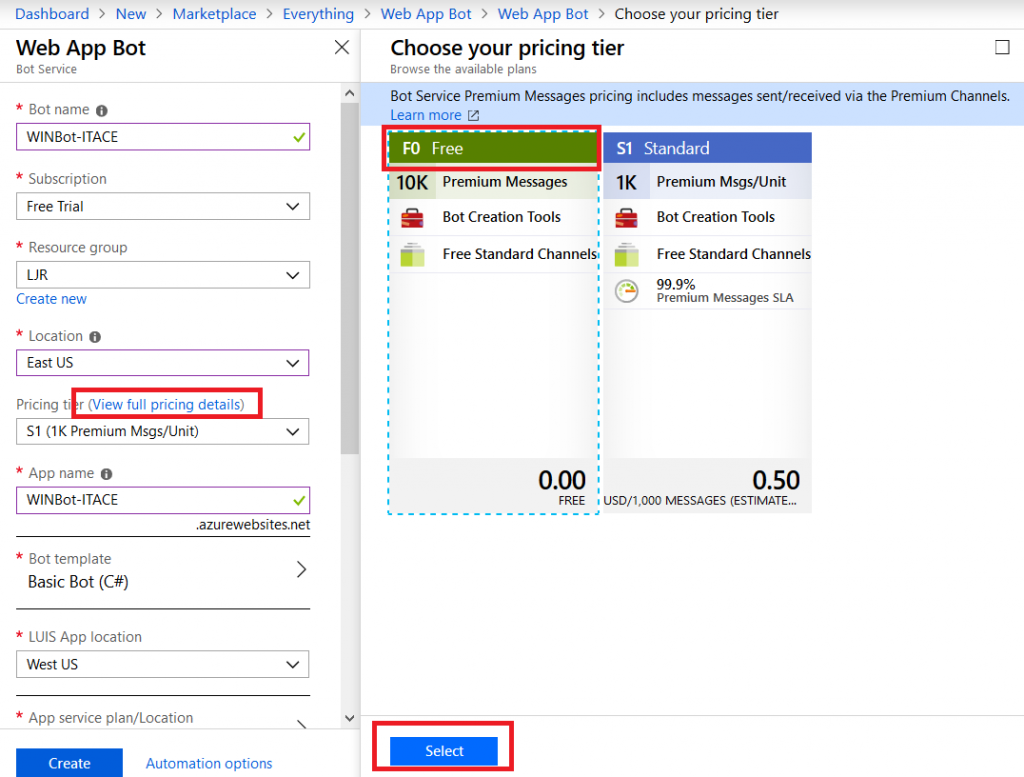
Give your bot a name – this needs to be unique. In the pricing tier, click on “View full pricing details” to see the options. Again, I am selecting the free tier. Don’t forget to hit ‘select’, or your selection will not be updated.
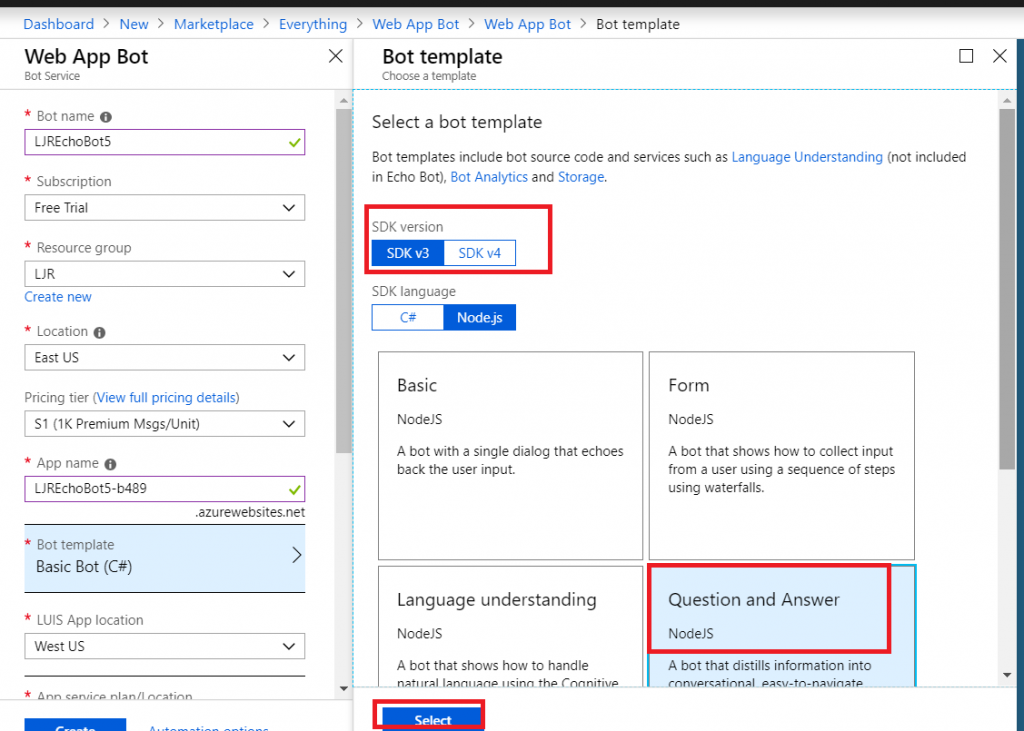
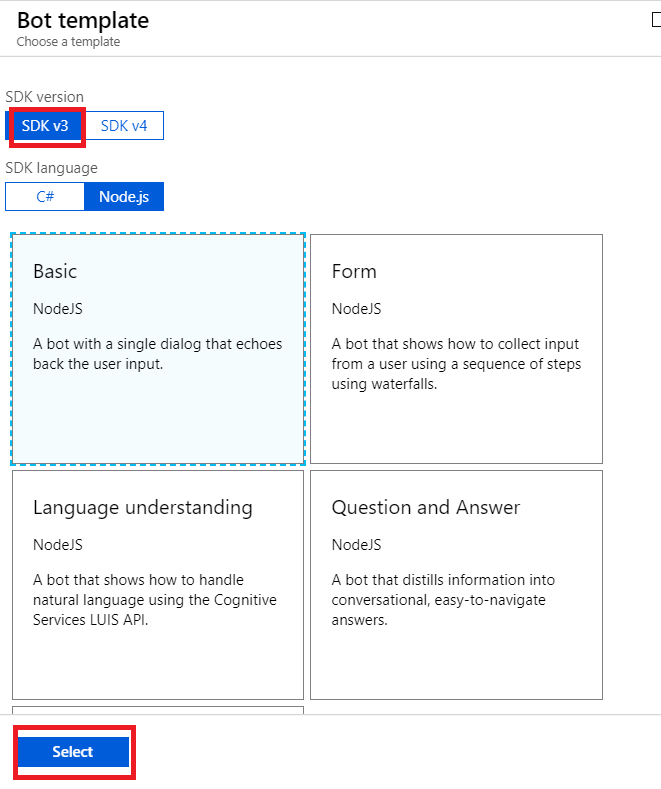
When you get to the bot template section, you can pick either C# or NodeJS – again, if you don’t plan on tweaking anything … doesn’t much matter. I am using C# because I know C#. Select the SDK v3, then find the “Question and Answer” bot template. Again, don’t forget to click “Select” or your selection won’t be saved.
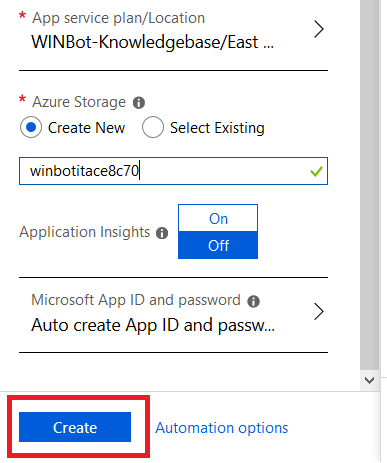
Create a new storage location, disable application insights (it’s a for-fee add-on), and click “Create”.
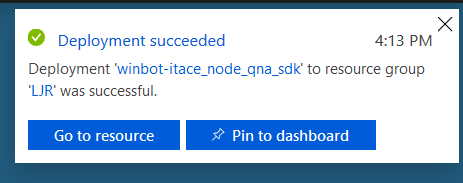
Wait for it …. You’ll see a blue bar running under the bell icon in the upper right-hand corner of the site.
Soon, you’ll see a success message in the upper right-hand corner.
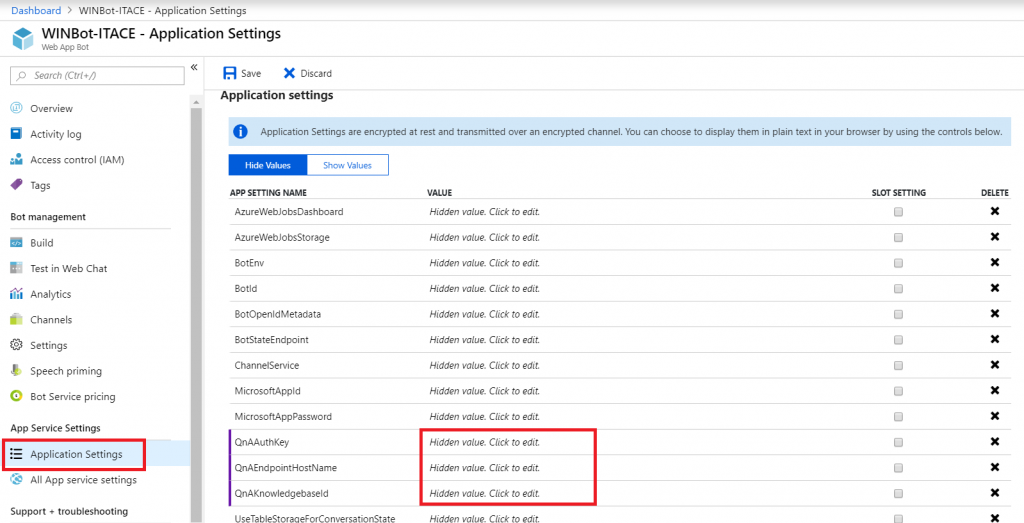
Refresh the resources on the dashboard and select the “WebApp Bot”. Under ‘App Service Settings’, go into “Application Settings”. Here’s where you enter the QnA information we saved after your knowledge base was published. Click in the “Value” column to paste in the values for QnAAuthKey, QnAEndpointHostname, and QnAKnowledgebaseId. Don’t have them? No big – go back to QnA Maker, open your KB, and select the “Settings” tab. There it is again!
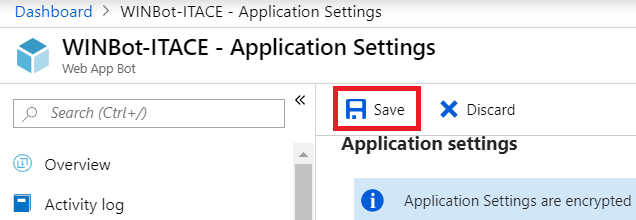
Click “Save” to commit your changes.
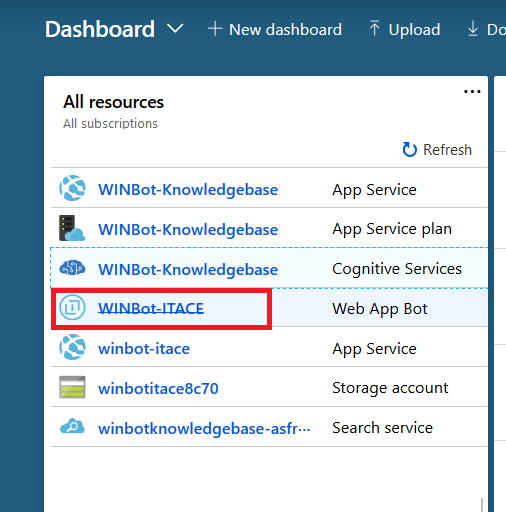
Return to the Dashboard and select your “Web App Bot”
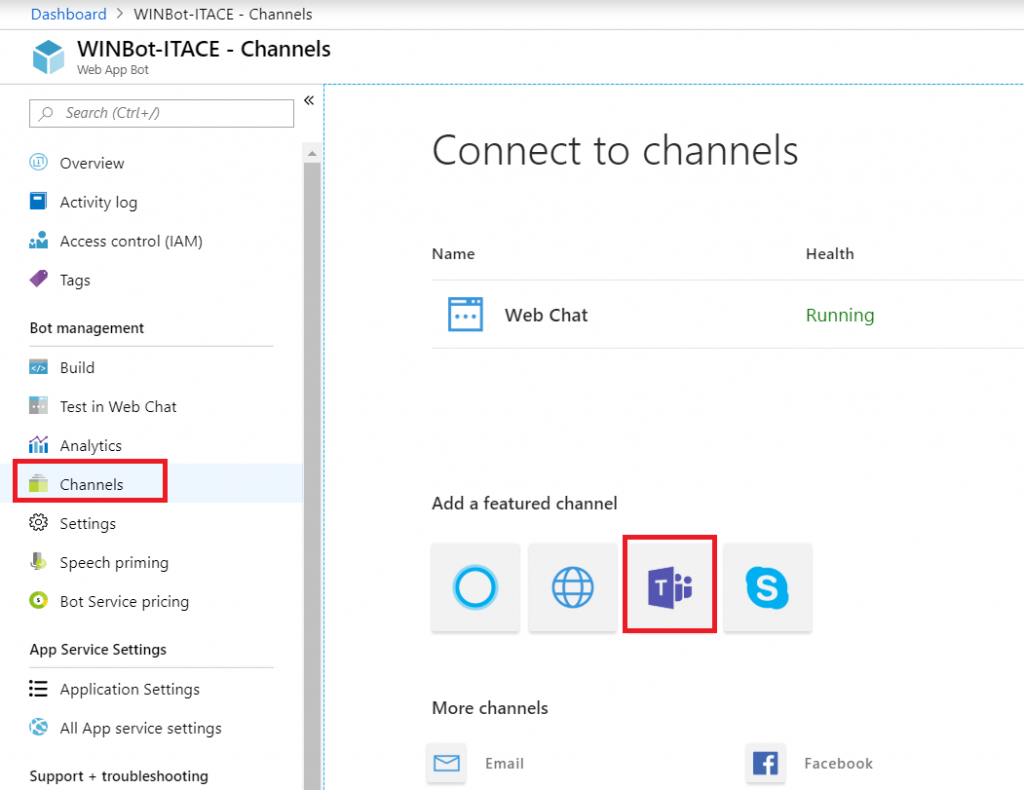
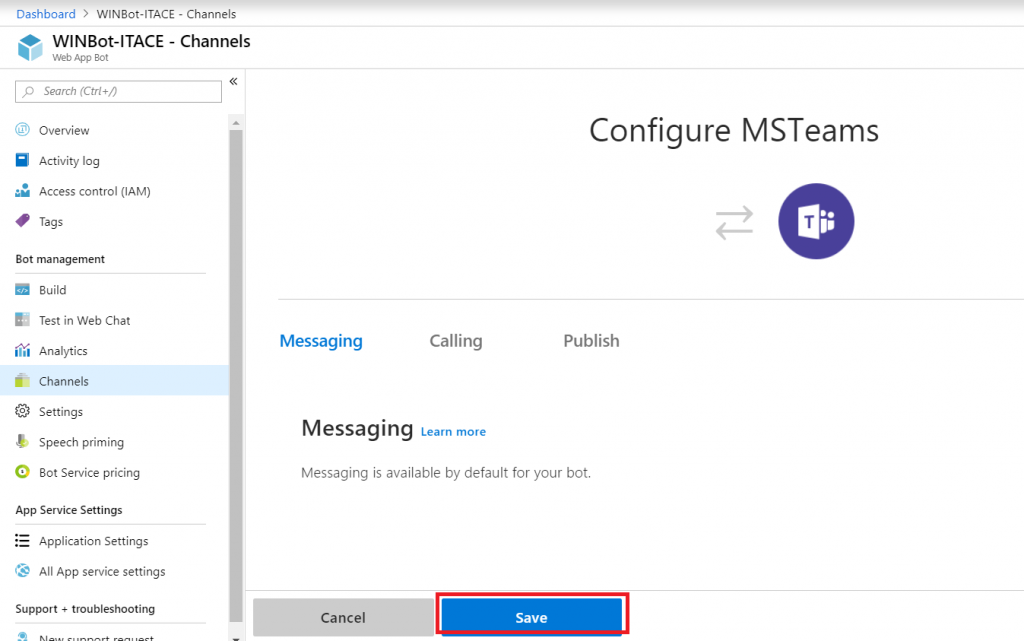
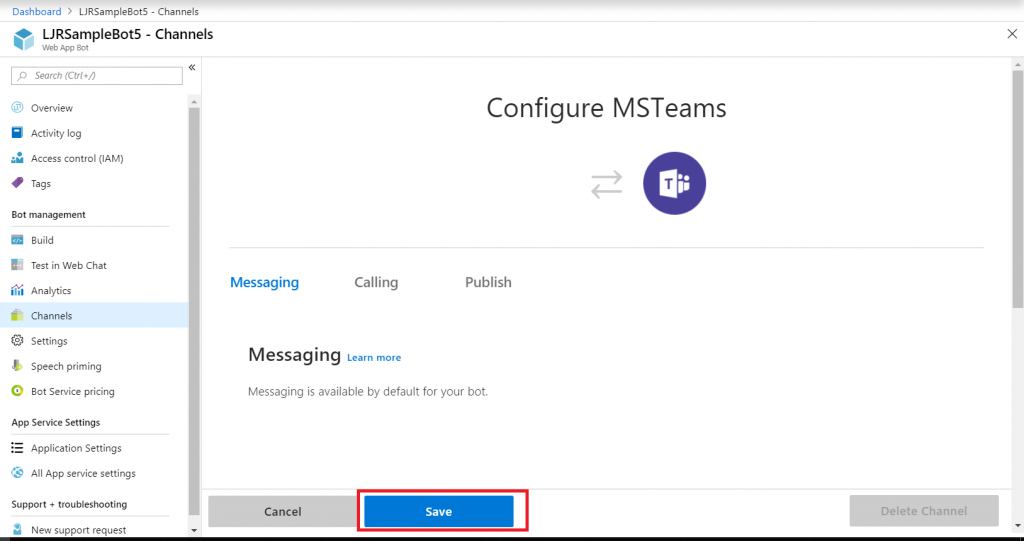
In the left-hand navigation column, select “Channels”. Click on the Teams logo.
The “Calling” tab will enable IVR or real-time media interaction with your bot – I have never done this, it may not be possible with our product set. “Publish” is to publish your Bot in the Microsoft store – not something I want to do with a bot designed to answer employee-specific questions, but I could see creating a Enterprise Customer Q&A bot that enterprise customers can add to their Teams spaces … in which case, making the bot available in the Microsoft Store would be convenient. Click “Save” to create a Teams channel for communication with your bot.
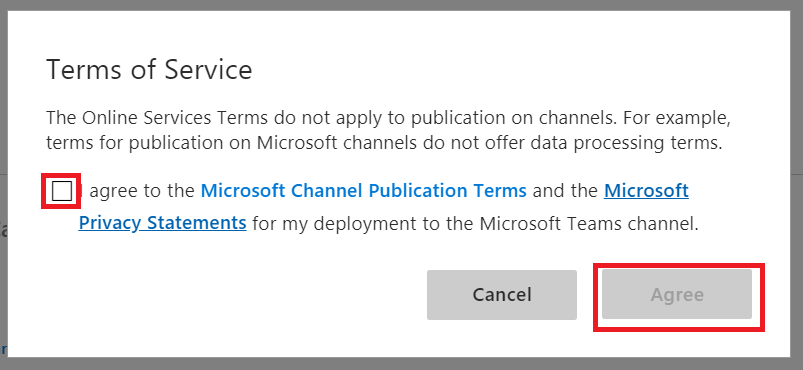
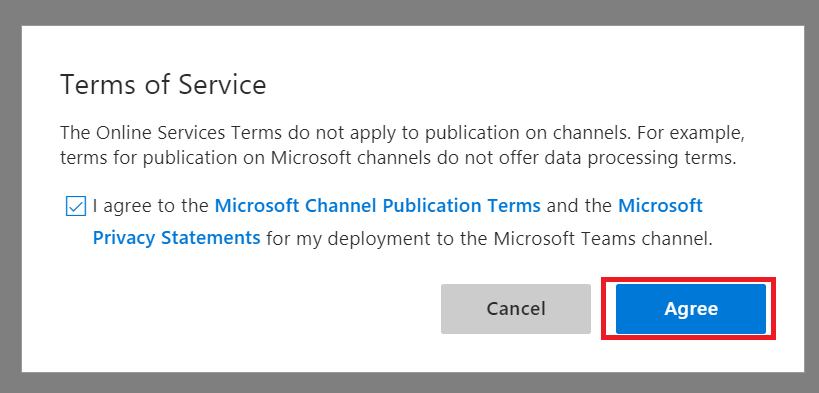
Read the publication terms and privacy statement. If you agree, check the box and click “Agree”.
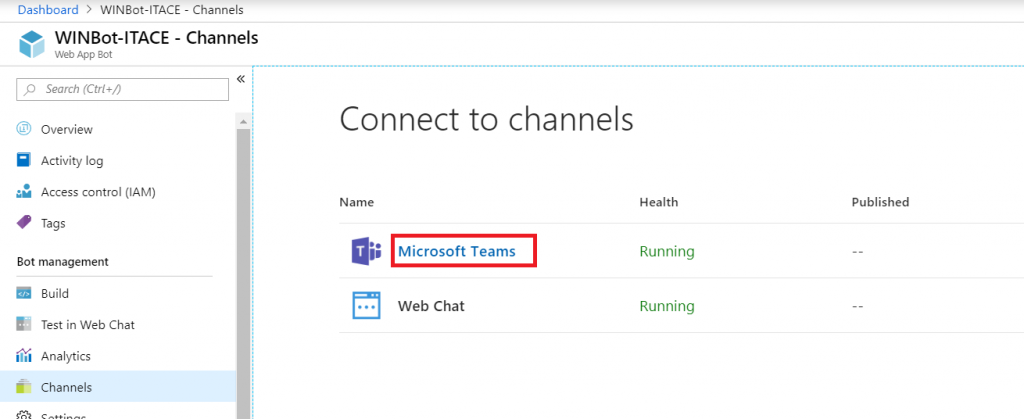
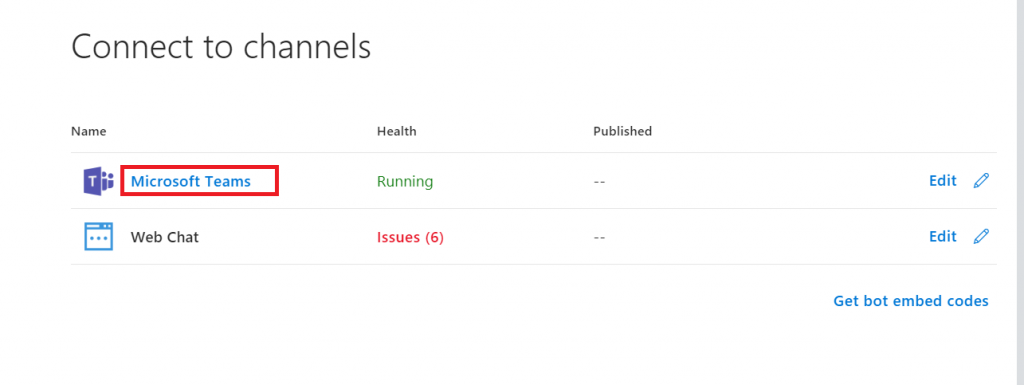
In the Channel section, click the “Microsoft Teams” hyperlink.
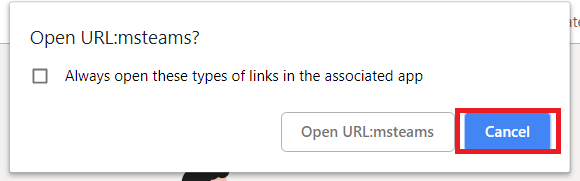
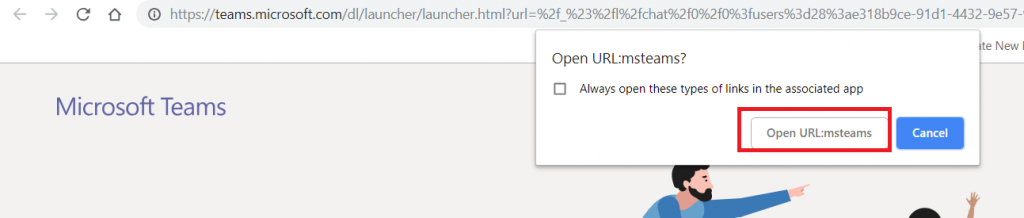
This will open a new browser tab. Click “Cancel” so you can copy the URL.
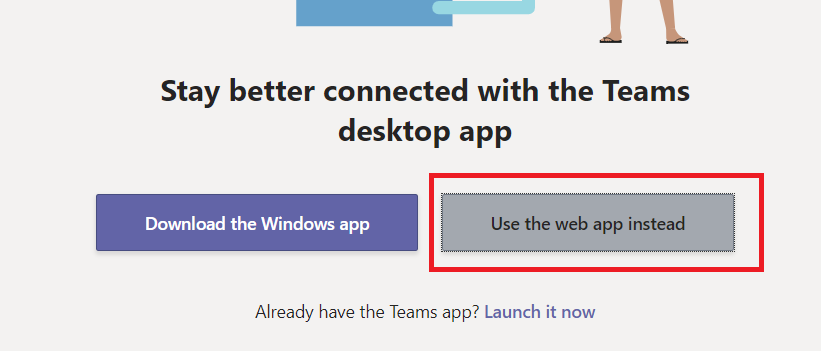
Once you’ve copied the URL, click “Open in Teams web app” to interact with your bot using the Teams web client (or ‘launch it now’ for Teams desktop client)
It’s alive! Ask some questions and verify that your answers are being delivered. Check for formatting problems or bad hyperlinks.
Anyone you have set as “Cognitive Service Maintainer” or“Owner” should be able to use QnA Maker to maintain the question and answer set. Log in to https://www.qnamaker.ai, select the “My knowledge bases” tab, and click on the knowledge base name. Modify/add question/answer pairs, then click “Save and train”, then “Publish”.
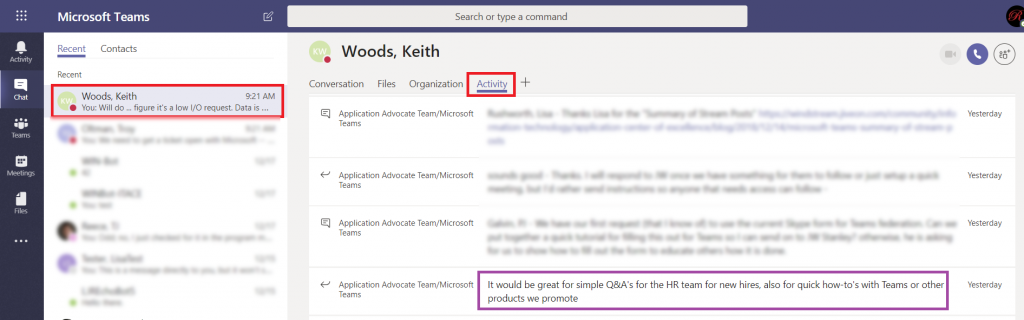
I am a member of multiple Teams, and I can remember that Keith posted something about creating a Q&A a few days ago … but I don’t remember where he posted that message. I cannot reply to it until I find it. Search can help — chat conversations are searchable. But did he type QnA, Q&A, Q and A …
Instead of clicking through all of the channels in all of my Teams spaces trying to find a single post or working my way through the various ways of phrasing “questions and answers”, I can look at my chat with Keith. Click the “Activity” tab. Now I am looking at things Keith has posted to our shared Teams spaces in the past two weeks.
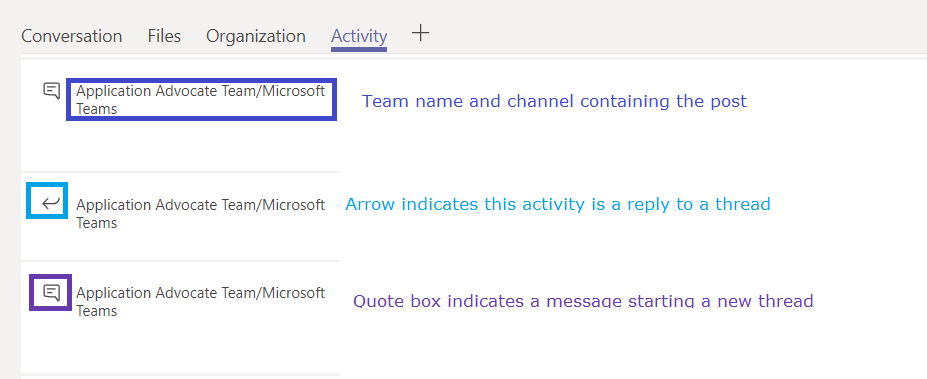
The Team and channel into which the activity was posted is included before each message. An icon indicates if the activity is a reply to an existing thread or a message starting a new thread.
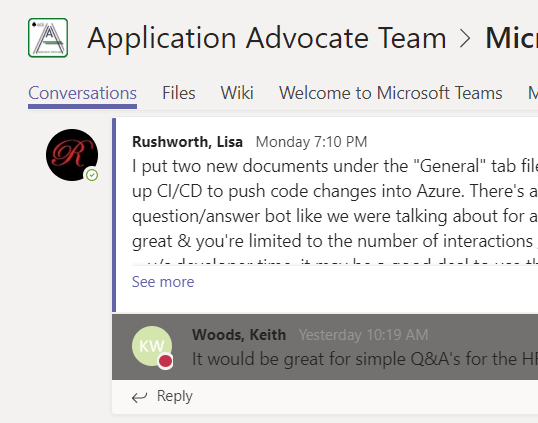
You can click on any entry in the activity log.
Your Teams client will show you the message in its context – you are in the correct Team and Channel, and the message is briefly highlighted. This makes replying to the message we found in the activity feed quite quick.
What if you’ve never chatted with the person? Start a new chat and type in their name. You don’t have to send a message to them (although I could totally see myself writing “ignore this message – I just needed to get you listed in my recent conversations”), just click away and there will be a draft chat with them. Click on that draft chat, and you’ll have an “Activity” tab.
Before you start, understand how billing works for Microsoft’s cloud services. There are generally free tiers for selections, but they are resource limited. When you first start with the Azure magic cloudy stuff, you get a 200$ credit. A message indicating your remaining credit is shown when you log into the Azure portal. Pay attention to that message – if you think you are using free tiers for everything but see your credit decreasing …you’ll need to investigate. Some features, like usage analytics, cost extra too.
Microsoft Teams uses Azure bots – so you’ll need to create an Azure bot to get started. From https://portal.azure.com, click on ‘Create a resource’. Search for “bot” and find the bots you are looking for. To host your bot on Azure, select either the “Functions Bot’ or “Web App Bot”. Functions bots use Azure functions, which are C# scripts, for logic processing; WebApp bots use WebAPI App Service for logic processing (C# or NodeJS). To host your bot elsewhere, select “Bot Channels Registration”. In this example, we are using a “Web App Bot”.
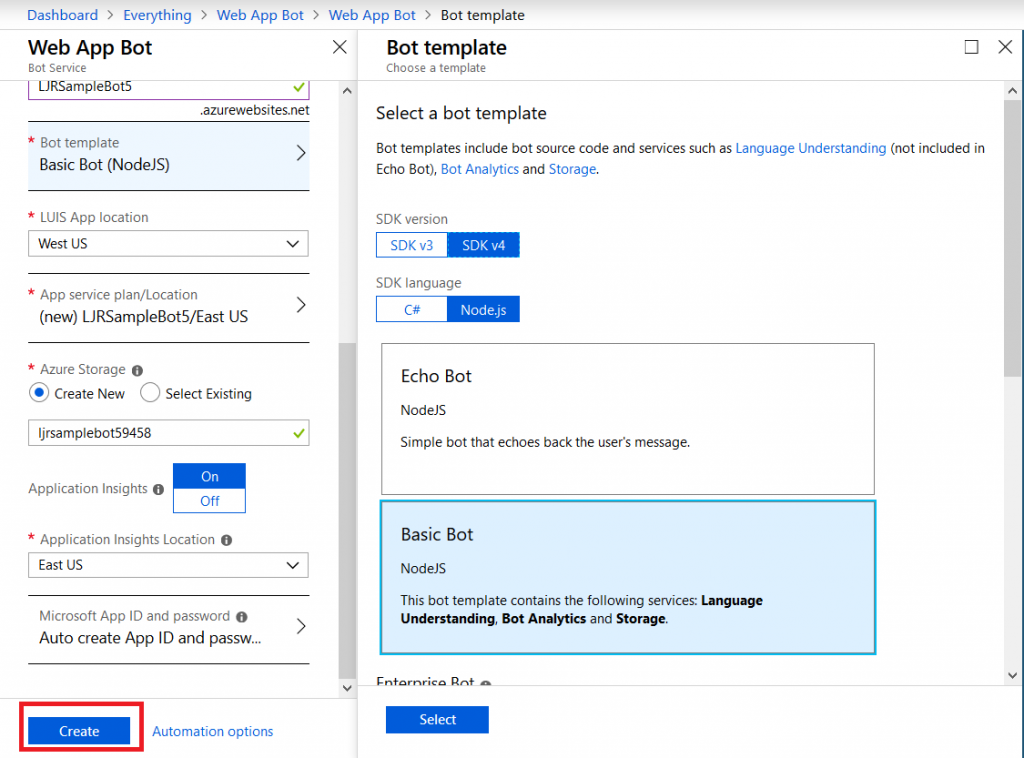
Give your bot a name– there will be a green check if the name is unique. Pick your language – C# or Node.JS – and then decide if you want an Echo bot (which gives you a starting place if you’re new to developing bots) or a blank slate (basic bot). Don’t forget to click “Select” otherwise you’ll be back to the defaults. You’ll need to create a resource group. Click on “Bot template” and select what you want to use as the basis for your bot. As of 14 Dec 2018, use v3 unless you need something new in v4 – there’s a lot more available there, and the Bot Builder extensions only work with v3 (https://github.com/OfficeDev/BotBuilder-MicrosoftTeams)
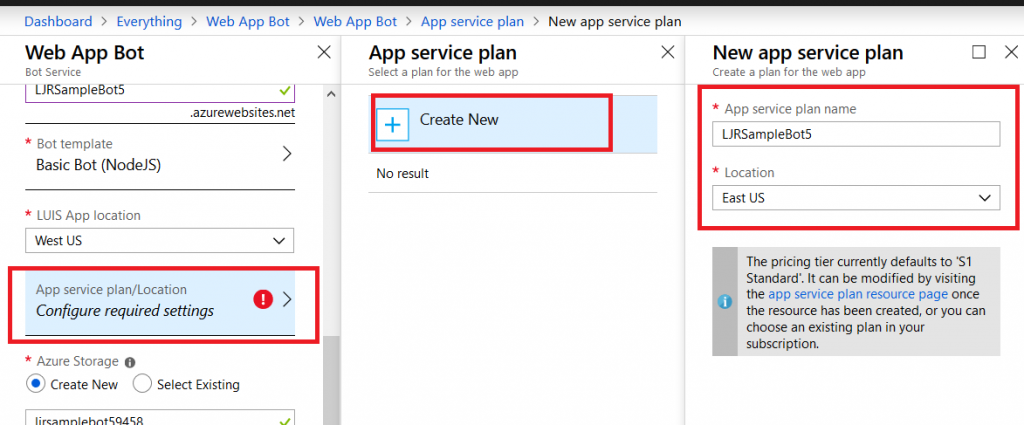
You may need to create a service plan
And storage configuration. Once you have completed the bot configuration, click “Create” and Azure will deploy resources for your bot.
You’ll see a deployment process message, and your messages will have a similar notification. Wait a minute or three.
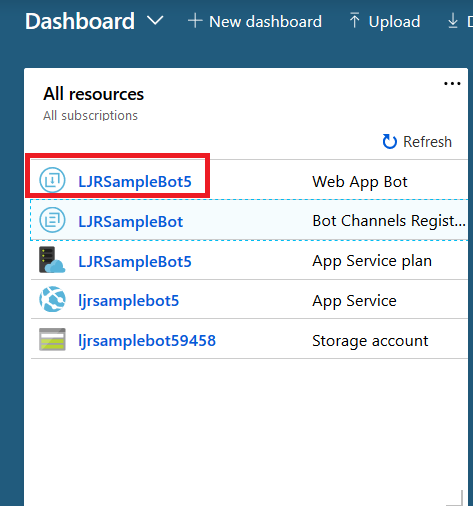
Return to the dashboard & you’ll see your bot services. Go into the bot that you just created.
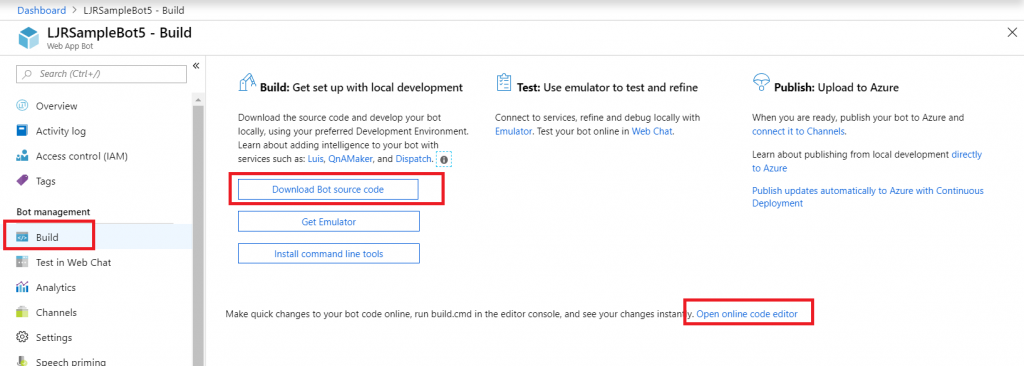
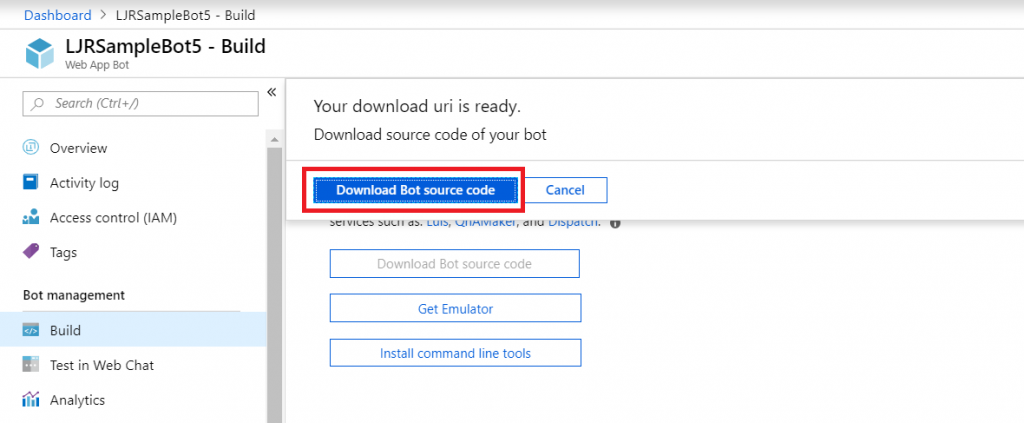
Select “Build” – you can use the online code editor or use an existing source repository and configure a continuous integration. I will be setting up a continuous integration – don’t click the link under “Publish”, it goes to an old resource. Click to download the source code – it takes a minute to generate a zip file for download.
Once the download link is available, download and extract the file – this will be the base of your project. Put it somewhere – in this example, I’ll be using a GitHub project. Extract the zip file and get the content into your source repository.
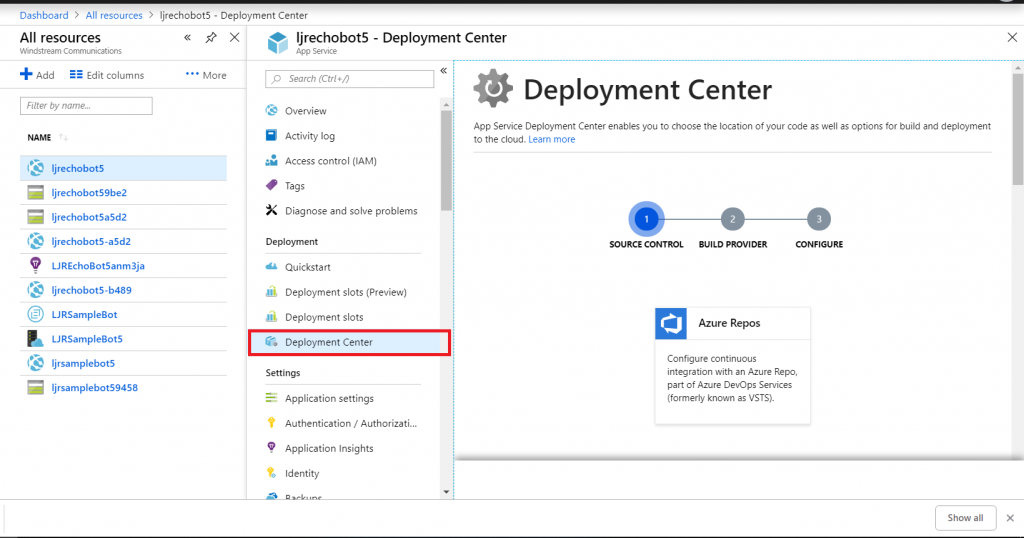
Return to your dashboard and open the App Service for your bot. Select the “Deployment Center”.
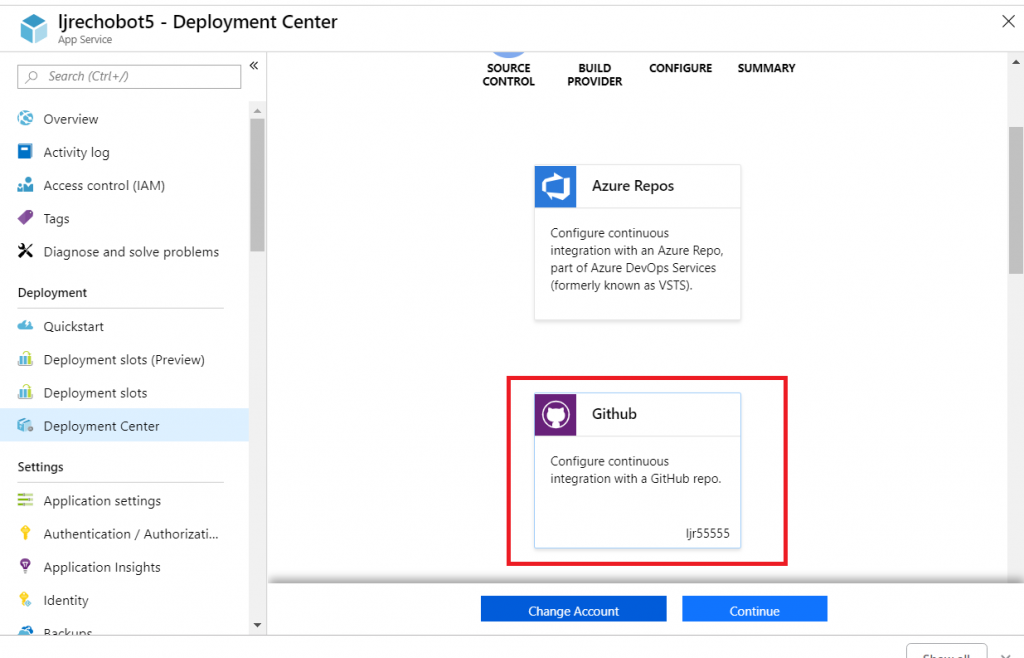
Select the appropriate source repository. When GitHub is used, you will need to sign in and grant access for Azure to use your GitHub account. Click “Continue” once the repository has been set up.
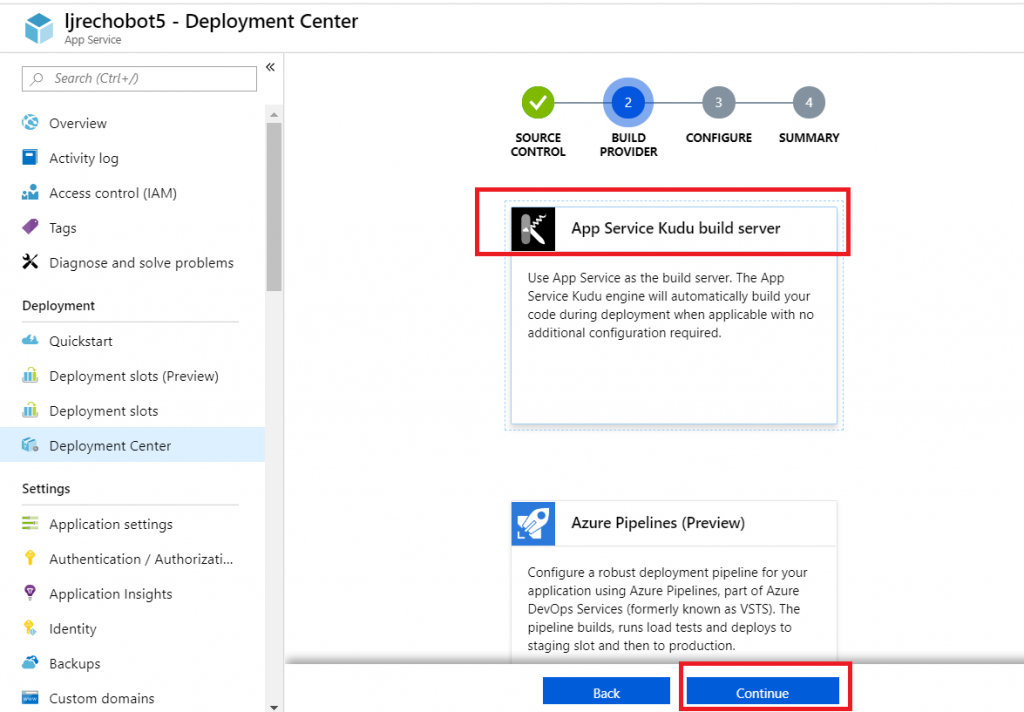
Select the build provider – Kudu or Azure Pipelines. Which one – that’s a personal preference. Azure Pipelines can deploy code stored in git (at least GitHub, never tried other Git services). Kudu can build code housed in Azure DevOps. Kudu has a debugging console that I find useful, and I’ve successfully linked Kudu up with GitLab to manage the build process elsewhere. Azure Pipelines is integrated with the rest of the Azure DevOps (hosted TFS) stuff, which is an obvious advantage to anyone already using Azure DevOps. It uses WebDeploy to deploy artifacts to your Azure websites (again, an advantage to anyone already doing this elsewhere).
The two build environments can be different – MS doesn’t concurrently update SDK’s in each environment, so there can be version differences. It’s possible to have a build fail in one that works in the other. Settings defined in one platform don’t have any meaning if you switch to the other platform (i.e. you’ll be moving app settings into a Build Definition file if you want to switch from Kudu to Azure Pipelines) so it’s not always super quick to swing over to the other build provider, but it might be an option.
I prefer Kudu, so I’ll be using it here.
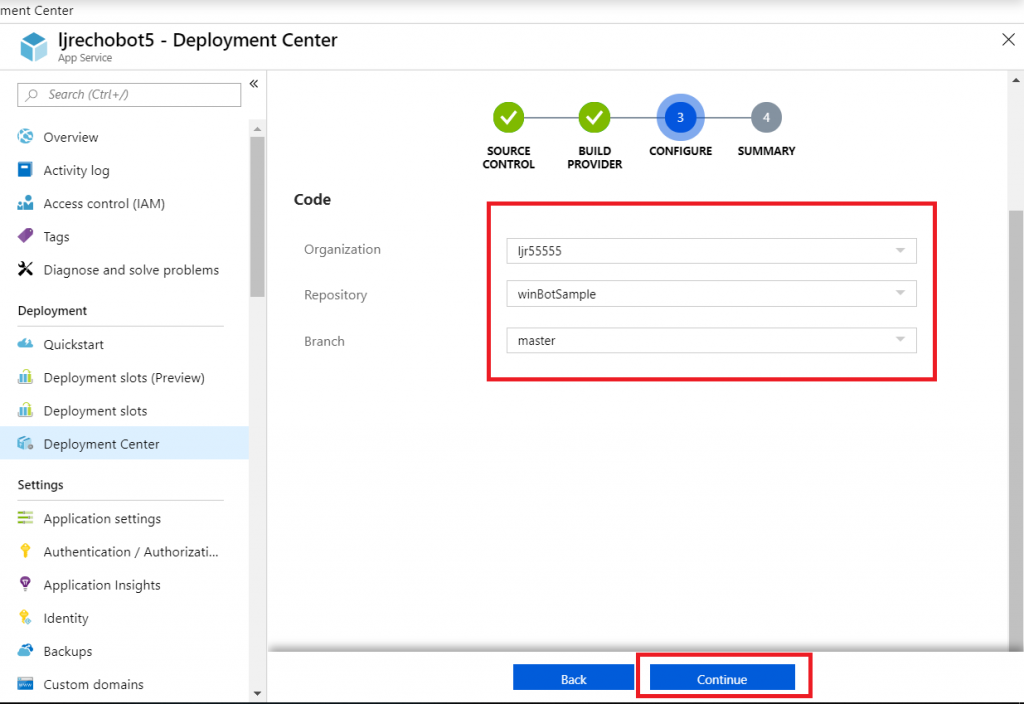
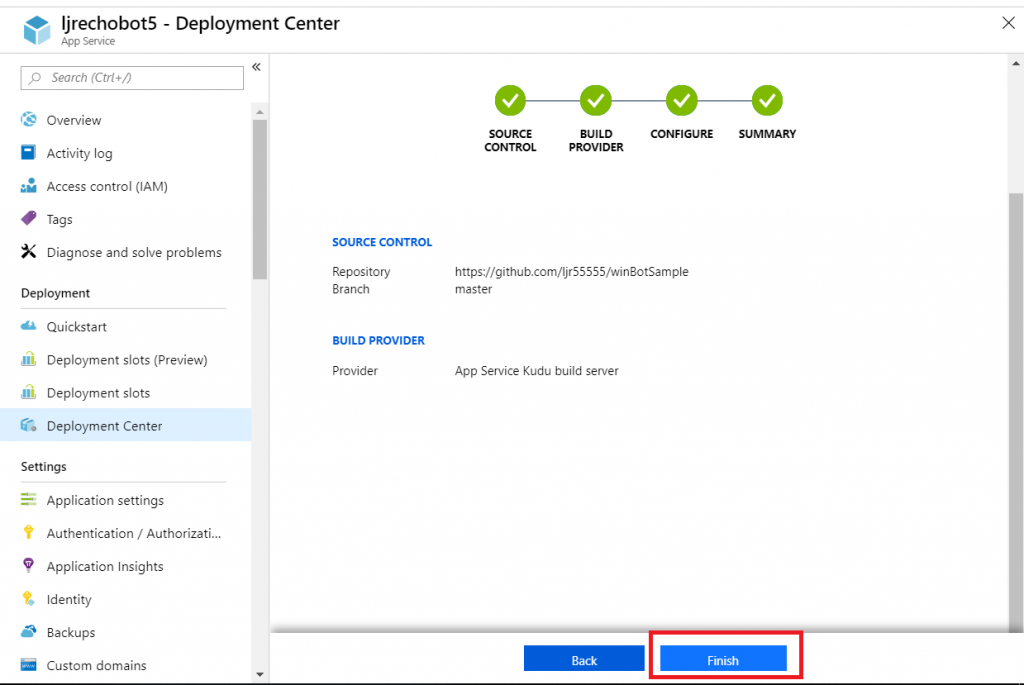
Select your repository name from the drop-down, then select the project and branch you want to use for deployment. In my repository, the master branch has functional code and there is a working branch for making and testing changes.
Review the summary and click “Finish”.
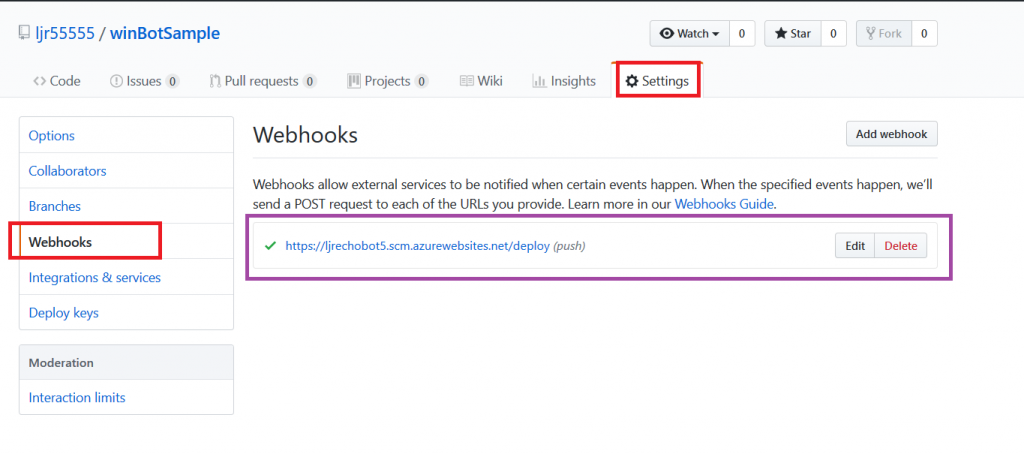
In GitHub, you confirm a webhook has been added to your project on push events. From your project’s settings tab, select “Webhooks” and look for a azurewebsites URL that includes your bot name. You can view the results of these webhook calls by clicking “Edit” and scrolling down to “Recent deliveries”.
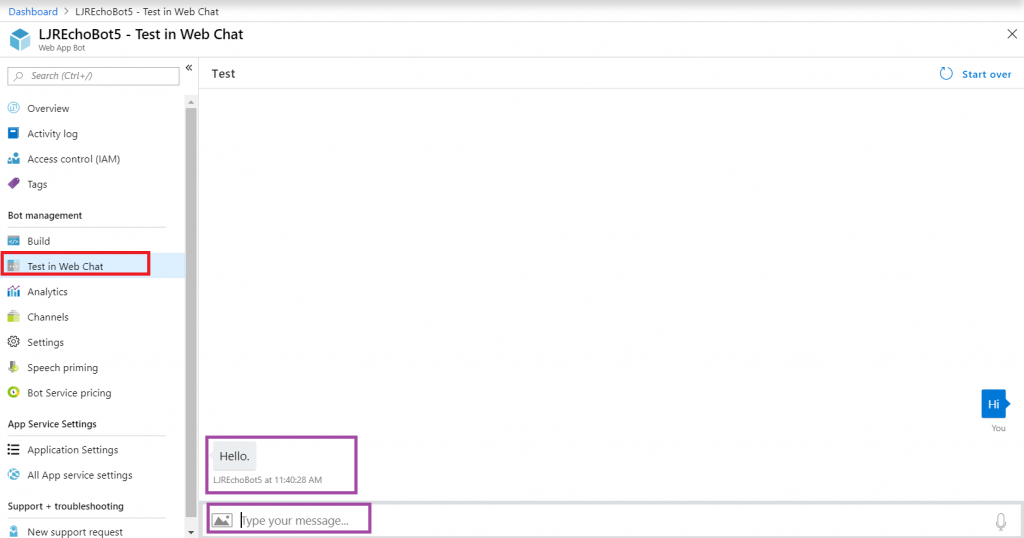
Add the interactions you want – information needs to be accessible from the Azure network, otherwise your bot won’t be able to get there. You can test your bot from the Azure portal to identify anything that works fine from your local computer but fails from the cloud. From the Web App Bot (*note* we are no longer in the App Service on the Azure portal — you need to select the bot resource), select “Test in Web Chat” and interact with your bot.
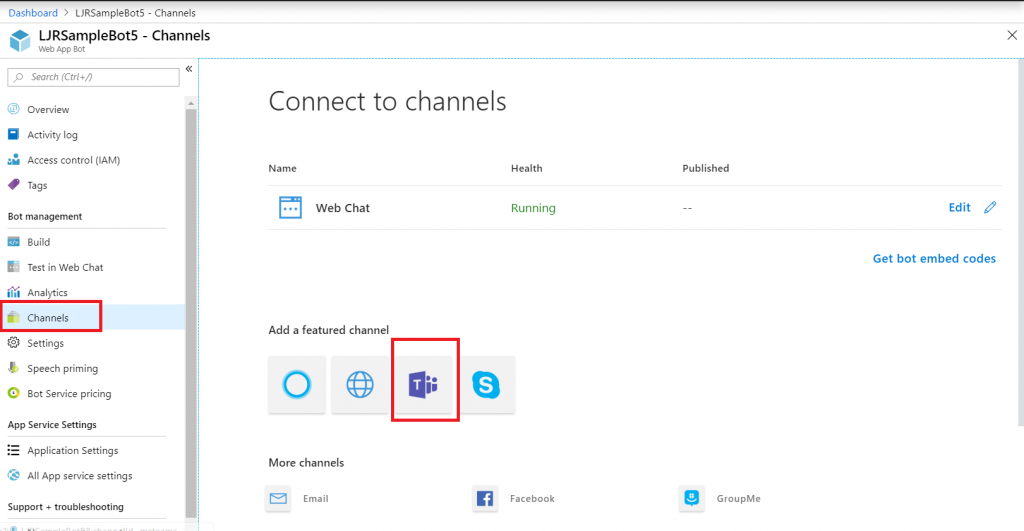
Once you have your bot working, you need to add the Teams channel to allow the bot to be used from Teams. Select “Channels” and click on the Teams logo.
There’s not much to set up for a bot – messaging is enabled by default. I don’t want IVR or real-time media functionality … but if you do click on the “Calling” tab. The “Publish” tab is to publish your bot in the Windows store – this might be a consideration, for instance, if you wanted to create a customer service interaction bot that enterprise customers could add to their Teams spaces (i.e. something you want random people to find and use). Since I am answering employee specific questions, I do not want to publish this bot to the Internet. Click “Save” when you have configured the channel as needed (in my case, just click ‘save’ without doing anything).
Review the publication terms and privacy statement. If these are agreeable, click “Agree”.
You’ll be returned to the Channels overview. Click on the hyperlinked “Microsoft Teams” – this will open a new URL that is your bot.
You can copy the URL here – others can use the same URL to use your bot. Either open the link in the Teams app
Or cancel and click “Use the web app instead” at the bottom of the screen.
Wait for it … your bot is alive!
That’s great … how do I interact with company resources? Quick answer is “you don’t” – this bot uses resources available on the Internet. To interact with private sources, the magic cloudy Microsoft network must be able to get there. Personally, I’d host my own bot engine. Expose the bot to the Internet and create a “Bot Channels Registration” instead.
This post contains more niche “for developers” information than most of my Teams info series 😊
You’ve seen third-party services with connectors in Teams – both services with connectors published to Teams and services that can use the “Incoming Webhook” connector to post data. Youcan use the “Incoming Webhook” connector within your code too. If you want to allow others to post information into their Teams spaces, you’ll need a configuration option that allows end-users to supply the webhook URL. If you want to post information into your Teams space, then you can include it directly in your code. If you are doing the former, provide something like the “Creating a Teams Webhook URL” instructions below to your end users. In this example, I am doing the later. The example script is Python code that gathers statistics and posts a summary to my Teams space.
Creating a Teams Webhook URL:
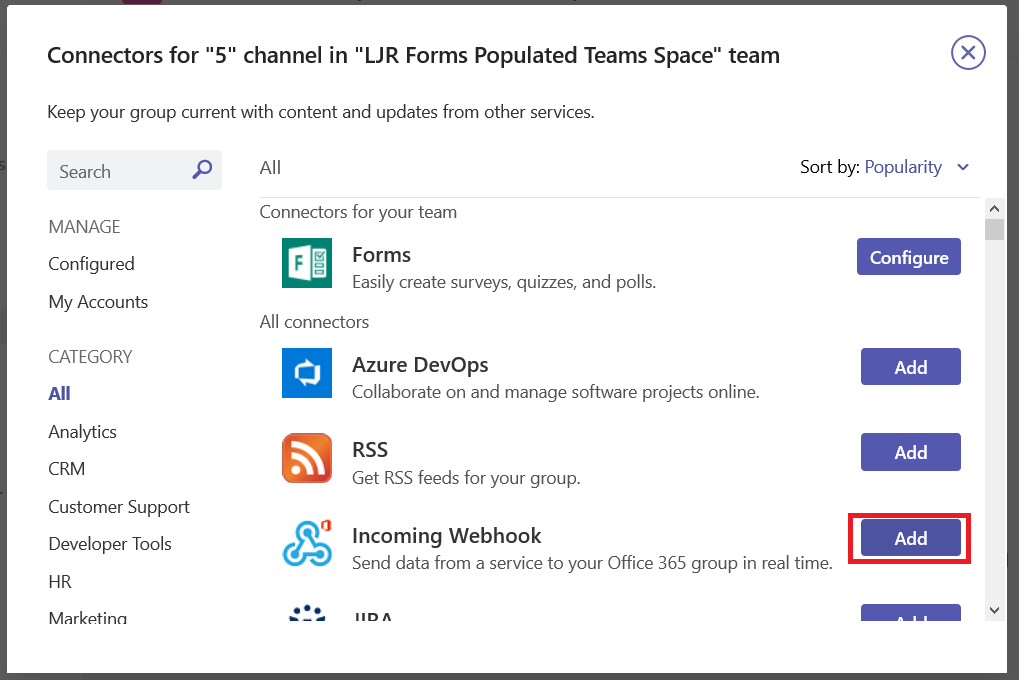
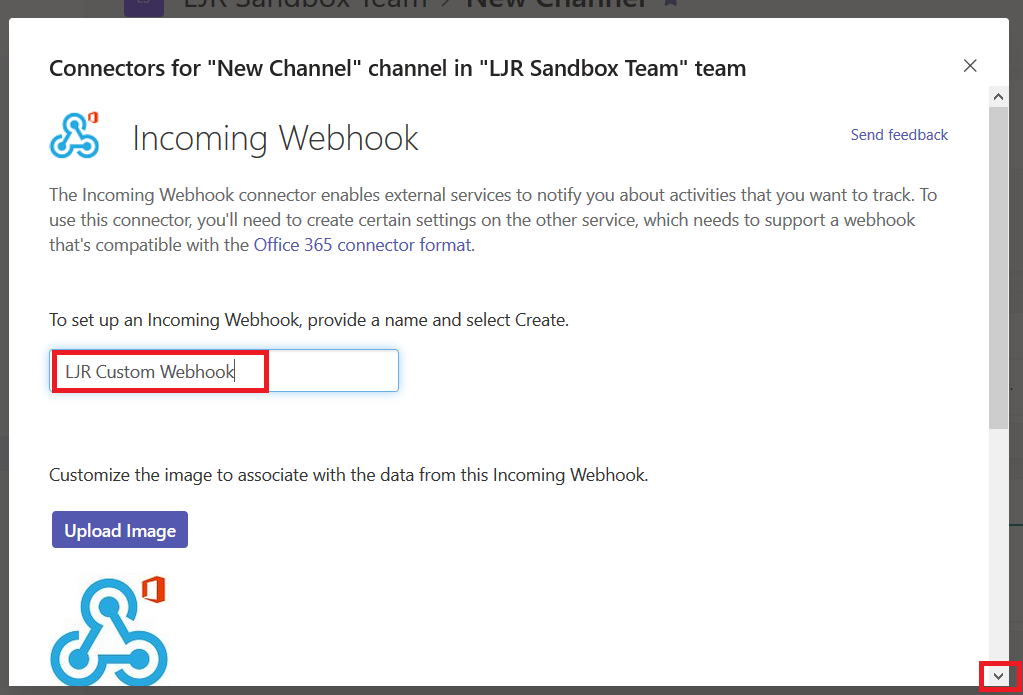
Create a URL for your incoming webhook – from the not-quite-a hamburger menu next to the channel into which you want to publish your data, select “Connectors”, find “Incoming Webhook”, and click “Add” (if you have already configured a webhook in your Teams space, you will see “Configure”instead, and will not have to ‘install’ the webhook)
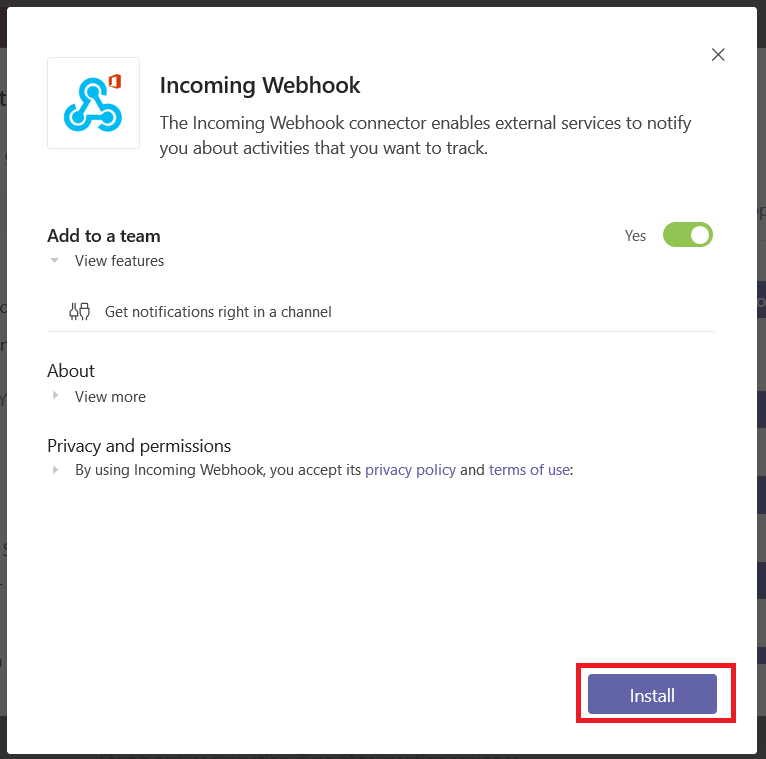
Read the privacy policy and terms of use, and if they are acceptable click “Install”
Provide a name for your webhook – this name will be displayed on all posts made via this webhook. Scroll down.
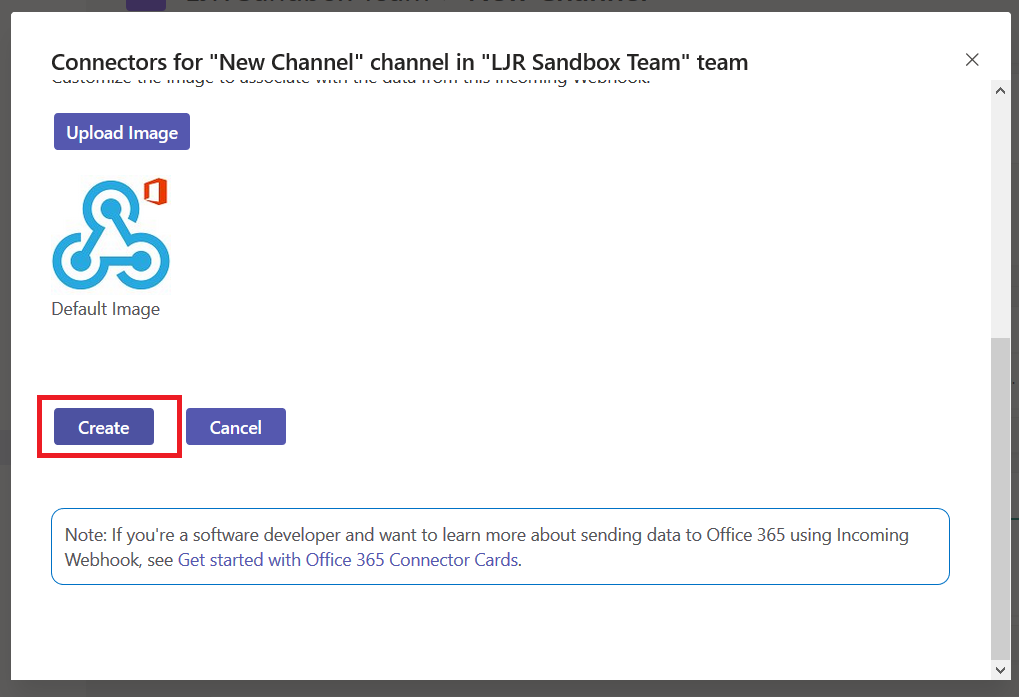
You can customize the logo associated with your webhook posts – nice if your application has a well-known logo. Click create to generate the webhook URL.
Copy the URL somewhere, then click ‘Done’.
Using Teams Webhooks Within Code:
OK, now you’ve got something like this in a text document (no, I didn’t post a real webhook to the Internet – the long pseudo-random alphanumeric string is hex, and there aren’t a whole lot of m’s and q’s in hex!):
What do you do with it? You make a POST call to that URL and supply JSON-formatted card content in the data. Microsoft provides a complete card reference, but you’ll need to use the O365Connector Card with the incoming webhook connector.
The card requires “summary” or “text” be included – you’ll get a bad data HTTP response if you fail to set one of these values. Card text can be formatted in markdown or HTML – if you want to use HTML, you need to set markdown to false.
You’ll need a function that POSTs data to a URL:
################################################################################
# This function POSTs to a URL
# Requirements: requests
# Input: strURL -- URL to which data is posted
#        strBody -- content to be sent as data
#        strContentType -- Content-Type definition
# Output: BOOL -- TRUE on 200 HTTP code, FALSE on other HTTP response
################################################################################
def postDataToURL(strURL, strBody, strContentType):
    if strURL is None:
        print("POST failed -- no URL provided")
        return False
    print("Sending POST request to strURL=%s" % strURL)
    print("Body: %s" % strBody)
    try:
        dictHeaders = {'Content-Type': strContentType}
        res = requests.post(strURL, headers=dictHeaders,data=strBody)
        print(res.text)
        if 200 <= res.status_code < 300:
            print("Receiver responded with HTTP status=%d" % res.status_code)
            return True
        else:
            print("POST failed -- receiver responded with HTTP status=%d" % res.status_code)
            return False
    except ValueError as e:
        print("POST failed -- Invalid URL: %s" % e)
    return False
And you’ll need something to create a card and call the HTTP POST function. Here, I define a function that takes statistics on Windstream’s Microsoft Teams usage, formats a card with the values, and POSTs it to my webhook URL.
################################################################################
# This function posts usage stats to Teams via webhook
# Requirements: json
# Input: strURL -- webhook url
# iPrivateMessages, iTeamMessages, iCalls, iMeetings -- integer usage stats
# strReportDate - datetime date for stats
# Output: BOOL -- TRUE on 200 HTTP code, FALSE on other HTTP response
################################################################################
def postStatsToTeams(strURL,iPrivateMessages,iTeamMessages,iCalls,iMeetings,strReportDate):
try:
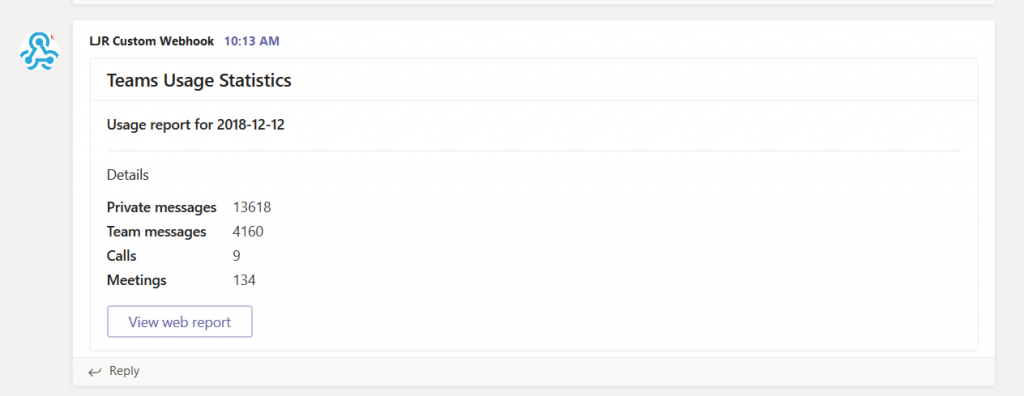
strCardContent = '{"title": "Teams Usage Statistics","sections": [{"activityTitle": "Usage report for ' + yesterday.strftime('%Y-%m-%d') + '"}, {"title": "Details","facts": [{"name": "Private messages","value": "' + str(iPrivateMessages) + '"}, {"name": "Team messages","value": "' + str(iTeamMessages) + '"}, {"name": "Calls ","value": "' + str(iCalls) + '"}, {"name": "Meetings","value": "' + str(iMeetings) + '"}]}],"summary": "Teams Usage Statistics","potentialAction": [{"name": "View web report","target": ["https://csgdirsvcs.windstream.com:1977/o365Stats/msTeams.php"],"@context": "http://schema.org","@type": "ViewAction"}]}'
jsonPostData = json.loads(strCardContent)
if postDataToURL(strURL, json.dumps(jsonPostData),'application/json'):
print("POST successful")
return True
else:
print("POST failed")
return False
except Exception as e:
print("ERROR Unexpected error: %s" % e)
return False
Run the program, and you’ll see information in Teams:
A personal recommendation based on my experience with third-party code that uses generic incoming webhooks — have a mechanism to see more than a generic error when the POST fails. It takes a lot of effort to pull apart what is actually being sent, turn it into a curl command to reproduce the event, and read the actual error.Providing a debug facility that includes both the POST body and actual response from the HTTP call saves you a lot of time should your posts fail.
Microsoft publishes outage notifications several places –there’s a web portal that provides general status for major Office 365 outages,a customer-only portal that provides a LOT of details on every diminished service state, a Twitter feed with status on wide-spread outages. The common feature of all of these, though, is *checking* to see if there’s an outage –start seeing several calls for the same problem, check the outage site. It works, but it is not proactive.
Twitter could be proactive, but I don’t want to be diving for my phone every time a friend posts some random musing. But Microsoft Teams connects to Twitter, and it posts filtered content into a channel,so I only see pertinent information in our Teams channel. The connector can also search hash tags – useful for tracking brand mentions.
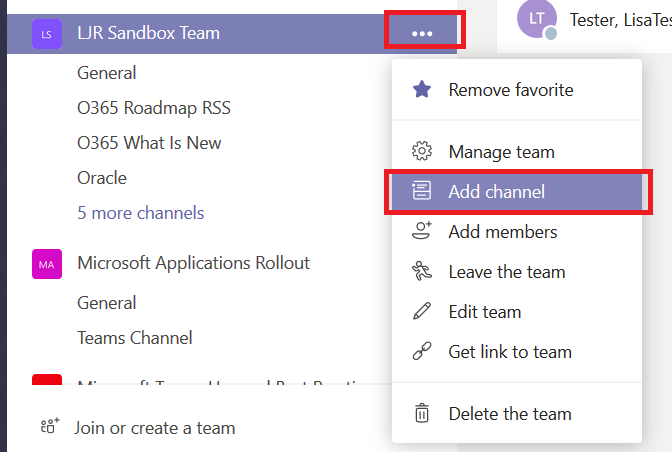
You can include Twitter posts into an existing channel or create a new one. I am creating a new channel to separate Twitter posts from other conversations.
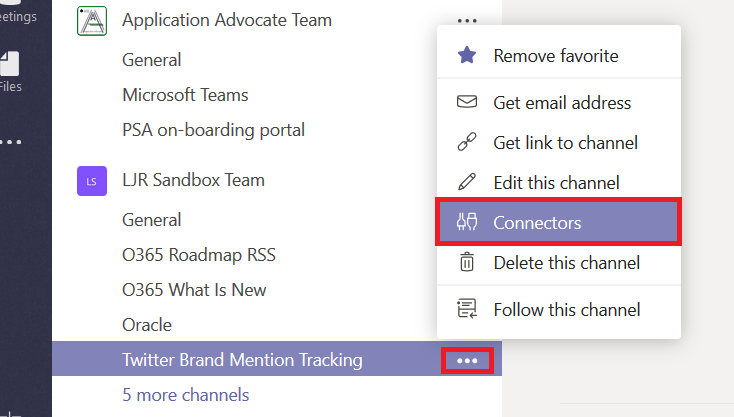
Click the not-quite-a hamburger menu next to the channel into which you want Twitter posts to appear and select “Connectors”.
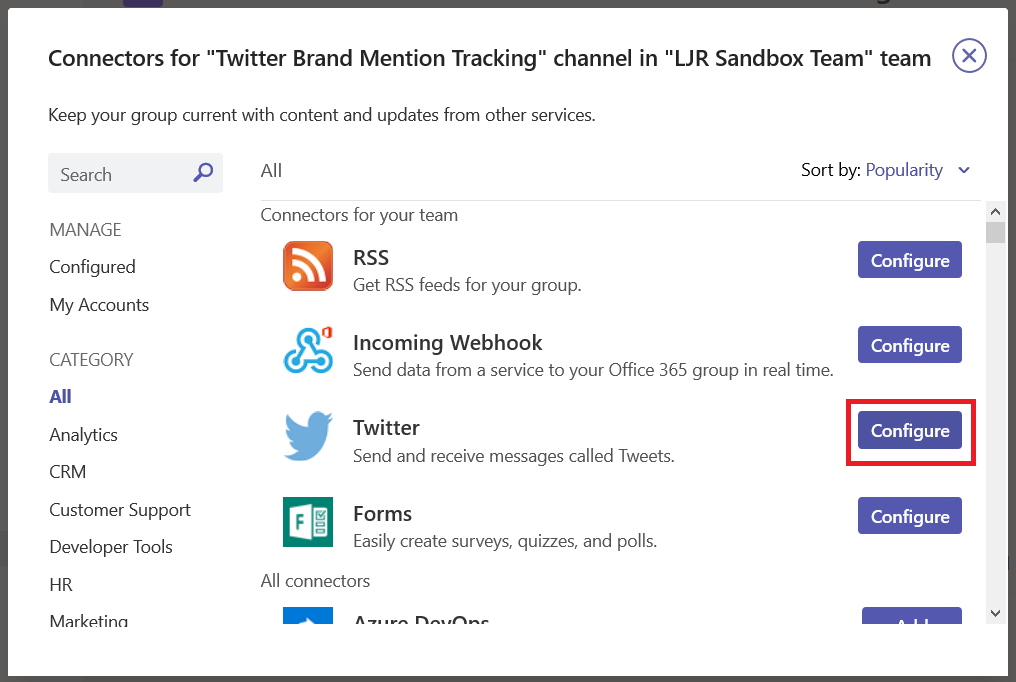
Locate “Twitter” and click “Configure”
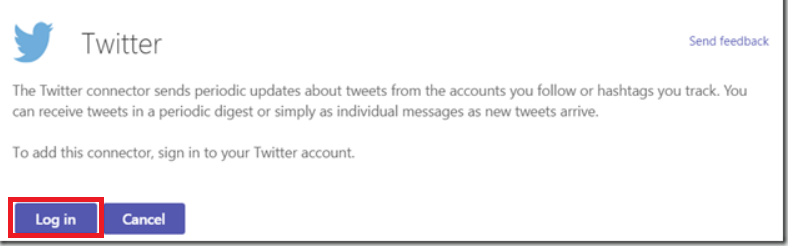
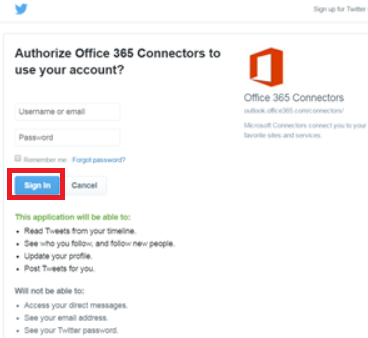
You will need to configure a Twitter account before you can configure the connector. I recommend not using your personal account. Create a new account to be used by your Teams space. If ownership of the Teams space changes, the new owner can take over the Twitter account too. Click “Log in”
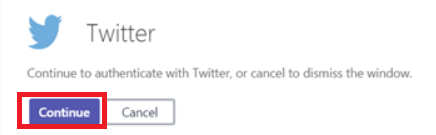
Click “Continue” to proceed with Twitter authentication
You are allowing the Twitter connector to use your account – read the access request and sign in if the usage is acceptable.
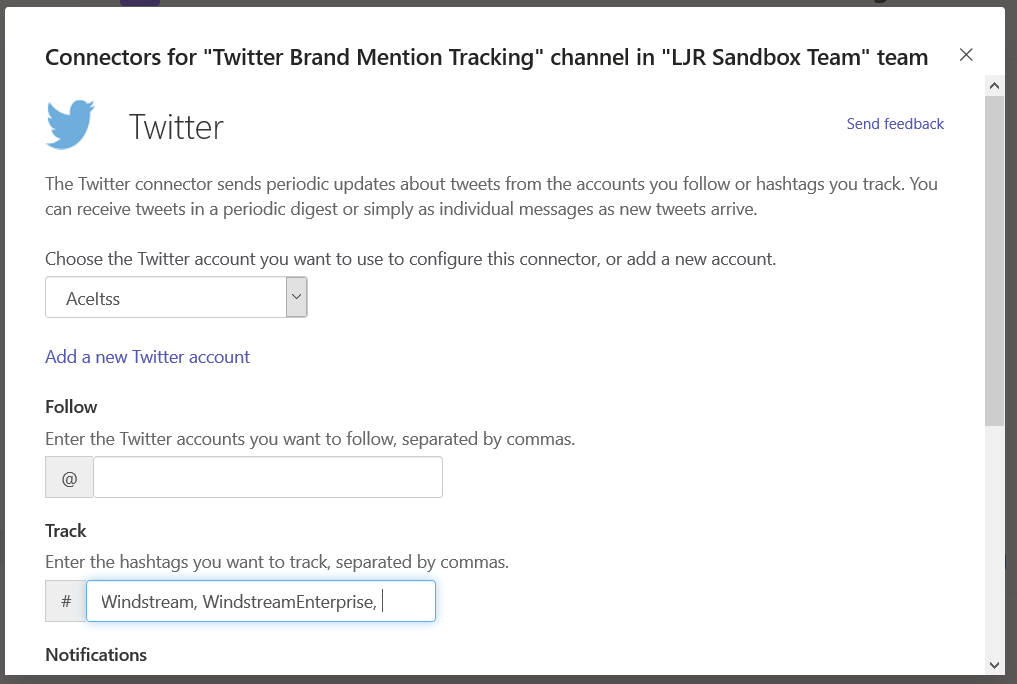
Once you have authenticated to Twitter, you will be able to configure the Teams connector. Enter accounts or tags to see Teams posts for relevant activity – do not put spaces after the commas!
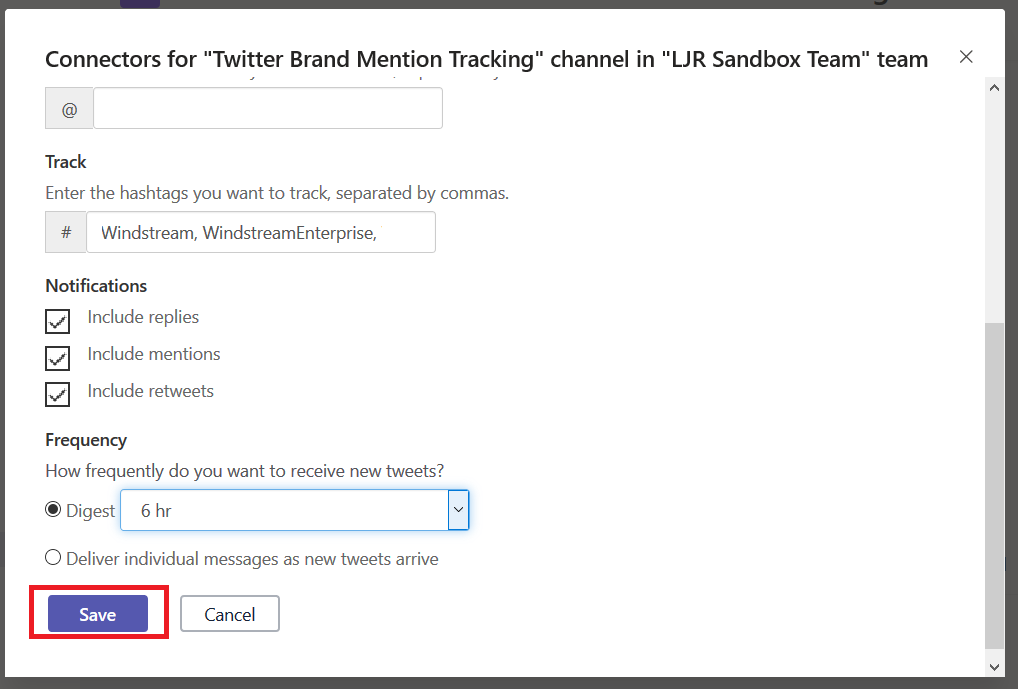
Decide if you want Teams posts for replies, mentions, or re-tweets. Select the frequency with which you want the Teams connector to check for updates – our Microsoft outage notification connector is set to “Deliver individual messages as new tweets arrive”, but I configure most other connectors to create a digest every 1 or 6 hours. Once you have completed the connector configuration, click “Save”.
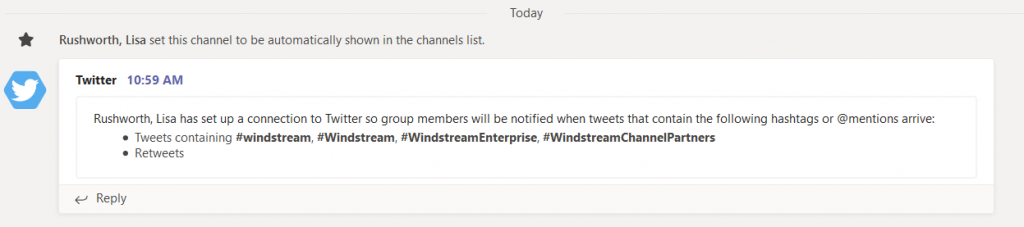
In your selected channel, you will find a post summarizing the connector configuration.