Before we can use map details in Kibana visualizations, we need to add fields with the geographic information. The first few steps are something the ELK admin staff will need to do in order to map source and/or destination IPs to geographic information.
First update the relevant index template to map the location information into geo-point fields – load this JSON (but, first, make sure there aren’t existing mappings otherwise you’ll need to merge the existing JSON in with the new elements for geoip_src and geoip_dst
{
"_doc": {
"_meta": {},
"_source": {},
"properties": {
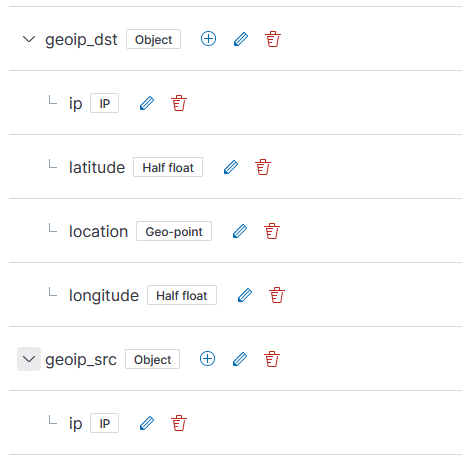
"geoip_dst": {
"dynamic": true,
"type": "object",
"properties": {
"ip": {
"type": "ip"
},
"latitude": {
"type": "half_float"
},
"location": {
"type": "geo_point"
},
"longitude": {
"type": "half_float"
}
}
},
"geoip_src": {
"dynamic": true,
"type": "object",
"properties": {
"ip": {
"type": "ip"
},
"latitude": {
"type": "half_float"
},
"location": {
"type": "geo_point"
},
"longitude": {
"type": "half_float"
}
}
}
}
}
}
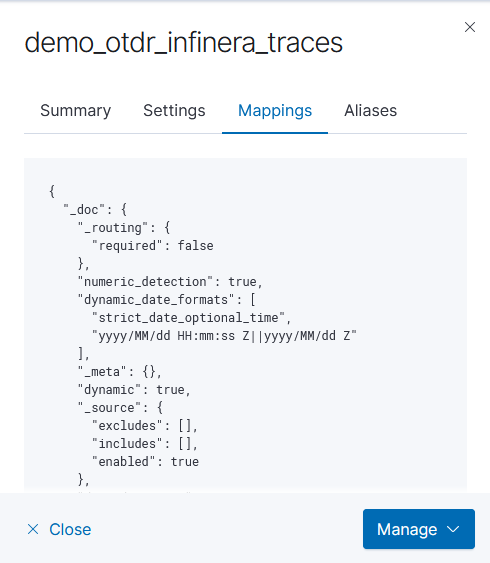
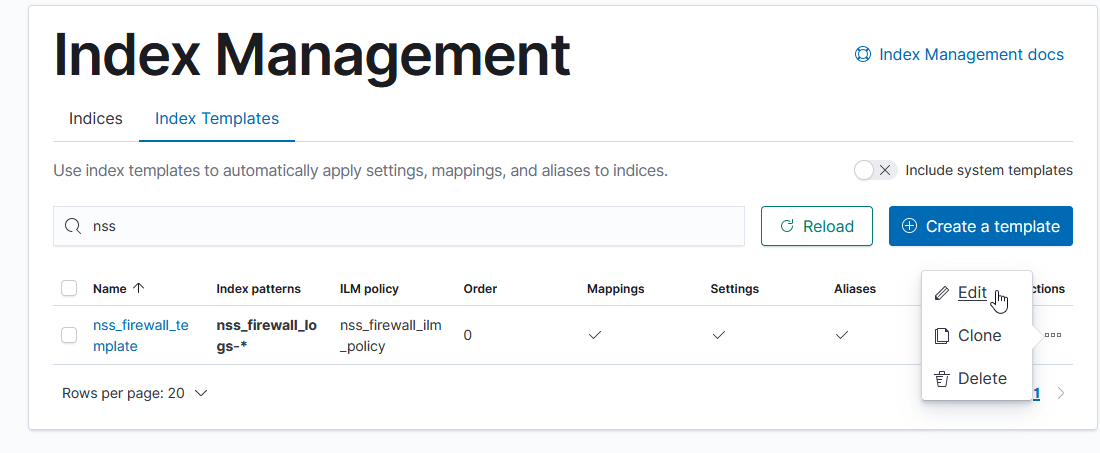
First, click on the index template name to view the settings. Click to the ‘mappings’ tab and copy what is in there
Munge in the two ‘properties’ in the above JSON. Edit the index template
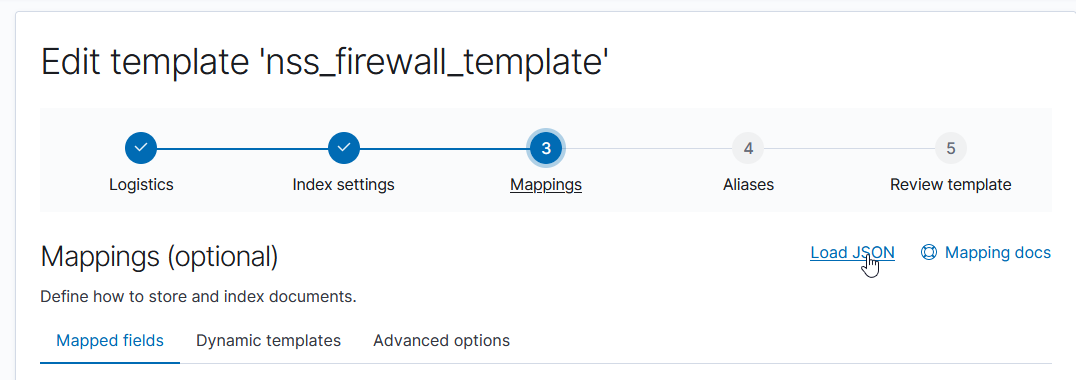
Click to the “Mappings” section and use “Load JSON” to import the new mapping configuration
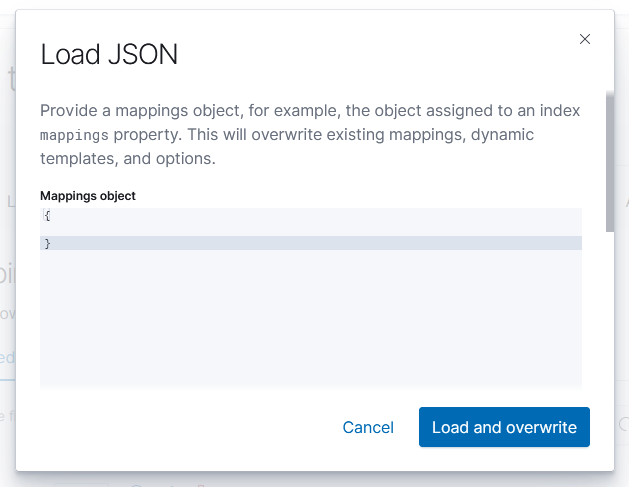
Paste in your JSON & click to “Load & Overwrite”
Voila – you will have geo-point items in the template.
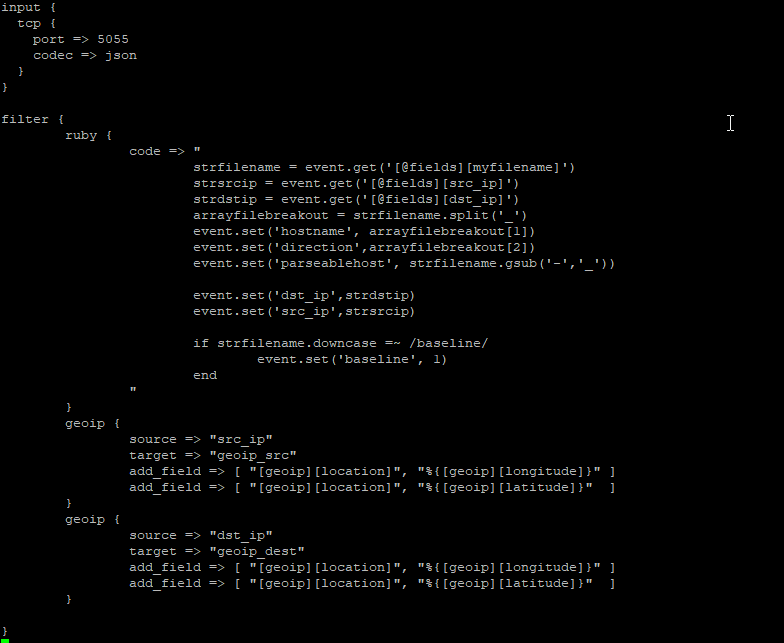
Next, the logstash pipeline needs to be configured to enrich log records with geoip information. There is a geoip filter available, which uses the MaxMind GeoIP database (this is refreshed automatically; currently, we do not merge in any geoip information for the private network address spaces) . You just need to indicate what field(s) have the IP address and where the location information should be stored. You can have multiple geographic IP fields – in this example, we map both source and destination IP addresses.
        geoip {
                source => "src_ip"
                target => "geoip_src"
                add_field => [ "[geoip][location]", "%{[geoip][longitude]}" ]
                add_field => [ "[geoip][location]", "%{[geoip][latitude]}"  ]
        }
        geoip {
                source => "dst_ip"
                target => "geoip_dest"
                add_field => [ "[geoip][location]", "%{[geoip][longitude]}" ]
                add_field => [ "[geoip][location]", "%{[geoip][latitude]}"  ]
        }
E.G.
One logstash is restarted, the documents stored in Kibana will have geoip_src and geoip_dest fields:

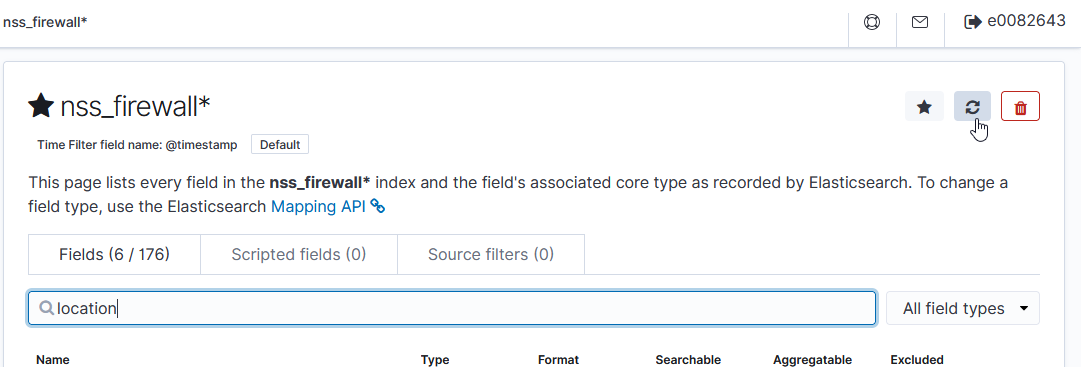
Once relevant data is being stored, use the refresh-looking button on the index pattern(s) to refresh the field list from stored data. This will add the geo-point items into the index pattern.
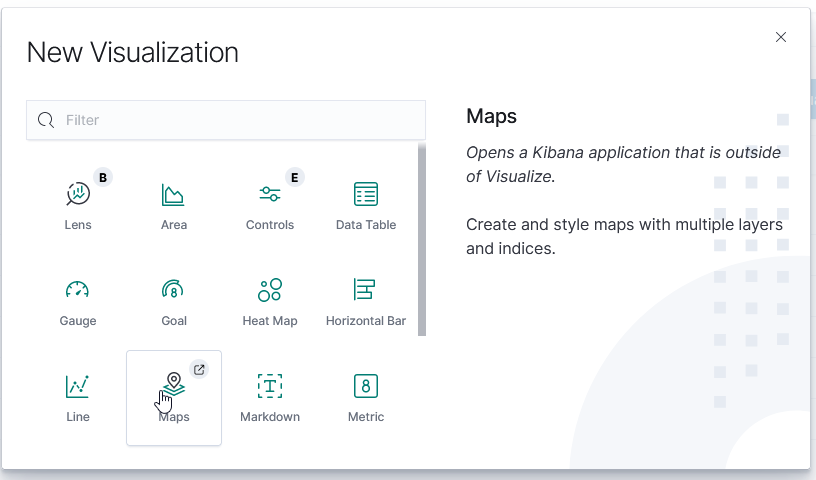
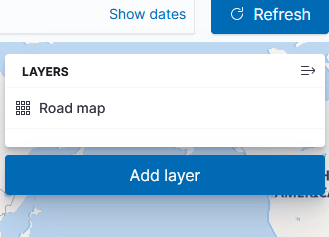
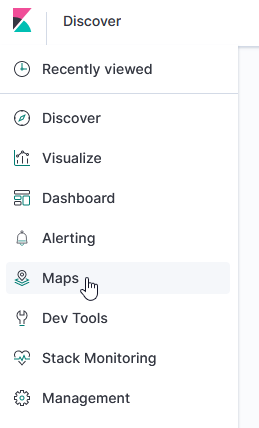
Once GeoIP information is available in the index pattern, select the “Maps” visualization
Leave the road map layer there (otherwise you won’t see the countries!)
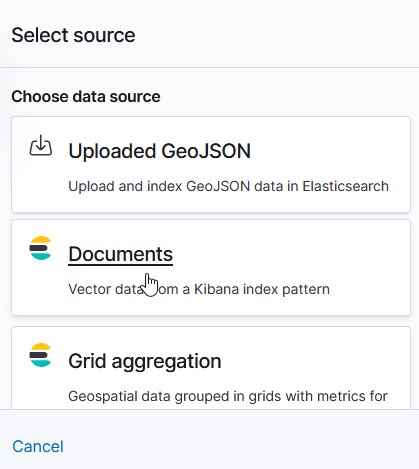
Select ‘Documents’ as the data source to link in ElasticSearch data
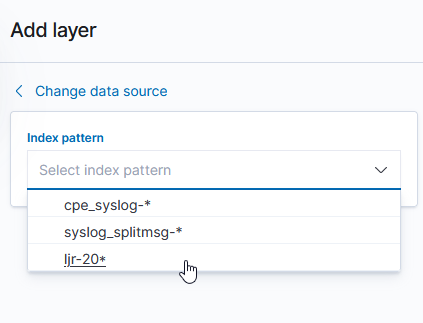
Select the index pattern that contains your data source (if your index pattern does not appear, then Kibana doesn’t recognize the pattern as containing geographic fields … I’ve had to delete and recreate my index pattern so the geographic fields were properly mapped).
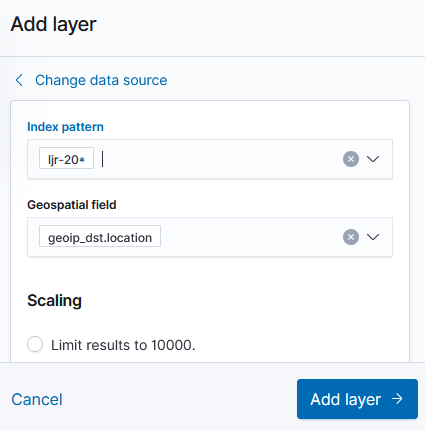
And select the field(s) that contain geographic details:
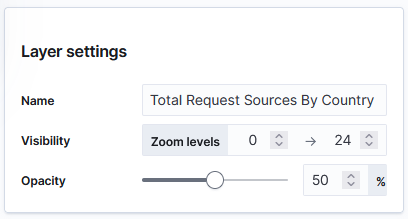
You can name the layer
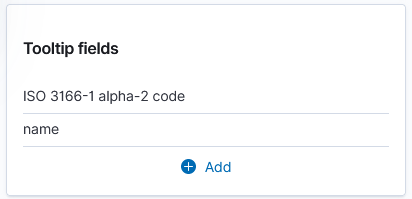
And add a tool tip that will include the country code or name
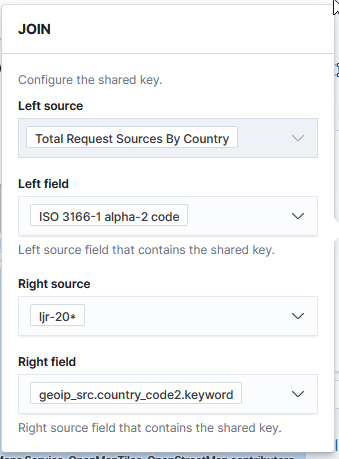
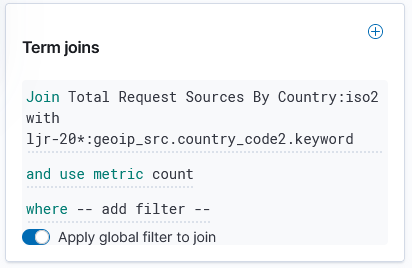
Under “Term joins”, add a new join. Click on “Join –select–” to link a field from the map to a field in your dataset.

In this case, I am joining the two-character country codes —
Normally, you can leave the “and use metric count” in place (the map is color coded by the number of requests coming from each country). If you want to add a filter, you can click the “where — add filter –” link to edit the filter.
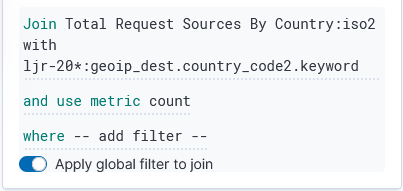
In this example, I don’t want to filter the data, so I’ve left that at the default.
Click “Save & close” to save the changes to the map visualization. To view your map, you won’t find it under Visualizations – instead, click “Maps” along the left-hand navigation menu.
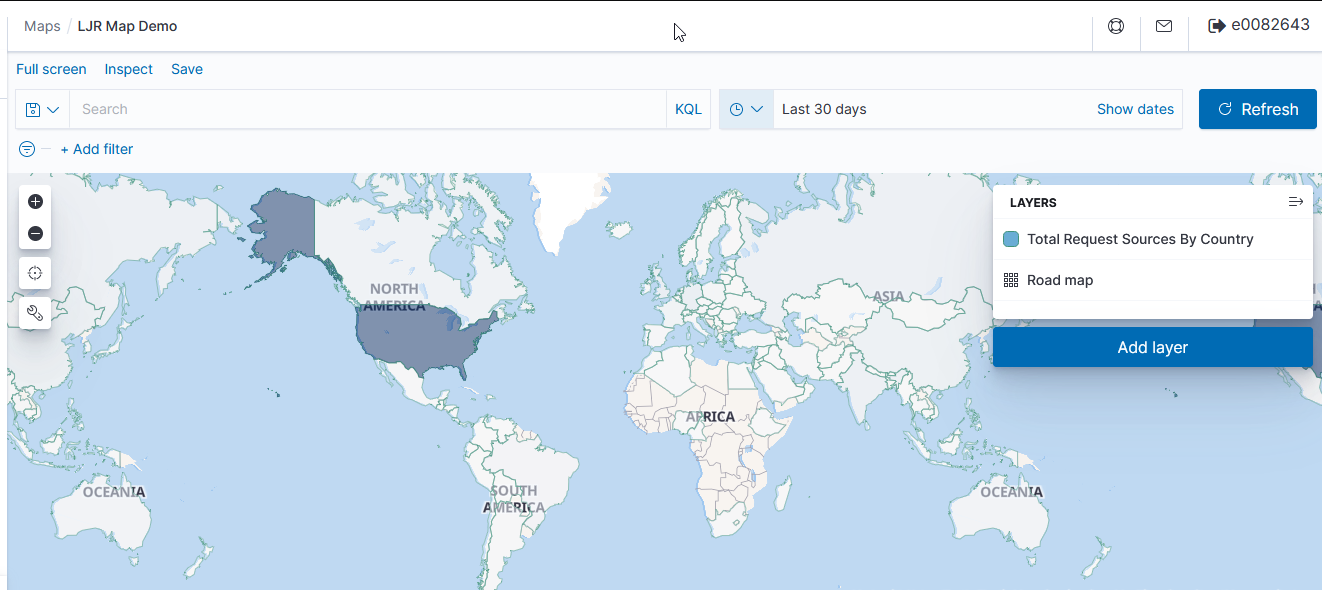
Voila – a map where the shading on a country gets darker the more requests have come from the country.
Internal Addresses
If we want to (and if we have information to map IP subnets to City/State/Zip/LatLong, etc), we can edit the database used for GeoIP mappings — https://github.com/maxmind/getting-started-with-mmdb provides a perl module that interacts with the database file. That isn’t currently done, so internal servers where traffic is sourced primarily from private address spaces won’t have particularly thrilling map data.