Microsoft Teams is a single workspace that provides access to a vast array of resources. You’ve got links to important web sites, posts from other Team members, discussion surrounding shared documents … but did you know posts can automatically be created from external systems?
Why? Well … doing so allows Teams to simplify finding and distributing information. Instead of having ten people subscribed to a vendor newsletter or five people trying to remember to check a web site for information, the information comes to every Team member directly in their Teams application.
You can turn vendor-provided patch and outage notifications via RSS or Twitter into Teams posts. Google Analytics data for your site can appear in Teams posts. Jenkins has an Office365 connector that reports pipeline information in Teams posts. Browse the available connectors to see what is useful in your group.
“Best practice” recommendation: some of these connectors rely solely on Microsoft’s Internet connection to an Internet-accessible resource – as in the example I present below. These connectors are essentially self-documenting because you can view the Connector configuration to determine the URL with which the connector communicates. Many connectors, however, use web hooks registered within your application or user credentials to access the remote system. In the “Files” or “Wiki” section of the channel in which the Connector is used, create a document detailing any configuration that was done – instructions for creating a web hook in your system, which account was used to access the remote system (don’t write the password in the document!).
For connectors that require user credentials, do not use a personal account. Create a new account for your Teams feed. Twitter, for example, requires a user account to follow other accounts or hashtags. Were I to use my Twitter account in the configuration … if I transfer ownership of the Team space to someone else, they’re inheriting a configuration with my account; but I’m not going just hand my password over to them. Even if ownership of the Team space never changes, we could cease seeing updates next time I change my Twitter password. Or decide to close my account. Or … point being, if you have a non-user account, the Team owners can maintain control of the account and any changes to it.
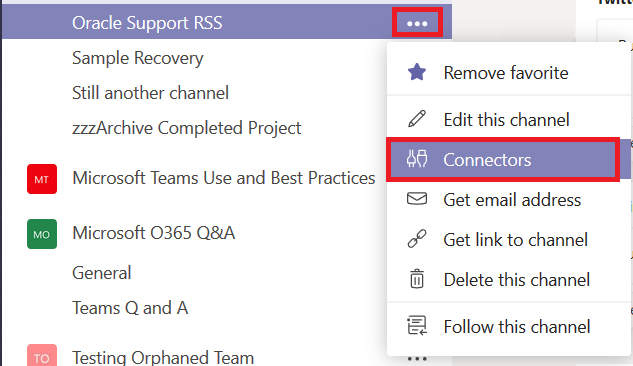
Using Connectors: Decide where you want the data posted – this can be a dedicated channel created just for this connector or it can be an existing one. Click the hamburger menu next to the channel into which you want messages posted. Select “Connectors”.
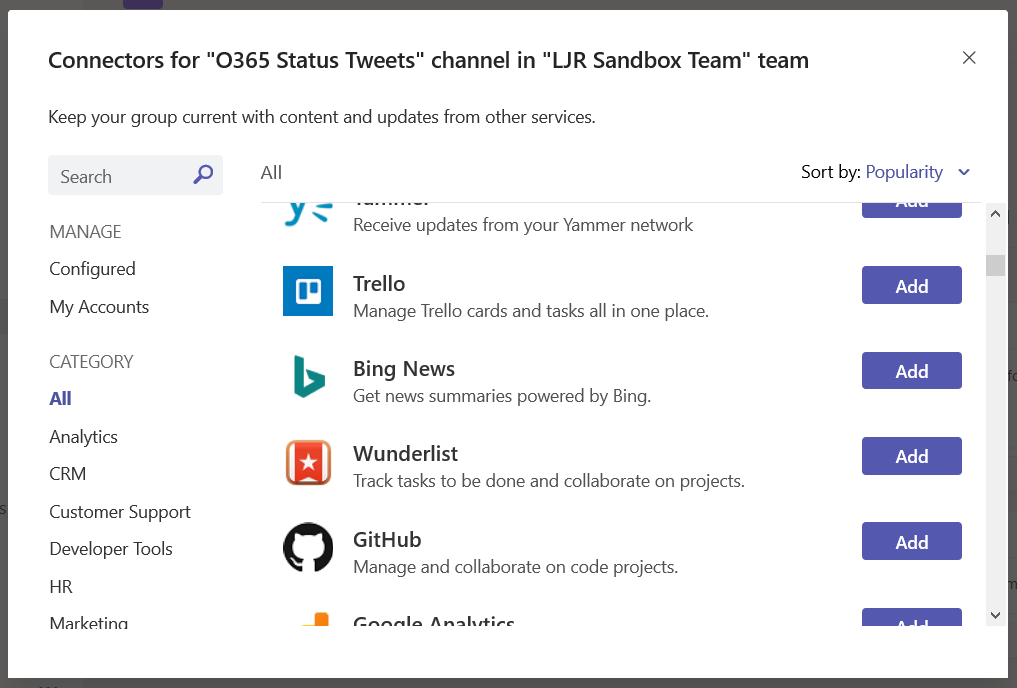
Browse through the list. Or type in the “Search” box to locate a specific connector. Click “Add” next to the connector you want to use.
Setup will vary depending on the connector selected – the Jenkins connector provides a URL to paste into your server config, Twitter asks for credentials and individuals or hashtags you want to follow in the channel. In this example, I am adding an RSS data feed.
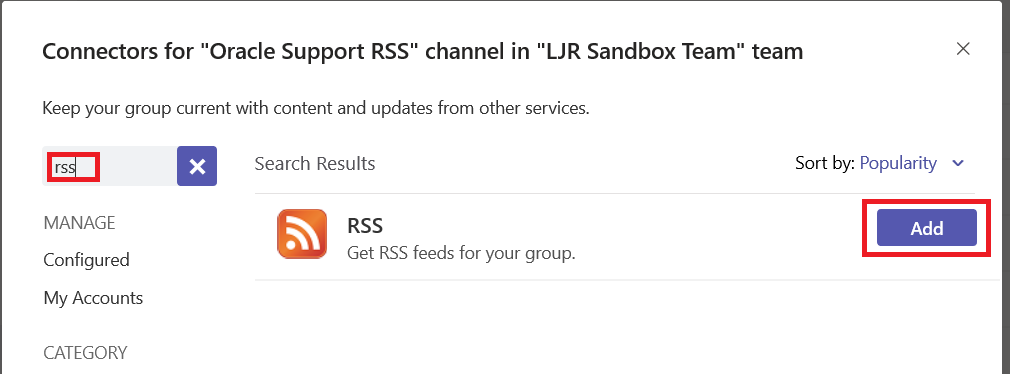
Type ‘rss’ in the search dialog. If this is the first time you’ve used the connector within this Team space, click “Add”.
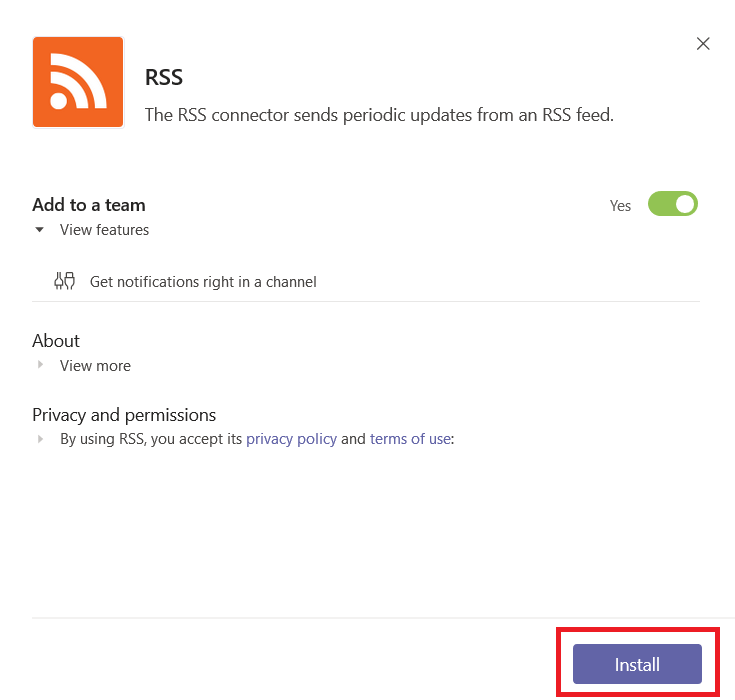
In this case, there’s not much on the next screen – read the privacy and terms of use statements. Assuming the connector permits your intended use and you agree to all of their terms, click “Install”.
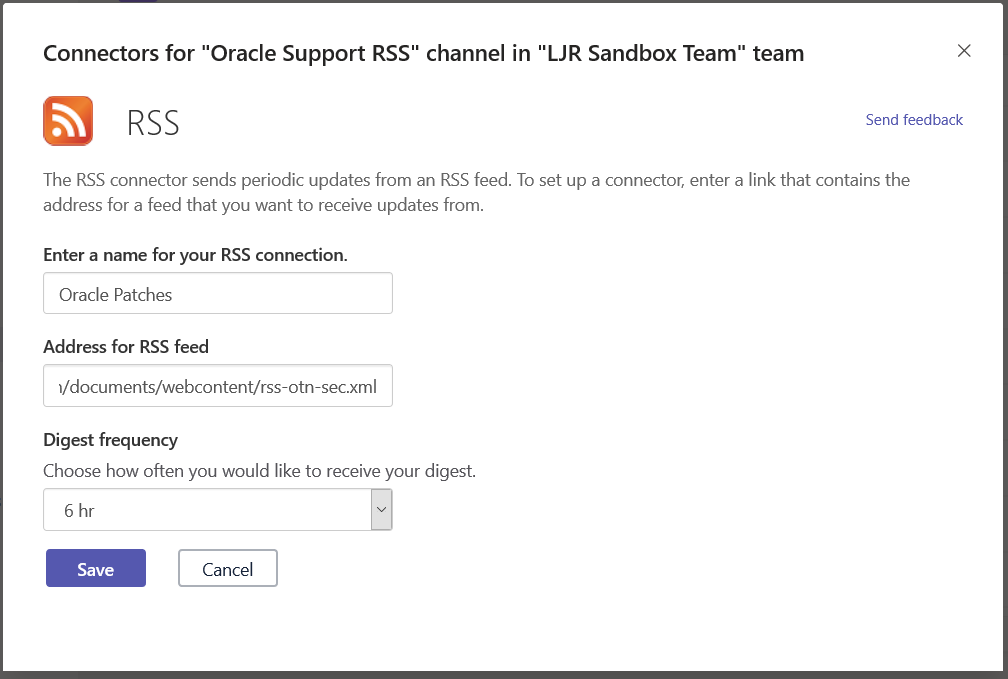
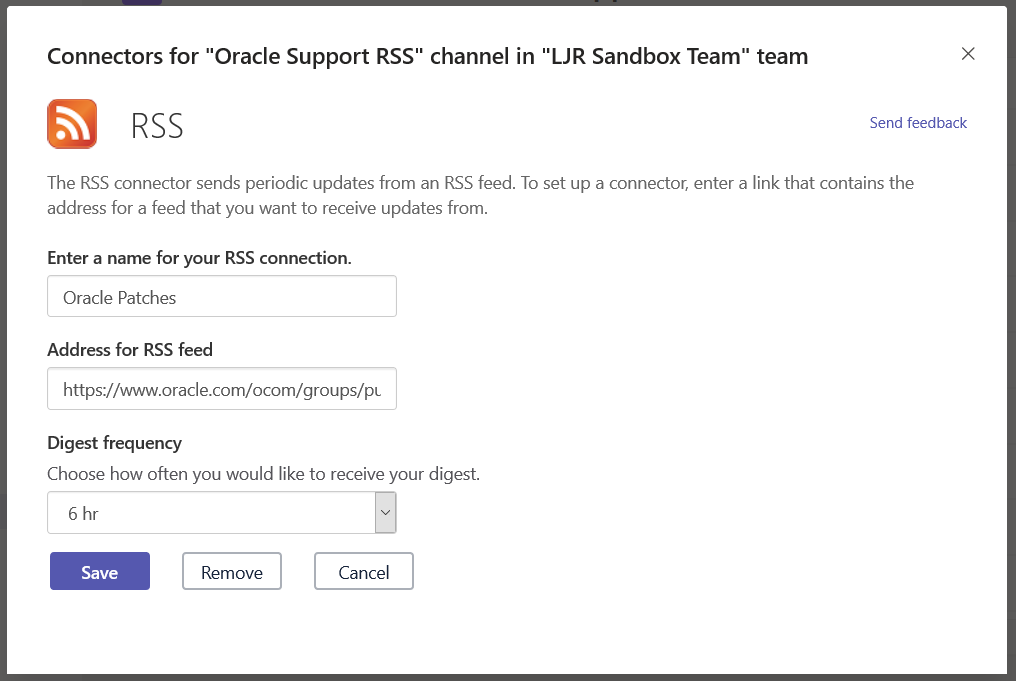
Enter a name for the connector, paste in the RSS feed URL, and select how often you want Teams to check for new data in the feed. Click “Save”
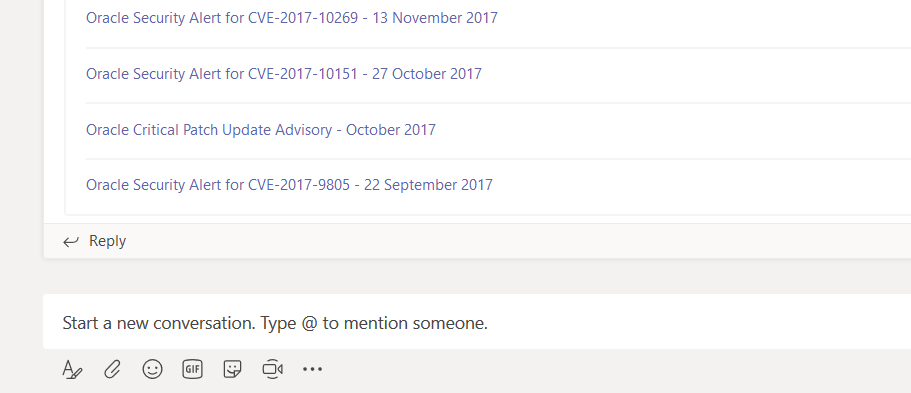
A post will be created in your channel with data from the RSS feed. Some feeds will provide information, some just provide a link. And when new data is posted to the RSS feed, a new post will be created in your Teams space.
If you need to make a change to an existing connector, click the hamburger menu next to the channel on which the connector is configured. Select “Connectors”.
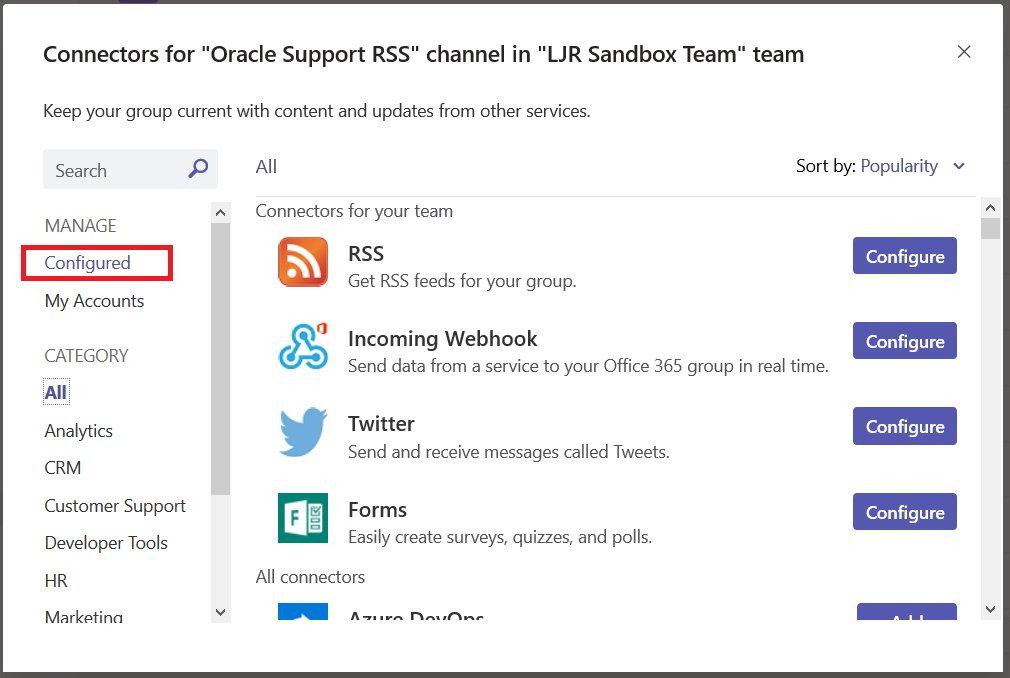
In the left-hand column, select “Configured”
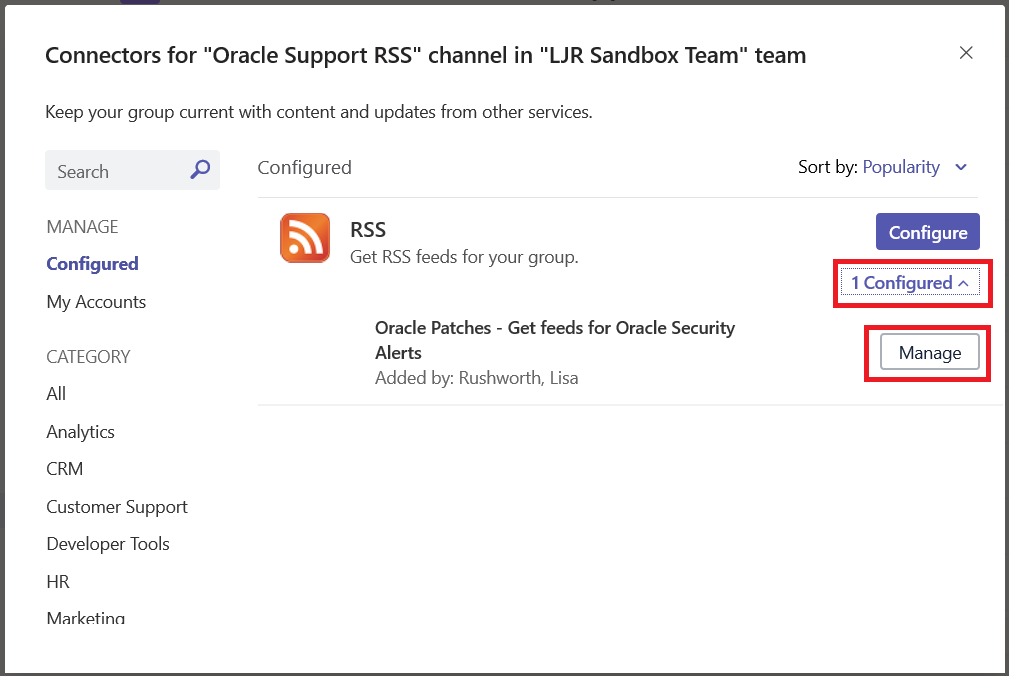
The “Configure” button will set up another connector on the channel. Instead, click the “# Configured” link below the “Configure” button. Then click “Manage” for the connector you want to manage.
Make whatever changes you need to make and click save. Or click “Remove” to remove the connector from the channel.
